이 문서에서는 Google Cloud 콘솔과 Vertex AI API에서 Google이 제공하는 코드 인터프리터 확장 프로그램을 등록하여 사용하는 방법을 보여줍니다. 이 확장 프로그램을 사용하면 Python 코드를 생성하고 실행하여 다음을 수행할 수 있습니다.
- 데이터 세트 분석, 정리, 변환, 재구성
- 차트 및 그래프로 데이터 시각화
- 계산 실행
코드 인터프리터 확장 프로그램은 code_interpreter_tool을 사용하여 자연어 설명에서 Python 코드를 생성하고 실행합니다. code_interpreter_tool은 OpenAPI 사양 code_interpreter.yaml 파일에 정의되어 있습니다.
openapi: "3.0.0"
info:
  version: 1.0.0
  title: code_interpreter_tool
  description: >
    This tool supports the following operations based on user input:

    1. **Generates and Executes Code:** Accepts a user query in natural language, generates corresponding code, and executes it to produce results for the user query.


    Supported AuthTypes:

    - `GOOGLE_SERVICE_ACCOUNT_AUTH`: (Vertex AI Extension Service Agent is supported).
paths:
  /generate_and_execute:
    post:
      operationId: generate_and_execute
      description: >
        Get the results of a natural language query by generating and executing a code snippet.
        Example queries: "Find the max in [1, 2, 5]" or "Plot average sales by year (from data.csv)".
      requestBody:
        required: true
        content:
          application/json:
            schema:
              type: object
              required:
              - query
              properties:
                query:
                  type: string
                  description: >
                    Required. The Natural language query to get the results for.
                    The query string can optionally contain data to use for the code generated.
                    For example: "I have a list of numbers: [1, 2, 3, 4]. Find the largest number in the provided data."
                timeout:
                  type: number
                  description: >
                    Optional. Timeout in miliseconds for the code execution. Default value: 30000.
                files:
                  type: array
                  description: >
                    Optional. Input files to use when executing the generated code.
                    If specified, the file contents are expected be base64-encoded.
                    For example: [{"name": "data.csv", "contents": "aXRlbTEsaXRlbTI="}]
                  items:
                    $ref: "#/components/schemas/File"
                file_gcs_uris:
                  type: array
                  description: >
                    Optional. GCS URIs of input files to use when executing the generated code.
                    For example: ["gs://input-bucket/data.csv"]
                    This option is only applicable when `file_input_gcs_bucket` is specified in `Extension.CodeInterpreterRuntimeConfig`.
                  items:
                    type: string
      responses:
        '200':
          description: >
            The results of generating and executing code based on the natual language query.
            The result contains the generated code, and the STDOUT, STDERR, and output files from code execution.
          content:
            application/json:
              schema:
                $ref: "#/components/schemas/GenerationAndExecutionResult"
components:
  schemas:
    File:
      description: >
        File used as inputs and outputs of code execution. The `contents` string should be base64-encoded bytes.
        For example: [{"name": "data.csv", "contents": "aXRlbTEsaXRlbTI="}]
      type: object
      properties:
        name:
          type: string
        contents:
          type: string
          format: byte
    GenerationAndExecutionResult:
      description: >
        The results of generating and executing code based on the natual language query.
      properties:
        generated_code:
          type: string
          description: >
            The generated code in markdown format.
            For example: "```python\nprint(\"Hello World\")\n```"
        execution_result:
          type: string
          description: >
            The code execution result string from STDOUT.
        execution_error:
          type: string
          description: >
            The code execution error string from STDERR.
        output_files:
          type: array
          description: >
            The output files generated from code execution.
            If present, the file contents are required be base64-encoded.
            For example: [{"name": "data.csv", "contents": "aXRlbTEsaXRlbTI="}]
          items:
            $ref: "#/components/schemas/File"
        output_gcs_uris:
          type: array
          description: >
            The output GCS URIs of files generated from code execution.
            For example: ["gs://output-bucket/subfolder/output.csv"]

            This field is only applicable when `file_output_gcs_bucket` is specified in `Extension.CodeInterpreterRuntimeConfig`.
          items:
            type: string
시작하기 전에
- Sign in to your Google Cloud account. If you're new to Google Cloud, create an account to evaluate how our products perform in real-world scenarios. New customers also get $300 in free credits to run, test, and deploy workloads.
-
In the Google Cloud console, on the project selector page, select or create a Google Cloud project.
Roles required to select or create a project
- Select a project: Selecting a project doesn't require a specific IAM role—you can select any project that you've been granted a role on.
-
Create a project: To create a project, you need the Project Creator
(
roles/resourcemanager.projectCreator), which contains theresourcemanager.projects.createpermission. Learn how to grant roles.
-
Verify that billing is enabled for your Google Cloud project.
-
Enable the Vertex AI API.
Roles required to enable APIs
To enable APIs, you need the Service Usage Admin IAM role (
roles/serviceusage.serviceUsageAdmin), which contains theserviceusage.services.enablepermission. Learn how to grant roles. -
In the Google Cloud console, on the project selector page, select or create a Google Cloud project.
Roles required to select or create a project
- Select a project: Selecting a project doesn't require a specific IAM role—you can select any project that you've been granted a role on.
-
Create a project: To create a project, you need the Project Creator
(
roles/resourcemanager.projectCreator), which contains theresourcemanager.projects.createpermission. Learn how to grant roles.
-
Verify that billing is enabled for your Google Cloud project.
-
Enable the Vertex AI API.
Roles required to enable APIs
To enable APIs, you need the Service Usage Admin IAM role (
roles/serviceusage.serviceUsageAdmin), which contains theserviceusage.services.enablepermission. Learn how to grant roles. Google Cloud 콘솔에서 Vertex AI 확장 프로그램 페이지로 이동합니다.
확장 프로그램 만들기를 클릭합니다.
새 확장 프로그램 만들기 대화상자에서 다음을 수행합니다.
- 확장 프로그램 이름: 확장 프로그램의 이름을 입력합니다(예: 'code_interpreter_extension').
- 설명: (선택사항) 확장 프로그램 설명을 입력합니다(예: '코드 인터프리터 확장 프로그램').
- 확장 프로그램 유형:
Code interpreter를 선택합니다.
이제 표시되는 OpenAPI 사양 파일 섹션에서 다음 필드가 올바르게 설정되었는지 확인합니다.
- API 이름:
code_interpreter_tool. - API 설명:
Tool to generate and run valid Python code from a natural language description, or to run custom Python code... - 소스:
Cloud Storage. - OpenAPI 사양:
vertex-extension-public/code_interpreter.yaml. - 인증:
Google service account.
- API 이름:
(선택사항) 런타임 구성 섹션에서 입력 버킷과 출력 버킷을 지정합니다.
- 입력 버킷은 확장 프로그램이
gs://프리픽스(예:gs://sample-bucket-name)를 포함한 입력 파일을 읽는 데 사용할 Cloud Storage 버킷입니다. 이를 지정하면 이 버킷의roles/storage.objectViewer역할을 Vertex 확장 프로그램 커스텀 코드 서비스 에이전트 서비스 계정에 할당해야 합니다. - 출력 버킷은 확장 프로그램이
gs://프리픽스(예:gs://sample-bucket-name)를 포함한 출력 파일을 작성하는 데 사용할 Cloud Storage 버킷입니다. 이를 지정하면 이 버킷의roles/storage.objectUser역할을 Vertex 확장 프로그램 커스텀 코드 서비스 에이전트 서비스 계정에 할당해야 합니다.
- 입력 버킷은 확장 프로그램이
확장 프로그램 만들기를 클릭합니다.
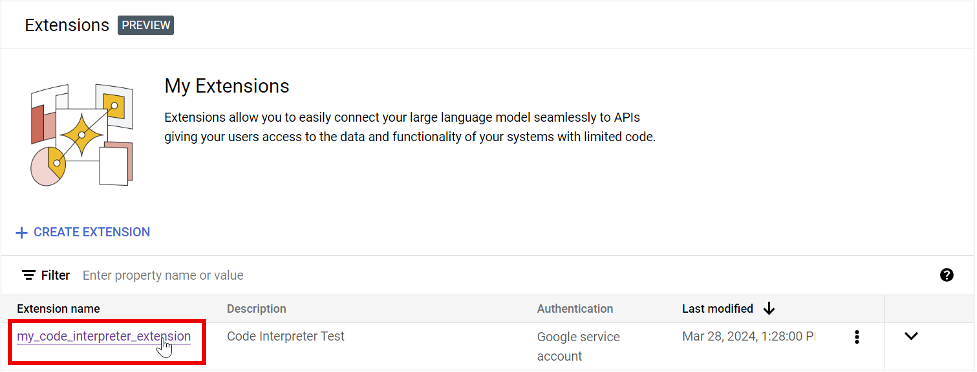
Google Cloud 콘솔에서 Vertex AI 확장 프로그램 페이지로 이동합니다.
코드 인터프리터 확장 프로그램 이름을 클릭하여 확장 프로그램 세부정보 페이지를 엽니다.
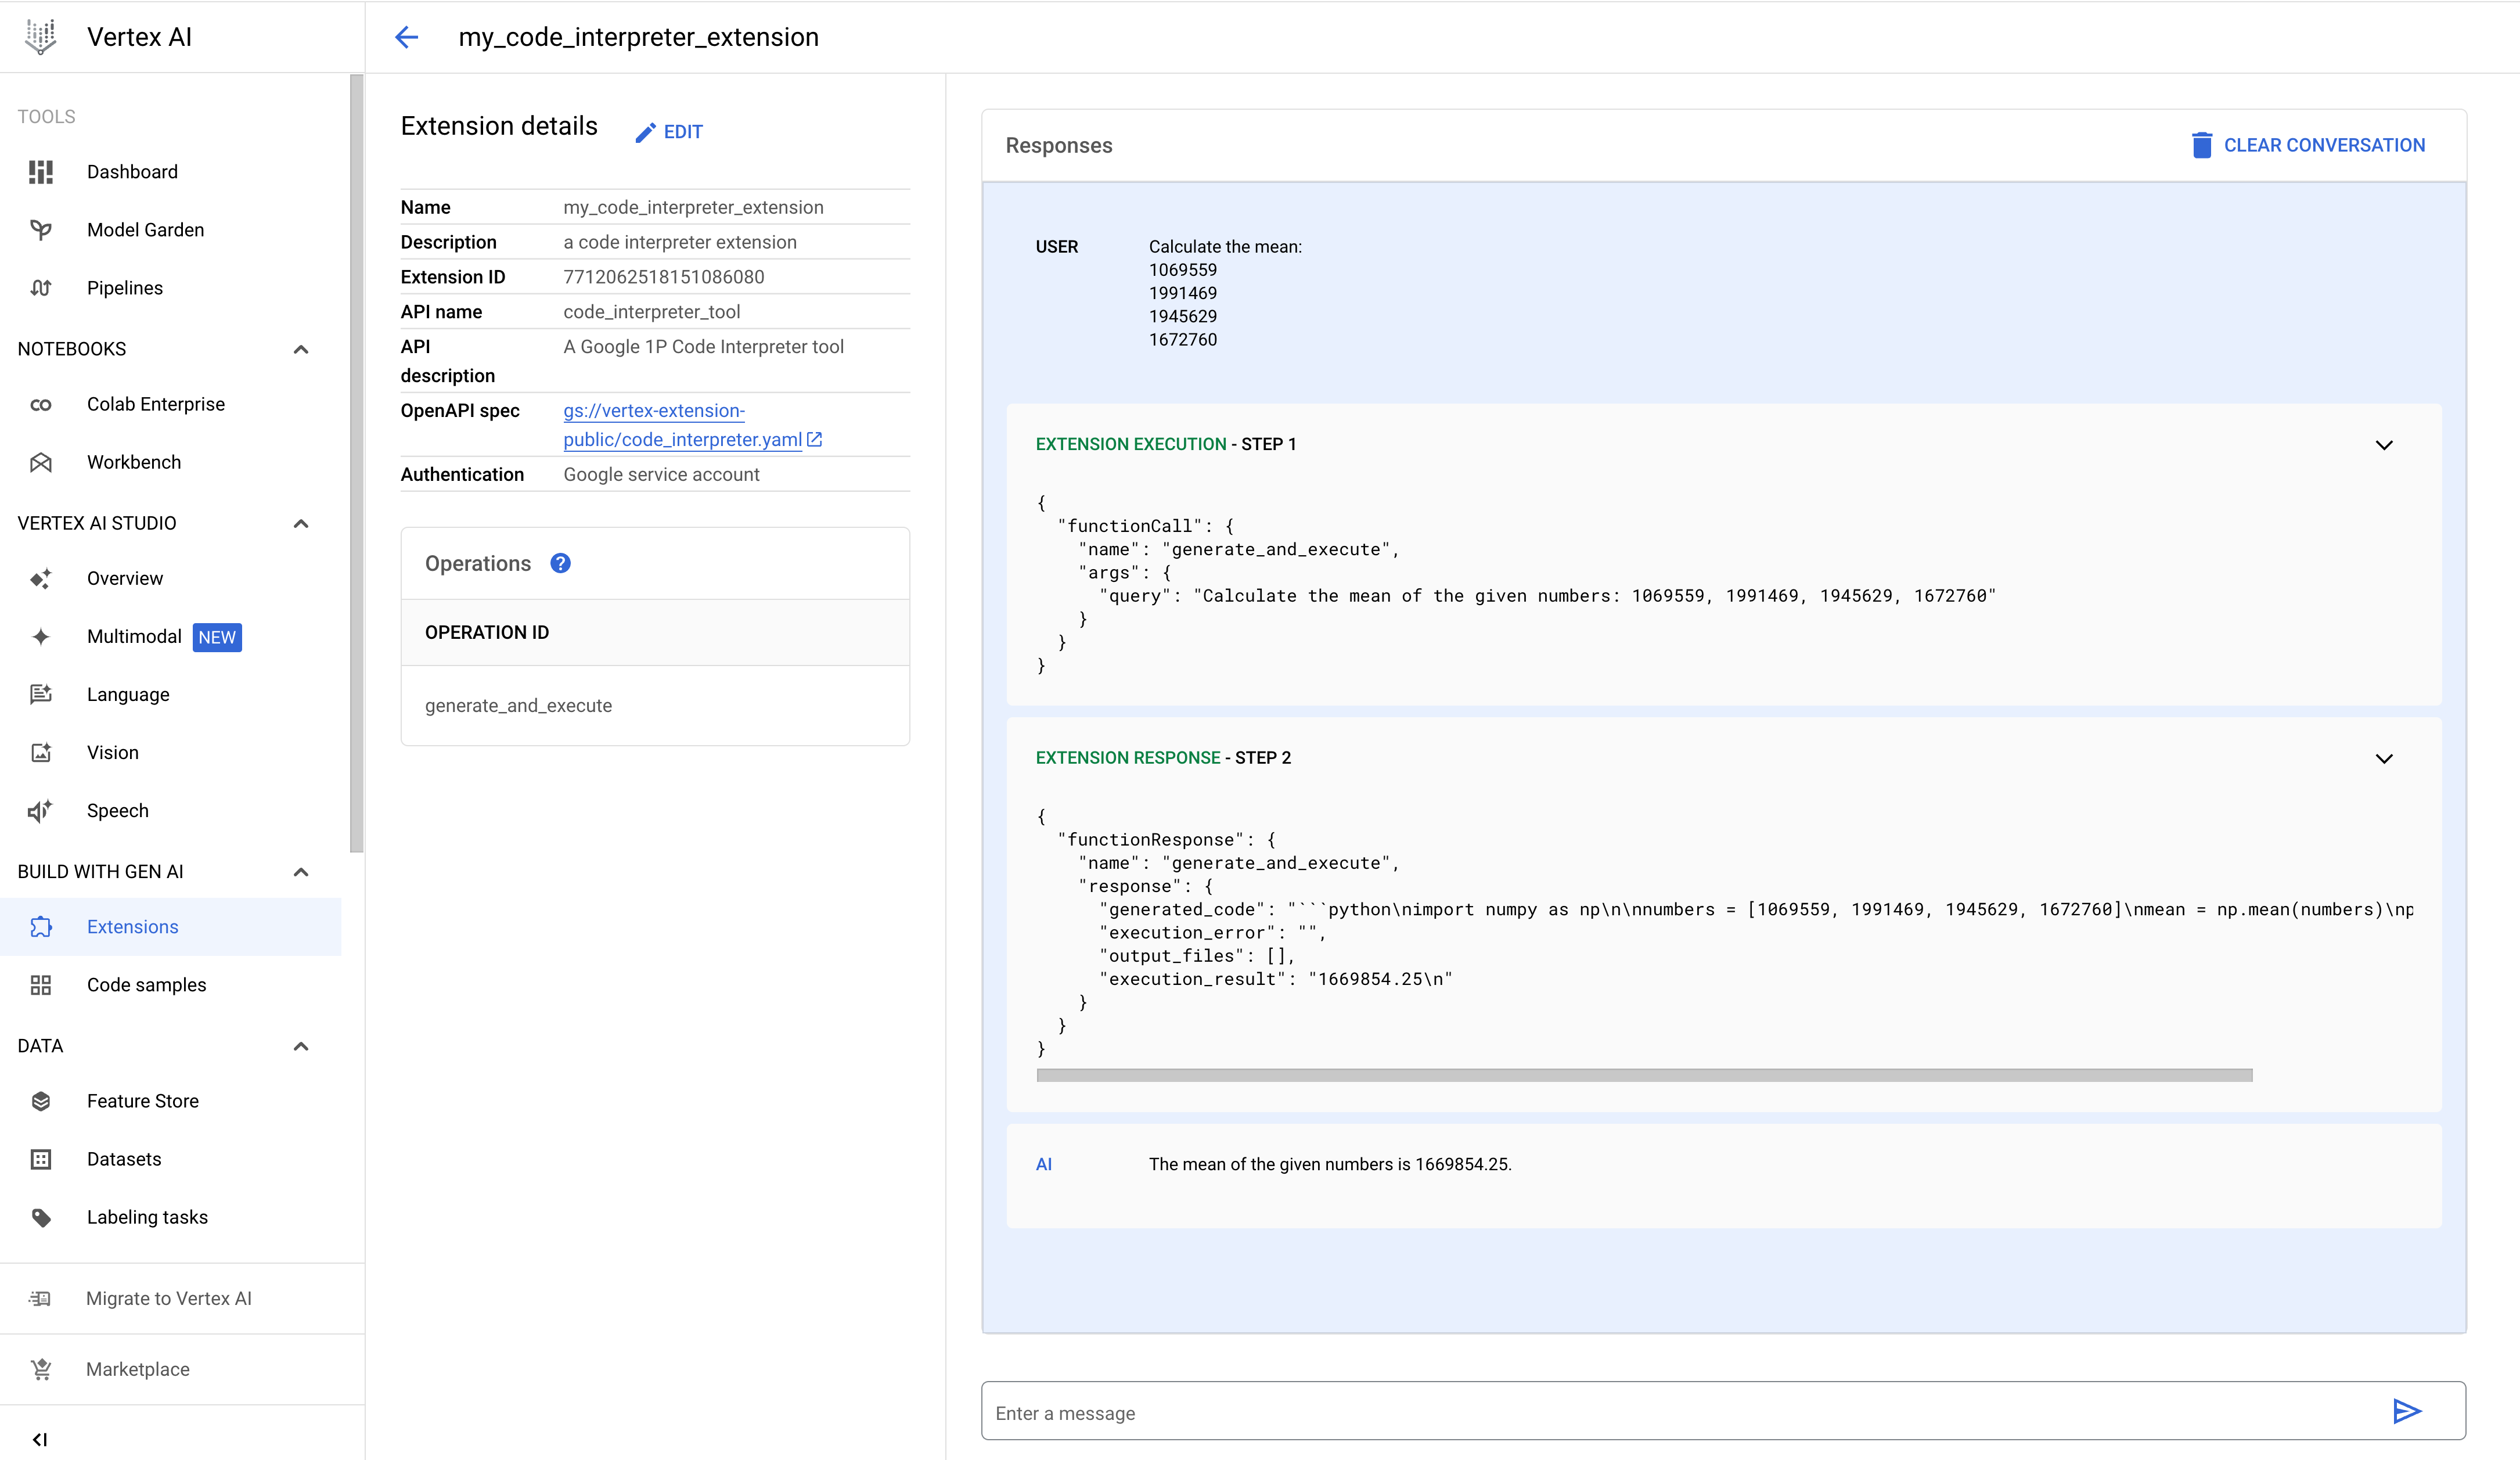
메시지를 입력합니다. 상자에 쿼리를 입력한 다음 응답을 확인합니다. 확장 프로그램 응답 섹션을 펼쳐 확장 프로그램에서 생성하고 결과를 생성하기 위해 실행한 코드를 확인합니다.
다음 예는 사용자가 입력한 숫자 목록의 평균 값을 계산한 쿼리의 결과를 보여줍니다.
- PROJECT_ID: Google Cloud 프로젝트의 ID.
- REGION: Compute Engine 리전
- DISPLAY_NAME: 사용자에게 표시되는 확장 프로그램 이름(예: 'my_code_interpreter_extension')
- DESCRIPTION: (선택사항) 사용자에게 표시되는 확장 프로그램 설명(예: '코드 인터프리터 확장 프로그램')
- SERVICE_ACCOUNT: (선택사항) 코드 인터프리터 확장 프로그램은 샘플 요청 본문에 표시된 것처럼 GOOGLE_SERVICE_ACCOUNT_AUTH를 사용합니다. 서비스 계정을 지정하지 않으면 확장 프로그램이 기본 Vertex AI Extension 서비스 에이전트 서비스 계정을 사용합니다.
다른 서비스 계정을 지정하면 지정된 서비스 계정에 대한
iam.serviceAccounts.getAccessToken권한이 Vertex AI 확장 프로그램 서비스 에이전트 서비스 계정에 부여됩니다. - INPUT_BUCKET: (선택사항) 확장 프로그램이
gs://프리픽스(예:gs://sample-bucket-name)를 포함한 입력 파일을 읽는 데 사용할 Cloud Storage 버킷. 이를 지정하면 이 버킷의roles/storage.objectViewer역할을 Vertex 확장 프로그램 커스텀 코드 서비스 에이전트 서비스 계정에 할당해야 합니다. - OUTPUT_BUCKET: (선택사항) 확장 프로그램이
gs://프리픽스(예:gs://sample-bucket-name)를 포함한 출력 파일을 쓰는 데 사용할 Cloud Storage 버킷. 이를 지정하면 이 버킷의roles/storage.objectUser역할을 Vertex 확장 프로그램 커스텀 코드 서비스 에이전트 서비스 계정에 할당해야 합니다. - 간단한 쿼리: 숫자 목록의 최댓값을 찾습니다.
- 인라인 데이터 쿼리: 쿼리할 데이터가 요청 본문에 제공됩니다.
- 파일 데이터로 쿼리: 파일 데이터를 인쇄합니다.
- Cloud Storage 데이터로 쿼리: Cloud Storage 데이터를 읽습니다.
- PROJECT_ID: Google Cloud 프로젝트의 ID.
- REGION: Compute Engine 리전
- EXTENSION_ID: Google Cloud 콘솔의 확장 프로그램 세부정보에 나열된 코드 인터프리터 확장 프로그램의 ID
- PROJECT_ID: Google Cloud 프로젝트의 ID.
- REGION: Compute Engine 리전
- EXTENSION_ID: Google Cloud 콘솔의 확장 프로그램 세부정보에 나열된 코드 인터프리터 확장 프로그램의 ID
- PROJECT_ID: Google Cloud 프로젝트의 ID.
- REGION: Compute Engine 리전
- EXTENSION_ID: Google Cloud 콘솔의 확장 프로그램 세부정보에 나열된 코드 인터프리터 확장 프로그램의 ID
- FILE_NAME: 요청 본문의 CSV 파일 데이터가 작업 디렉터리에 있는 이 파일에 기록됩니다.
- BASE64_ENCODED_FILE_BYTES: 요청 본문의 파일 바이트는 base64로 인코딩되어야 합니다.
- PROJECT_ID: Google Cloud 프로젝트의 ID.
- REGION: Compute Engine 리전
- EXTENSION_ID: Google Cloud 콘솔의 확장 프로그램 세부정보에 나열된 코드 인터프리터 확장 프로그램의 ID
- BUCKET_NAME: 인쇄할 CSV 파일이 포함된 Cloud Storage 버킷. 코드 인터프리터 확장 프로그램을 등록할 때 이 입력 버킷을 지정해야 합니다.
- FILE_NAME: 인쇄할 BUCKET_NAME의 CSV 파일 데이터
코드 인터프리터 확장 프로그램 등록, 쿼리, 실행
다음 섹션에서는 Google Cloud 콘솔 및 Vertex AI API를 사용하여 코드 인터프리터 확장 프로그램을 등록하는 방법을 보여줍니다. 확장 프로그램을 등록한 후에는 Google Cloud 콘솔을 사용하여 쿼리하거나 Vertex AI API를 사용하여 실행할 수 있습니다.
콘솔
확장 프로그램 등록
Google Cloud 콘솔을 사용하여 코드 인터프리터 확장 프로그램을 등록하려면 다음 단계를 수행하세요.
(선택사항) 확장 프로그램 쿼리
Google Cloud 콘솔을 사용하여 코드 인터프리터 확장 프로그램을 실험할 수 있습니다. 자연어 프롬프트로 확장 프로그램을 호출하려면 다음 단계를 수행합니다.
REST
확장 프로그램 등록
Vertex AI API extensions.import 요청을 제출하여 코드 인터프리터 확장 프로그램을 등록합니다.
요청 데이터를 사용하기 전에 다음을 바꿉니다.
HTTP 메서드 및 URL:
POST https://REGION-aiplatform.googleapis.com/v1beta1/projects/PROJECT_ID/locations/REGION/extensions:import
JSON 요청 본문:
{
  "displayName":"DISPLAY_NAME",
  "description":"DESCRIPTION",
  "manifest":{
    "name":"code_interpreter_tool",
    "description":"A Google Code Interpreter tool",
    "apiSpec":{
      "openApiGcsUri":"gs://vertex-extension-public/code_interpreter.yaml"
    },
    "authConfig":{
      "authType":"GOOGLE_SERVICE_ACCOUNT_AUTH",
      "googleServiceAccountConfig":{
        "serviceAccount":"SERVICE_ACCOUNT"
      }
    }
  }
  "runtimeConfig": {
     "codeInterpreterRuntimeConfig": {
        "fileInputGcsBucket": "INPUT_BUCKET",
        "fileOutputGcsBucket": "OUTPUT_BUCKET"
     }
  }
}
요청을 보내려면 다음 옵션 중 하나를 선택합니다.
curl
요청 본문을 request.json 파일에 저장하고 다음 명령어를 실행합니다.
curl -X POST \
     -H "Authorization: Bearer $(gcloud auth print-access-token)" \
     -H "Content-Type: application/json; charset=utf-8" \
     -d @request.json \
     "https://REGION-aiplatform.googleapis.com/v1beta1/projects/PROJECT_ID/locations/REGION/extensions:import"
PowerShell
요청 본문을 request.json 파일에 저장하고 다음 명령어를 실행합니다.
$cred = gcloud auth print-access-token
$headers = @{ "Authorization" = "Bearer $cred" }

Invoke-WebRequest `
    -Method POST `
    -Headers $headers `
    -ContentType: "application/json; charset=utf-8" `
    -InFile request.json `
    -Uri "https://REGION-aiplatform.googleapis.com/v1beta1/projects/PROJECT_ID/locations/REGION/extensions:import" | Select-Object -Expand Content
확장 프로그램 실행
Vertex AI API에 execute 작업을 제출하여 자연어 쿼리를 기반으로 Python 코드를 생성하고 실행할 수 있습니다.
검색어 예:
간단한 쿼리
요청 데이터를 사용하기 전에 다음을 바꿉니다.
HTTP 메서드 및 URL:
POST https://REGION-aiplatform.googleapis.com/v1beta1/projects/PROJECT_ID/locations/REGION/extensions/EXTENSION_ID:execute
JSON 요청 본문:
{
  "operation_id":"generate_and_execute",
  "operation_params":{
    "query":"find the max value in the list: [1,2,3,4,-5]"
  }
}
요청을 보내려면 다음 옵션 중 하나를 선택합니다.
curl
요청 본문을 request.json 파일에 저장하고 다음 명령어를 실행합니다.
curl -X POST \
     -H "Authorization: Bearer $(gcloud auth print-access-token)" \
     -H "Content-Type: application/json; charset=utf-8" \
     -d @request.json \
     "https://REGION-aiplatform.googleapis.com/v1beta1/projects/PROJECT_ID/locations/REGION/extensions/EXTENSION_ID:execute"
PowerShell
요청 본문을 request.json 파일에 저장하고 다음 명령어를 실행합니다.
$cred = gcloud auth print-access-token
$headers = @{ "Authorization" = "Bearer $cred" }

Invoke-WebRequest `
    -Method POST `
    -Headers $headers `
    -ContentType: "application/json; charset=utf-8" `
    -InFile request.json `
    -Uri "https://REGION-aiplatform.googleapis.com/v1beta1/projects/PROJECT_ID/locations/REGION/extensions/EXTENSION_ID:execute" | Select-Object -Expand Content
인라인 데이터
요청 데이터를 사용하기 전에 다음을 바꿉니다.
HTTP 메서드 및 URL:
POST https://REGION-aiplatform.googleapis.com/v1beta1/projects/PROJECT_ID/locations/REGION/extensions/EXTENSION_ID:execute
JSON 요청 본문:
{
  "operation_id":"generate_and_execute",
  "operation_params":{
    "query":"Calculate the total values of each column(mobile_subscribers, percent_internet_users, total_internet_users, fixed_broadband_subscribers) from the below dataset.\n\n\ncountry_name        country_code        year        mobile_subscribers        percent_internet_users        total_internet_users        fixed_broadband_subscribers\nUnited States        US        2023        333.4        90.5        303.1        200.3\nChina        CN        2023        1.613        70.2        1131.4        512.2\nIndia        IN        2023        1.165        50.7        688.5        557.2\nJapan        JP        2023        124.3        88.2        109.5        114.8\nGermany        DE        2023        102.1        90.5        92.1        100\nUnited Kingdom        UK        2023        67.1        92.7        62.2        65\nFrance        FR        2023        66.7        89        63        69.7\nBrazil        BR        2023        213.5        68        144.1        69.4\nRussia        RU        2023        203.8        74.9        152.7        51.1"
  }
}
요청을 보내려면 다음 옵션 중 하나를 선택합니다.
curl
요청 본문을 request.json 파일에 저장하고 다음 명령어를 실행합니다.
curl -X POST \
     -H "Authorization: Bearer $(gcloud auth print-access-token)" \
     -H "Content-Type: application/json; charset=utf-8" \
     -d @request.json \
     "https://REGION-aiplatform.googleapis.com/v1beta1/projects/PROJECT_ID/locations/REGION/extensions/EXTENSION_ID:execute"
PowerShell
요청 본문을 request.json 파일에 저장하고 다음 명령어를 실행합니다.
$cred = gcloud auth print-access-token
$headers = @{ "Authorization" = "Bearer $cred" }

Invoke-WebRequest `
    -Method POST `
    -Headers $headers `
    -ContentType: "application/json; charset=utf-8" `
    -InFile request.json `
    -Uri "https://REGION-aiplatform.googleapis.com/v1beta1/projects/PROJECT_ID/locations/REGION/extensions/EXTENSION_ID:execute" | Select-Object -Expand Content
파일 인쇄
요청 데이터를 사용하기 전에 다음을 바꿉니다.
HTTP 메서드 및 URL:
POST https://REGION-aiplatform.googleapis.com/v1beta1/projects/PROJECT_ID/locations/REGION/extensions/EXTENSION_ID:execute
JSON 요청 본문:
{
  "operation_id":"generate_and_execute",
  "operation_params":{
    "query":"print the csv file",
    "files":[
      {
        "name":"FILE_NAME",
        "contents":"BASE64_ENCODED_FILE_BYTES"
      }
    ]
  }
}
요청을 보내려면 다음 옵션 중 하나를 선택합니다.
curl
요청 본문을 request.json 파일에 저장하고 다음 명령어를 실행합니다.
curl -X POST \
     -H "Authorization: Bearer $(gcloud auth print-access-token)" \
     -H "Content-Type: application/json; charset=utf-8" \
     -d @request.json \
     "https://REGION-aiplatform.googleapis.com/v1beta1/projects/PROJECT_ID/locations/REGION/extensions/EXTENSION_ID:execute"
PowerShell
요청 본문을 request.json 파일에 저장하고 다음 명령어를 실행합니다.
$cred = gcloud auth print-access-token
$headers = @{ "Authorization" = "Bearer $cred" }

Invoke-WebRequest `
    -Method POST `
    -Headers $headers `
    -ContentType: "application/json; charset=utf-8" `
    -InFile request.json `
    -Uri "https://REGION-aiplatform.googleapis.com/v1beta1/projects/PROJECT_ID/locations/REGION/extensions/EXTENSION_ID:execute" | Select-Object -Expand Content
Cloud Storage 읽기
요청 데이터를 사용하기 전에 다음을 바꿉니다.
HTTP 메서드 및 URL:
POST https://REGION-aiplatform.googleapis.com/v1beta1/projects/PROJECT_ID/locations/REGION/extensions/EXTENSION_ID:execute
JSON 요청 본문:
{
  "operation_id":"generate_and_execute",
  "operation_params":{
    "query":"print the csv file",
    "file_gcs_uris": ["gs://BUCKET_NAME/FILE_NAME"]
  }
}
요청을 보내려면 다음 옵션 중 하나를 선택합니다.
curl
요청 본문을 request.json 파일에 저장하고 다음 명령어를 실행합니다.
curl -X POST \
     -H "Authorization: Bearer $(gcloud auth print-access-token)" \
     -H "Content-Type: application/json; charset=utf-8" \
     -d @request.json \
     "https://REGION-aiplatform.googleapis.com/v1beta1/projects/PROJECT_ID/locations/REGION/extensions/EXTENSION_ID:execute"
PowerShell
요청 본문을 request.json 파일에 저장하고 다음 명령어를 실행합니다.
$cred = gcloud auth print-access-token
$headers = @{ "Authorization" = "Bearer $cred" }

Invoke-WebRequest `
    -Method POST `
    -Headers $headers `
    -ContentType: "application/json; charset=utf-8" `
    -InFile request.json `
    -Uri "https://REGION-aiplatform.googleapis.com/v1beta1/projects/PROJECT_ID/locations/REGION/extensions/EXTENSION_ID:execute" | Select-Object -Expand Content