Cloud Service Mesh 1.5 以降では、自動相互 TLS(自動 mTLS)がデフォルトで有効になっています。自動 mTLS の場合、クライアント サイドカー プロキシがサーバーにサイドカーがあるかどうかを自動的に検出します。クライアント サイドカーは、サイドカーを含むワークロードには mTLS を送信し、サイドカーを含まないワークロードには平文を送信します。ただし、サービスは平文と mTLS トラフィックの両方を受け入れます。Pod にサイドカー プロキシを挿入する際に、mTLS トラフィックのみを受け入れるようにサービスも構成することをおすすめします。
Cloud Service Mesh では、単一の YAML ファイルを適用することで、アプリケーション コードの外部で mTLS を適用できます。Cloud Service Mesh には、サービス メッシュ全体、名前空間、個々のワークロードに認証ポリシーを適用できる柔軟性があります。

Online Boutique にアクセスする
kubectlの現在のコンテキストを、Online Boutique をデプロイしたクラスタに設定します。gcloud container clusters get-credentials CLUSTER_NAME \ --project=PROJECT_ID \ --zone=CLUSTER_LOCATIONfrontend名前空間のサービスを一覧表示します。kubectl get services -n frontendfrontend-externalはLoadBalancerであり、外部 IP アドレスがあります。サンプル アプリケーションには、Cloud Service Mesh を使用せずに GKE にデプロイできるようにロードバランサのサービスが含まれています。frontend-externalサービスの外部 IP アドレスを使用して、ブラウザでアプリケーションにアクセスします。http://FRONTEND_EXTERNAL_IP/Cloud Service Mesh では、Ingress ゲートウェイをデプロイできます。Ingress ゲートウェイの外部 IP アドレスを使用して Online Boutique にアクセスすることもできます。アプリケーションの外部 IP を取得します。プレースホルダを次の情報に置き換えます。
- GATEWAY_SERVICE_NAME: Ingress ゲートウェイ サービスの名前。サンプル ゲートウェイをそのままデプロイしたか、デフォルトの Ingress ゲートウェイをデプロイした場合、名前は
istio-ingressgatewayになります。 - GATEWAY_NAMESPACE: Ingress ゲートウェイをデプロイした名前空間。デフォルトの Ingress ゲートウェイをデプロイした場合、名前空間は
istio-systemです。
kubectl get service GATEWAY_NAME -n GATEWAY_NAMESPACE- GATEWAY_SERVICE_NAME: Ingress ゲートウェイ サービスの名前。サンプル ゲートウェイをそのままデプロイしたか、デフォルトの Ingress ゲートウェイをデプロイした場合、名前は
ブラウザで別のタブを開き、ingress ゲートウェイの外部 IP アドレスを使用してアプリケーションにアクセスします。
http://INGRESS_GATEWAY_EXTERNAL_IP/次のコマンドを実行して、別の Pod からプレーン HTTP で
frontendサービスのcurlを実行します。サービスが異なる名前空間にあるため、frontendサービスの DNS 名を curl で転送する必要があります。kubectl debug --image istio/base --target istio-proxy -it \ $(kubectl get pod -l app=productcatalogservice -n product-catalog -o jsonpath={.items..metadata.name}) \ -n product-catalog -- \ curl http://frontend.frontend.svc.cluster.local:80/ -o /dev/null -s -w '%{http_code}\n'デフォルトでは TLS と平文の両方のトラフィックが受け入れられるため、ステータス
200でリクエストが成功します。
名前空間ごとに相互 TLS を有効にする
mTLS を適用するには、kubectl で PeerAuthentication ポリシーを適用します。
次の認証ポリシーを
mtls-namespace.yamlとして保存します。cat <<EOF > mtls-namespace.yaml apiVersion: "security.istio.io/v1beta1" kind: "PeerAuthentication" metadata: name: "namespace-policy" spec: mtls: mode: STRICT EOFYAML の
mode: STRICT行は、mTLS のみを受け入れるようにサービスを構成します。デフォルトでは、modeはPERMISSIVEであり、平文と mTLS の両方を受け入れるようにサービスを構成します。mTLS のみを受け入れるように、認証ポリシーを適用してすべての Online Boutique サービスを構成します。
for ns in ad cart checkout currency email frontend loadgenerator \
     payment product-catalog recommendation shipping; do
kubectl apply -n $ns -f mtls-namespace.yaml
done
予想される出力:
peerauthentication.security.istio.io/namespace-policy created
peerauthentication.security.istio.io/namespace-policy created
peerauthentication.security.istio.io/namespace-policy created
peerauthentication.security.istio.io/namespace-policy created
peerauthentication.security.istio.io/namespace-policy created
peerauthentication.security.istio.io/namespace-policy created
peerauthentication.security.istio.io/namespace-policy created
peerauthentication.security.istio.io/namespace-policy created
peerauthentication.security.istio.io/namespace-policy created
peerauthentication.security.istio.io/namespace-policy created
peerauthentication.security.istio.io/namespace-policy created
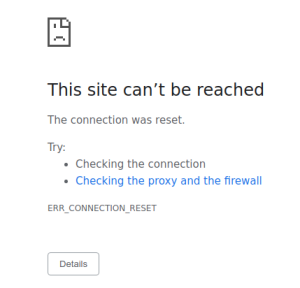
frontend-externalサービスの外部 IP アドレスを使用して、Online Boutique にアクセスするブラウザのタブに移動します。http://FRONTEND_EXTERNAL_IP/ページを更新すると、ブラウザに次のエラーが表示されます。
ページを更新すると、平文が
frontendサービスに送信されます。STRICT認証ポリシーにより、サイドカー プロキシはサービスに対するリクエストをブロックします。ブラウザのタブから、
istio-ingressgatewayの外部 IP アドレスを使用して Online Boutique にアクセスし、ページを更新して正常に表示します。Ingress ゲートウェイを使用して Online Boutique にアクセスする場合、リクエストは次のパスを取得します。
mTLS 認証フロー:
- ブラウザが平文の HTTP リクエストをサーバーに送信します。
- Ingress ゲートウェイ プロキシ コンテナがリクエストをインターセプトします。
- Ingress ゲートウェイ プロキシは、サーバー側プロキシ(この例ではフロントエンド サービス)を使用して TLS handshake を実行します。この handshake には、証明書交換が含まれています。これらの証明書は、Cloud Service Mesh によってプロキシ コンテナにあらかじめ読み込まれています。
- Ingress ゲートウェイ プロキシは、サーバーの証明書に対して安全な名前チェックを実行し、認可された ID がサーバーで実行されていることを確認します。
- Ingress ゲートウェイとサーバー プロキシは相互 TLS 接続を確立し、サーバー プロキシがリクエストをサーバー アプリケーション コンテナ(フロントエンド サービス)に転送します。
次のコマンドを実行して、別の Pod からプレーン HTTP で
frontendサービスのcurlを実行します。kubectl exec testcurl -n default -- curl \ http://frontend.frontend.svc.cluster.local:80/ -o /dev/null -s -w '%{http_code}\n'STRICT
peerAuthenticationポリシーが適用されているサイドカーレス ワークロードから平文トラフィックを送信しているため、このリクエストは失敗します。
認証ポリシーを検索して削除する
サービス メッシュ内のすべての
PeerAuthenticationポリシーの一覧を表示するには、次のコマンドを実行します。kubectl get peerauthentication --all-namespaces出力は次のようになります。
NAMESPACE         NAME               MODE     AGE
ad                namespace-policy   STRICT   17m
cart              namespace-policy   STRICT   17m
checkout          namespace-policy   STRICT   17m
currency          namespace-policy   STRICT   17m
email             namespace-policy   STRICT   17m
frontend          namespace-policy   STRICT   17m
loadgenerator     namespace-policy   STRICT   17m
payment           namespace-policy   STRICT   17m
product-catalog   namespace-policy   STRICT   17m
recommendation    namespace-policy   STRICT   17m
shipping          namespace-policy   STRICT   17m
すべての Online Boutique の名前空間から認証ポリシーを削除します。
for ns in ad cart checkout currency email frontend loadgenerator payment \
  product-catalog recommendation shipping; do
    kubectl delete peerauthentication -n $ns namespace-policy
done;
予想される出力:
peerauthentication.security.istio.io "namespace-policy" deleted peerauthentication.security.istio.io "namespace-policy" deleted peerauthentication.security.istio.io "namespace-policy" deleted peerauthentication.security.istio.io "namespace-policy" deleted peerauthentication.security.istio.io "namespace-policy" deleted peerauthentication.security.istio.io "namespace-policy" deleted peerauthentication.security.istio.io "namespace-policy" deleted peerauthentication.security.istio.io "namespace-policy" deleted peerauthentication.security.istio.io "namespace-policy" deleted peerauthentication.security.istio.io "namespace-policy" deleted peerauthentication.security.istio.io "namespace-policy" deletedfrontend-externalサービスの外部 IP アドレスを使用して Online Boutique にアクセスし、ページを更新します。ページが想定どおりに表示されます。次のコマンドを実行して、別の Pod からプレーン HTTP で
frontendサービスのcurlを実行します。kubectl debug --image istio/base --target istio-proxy -it \ $(kubectl get pod -l app=productcatalogservice -n product-catalog -o jsonpath={.items..metadata.name}) \ -n product-catalog -- \ curl http://frontend.frontend.svc.cluster.local:80/ -o /dev/null -s -w '%{http_code}\n'デフォルトでは TLS と平文の両方のトラフィックが受け入れられるため、ステータス
200でリクエストが成功します。
Google Cloud コンソールでページを更新して [ワークロード] リストを表示すると、mTLS ステータスが Permissive であることが示されます。
ワークロードごとに相互 TLS を有効にする
特定のワークロードに PeerAuthentication ポリシーを設定するには、selector セクションを構成し、目的のワークロードに一致するラベルを指定する必要があります。ただし、Cloud Service Mesh は、サービスへの送信 mTLS トラフィックのワークロード レベルのポリシーを集計できません。この動作を管理するには、宛先ルールを構成する必要があります。
特定のワークロードに認証ポリシーを適用します。次のポリシーでは、ラベルとセレクタを使用して特定の
frontendデプロイをターゲットにしていることに注意してください。cat <<EOF | kubectl apply -n frontend -f - apiVersion: "security.istio.io/v1beta1" kind: "PeerAuthentication" metadata: name: "frontend" namespace: "frontend" spec: selector: matchLabels: app: frontend mtls: mode: STRICT EOF予想される出力:
peerauthentication.security.istio.io/frontend created
一致する宛先ルールを構成します。
cat <<EOF | kubectl apply -n frontend -f -
apiVersion: "networking.istio.io/v1alpha3"
kind: "DestinationRule"
metadata:
  name: "frontend"
spec:
  host: "frontend.demo.svc.cluster.local"
  trafficPolicy:
    tls:
      mode: ISTIO_MUTUAL
EOF
予想される出力:
destinationrule.networking.istio.io/frontend created
frontend-externalサービスの外部 IP アドレスを使用して Online Boutique にアクセスし、ページを更新します。frontend serviceがSTRICTmTLS に設定され、サイドカー プロキシがリクエストをブロックしているため、このページは表示されません。次のコマンドを実行して、別の Pod からプレーン HTTP で
frontendサービスのcurlを実行します。kubectl exec testcurl -n default -- curl \ http://frontend.frontend.svc.cluster.local:80/ -o /dev/null -s -w '%{http_code}\n'STRICT
peerAuthenticationポリシーが適用されているサイドカーレス ワークロードから平文トラフィックを送信しているため、このリクエストは失敗します。認証ポリシーを削除します。
kubectl delete peerauthentication -n frontend frontend予想される出力:
peerauthentication.security.istio.io "frontend" deleted宛先ルールを削除します。
kubectl delete destinationrule -n frontend frontend予想される出力:
destinationrule.networking.istio.io "frontend" deleted
メッシュ全体の mTLS を適用する
メッシュ内のすべてのサービスが平文トラフィックを受け入れるのを防ぐには、mTLS モードを STRICT に設定してメッシュ全体の PeerAuthentication ポリシーを設定します。メッシュ全体の PeerAuthentication ポリシーにはセレクタがないため、このポリシーはルート名前空間 istio-system に適用する必要があります。ポリシーをデプロイすると、コントロール プレーンが TLS 証明書を自動的にプロビジョニングし、ワークロードの相互認証を可能にします。
メッシュ全体の mTLS を適用します。
kubectl apply -f - <<EOF
apiVersion: "security.istio.io/v1beta1"
kind: "PeerAuthentication"
metadata:
  name: "mesh-wide"
  namespace: "istio-system"
spec:
  mtls:
    mode: STRICT
EOF
予想される出力:
peerauthentication.security.istio.io/mesh-wide created
frontend-externalサービスの外部 IP アドレスを使用して Online Boutique にアクセスし、ページを更新します。ページは表示されません。次のコマンドを実行して、別の Pod からプレーン HTTP で
frontendサービスのcurlを実行します。kubectl exec testcurl -n default -- curl \ http://frontend.frontend.svc.cluster.local:80/ -o /dev/null -s -w '%{http_code}\n'STRICT
peerAuthenticationポリシーが適用されているサイドカーレス ワークロードから平文トラフィックを送信しているため、このリクエストは失敗します。mesh-wideポリシーを削除します。kubectl delete peerauthentication -n istio-system mesh-wide予想される出力:
peerauthentication.security.istio.io "mesh-wide" deleted