API 요청 생성 및 응답 처리


이 문서에서는 API 요청을 구성하고 Compute Engine API의 API 응답을 처리하는 방법을 설명합니다. 구체적으로는 다음을 수행하는 방법을 다룹니다.

  • 요청 본문을 구성합니다.
  • 요청에 필요한 리소스 URI를 확인합니다.
  • API 응답을 처리합니다.
  • API 요청이 성공했는지 확인합니다.

이 문서에서는 API에 인증하는 방법을 다루지 않습니다. API에 인증하는 방법은 Compute Engine에 인증을 참조하세요.

시작하기 전에

  • REST API를 익힙니다.
  • Compute Engine API에 인증하는 방법을 알아봅니다.

API 요청 만들기

Compute Engine API는 API 요청이 JSON 형식일 것이라고 예상합니다. API 요청을 수행하려면 curl 또는 httplib2와 같은 도구를 사용하여 직접 HTTP 요청을 수행하거나 사용 가능한 클라이언트 라이브러리 중 하나를 사용하면 됩니다.

POST, UPDATE, PATCH 요청과 같이 요청 본문이 필요한 API 요청을 수행할 경우 해당 요청 본문에는 이 요청에 설정하려는 리소스 속성이 포함됩니다. 예를 들어 다음 curl 명령어는 인스턴스 리소스 URI에 대해 POST 요청을 수행합니다. 이 요청은 요청 본문에 정의된 속성을 사용하여 인스턴스를 만듭니다. 요청 본문은 -d 플래그로 표시됩니다.

curl -X POST -H "Authorization: Bearer [OAUTH_TOKEN]" -H "Content-Type: application/json"
https://compute.googleapis.com/compute/v1/projects/PROJECT_ID/zones/ZONE/instances -d
'{
  "disks":[
    {
      "boot":"true",
      "initializeParams":{
        "sourceImage":"https://www.googleapis.com/compute/v1/projects/debian-cloud/global/images/debian-10-buster-v20210122"
      }
    }
  ],
  "machineType":"https://www.googleapis.com/compute/v1/projects/PROJECT_ID/zones/ZONE/machineTypes/e2-standard-2",
  "name":"VM_NAME",
  "networkInterfaces":[
    {
      "accessConfigs":[
        {
          "name":"external-nat",
          "type":"ONE_TO_ONE_NAT"
        }
      ],
      "network":"https://www.googleapis.com/compute/v1/projects/PROJECT_ID/global/networks/default"
    }
  ]
}'

이미지 URI의 프로젝트 ID(debian-cloud)는 사용자의 프로젝트 ID와 다릅니다. 이미지는 그 유형에 따라 서로 다른 프로젝트에 속하기 때문입니다. 예를 들어 Compute Engine에서 제공하며 공개적으로 사용 가능한 모든 Debian 이미지는 debian-cloud 프로젝트에서 호스팅됩니다.

다른 리소스를 참조할 때는 정규화된 리소스 URI를 사용합니다. 예를 들어 network 속성은 default 네트워크에 정규화된 URI를 사용합니다.

API 요청 예시

Python

def create_instance(
    compute: object,
    project: str,
    zone: str,
    name: str,
    bucket: str,
) -> str:
    """Creates an instance in the specified zone.

    Args:
      compute: an initialized compute service object.
      project: the Google Cloud project ID.
      zone: the name of the zone in which the instances should be created.
      name: the name of the instance.
      bucket: the name of the bucket in which the image should be written.

    Returns:
      The instance object.
    """
    # Get the latest Debian Jessie image.
    image_response = (
        compute.images()
        .getFromFamily(project="debian-cloud", family="debian-11")
        .execute()
    )
    source_disk_image = image_response["selfLink"]

    # Configure the machine
    machine_type = "zones/%s/machineTypes/n1-standard-1" % zone
    startup_script = open(
        os.path.join(os.path.dirname(__file__), "startup-script.sh")
    ).read()
    image_url = "http://storage.googleapis.com/gce-demo-input/photo.jpg"
    image_caption = "Ready for dessert?"

    config = {
        "name": name,
        "machineType": machine_type,
        # Specify the boot disk and the image to use as a source.
        "disks": [
            {
                "boot": True,
                "autoDelete": True,
                "initializeParams": {
                    "sourceImage": source_disk_image,
                },
            }
        ],
        # Specify a network interface with NAT to access the public
        # internet.
        "networkInterfaces": [
            {
                "network": "global/networks/default",
                "accessConfigs": [{"type": "ONE_TO_ONE_NAT", "name": "External NAT"}],
            }
        ],
        # Allow the instance to access cloud storage and logging.
        "serviceAccounts": [
            {
                "email": "default",
                "scopes": [
                    "https://www.googleapis.com/auth/devstorage.read_write",
                    "https://www.googleapis.com/auth/logging.write",
                ],
            }
        ],
        # Metadata is readable from the instance and allows you to
        # pass configuration from deployment scripts to instances.
        "metadata": {
            "items": [
                {
                    # Startup script is automatically executed by the
                    # instance upon startup.
                    "key": "startup-script",
                    "value": startup_script,
                },
                {"key": "url", "value": image_url},
                {"key": "text", "value": image_caption},
                {"key": "bucket", "value": bucket},
            ]
        },
    }

    return compute.instances().insert(project=project, zone=zone, body=config).execute()

자바

public static Operation startInstance(Compute compute, String instanceName) throws IOException {
  System.out.println("================== Starting New Instance ==================");

  // Create VM Instance object with the required properties.
  Instance instance = new Instance();
  instance.setName(instanceName);
  instance.setMachineType(
      String.format(
          "https://www.googleapis.com/compute/v1/projects/%s/zones/%s/machineTypes/e2-standard-1",
          PROJECT_ID, ZONE_NAME));
  // Add Network Interface to be used by VM Instance.
  NetworkInterface ifc = new NetworkInterface();
  ifc.setNetwork(
      String.format(
          "https://www.googleapis.com/compute/v1/projects/%s/global/networks/default",
          PROJECT_ID));
  List<AccessConfig> configs = new ArrayList<>();
  AccessConfig config = new AccessConfig();
  config.setType(NETWORK_INTERFACE_CONFIG);
  config.setName(NETWORK_ACCESS_CONFIG);
  configs.add(config);
  ifc.setAccessConfigs(configs);
  instance.setNetworkInterfaces(Collections.singletonList(ifc));

  // Add attached Persistent Disk to be used by VM Instance.
  AttachedDisk disk = new AttachedDisk();
  disk.setBoot(true);
  disk.setAutoDelete(true);
  disk.setType("PERSISTENT");
  AttachedDiskInitializeParams params = new AttachedDiskInitializeParams();
  // Assign the Persistent Disk the same name as the VM Instance.
  params.setDiskName(instanceName);
  // Specify the source operating system machine image to be used by the VM Instance.
  params.setSourceImage(SOURCE_IMAGE_PREFIX + SOURCE_IMAGE_PATH);
  // Specify the disk type as Standard Persistent Disk
  params.setDiskType(
      String.format(
          "https://www.googleapis.com/compute/v1/projects/%s/zones/%s/diskTypes/pd-standard",
          PROJECT_ID, ZONE_NAME));
  disk.setInitializeParams(params);
  instance.setDisks(Collections.singletonList(disk));

  // Initialize the service account to be used by the VM Instance and set the API access scopes.
  ServiceAccount account = new ServiceAccount();
  account.setEmail("default");
  List<String> scopes = new ArrayList<>();
  scopes.add("https://www.googleapis.com/auth/devstorage.full_control");
  scopes.add("https://www.googleapis.com/auth/compute");
  account.setScopes(scopes);
  instance.setServiceAccounts(Collections.singletonList(account));

  // Optional - Add a startup script to be used by the VM Instance.
  Metadata meta = new Metadata();
  Metadata.Items item = new Metadata.Items();
  item.setKey("startup-script-url");
  // If you put a script called "vm-startup.sh" in this Google Cloud Storage
  // bucket, it will execute on VM startup.  This assumes you've created a
  // bucket named the same as your PROJECT_ID.
  // For info on creating buckets see:
  // https://cloud.google.com/storage/docs/cloud-console#_creatingbuckets
  item.setValue(String.format("gs://%s/vm-startup.sh", PROJECT_ID));
  meta.setItems(Collections.singletonList(item));
  instance.setMetadata(meta);

  System.out.println(instance.toPrettyString());
  Compute.Instances.Insert insert = compute.instances().insert(PROJECT_ID, ZONE_NAME, instance);
  return insert.execute();
}

리소스 URI 만들기

Compute Engine API에서 다른 Google Cloud 리소스 참조는 정규화된 URI로 제공됩니다.

https://compute.googleapis.com/compute/v1/projects/PROJECT_ID/zones/ZONE/RESOURCE_TYPE/SPECIFIC_RESOURCE

API를 사용할 경우 이미지, 머신 유형, 네트워크, 기타 리소스를 지정할 때마다 리소스에 URI를 제공해야 합니다. Google Cloud CLI 및 Google Cloud Console 등의 클라이언트 도구를 사용하면 이러한 복잡성이 가려지고 이러한 리소스 URI가 자동으로 생성되지만 사용자가 API와 직접 상호작용할 때는 이러한 리소스 URI를 직접 만들어야 합니다.

리소스 유형마다 리소스 URI가 약간씩 다릅니다. 예를 들어 영역별 리소스는 다음과 같이 URI에 zone 사양이 포함됩니다.

https://compute.googleapis.com/compute/v1/projects/PROJECT_ID/zones/ZONE/machineTypes/e2-standard-2

리전 리소스는 zone 사양을 region 사양으로 바꿉니다.

https://compute.googleapis.com/compute/v1/projects/PROJECT_ID/regions/REGION/addresses/ADDRESS_NAME

이와 비슷하게 전역 리소스에는 global 사양이 포함됩니다.

https://compute.googleapis.com/compute/v1/projects/PROJECT_ID/global/images/VM_NAME

Compute Engine API는 부분 URI도 허용하는데, 이는 이 서비스가 프로젝트 ID와 같은 정보를 유추할 수 있기 때문입니다. 따라서 상기 URI의 허용되는 부분 버전은 다음과 같습니다.

zones/ZONE/machineTypes/e2-standard-2
regions/REGION/addresses/ADDRESS_NAME
project/PROJECT_ID/global/images/VM_NAME

위의 부분 URI에서는 영역 URI와 지역 URI 모두에 프로젝트 ID가 생략되었으나 이미지 URI는 그렇지 않습니다. Compute Engine에서 제공되는 공개적으로 사용 가능한 이미지가 모든 Debian 이미지의 debian-cloud 및 모든 Ubuntu 이미지의 ubuntu-os-cloud와 같은 다른 프로젝트에 호스팅되기 때문입니다. 이러한 이미지를 사용할 수 있으려면 적절한 프로젝트 ID를 제공해야 합니다. 이미지의 프로젝트 ID를 누락하면 Compute Engine이 프로젝트에서 이미지를 찾으려고 시도하지만 이미지가 존재하지 않기 때문에 요청이 실패하게 됩니다.

하지만 프로젝트(이 리소스를 만드는 프로젝트)에 속한 커스텀 이미지를 사용할 경우, 이미지 URI를 지정할 때 프로젝트 지정을 생략해도 됩니다.

필요한 속성 결정

v1베타 API 모두 사용 가능한 Compute Engine API 참조 문서에는 특정 리소스에 설정할 수 있는 모든 사용 가능한 속성이 설명되어 있습니다. 이 참조 문서는 변경 가능한 속성과 변경이 불가능한 속성을 구분하고 있으나(속성 설명에 [Output Only]로 표시) 리소스에 필요한 속성을 확인하려면 해당 태스크와 관련된 문서를 검토해야 합니다.

예를 들어 인스턴스를 만드는 경우 요청에 필요한 API 속성은 이미지에서 인스턴스 만들기를 참조하세요. API에서 고정 외부 IP 주소를 만들려면 고정 외부 IP 주소 문서를 참조하세요.

API 요청 검증

API 요청을 검증하려면 다음 안내를 따르세요.

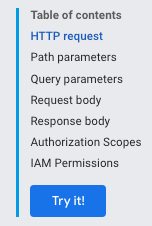
  1. Compute Engine API 참조에서 코드가 호출하는 메서드를 찾습니다. 예를 들면 v1/compute.instances.insert입니다.
  2. 콘텐츠 메뉴에서 사용해 보기!를 클릭합니다. 그러면 API 사용해 보기 창이 열립니다.

    콘텐츠 메뉴의 사용해 보기! 버튼

  3. 요청 매개변수에서는 검증을 위해 요청을 제출할 필요가 없기 때문에 프로젝트 또는 영역을 제공할 필요가 없습니다.

  4. 요청 본문에서 요청을 붙여넣습니다.

    요청 본문 필드로 검증을 위해 요청에 붙여넣을 위치를 표시하는 API 사용해 보기 창

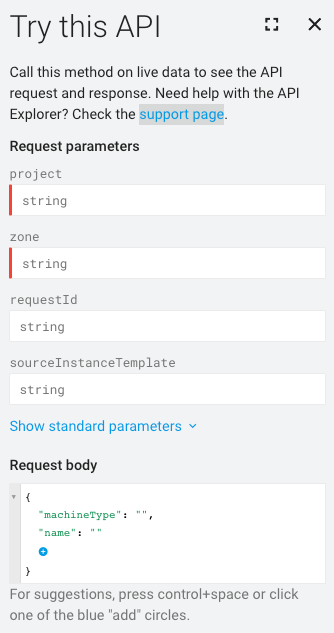
요청에서 형식이 잘못된 부분은 파란색 밑줄로 표시됩니다. 자세한 문제 해결 정보를 보려면 밑줄로 표시된 각 섹션을 클릭합니다.

API 응답 처리

데이터를 음소거(변경)하는 요청을 수행할 경우 Compute Engine이 Operation 객체를 반환합니다. 사용자는 이를 폴링하여 요청 작업 상태를 가져올 수 있습니다. Operation 리소스는 다음과 같이 표시됩니다.

{
 "kind": "compute#operation",
 "id": "7127550864823803662",
 "name": "operation-1458856416788-52ed27a803e22-1c3bd86a-9e95017b",
 "zone": "https://www.googleapis.com/compute/v1/projects/PROJECT_ID/zones/ZONE",
 "operationType": "insert",
 "targetLink": "https://www.googleapis.com/compute/v1/projects/PROJECT_ID/zones/ZONE/instances/EXAMPLE_VM",
 "targetId": "4132355614508179214",
 "status": "PENDING",
 "user": "user@example.com",
 "progress": 0,
 "insertTime": "2016-03-24T14:53:37.788-07:00",
 "selfLink": "https://www.googleapis.com/compute/v1/projects/PROJECT_ID/zones/ZONE/operations/operation-1458856416788-52ed27a803e22-1c3bd86a-9e95017b"
}

디스크 스냅샷 작성 또는 인스턴스 중지와 같이 원래 요청이 영역별 리소스를 음소거(변경)하는 요청인 경우, Compute Engine이 zoneOperations 객체를 반환합니다. 마찬가지로 리전 리소스와 전역 리소스는 각각 regionOperations 또는 globalOperations 객체를 반환합니다. 특정 Operation 리소스에 대해 get 또는 wait 메서드를 사용하는 요청을 수행하고 작업의 name을 제공하여 작업 상태를 가져올 수 있습니다.

Operation 리소스 상태가 DONE으로 반환될 때까지는 요청이 완료된 것이 아닙니다. 이 작업은 요청의 성격에 따라 어느 정도 시간이 걸릴 수 있습니다. 그런 후 Operation 리소스 상태가 DONE으로 반환된 후 작업이 성공했고 오류가 있는지 확인할 수 있습니다.

예를 들어 다음 응답은 이전 작업이 DONE 상태로 지정되어 현재 완료되었음을 나타냅니다.

endTime: '2016-03-24T14:54:07.119-07:00'
id: '7127550864823803662'
insertTime: '2016-03-24T14:53:37.788-07:00'
kind: compute#operation
name: operation-1458856416788-52ed27a803e22-1c3bd86a-9e95017b
operationType: insert
progress: 100
selfLink: https://compute.googleapis.com/compute/v1/projects/PROJECT_ID/zones/ZONE/operations/operation-1458856416788-52ed27a803e22-1c3bd86a-9e95017b
startTime: '2016-03-24T14:53:38.397-07:00'
status: DONE
targetId: '4132355614508179214'
targetLink: https://compute.googleapis.com/compute/v1/projects/PROJECT_ID/zones/ZONE/instances/EXAMPLE_VM
user: user@example.com
zone: https://compute.googleapis.com/compute/v1/projects/PROJECT_ID/zones/ZONE

확인을 위해서는 리소스에 get 요청을 실행하여 리소스가 존재하고 실행 중인지 확인합니다. 예를 들면 다음과 같습니다.

GET /compute/v1/projects/PROJECT_ID/zones/ZONE/instances/EXAMPLE_VM

{
  "cpuPlatform": "Intel Haswell",
  "creationTimestamp": "2016-03-24T14:53:37.170-07:00",
  "disks": [
    ..[snip]..
  "selfLink": "https://www.googleapis.com/compute/v1/projects/PROJECT_ID/zones/ZONE/instances/EXAMPLE_VM",
  "status": "RUNNING",
  "tags": {
    "fingerprint": "42WmSpB8rSM="
  },
  "zone": "https://www.googleapis.com/compute/v1/projects/PROJECT_ID/zones/ZONE"
}

폴링 작업

작업 상태가 DONE일 때 반환되는 get 또는 wait 요청을 사용해서 작업을 주기적으로 폴링해서 코드를 작성할 수 있습니다.

get 요청을 사용하면 작업 상태에 관계없이 작업이 즉시 반환됩니다. 작업이 완료된 시간을 확인하기 위해서는 작업을 주기적으로 폴링해야 합니다.

wait 요청을 수행하면 작업이 DONE일 때 또는 요청이 2분 기한에 도달할 때 요청이 반환됩니다. wait 또는 get을 사용해서 작업을 폴링하도록 선택할 수 있지만 wait 메서드가 get 메서드보다 확실한 이점을 제공합니다.

  • 작업 상태를 덜 자주 폴링하도록 클라이언트를 설정하여 Compute Engine API의 QPS 사용을 줄일 수 있습니다.
  • 작업이 완료되는 즉시 서버가 응답하기 때문에 작업이 완료된 시간과 클라이언트에 작업 완료가 알려지는 시간 사이의 평균 지연 시간이 크게 줄어듭니다.
  • 이 메서드는 한정된 시간 동안만 대기합니다. 이 메서드는 최대한 기본 HTTP 제한 시간(2분)까지만 기다린 후 DONE 또는 여전히 진행 중일 수 있는 작업의 현재 상태를 반환합니다.

wait 메서드는 최선형 API입니다. 서버가 과부하 상태이면 기본 기한에 도달하기 전이나 대기 시간이 0초인 경우에도 요청이 반환될 수 있습니다. 또한 작업이 DONE일 때만 반환된다는 보장도 없습니다. 예를 들어 요청이 2분 기한에 도달하면 작업이 완료되지 않더라도 메서드가 반환됩니다. 작업을 확인하려면 중간 대기 시간이 있는 재시도 루프에서 wait 또는 get 메서드를 사용해서 작업 상태를 주기적으로 폴링하는 것이 좋습니다. 최대 재시도 간격은 최소 작업 보관 기간을 초과하면 안 됩니다.

폴링 예시

다음 예시에는 get 메서드가 사용됩니다. get 메서드는 wait 메서드로 바꿀 수 있습니다.

Python

def wait_for_operation(
    compute: object,
    project: str,
    zone: str,
    operation: str,
) -> dict:
    """Waits for the given operation to complete.

    Args:
      compute: an initialized compute service object.
      project: the Google Cloud project ID.
      zone: the name of the zone in which the operation should be executed.
      operation: the operation ID.

    Returns:
      The result of the operation.
    """
    print("Waiting for operation to finish...")
    while True:
        result = (
            compute.zoneOperations()
            .get(project=project, zone=zone, operation=operation)
            .execute()
        )

        if result["status"] == "DONE":
            print("done.")
            if "error" in result:
                raise Exception(result["error"])
            return result

        time.sleep(1)

자바

/**
 * Wait until {@code operation} is completed.
 *
 * @param compute the {@code Compute} object
 * @param operation the operation returned by the original request
 * @param timeout the timeout, in millis
 * @return the error, if any, else {@code null} if there was no error
 * @throws InterruptedException if we timed out waiting for the operation to complete
 * @throws IOException if we had trouble connecting
 */
public static Operation.Error blockUntilComplete(
    Compute compute, Operation operation, long timeout) throws Exception {
  long start = System.currentTimeMillis();
  final long pollInterval = 5 * 1000;
  String zone = getLastWordFromUrl(operation.getZone()); // null for global/regional operations
  String region = getLastWordFromUrl(operation.getRegion());
  String status = operation.getStatus();
  String opId = operation.getName();
  while (operation != null && !status.equals("DONE")) {
    Thread.sleep(pollInterval);
    long elapsed = System.currentTimeMillis() - start;
    if (elapsed >= timeout) {
      throw new InterruptedException("Timed out waiting for operation to complete");
    }
    System.out.println("waiting...");
    if (zone != null) {
      Compute.ZoneOperations.Get get = compute.zoneOperations().get(PROJECT_ID, zone, opId);
      operation = get.execute();
    } else if (region != null) {
      Compute.RegionOperations.Get get = compute.regionOperations().get(PROJECT_ID, region, opId);
      operation = get.execute();
    } else {
      Compute.GlobalOperations.Get get = compute.globalOperations().get(PROJECT_ID, opId);
      operation = get.execute();
    }
    if (operation != null) {
      status = operation.getStatus();
    }
  }
  return operation == null ? null : operation.getError();
}