Avant de commencer
Avant de commencer à utiliser Cloud Workstations, assurez-vous de disposer des autorisations requises et d'effectuer les étapes de configuration obligatoires suivantes :
- Sign in to your Google Cloud account. If you're new to Google Cloud, create an account to evaluate how our products perform in real-world scenarios. New customers also get $300 in free credits to run, test, and deploy workloads.
-
In the Google Cloud console, on the project selector page, select or create a Google Cloud project.
Roles required to select or create a project
- Select a project: Selecting a project doesn't require a specific IAM role—you can select any project that you've been granted a role on.
-
Create a project: To create a project, you need the Project Creator
(
roles/resourcemanager.projectCreator), which contains theresourcemanager.projects.createpermission. Learn how to grant roles.
-
Verify that billing is enabled for your Google Cloud project.
-
Enable the Cloud Workstations API.
Roles required to enable APIs
To enable APIs, you need the Service Usage Admin IAM role (
roles/serviceusage.serviceUsageAdmin), which contains theserviceusage.services.enablepermission. Learn how to grant roles. -
Si vous êtes administrateur, assurez-vous de disposer du rôle IAM Administrateur Cloud Workstations sur le projet afin de pouvoir créer des configurations de stations de travail.
Si vous êtes développeur et que vous ne disposez pas de configurations de station de travail dans la consoleGoogle Cloud , demandez à l'administrateur Cloud Workstations de votre organisation de créer une configuration de station de travail pour vous. Vous pouvez également vous assurer de disposer d'un rôle IAM d'administrateur Cloud Workstations sur le projet afin de pouvoir créer ces ressources vous-même. Pour vérifier vos rôles IAM, accédez à la page IAM de la console Google Cloud :
Recherchez votre clé de licence Posit Workbench et gardez-la à portée de main, car vous en aurez besoin lors d'une étape ultérieure. Si vous avez besoin d'une clé de licence Posit Workbench, contactez votre représentant Posit chargé du succès client ou envoyez un e-mail à sales@posit.co.
Suivez les instructions pour créer une configuration de station de travail.
À l'étape Personnalisation de l'environnement, sélectionnez Éditeurs de code sur des images de base.
Dans le menu Éditeurs de code, sélectionnez Posit Workbench (y compris RStudio Pro) fourni par un tiers.
Cliquez sur la flèche arrow_drop_down pour développer la section Options avancées des conteneurs.
Accédez à la section Variables d'environnement, puis cliquez sur Ajouter une variable.
Saisissez
RSW_LICENSEdans le champ Clé, puis collez votre clé de licence Posit Workbench dans le champ Valeur.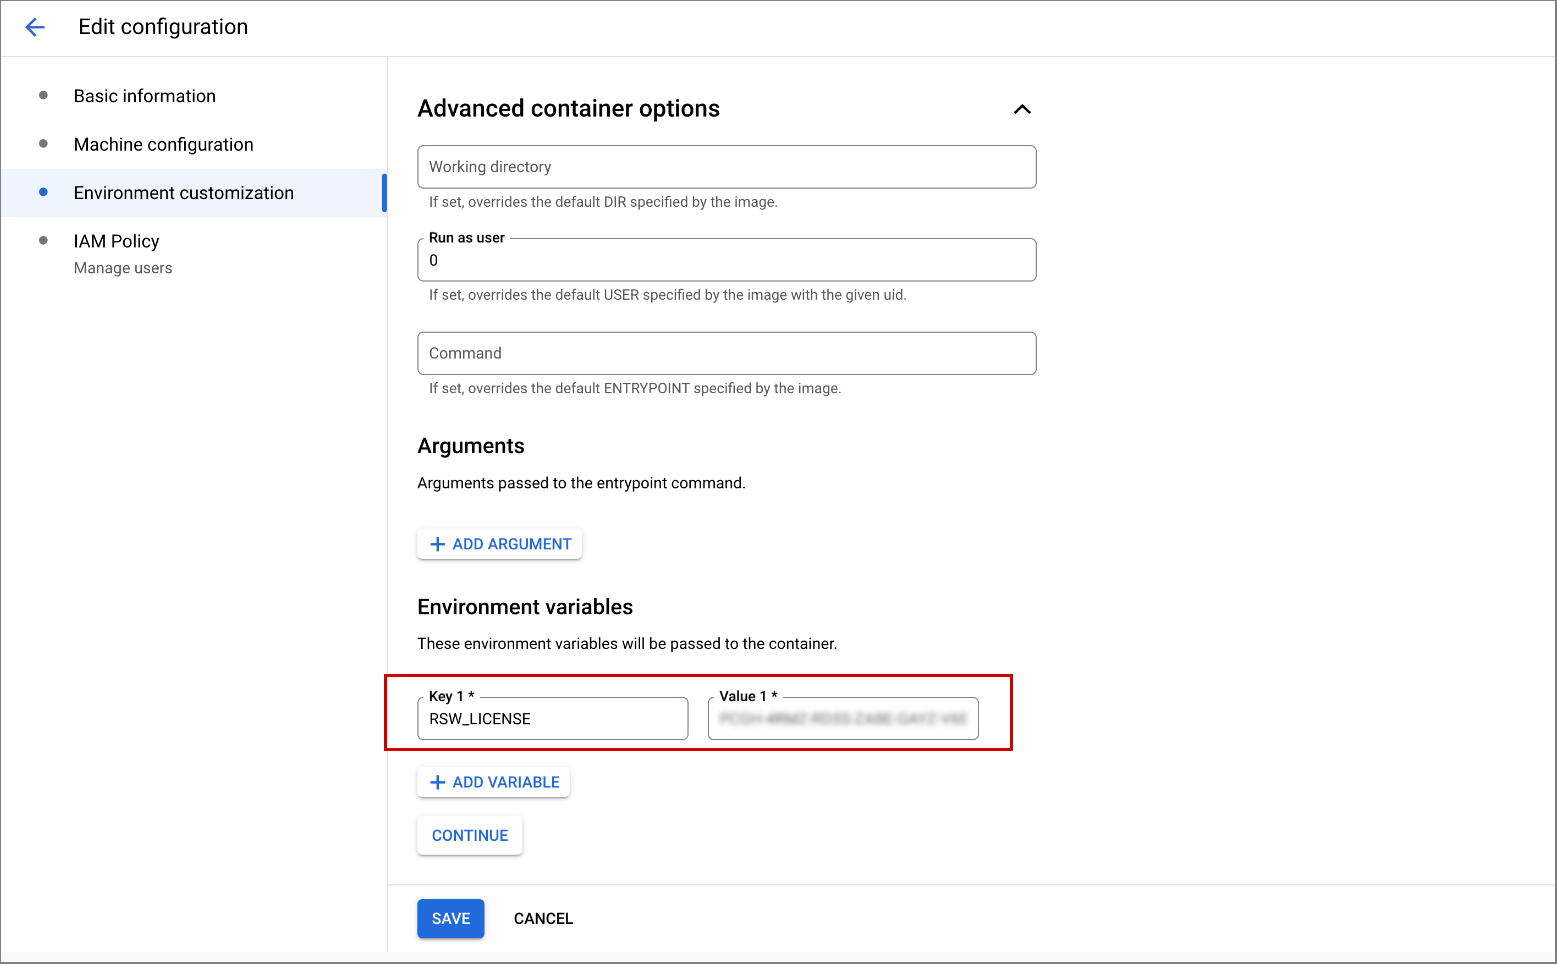
Cliquez sur Continuer.
À l'étape Ajouter des utilisateurs, accordez à vos développeurs les autorisations d'accès IAM Cloud Workstations à la configuration de la station de travail.
Pour créer la configuration de votre station de travail et y ajouter ces utilisateurs, cliquez sur Créer.
Si vous avez également choisi de créer un cluster, la création du cluster peut prendre jusqu'à 20 minutes.
Les développeurs de votre équipe devraient maintenant pouvoir créer des stations de travail avec Posit Workbench.
Dans la console Google Cloud , accédez à la page Cloud Workstations > Workstations.
Cliquez sur add_boxCréer.
Le lien Créer peut être désactivé s'il n'existe aucune configuration dans le projet ou si vous ne disposez pas des autorisations nécessaires pour les afficher. Demandez à l'administrateur Cloud Workstations de votre organisation de créer une configuration de station de travail pour vous.
Saisissez le nom de votre station de travail.
Suivez les conventions de dénomination des ressources Compute Engine et choisissez un nom unique dans le cluster de stations de travail.
Cliquez sur la flèche de développement arrow_drop_down dans le champ Configuration, puis sélectionnez la configuration de station de travail Posit Workbench (tiers).
Cliquez sur
Créer pour créer votre station de travail.- Cliquez sur Postes de travail.
- Recherchez la station de travail que vous avez créée dans la liste des stations de travail disponibles, cochez la case à côté, puis cliquez sur Démarrer. Votre station de travail est alors lancée et correspond à la configuration de la station de travail parente.
- Si vous êtes invité à démarrer votre poste de travail, cliquez sur Démarrer pour confirmer. L'état passe à Démarrage et l'icône d'état Actualiser tourne pendant l'opération de démarrage. Le démarrage de votre station de travail peut prendre quelques minutes.
- Lorsque votre station de travail est prête, l'état passe à En cours d'exécution et l'icône d'état affiche la coche check_circle.
- Cliquez sur Lancement.
L'exemple suivant montre la page d'accueil de Posit Workbench. L'apparence de votre page peut varier en fonction de la façon dont votre organisation définit la configuration de votre poste de travail :
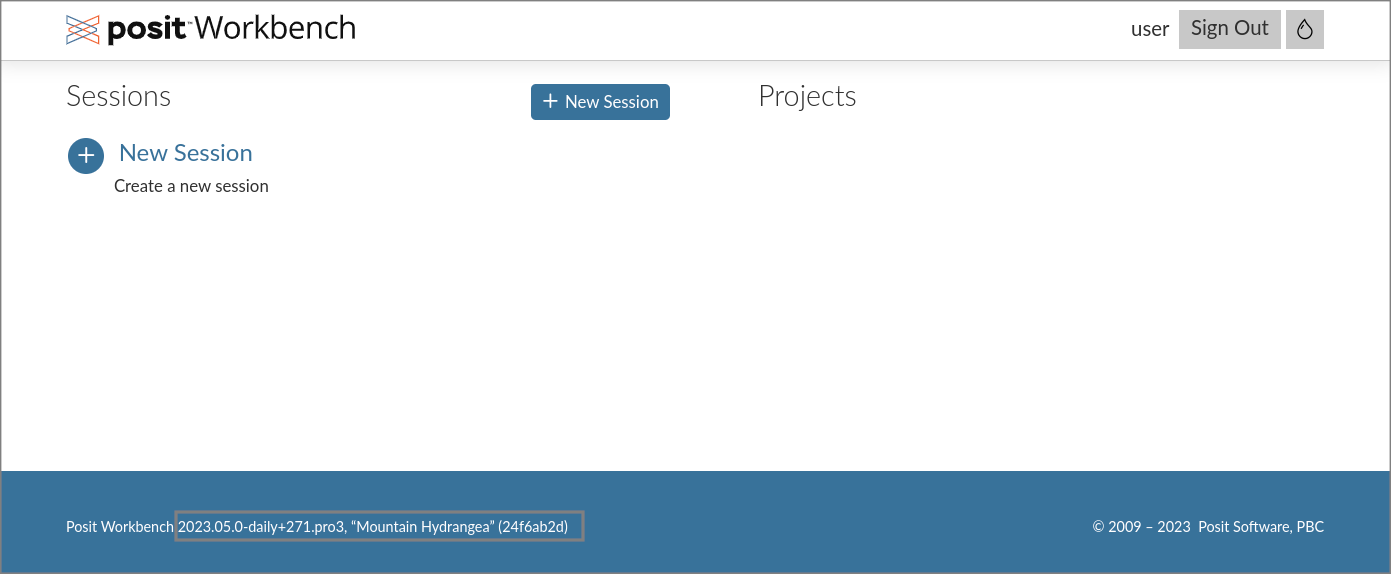
Cliquez sur Nouvelle session.
Sélectionnez RStudio Pro comme IDE et laissez Cluster défini sur Local.
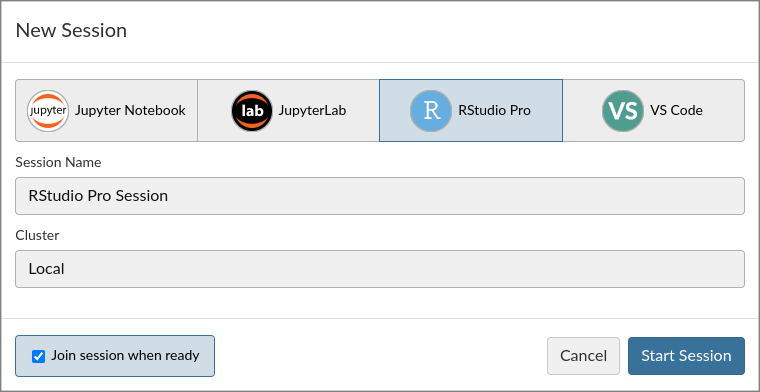
Pour en savoir plus sur Posit Workbench et les IDE qu'il prend en charge, tels que Jupyter Notebook, JupyterLab et VS Code, consultez la documentation Posit.
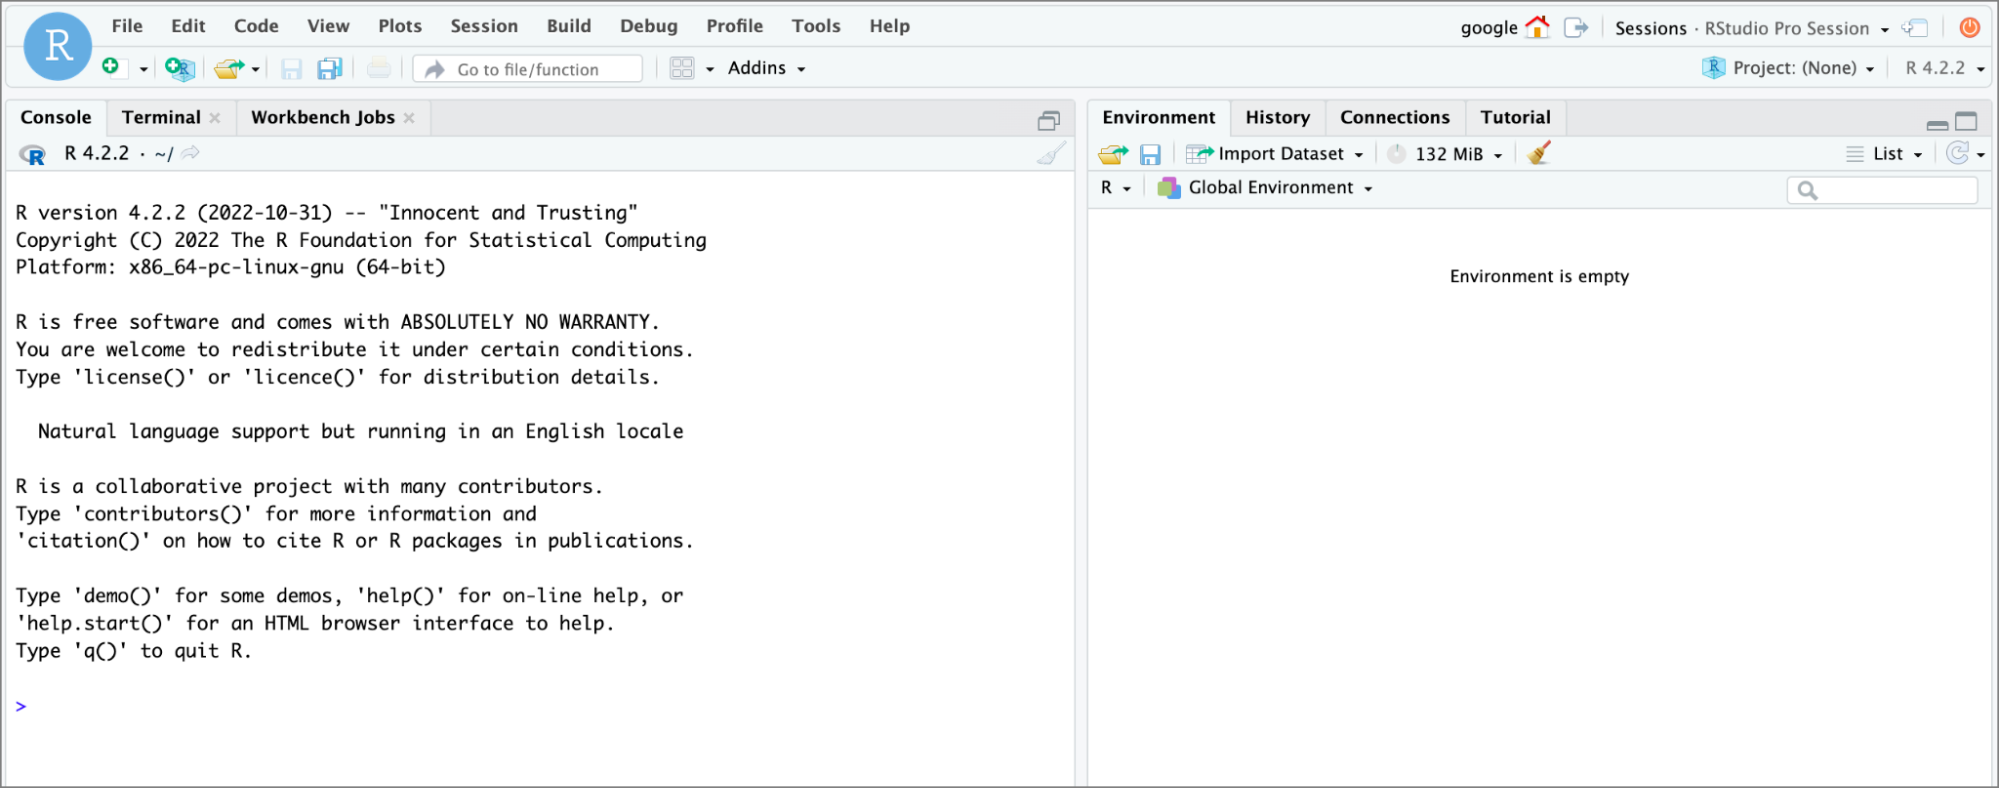
Cliquez sur Start Session (Démarrer la session).
Attendez que la session démarre, puis commencez à coder.
Pour importer des fichiers de votre ordinateur local vers votre poste de travail, cliquez sur Importer.
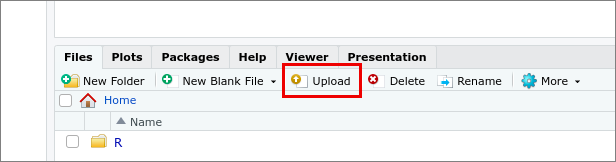
Sélectionnez le répertoire cible dans lequel vous souhaitez stocker les fichiers sur votre poste de travail.
Cliquez sur Sélectionner un fichier pour choisir le fichier à importer.
Pour lancer l'importation, cliquez sur OK.
Pour importer des fichiers depuis votre poste de travail, cliquez sur Importer un ensemble de données, puis sélectionnez le type d'ensemble de données.
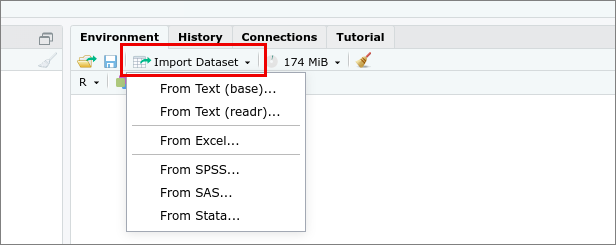
Accédez à l'ensemble de données à importer depuis votre poste de travail, puis sélectionnez-le.
L'IDE Posit Workbench dépend de différents packages R pour différentes fonctionnalités. Par exemple, si vous importez un fichier Excel, certains packages doivent être installés. Si vous êtes invité à installer les packages requis, cliquez sur Oui.
Pour commencer l'importation, cliquez sur Importer.
Découvrez comment personnaliser les images de conteneurs pour répondre aux besoins de votre organisation.
Pour en savoir plus sur Posit Workbench, consultez le hub de documentation de Posit Software.
Créer la configuration de la station de travail
Pour utiliser Posit Workbench (y compris RStudio Pro), vous devez créer une configuration de station de travail pour les développeurs de votre organisation :
Configurer votre poste de travail
Pour créer une station de travail, procédez comme suit :
Lancer votre station de travail
Maintenant que vous avez créé votre poste de travail, vous pouvez le démarrer, puis le lancer pour commencer le développement :
Lancer une session RStudio Pro Posit Workbench
Importer des fichiers sur votre poste de travail
Pour importer plusieurs fichiers ou un répertoire, créez un fichier ZIP. Le fichier ZIP est décompressé après l'importation.
Importer des fichiers depuis votre poste de travail
Obtenir de l'aide pour les problèmes liés à Posit Workbench
Si vous rencontrez des problèmes avec Posit Workbench ou avec l'image de conteneur Posit Workbench, signalez-les à Posit à l'adresse support@posit.co.