The Cloud Workstations plugin lets you initiate remote development sessions for Cloud Workstations using JetBrains IDEs such as IntelliJ IDEA Ultimate, PyCharm Professional, Rider, CLion, PhpStorm, and WebStorm.
Supported operating systems
The Cloud Workstations plugin supports the following operating systems:
- Windows
- macOS (Intel and Apple Silicon)
- Linux
Supported versions
The Cloud Workstations plugin supports the latest version, and one previous version, of JetBrains IDEs and JetBrains Gateway. When a new JetBrains IDE major version is released, the next Cloud Workstations plugin release supports the new version and drops support for the earliest, previously supported version.
To make it easier to keep JetBrains apps up-to-date, you can also install JetBrains Toolbox.
For more information about JetBrains IDE versions in preconfigured base images, see the Cloud Workstations release notes.
Before you begin
Be sure to follow these steps before installing the Cloud Workstations plugin:
Follow the steps to Create a workstation. When prompted for the Configuration, choose the image that corresponds to the JetBrains IDE that you want to use.
After entering the name for your workstation, click Create.
Click the Workstations page and wait for the workstation to finish creating.
Download and install a supported version of JetBrains Gateway.
Add a server readiness check
For convenience, all JetBrains images come preinstalled with a basic HTTP server
running on port 80 which can be used to determine if the preconfigured JetBrains
IDE is ready to accept incoming connections. We recommend adding an HTTP
readiness check
on port 80 in your workstation configuration. With this readiness check, workstations
appear in the Google Cloud console as RUNNING only after the IDE is ready.
Consequently, JetBrains Gateway will wait until the IDE is ready before
attempting to connect.
Install the Cloud Workstations plugin
Install the Cloud Workstations plugin:
Open JetBrains Gateway.
Select All Providers.
In the Install More Providers section, find Google Cloud and then click Install to download the Cloud Workstations plugin.
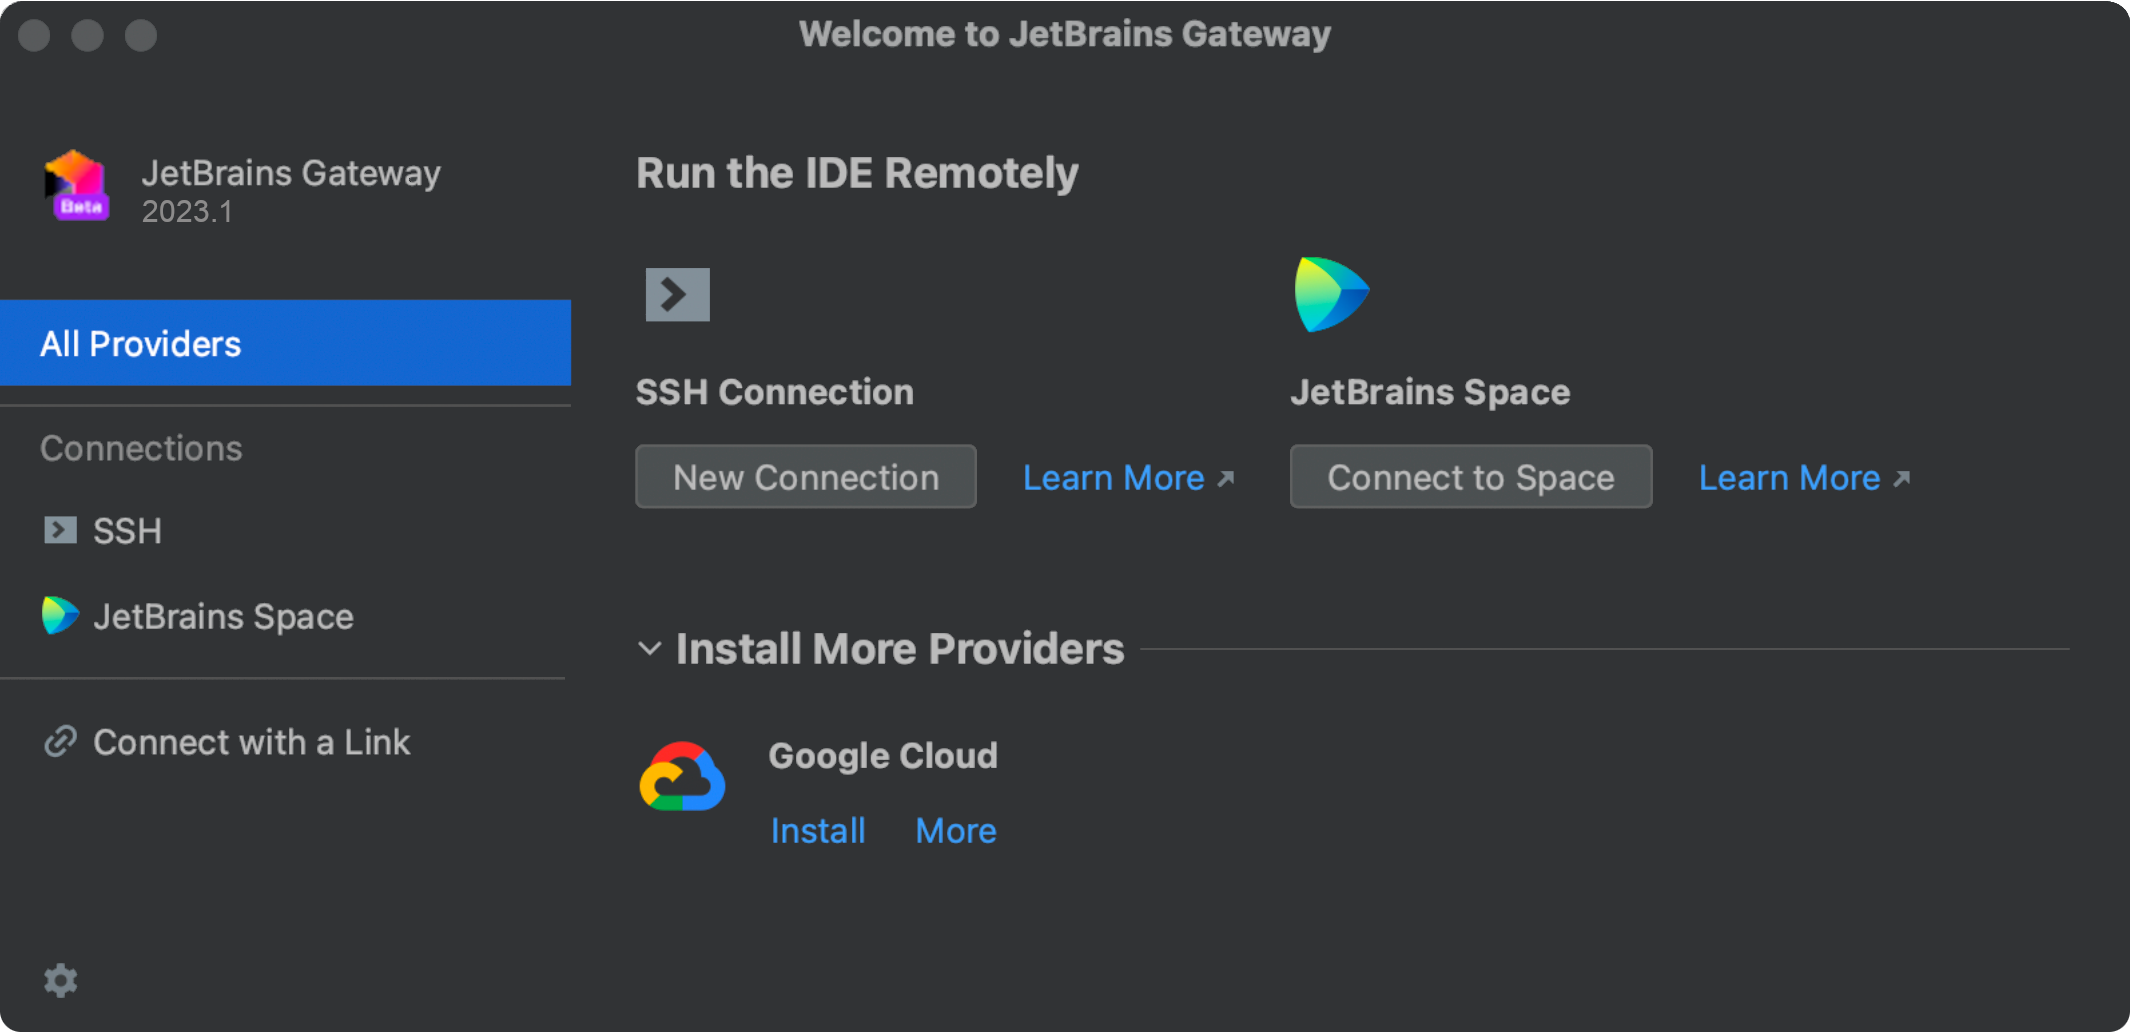
After installation, Cloud Workstations appears in the Run the IDE Remotely section.
Connect using the Cloud Workstations plugin
To connect to a workstation using the plugin, follow these steps:
Open JetBrains Gateway.
In the Run the IDE Remotely section, click Connect to Google Cloud.
Click Sign in to sign into your Google Account.
Follow the prompts to grant the Cloud Workstations plugin access to Google Cloud.
Click Continue to complete the sign in.
Click
 Browse to open a project selector dialog and select a cloud project.
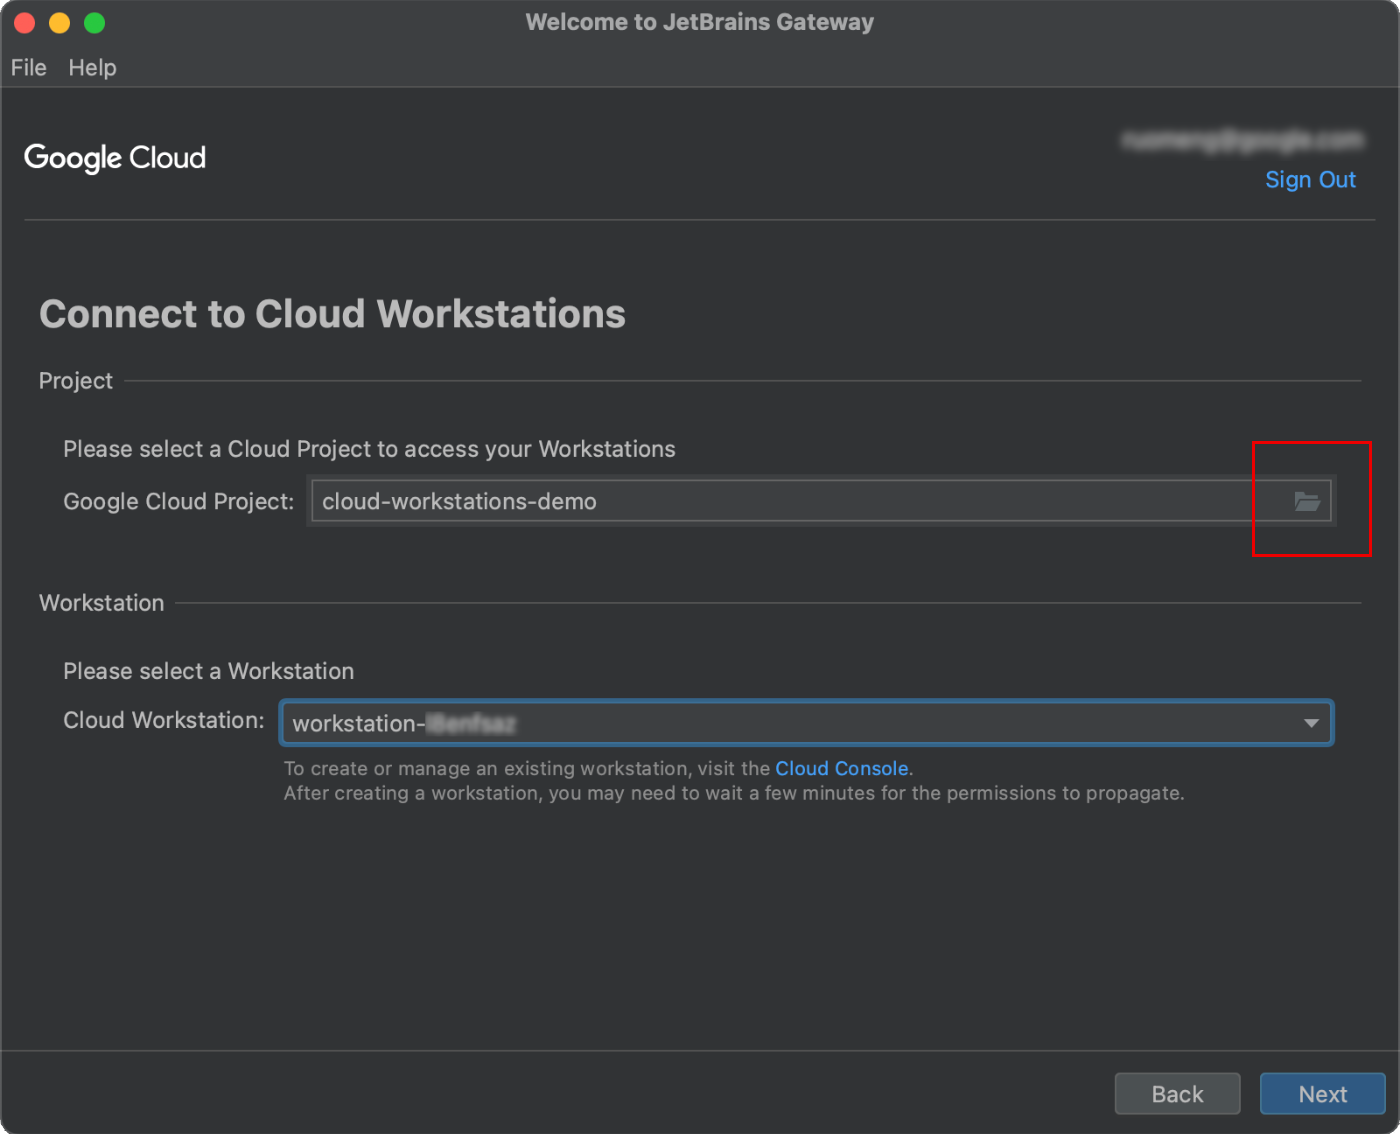
Select a workstation under the cloud project, click Next, and wait for the selected workstation to start.
Select your IDE and project:
Select an IDE version in the remote host.
Enter an IDE project path on the remote host.
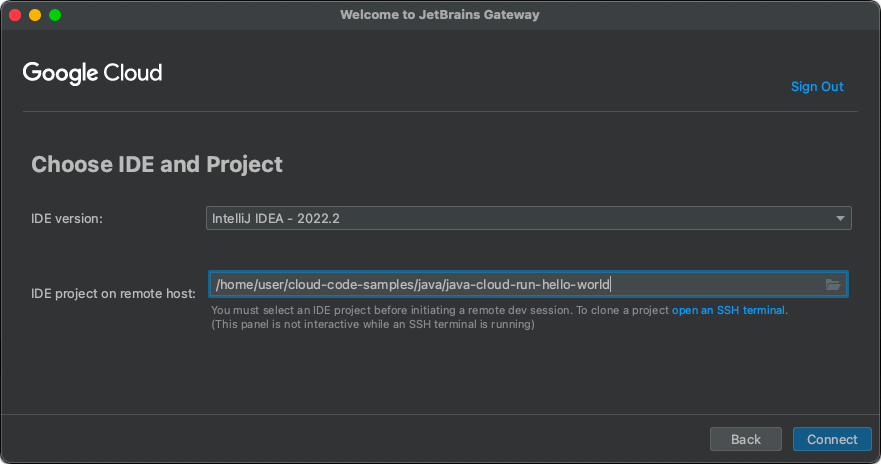
Click Connect and wait for the IDE and project to open.
Reconnect to a workstation
To quickly reconnect to a workstation and an IDE project:
Open the recent Connections panel.
Click a project path to open an IDE in Cloud Workstations.
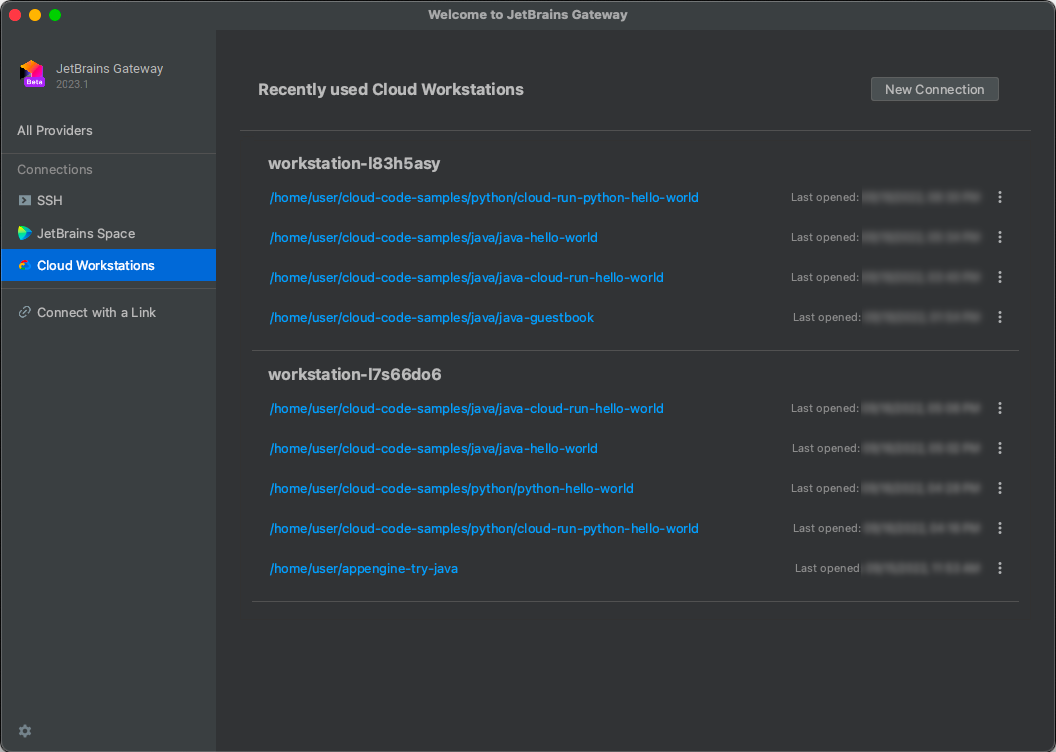
Wait for the IDE and project to open.
Use port forwarding
After the JetBrains client opens with your IDE and project, you may want to
access remote ports on Cloud Workstations from your local machine. For example,
when you run a Python server on the workstation, python -m SimpleHTTPServer
8080. In certain cases, JetBrains Gateway automatically performs port
forwarding for you so that you can access projects running remotely through your
local browser.
You can also manually port forward from Cloud Workstations to your local machine as follows:
For Windows and Linux, select File > Settings from the main menu.
For macOS, select IntelliJ IDEA > Preferences from the main menu.
Go to Tools > Port Forwarding, and add a new rule to forward TCP for port
8080.After you set this rule, you can access port
8080of Cloud Workstations locally at http://localhost:8080
Override API endpoints
For Virtual Private Cloud users that need to override API endpoints, make sure the plugin can connect to your cloud services. To override API endpoints, follow these steps:
From Windows and Linux, click settings Options menu > Settings.

From macOS, click settings Options menu > Preferences.

Optional: To access JetBrains Settings for IntelliJ and other IDEs, see configure project settings.
Go to Tools > Google Cloud Workstations > Advanced.
Add API endpoint override URLs.
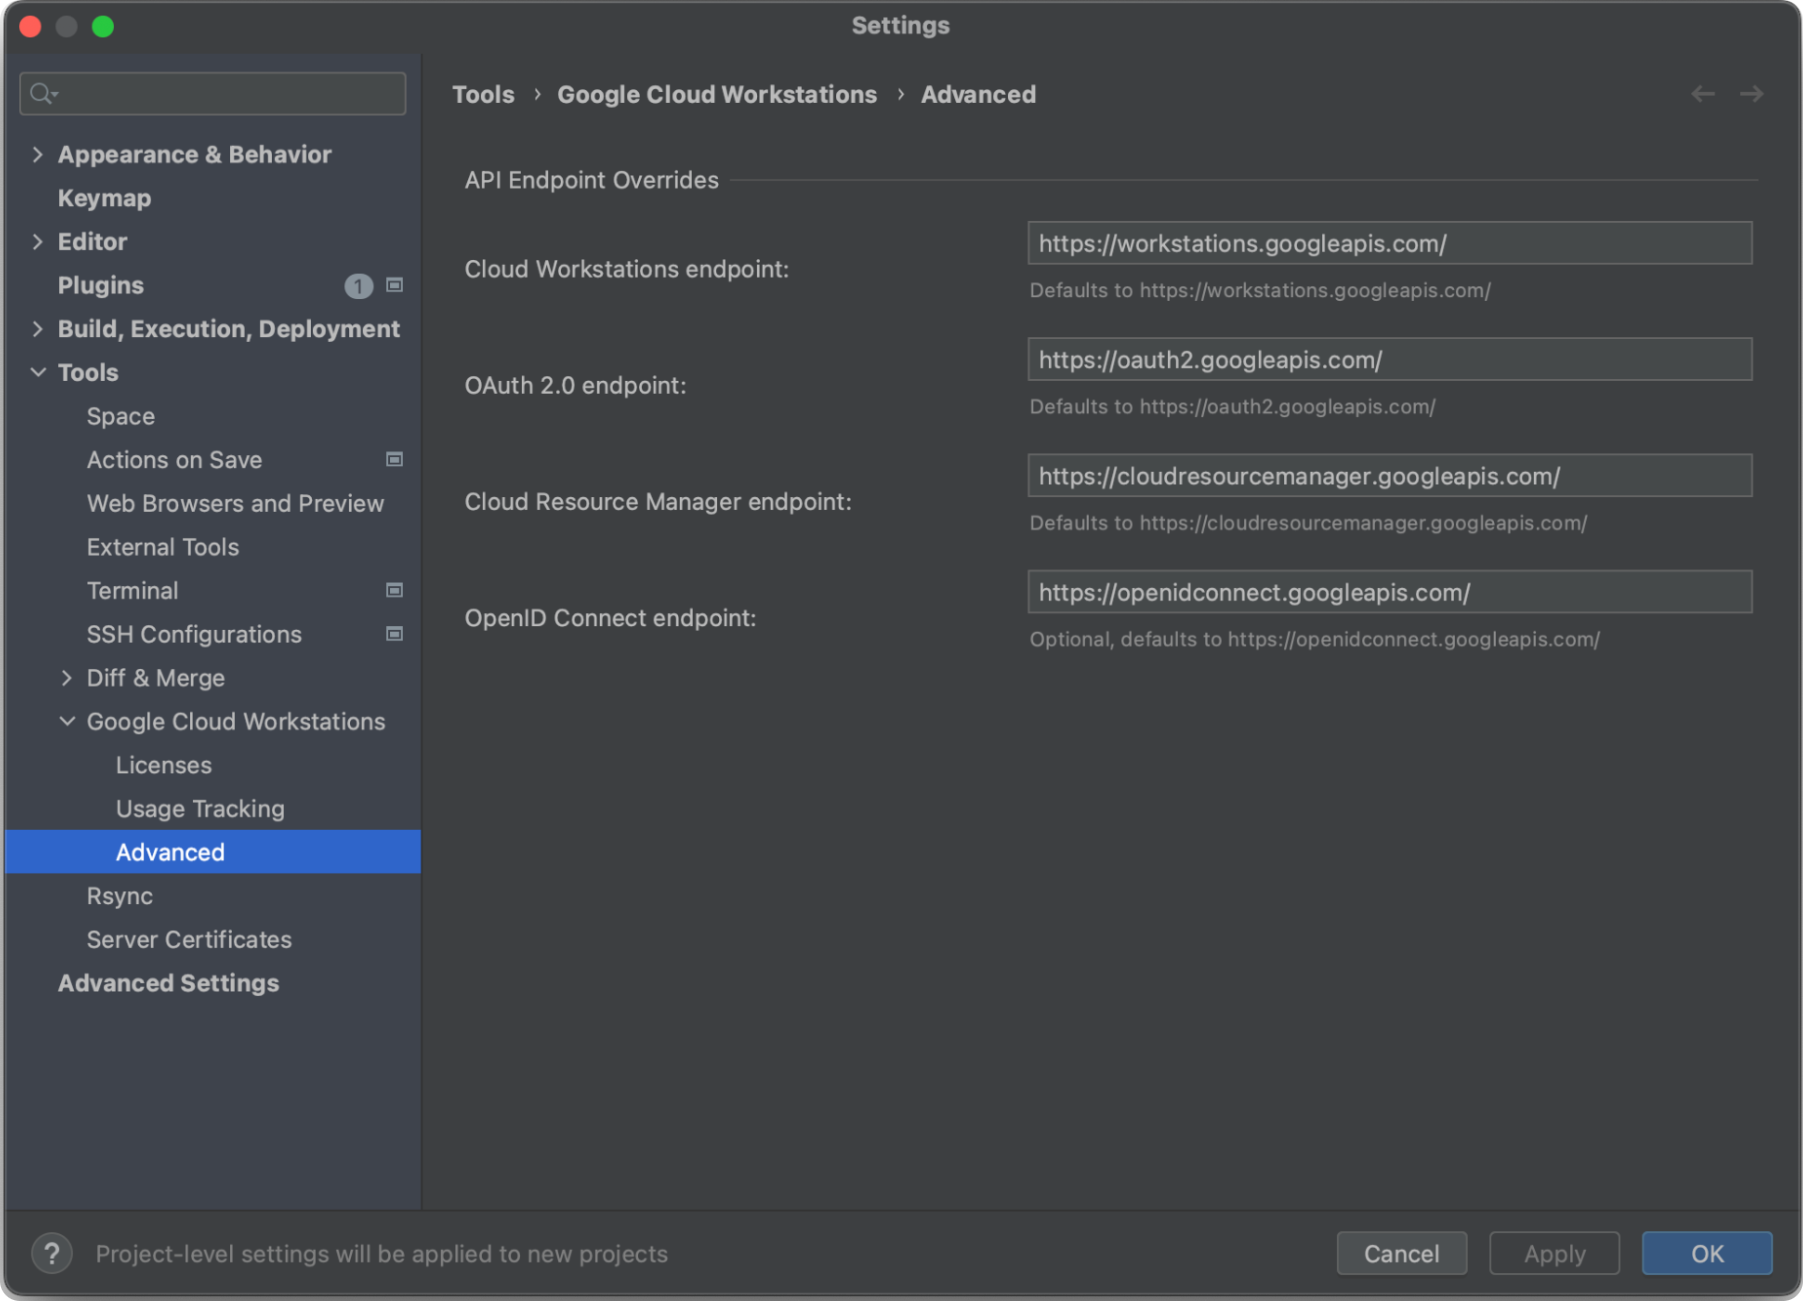
Click Apply.
For more information about using endpoints in Google Cloud, see the Virtual Private Cloud description of accessing Google APIs through endpoints.
Alternate connection instructions for BYOID users
If you use BYOID, you need to take additional steps to connect with Jetbrains Gateway. Follow these steps:
Start your workstation and open a TCP connection
The following steps start your workstation and open a TCP connection:
- Follow the instructions in the Before you begin section.
Make sure your workstation is running. You can use the following
gcloudCLI command to start it.gcloud workstations start WORKSTATION_ID –-project=PROJECT \ --cluster=WORKSTATION_CLUSTER_ID --config=WORKSTATION_CONFIG_ID \ --region=WORKSTATION_CLUSTER_REGIONStart a TCP tunnel to your workstation on port 22:
gcloud workstations start-tcp-tunnel --project=PROJECT \
    --cluster=WORKSTATION_CLUSTER_ID \
    --config=WORKSTATION_CONFIG_ID \
    --region=WORKSTATION_CLUSTER_REGION \
    WORKSTATION_ID 22 --local-host-port=127.0.0.1:2222
With the initial setup and installation complete, the next step is to launch Jetbrains Gateway.
Launch Jetbrains Gateway
After launching Jetbrains Gateway, select Connect via SSH.
On the Connect to SSH page, click
 Settings to set-up a new connection.
From the SSH Configuration page:
- Click Add a new connection.
- Enter your connection information. For example, Local Host=
127.0.0.1, Port=2222and Username=user. Be sure to use values appropriate to your configuration for the local host, port, and username. - Set the Authentication type to Password and leave the password field blank.
- Clear the option for Parse config file ~/.ssh/config
- Click OK to create the connection.
- Click Check Connection and Continue.
On the Choose IDE and Project page, select the following:
- Select the IDE that you want to use.
Select the directory that contains your project by clicking more_horiz More. Note that you cannot create a project from this menu. You can only open a project. To create a new project, select Open an SSH Terminal and run commands to create a directory for your JetBrains project.
Alternatively, you can also click Open an SSH terminal to run
gitcommands inside your workstations. For example, the following command clones the Cloud Code Samples project in your home directory:git clone https://github.com/GoogleCloudPlatform/cloud-code-samples.gitAfter selecting the project directory, click Download and Start IDE.
After the IDE connects, you can access files in your workstation directly from your Jetbrains IDE, which can also use the Cloud Workstations extension to help build and run your code.