Vertex AI 기반 Imagen의 텍스트 이미지 생성 기능을 사용하고 생성된 이미지에서 디지털 워터마크(SynthID)를 확인하는 방법을 알아봅니다. 이 빠른 시작에서는Google Cloud 콘솔에서 Imagen 이미지 생성 기능을 사용하는 방법을 설명합니다.
Vertex AI의 Imagen 가격 책정은 사용하는 기능에 따라 달라집니다. 자세한 내용은 가격 책정을 참조하세요.
시작하기 전에
- Sign in to your Google Cloud account. If you're new to Google Cloud, create an account to evaluate how our products perform in real-world scenarios. New customers also get $300 in free credits to run, test, and deploy workloads.
-
In the Google Cloud console, on the project selector page, select or create a Google Cloud project.
Roles required to select or create a project
- Select a project: Selecting a project doesn't require a specific IAM role—you can select any project that you've been granted a role on.
-
Create a project: To create a project, you need the Project Creator
(
roles/resourcemanager.projectCreator), which contains theresourcemanager.projects.createpermission. Learn how to grant roles.
-
Verify that billing is enabled for your Google Cloud project.
-
Enable the Vertex AI API.
Roles required to enable APIs
To enable APIs, you need the Service Usage Admin IAM role (
roles/serviceusage.serviceUsageAdmin), which contains theserviceusage.services.enablepermission. Learn how to grant roles. -
Make sure that you have the following role or roles on the project: Vertex AI User
Check for the roles
-
In the Google Cloud console, go to the IAM page.
Go to IAM - Select the project.
-
In the Principal column, find all rows that identify you or a group that you're included in. To learn which groups you're included in, contact your administrator.
- For all rows that specify or include you, check the Role column to see whether the list of roles includes the required roles.
Grant the roles
-
In the Google Cloud console, go to the IAM page.
IAM으로 이동 - 프로젝트를 선택합니다.
- 액세스 권한 부여를 클릭합니다.
-
새 주 구성원 필드에 사용자 식별자를 입력합니다. 일반적으로 Google 계정의 이메일 주소입니다.
- 역할 선택 목록에서 역할을 선택합니다.
- 역할을 추가로 부여하려면 다른 역할 추가를 클릭하고 각 역할을 추가합니다.
- 저장을 클릭합니다.
-
-
In the Google Cloud console, on the project selector page, select or create a Google Cloud project.
Roles required to select or create a project
- Select a project: Selecting a project doesn't require a specific IAM role—you can select any project that you've been granted a role on.
-
Create a project: To create a project, you need the Project Creator
(
roles/resourcemanager.projectCreator), which contains theresourcemanager.projects.createpermission. Learn how to grant roles.
-
Verify that billing is enabled for your Google Cloud project.
-
Enable the Vertex AI API.
Roles required to enable APIs
To enable APIs, you need the Service Usage Admin IAM role (
roles/serviceusage.serviceUsageAdmin), which contains theserviceusage.services.enablepermission. Learn how to grant roles. -
Make sure that you have the following role or roles on the project: Vertex AI User
Check for the roles
-
In the Google Cloud console, go to the IAM page.
Go to IAM - Select the project.
-
In the Principal column, find all rows that identify you or a group that you're included in. To learn which groups you're included in, contact your administrator.
- For all rows that specify or include you, check the Role column to see whether the list of roles includes the required roles.
Grant the roles
-
In the Google Cloud console, go to the IAM page.
IAM으로 이동 - 프로젝트를 선택합니다.
- 액세스 권한 부여를 클릭합니다.
-
새 주 구성원 필드에 사용자 식별자를 입력합니다. 일반적으로 Google 계정의 이메일 주소입니다.
- 역할 선택 목록에서 역할을 선택합니다.
- 역할을 추가로 부여하려면 다른 역할 추가를 클릭하고 각 역할을 추가합니다.
- 저장을 클릭합니다.
-
Google Cloud 콘솔에서 Vertex AI > Media Studio 페이지로 이동합니다.
프롬프트(여기에 프롬프트를 작성하세요.) 필드에 다음 프롬프트를 입력합니다.
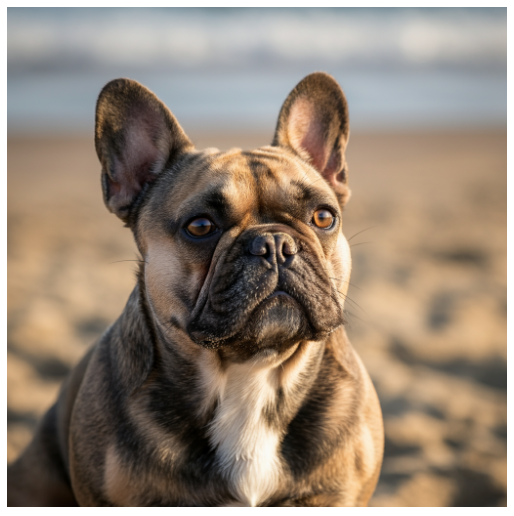
portrait of a french bulldog at the beach, 85mm f/2.8선택하지 않은 경우 매개변수 패널의 모델 옵션 상자에서
Imagen 3을 선택합니다.선택하지 않은 경우 매개변수 패널의 가로세로 비율 섹션에서
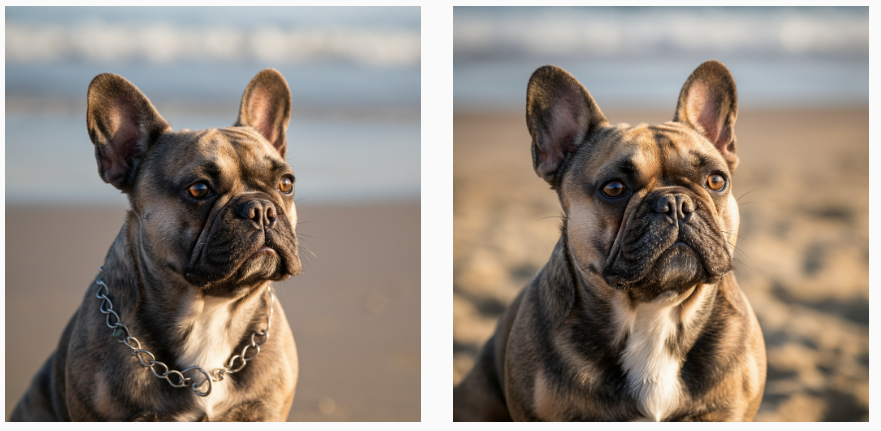
1:1을 선택합니다.결과 수 섹션에서 결과 수를
2로 변경합니다.생성을 클릭합니다.
이미지를 생성하면 다음 이미지와 비슷한 이미지가 생성됩니다.
이미지의 로컬 사본을 저장하려면 이미지 중 하나를 클릭합니다.
이미지 세부정보 창이 열리면 내보내기를 클릭합니다.
이미지 내보내기 대화상자에서 내보내기를 클릭합니다.
이미지 세부정보 창에서 내보내기를 클릭합니다.
하단 패널에서 확인을 클릭합니다.
이미지 업로드를 클릭합니다.
로컬로 저장된 생성된 이미지를 선택합니다.
- In the Google Cloud console, go to the Manage resources page.
- In the project list, select the project that you want to delete, and then click Delete.
- In the dialog, type the project ID, and then click Shut down to delete the project.
- Vertex AI의 Imagen 개요에서 모든 이미지 생성 AI 기능에 대해 알아보기
- Vertex AI의 Imagen에 대한 사용 가이드라인 읽어보기
- Model Garden의 미리 학습된 모델 살펴보기
- 책임감 있는 AI 권장사항 및 Vertex AI 안전 필터 알아보기
이미지 생성 및 로컬 사본 저장
Google Cloud 콘솔을 사용하여 텍스트 이미지 생성 요청을 보냅니다.
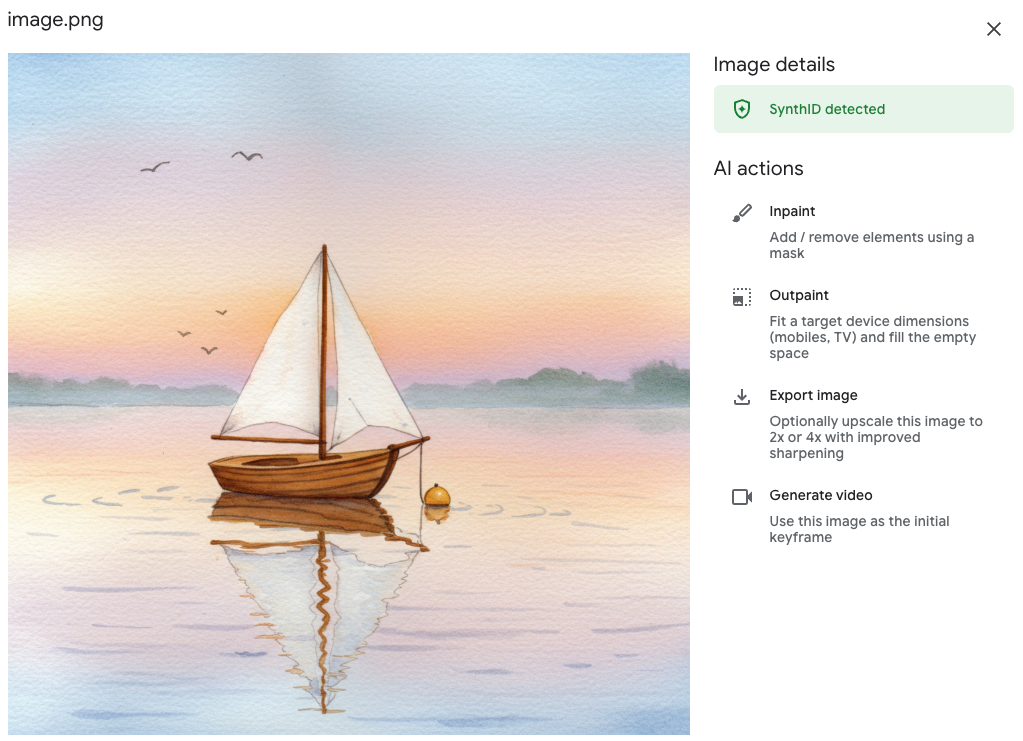
이미지의 디지털 워터마크 확인
워터마크가 추가된 이미지를 생성한 후에 새로운 이미지의 디지털 워터마크를 확인할 수 있습니다.
수고하셨습니다. 지금까지 Imagen 텍스트 이미지 생성 기능을 사용하여 새로운 이미지를 만들고 이미지 중 하나의 디지털 워터마크를 확인했습니다.
삭제
이 페이지에서 사용한 리소스 비용이 Google Cloud 계정에 청구되지 않도록 하려면 다음 단계를 수행합니다.