Create a migration plan
You begin migrating VMs by creating a migration. This results in a migration plan object. Further review and customization of the generated plan is typically required before proceeding to execute the migration.
A migration is the central object with which you perform migration actions,
monitor migration activities and status with migctl and the Google Cloud console. The migration
object is implemented as a Kubernetes Custom Resource Definition (CRD), and is
contained along with additional resources such as a Kubernetes PersistentVolumeClaim
in the migration plan.
Before you begin
- Add a migration source.
- Find the virtual machine (VM) instance ID, as described in the following section.
- When using Compute Engine as the migration source, stop the source VM before you to create a migration. After the migration object has been created, you can restart the VM.
Find the VM ID
You can find the VM ID by browsing the VM inventory, or by finding it manually, depending on the source type.
Find the ID using VM inventory
When using
migctl, you can view a list of VMs by issuing the following command:migctl source list-vms <name> [ --refresh ] [ --wide ]When using the Google Cloud console, browse to the source type, and you'll find a table listing all VMs of that type.
Manually find the ID
You can find the VM ID manually by source type:
Compute Engine
vmId-- Name of the VM as it appears in the Google Cloud console.
VMware
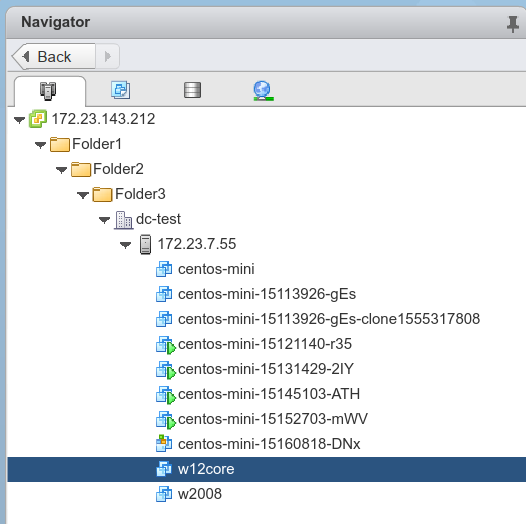
vmId-- ID or name of the VM to migrate as it is known on the source platform. You can use one of the following values.The VM name. If you're confident that each VM name is unique across your VMware deployment, the simple VM name works. If VM names might be duplicated, use the VM ID as described below.
You can get the VM name from the vSphere web client, as shown in the following image.
The VM ID from vSphere (also called a MoRef). This is visible from the URL of the vSphere web client when selecting the VM.

You can find also the MoRef by using PowerCLI.
Naming requirements
You assign a name to a migration when you create it in Migrate to Containers. The name must meet the following requirements:
- Contain at most 63 characters.
- Contain only lowercase alphanumeric characters or "-" (hyphen).
- Start with an alphanumeric character.
- End with an alphanumeric character.
Supported workloads
Create a migration
Linux and Windows workloads
Create a migration by using the migctl tool or the
Google Cloud console.
migctl
Stop the VM. The VM must be stopped for you to create a migration. After the migration completes, you can restart the VM.
Create the migration:
migctl migration create my-migration --source
my-src --vm-idmy-id --typeserver-type Where
--vm-idspecifies the name of the VM instance as shown in the source type console. Where--typeis either--type=windows-iis-containerorlinux-system-container.
Console
If the migration source is a Compute Engine VM, stop the Compute Engine VM. The VM must be stopped for you to create a migration. After the migration completes, you can restart the VM.
Open the Migrate to Containers page in the Google Cloud console.
Click the Migrations tab to display a table containing the available migrations.
Click Create Migration.
Enter the Migration name.
Select the migration source that you created in Adding a migration source.
Set the Workload type as Image Based System Container or Windows IIS container.
Enter the source VM ID. See Before you begin for more on determining the VM ID.
Click Create Migration.
When migration creation completes, the Status column displays Migration plan generated.
CRD
To define a migration, create a Migration file called
my-migration.yaml.In this file, the
namefield undersourceProviderRefspecifies the name of a previously created SourceProvider andsourceIdfield specifies the name of the Compute Engine instance.Typewill be either--type=windows-iis-containerorlinux-system-container.apiVersion: anthos-migrate.cloud.google.com/v1 kind: Migration metadata: name: my-migration namespace: v2k-system spec: type: linux-system-container sourceSnapshotTemplate: spec: sourceProviderRef: name: my-ce-src sourceId: my-idIf you are migrating a Compute Engine VM, stop the VM. The VM must be stopped for you to create a migration. After the migration completes, you can restart the VM.
Apply the file:
kubectl apply -f my-migration.yaml
Tomcat workloads
Specify Tomcat parameters
You need to manually specify the values for CATALINA_BASE and CATALINA_HOME.
migctl
Stop the Compute Engine VM. The VM must be stopped for you to create a migration. After the migration completes, you can restart the VM.
Create the migration:
migctl migration create my-migration --source my-ce-src --vm-id my-id
--type tomcat-container --parameters catalina-base=/catalina/base/path1:/catalina/base/path2,catalina-home=/catalina/home/path/,java-version=11
--vm-idspecifies the name of the instance as shown in the service console.catalina-basespecifies a list ofCATALINA_BASEvalues separated by colon.catalina-homespecifies the value ofCATALINA_HOME.java-versionan optional parameter that specifies the Java version that will be used by the container.
CRD
To define a migration, create a Migration file called
my-migration.yaml.In this file, set the following fields:
sourceProvider: specifies the name of a previously created SourceProvider.sourceId: specifies the name of the Compute Engine VM instance.parameters: sets parameters specific to Tomcat workloads.
Following is an example of a migration file with these field values set:
apiVersion: anthos-migrate.cloud.google.com/v1
kind: Migration
metadata:
 name: my-migration
 namespace: v2k-system
spec:
 type: tomcat-container
 sourceSnapshotTemplate:
   spec:
     sourceProviderRef:
       name: my-ce-src
     sourceId: my-id
     parameters:
     - name: catalina-base
       value: /opt/tomcat
     - name: catalina-home
       value: /opt/tomcat
If you are migrating a Compute Engine VM, stop the VM. The VM must be stopped for you to create a migration. After the migration completes, you can restart the VM.
Apply the file:
kubectl apply -f my-migration.yaml
WebSphere traditional workloads
Specify WAS_HOME
The WAS_HOME environment variable specifies where WAS traditional is installed,
such as /opt/IBM/WebSphere/AppServer/. Migrate to Containers uses this value
when you create a migration to run scripts that fetch information about an app
and to determine the path of an app profile. If Migrate to Containers fails to locate the installation
folder, you can set the value of WAS_HOME.
migctl
Stop the VM. The VM must be stopped for you to create a migration. After the migration completes, you can restart the VM.
Create the migration:
migctl migration create my-migration --source
my-was-src --vm-idmy-id --type websphere-traditional-container --parameters was-home=/opt/IBM/WebSphere/AppServer/ Where
--vm-idspecifies the name of the instance as shown in the service console.
CRD
To define a migration, create a Migration filed called
my-migration.yaml.In this file, set the following fields:
sourceProvider: specifies the name of a previously created SourceProvider.sourceId: specifies the name of the Compute Engine VM instance.parameters: sets parameters specific to WebSphere workloads.
Following is an example of a migration file with these field values set:
apiVersion: anthos-migrate.cloud.google.com/v1
kind: Migration
metadata:
 name: my-migration
 namespace: v2k-system
spec:
 type: websphere-traditional-container
 sourceSnapshotTemplate:
   spec:
     sourceProviderRef:
       name: my-ce-src
     sourceId: my-id
     parameters:
     - name: was_home
       value: /opt/IBM/WebSphere/AppServer/
If you are migrating a Compute Engine VM, stop the VM. The VM must be stopped for you to create a migration. After the migration completes, you can restart the VM.
Apply the file:
kubectl apply -f my-migration.yaml
JBoss workloads
Create a migration by using the migctl tool or the
Google Cloud console.
migctl
Stop the VM. The VM must be stopped for you to create a migration. After the migration completes, you can restart the VM.
Create the migration:
migctl migration create my-migration --source
my-src --vm-idmy-id --type=jboss-container --parameters jboss-home=/opt/jboss Where
--vm-idspecifies the name of the VM instance as shown in the source type console.
Console
If the migration source is a Compute Engine VM, stop the Compute Engine VM. The VM must be stopped for you to create a migration. After the migration completes, you can restart the VM.
Open the Migrate to Containers page in the Google Cloud console.
Click the Migrations tab to display a table containing the available migrations.
Click Create Migration.
Enter the Migration name.
Select the migration source that you created in Adding a migration source.
Set the Workload type as JBoss container.
Enter the source Instance Name. See Before you begin for more on determining the Instance Name.
Set the JBOSS_HOME parameter, use the JBoss installation path.
Click Create Migration.
When migration creation completes, the Status column displays Migration plan generated.
CRD
To define a migration, create a Migration file called
my-migration.yaml.In this file, the
namefield undersourceProviderRefspecifies the name of a previously created SourceProvider andsourceIdfield specifies the name of the Compute Engine instance. For thetypefield, enterjboss-container. You can add a list of discovery parameters underdiscoveryParameters. EachdiscoveryParametersparameter has 2 properties:nameandvalue. When creating a JBoss migration, thediscoveryParametersparameter namedjboss-homewhich specifies the JBoss home path as itsvalueis mandatory.apiVersion: anthos-migrate.cloud.google.com/v1 kind: Migration metadata: name: my-migration namespace: v2k-system spec: type: jboss-container2 discoveryParameters: - name: jboss-home value: /path-to-jboss-home sourceSnapshotTemplate: spec: sourceProviderRef: name: my-ce-src sourceId: my-idIf you are migrating a Compute Engine VM, stop the VM. The VM must be stopped for you to create a migration. After the migration completes, you can restart the VM.
Apply the file:
kubectl apply -f my-migration.yaml
Apache workloads
Create a migration by using the migctl tool or the
Google Cloud console.
migctl
Stop the VM. The VM must be stopped for you to create a migration. After the migration completes, you can restart the VM.
Create the migration:
migctl migration create my-migration --source
my-src --vm-idmy-id --type=apache-containerWhere
--vm-idspecifies the name of the VM instance as shown in the source type console.
Console
If the migration source is a Compute Engine VM, stop the Compute Engine VM. The VM must be stopped for you to create a migration. After the migration completes, you can restart the VM.
Open the Migrate to Containers page in the Google Cloud console.
Click the Migrations tab to display a table containing the available migrations.
Click Create Migration.
Enter the Migration name.
Select the migration source that you created in Adding a migration source.
Set the Workload type as Apache container.
Enter the source VM ID. See Before you begin for more on determining the VM ID.
Click Create Migration.
When migration creation completes, the Status column displays Migration plan generated.
CRD
To define a migration, create a Migration file called
my-migration.yaml.In this file, the
namefield undersourceProviderRefspecifies the name of a previously created SourceProvider andsourceIdfield specifies the name of the Compute Engine instance. For thetypefield, enterapache-container.apiVersion: anthos-migrate.cloud.google.com/v1 kind: Migration metadata: name: my-migration namespace: v2k-system spec: type: apache-container sourceSnapshotTemplate: spec: sourceProviderRef: name: my-ce-src sourceId: my-idIf you are migrating a Compute Engine VM, stop the VM. The VM must be stopped for you to create a migration. After the migration completes, you can restart the VM.
Apply the file:
kubectl apply -f my-migration.yaml
WordPress workloads
Create a migration by using the migctl tool or the
Google Cloud console.
migctl
Stop the VM. The VM must be stopped for you to create a migration. After the migration completes, you can restart the VM.
Create the migration:
migctl migration create my-migration --source
my-src --vm-idmy-id --type=wordpress-containerWhere
--vm-idspecifies the name of the VM instance as shown in the source type console.
Console
If the migration source is a Compute Engine VM, stop the Compute Engine VM. The VM must be stopped for you to create a migration. After the migration completes, you can restart the VM.
Open the Migrate to Containers page in the Google Cloud console.
Click the Migrations tab to display a table containing the available migrations.
Click Create Migration.
Enter the Migration name.
Select the migration source that you created in Adding a migration source.
Set the Workload type as WordPress container.
Enter the source VM ID. See Before you begin for more on determining the VM ID.
Click Create Migration.
When migration creation completes, the Status column displays Migration plan generated.
CRD
To define a migration, create a Migration file called
my-migration.yaml.In this file, the
namefield undersourceProviderRefspecifies the name of a previously created SourceProvider andsourceIdfield specifies the name of the Compute Engine instance. For thetypefield, enterwordpress-container.apiVersion: anthos-migrate.cloud.google.com/v1 kind: Migration metadata: name: my-migration namespace: v2k-system spec: type: wordpress-container sourceSnapshotTemplate: spec: sourceProviderRef: name: my-ce-src sourceId: my-idIf you are migrating a Compute Engine VM, stop the VM. The VM must be stopped for you to create a migration. After the migration completes, you can restart the VM.
Apply the file:
kubectl apply -f my-migration.yaml
Monitor migration creation
Use the migctl tool or the Google Cloud console
to monitor the progress of migration creation.
migctl
Wait for the migration creation phase to end:
migctl migration status my-migration

NAME           CURRENT-OPERATION      PROGRESS   STEP                   STATUS   AGE
my-migration   GenerateMigrationPlan  [1/3]      CreateSourceSnapshots  Running  13s
If you are migrating a Compute Engine VM, then restart it. A stopped VM is not required after this step.
Console
When migration status show that the migration has been created, you can move on to the next step:
Open the Migrate to Containers page in the Google Cloud console.
Click the Migrations tab to display a table containing the available migrations.
View the status of a migration by:
Viewing the Status column for the row for your migration.
Clicking the migration name. The Migration details page opens. Click the Monitoring tab to see the detailed status, or the Events tab to see migration events.
When migration creation completes, the Status displays Migration plan generated.
If you are migrating a Compute Engine VM, then restart it. A stopped VM is not required after this step.
CRD
Use kubectl to get migration information and status MigrationStatus by specifying a JSONPath
to the necessary field.
Wait for the migration creation phase to end:
Use two
kubectl waitcommands, one to wait for the "Ready" condition and the other for the "Failed" condition. The migration plan creation phase is running until the first condition is met.unset pids; for cond in "Ready" "Failed"; do kubectl wait migrations.anthos-migrate.cloud.google.com my-migration -n v2k-system --for condition=$cond --timeout=15m & pids+=($!); done; wait -p met_pid -n ${pids[@]} kill ${pids[@]/$met_pid} # terminate the process that did not complete.When the wait command completes, the operation has completed, you can move on to the next step.
Get the migration plan status:
kubectl get migrations.anthos-migrate.cloud.google.com -n v2k-system -o jsonpath={.status.conditions[?(@.type==\"Ready\")].status} my-migrationReturns
Truewhen the migration plan is ready orFalsewhen it failed.When the migration creation phase fails, use the following command to get the error message:
kubectl get migrations.anthos-migrate.cloud.google.com -n v2k-system -o jsonpath={.status.conditions[?(@.type=="Ready")].message} my-migrationIf you are migrating a Compute Engine VM, then restart it. A stopped VM is not required after this step.
What's next
- Learn how to migrate data.