このページでは、カスタム コネクタの作成方法について説明します。
始める前に
始める前に、以下のものが揃っていることをご確認ください。
Google Cloud プロジェクトの Discovery Engine 管理者アクセス権を取得します。
サードパーティのデータソースのアクセス認証情報(API キーやデータベース認証など)を取得します。
明確なデータ マッピング プランを作成します。これには、インデックスに登録するフィールドと、サードパーティ ID を含むアクセス制御を表す方法を含める必要があります。
基本的なコネクタを作成する
このセクションでは、選択した言語でカスタム コネクタを作成する方法について説明します。ここで紹介する原則とパターンは、外部システムに適用できます。選択した言語で特定のソースに合わせて API 呼び出しとデータ変換を調整するだけで、基本的なコネクタを作成できます。
データを取得する
まず、サードパーティのデータソースからデータを取得します。この例では、ページネーションを使用して投稿を取得する方法を示します。本番環境では、大規模なデータセットにストリーミング アプローチを使用することをおすすめします。これにより、すべてのデータを一度に読み込むときに発生する可能性のあるメモリの問題を防ぐことが可能です。
Python
    def fetch_posts(base_url: str, per_page: int = 15) -> List[dict]:
        #Fetch all posts from the given site.#
        url = base_url.rstrip("/") + "/wp-json/wp/v2/posts"
        posts: List[dict] = []
        page = 1
        while True:
            resp = requests.get(
                url,
                params={"page": page, "per_page": per_page},
            )
            resp.raise_for_status()
            batch = resp.json()
            posts.extend(batch)
            if len(batch) < per_page:
                break
            page += 1
        return posts
データの変換
ソースデータを Discovery Engine ドキュメント形式に変換するには、次のペイロード例に示すように構造化します。必要な数の Key-Value ペアを含めることが可能です。たとえば、包括的な検索を行うために、コンテンツ全体を含めることが可能です。ファセット検索用の構造化フィールドを含めることも、両方を組み合わせることもできます。
Python
    def convert_posts_to_documents(posts: List[dict]) -> List[discoveryengine.Document]:
        # Convert WP posts into Discovery Engine Document messages.
        docs: List[discoveryengine.Document] = []
        for post in posts:
            payload = {
                "title": post.get("title", {}).get("rendered"),
                "body": post.get("content", {}).get("rendered"),
                "url": post.get("link"),
                "author": post.get("author"),
                "categories": post.get("categories"),
                "tags": post.get("tags"),
                "date": post.get("date"),
            }
            doc = discoveryengine.Document(
                id=str(post["id"]),
                json_data=json.dumps(payload),
            )
            docs.append(doc)
        return docs
ID ストアを取得または作成する
アクセス制御のためにユーザー ID とグループを管理するには、ID ストアを取得または作成する必要があります。この関数は、ID、プロジェクト、ロケーションで既存の ID ストアを取得します。ID ストアが存在しない場合は、新しい空の ID ストアを作成して返します。
Python
    def get_or_create_ims_data_store(
        project_id: str,
        location: str,
        identity_mapping_store_id: str,
    ) -> discoveryengine.DataStore:
      """Get or create a DataStore."""
      # Initialize the client
      client_ims = discoveryengine.IdentityMappingStoreServiceClient()
      # Construct the parent resource name
      parent_ims = client_ims.location_path(project=project_id, location=location)

      try:
        # Create the request object
        name = f"projects/{project_id}/locations/{location}/identityMappingStores/{identity_mapping_store_id}"
        request = discoveryengine.GetIdentityMappingStoreRequest(
            name=name,
        )
        return client_ims.get_identity_mapping_store(request=request)
      except:
        # Create the IdentityMappingStore object (it can be empty for basic creation)
        identity_mapping_store = discoveryengine.IdentityMappingStore()
        # Create the request object
        request = discoveryengine.CreateIdentityMappingStoreRequest(
            parent=parent_ims,
            identity_mapping_store=identity_mapping_store,
            identity_mapping_store_id=identity_mapping_store_id,
        )
        return client_ims.create_identity_mapping_store(request=request)
get_or_create_ims_data_store 関数は、次の主要な変数を使用します。
project_id: 実際の Google Cloud プロジェクト ID。location: ID マッピング ストアの Google Cloud ロケーション。identity_mapping_store_id: ID ストアの固有識別子。client_ims: ID ストア API とのやり取りに使用される discoveryengine.IdentityMappingStoreServiceClient のインスタンス。parent_ims: 親ロケーションのリソース名。client_ims.location_path を使用して構築されます。name: GetIdentityMappingStoreRequest に使用される ID マッピング ストアの完全なリソース名。
ID マッピングを ID ストアに取り込む
この関数を使用して、指定された ID ストアに ID マッピング エントリを読み込みます。ID マッピング エントリのリストを取得し、インライン インポート オペレーションを開始します。これは、アクセス制御とパーソナライズに必要なユーザー、グループ、外部 ID の関係を確立するために不可欠です。
Python
def load_ims_data(
    ims_store: discoveryengine.DataStore,
    id_mapping_data: list[discoveryengine.IdentityMappingEntry],
) -> discoveryengine.DataStore:
  """Get the IMS data store."""
  # Initialize the client
  client_ims = discoveryengine.IdentityMappingStoreServiceClient()

  #  Create the InlineSource object
  inline_source = discoveryengine.ImportIdentityMappingsRequest.InlineSource(
      identity_mapping_entries=id_mapping_data
  )

  # Create the main request object
  request_ims = discoveryengine.ImportIdentityMappingsRequest(
      identity_mapping_store=ims_store.name,
      inline_source=inline_source,
  )

  try:
    # Create the InlineSource object, which holds your list of entries
    operation = client_ims.import_identity_mappings(
        request=request_ims,
    )
    result = operation.result()
    return result

  except Exception as e:
    print(f"IMS Load Error: {e}")
    result = operation.result()
    return result
load_ims_data 関数では、次の主要な変数を使用します。
ims_store: データを読み込む ID マッピング ストアを表す discoveryengine.DataStore オブジェクト。id_mapping_data: discoveryengine.IdentityMappingEntry オブジェクトのリスト。各オブジェクトには、外部 ID とそれに対応するユーザーまたはグループ ID が含まれています。result: discoveryengine.DataStore 型の戻り値。
データストアを作成
カスタム コネクタを使用するには、コンテンツのデータストアを初期化する必要があります。カスタム コネクタには default_collection を使用します。IndustryVertical パラメータは、特定のユースケースに合わせてデータストアの動作をカスタマイズします。GENERIC はほとんどのシナリオに適しています。ただし、特定の業種(MEDIA や HEALTHCARE_FHIR など)に対して別の値を選択することもできます。プロジェクトの命名規則と要件に合わせて、表示名やその他のプロパティを構成します。
Python
def get_or_create_data_store(
    project_id: str,
    location: str,
    display_name: str,
    data_store_id: str,
    identity_mapping_store: str,
) -> discoveryengine.DataStore:
  """Get or create a DataStore."""
  client = discoveryengine.DataStoreServiceClient()
  ds_name = client.data_store_path(project_id, location, data_store_id)
  try:
    result = client.get_data_store(request={"name": ds_name})
    return result
  except:
    parent = client.collection_path(project_id, location, "default_collection")
    operation = client.create_data_store(
        request={
            "parent": parent,
            "data_store": discoveryengine.DataStore(
                display_name=display_name,
                acl_enabled=True,
                industry_vertical=discoveryengine.IndustryVertical.GENERIC,
                identity_mapping_store=identity_mapping_store,
            ),
            "data_store_id": data_store_id,
        }
    )
    result = operation.result()
    return result
get_or_create_data_store 関数は、次の主要な変数を使用します。
project_id: 実際の Google Cloud プロジェクト ID。location: データストアの Google Cloudロケーション。display_name: データストアの人が読める表示名。data_store_id: データストアの固有識別子。identity_mapping_store: バインドする ID マッピング ストアのリソース名。result: discoveryengine.DataStore 型の戻り値。
ドキュメントをインラインでアップロードする
ドキュメントを Discovery Engine に直接送信するには、インライン アップロードを使用します。このメソッドはデフォルトで増分調整モードを使用し、完全調整モードはサポートしていません。増分モードでは、新しいドキュメントが追加され、既存のドキュメントが更新されますが、ソースに存在しなくなったドキュメントは削除されません。完全な調整モードでは、データストアがソースデータと同期されます。これには、ソースに存在しなくなったドキュメントの削除も含まれます。
増分調整は、データの小規模で頻繁な変更を処理する CRM などのシステムに最適です。データベース全体を同期するのではなく、特定の変更のみを送信するため、プロセスが高速化され、効率が向上します。完全同期は、データの完全性全体を維持するために定期的に実行できます。
Python
    def upload_documents_inline(
        project_id: str,
        location: str,
        data_store_id: str,
        branch_id: str,
        documents: List[discoveryengine.Document],
    ) -> discoveryengine.ImportDocumentsMetadata:
        """Inline import of Document messages."""
        client = discoveryengine.DocumentServiceClient()
        parent = client.branch_path(
            project=project_id,
            location=location,
            data_store=data_store_id,
            branch=branch_id,
        )
        request = discoveryengine.ImportDocumentsRequest(
            parent=parent,
            inline_source=discoveryengine.ImportDocumentsRequest.InlineSource(
                documents=documents,
            ),
        )
        operation = client.import_documents(request=request)
        operation.result()
        result = operation.metadata
        return result
upload_documents_inline 関数では、次の主要な変数を使用します。
project_id: 実際の Google Cloud プロジェクト ID。location: データストアの Google Cloud ロケーション。data_store_id: データストアの ID。branch_id: データストア内のブランチの ID(通常は「0」)。documents: アップロードする discoveryengine.Document オブジェクトのリスト。result: discoveryengine.ImportDocumentsMetadata 型の戻り値。
コネクタを検証する
コネクタが想定どおりに動作していることを検証するには、テスト実行を行い、ソースから Discovery Engine へのデータフローが適切であることを確認します。
Python
    SITE = "https://altostrat.com"
    PROJECT_ID = "ucs-3p-connectors-testing"
    LOCATION = "global"
    IDENTITY_MAPPING_STORE_ID = "your-unique-ims-id17" # A unique ID for your new store
    DATA_STORE_ID = "my-acl-ds-id1"
    BRANCH_ID = "0"

    posts = fetch_posts(SITE)
    docs = convert_posts_to_documents(posts)
    print(f"Fetched {len(posts)} posts and converted to {len(docs)} documents.")

    try:
      # Step #1: Retrieve an existing identity mapping store or create a new identity mapping store
      ims_store = get_or_create_ims_data_store(PROJECT_ID, LOCATION, IDENTITY_MAPPING_STORE_ID)
      print(f"STEP #1: IMS Store Retrieval/Creation: {ims_store}")

      RAW_IDENTITY_MAPPING_DATA = [
          discoveryengine.IdentityMappingEntry(
              external_identity="external_id_1",
              user_id="testuser1@example.com",
          ),
          discoveryengine.IdentityMappingEntry(
              external_identity="external_id_2",
              user_id="testuser2@example.com",
          ),
          discoveryengine.IdentityMappingEntry(
              external_identity="external_id_2",
              group_id="testgroup1@example.com",
          )
      ]

      # Step #2: Load IMS Data
      response = load_ims_data(ims_store, RAW_IDENTITY_MAPPING_DATA)
      print(
          "\nStep #2: Load Data in IMS Store successful.", response
      )

      # Step #3: Create Entity Data Store & Bind IMS Data Store
      data_store =  get_or_create_data_store(PROJECT_ID, LOCATION, "my-acl-datastore", DATA_STORE_ID, ims_store.name)
      print("\nStep #3: Entity Data Store Create Result: ", data_store)

      metadata = upload_documents_inline(
          PROJECT_ID, LOCATION, DATA_STORE_ID, BRANCH_ID, docs
      )
      print(f"Uploaded {metadata.success_count} documents inline.")

    except gcp_exceptions.GoogleAPICallError as e:
      print(f"\n--- API Call Failed ---")
      print(f"Server Error Message: {e.message}")
      print(f"Status Code: {e.code}")

    except Exception as e:
      print(f"An error occurred: {e}")
コネクタコードで次の主要な変数を使用していることを確認します。
SITE: サードパーティ データソースのベース URL。PROJECT_ID: 実際の Google Cloud プロジェクト ID。LOCATION: リソースの Google Cloud ロケーション。IDENTITY_MAPPING_STORE_ID: ID マッピング ストアの一意の ID。DATA_STORE_ID: データストアの一意の ID。BRANCH_ID: データストア内のブランチの ID。posts: サードパーティ ソースから取得した投稿を保存します。docs: 変換されたドキュメントを discoveryengine.Document 形式で保存します。ims_store: ID マッピング用に取得または作成された discoveryengine.DataStore オブジェクト。RAW_IDENTITY_MAPPING_DATA: discoveryengine.IdentityMappingEntry オブジェクトのリスト。
予想される出力:
Shell
  Fetched 20 posts and converted to 20 documents.
  STEP #1: IMS Store Retrieval/Creation: "projects/ <Project Number>/locations/global/identityMappingStores/your-unique-ims-id17"
  Step #2: Load Data in IMS Store successful.
  Step #3: Entity Data Store Create Result: "projects/ <Project Number>/locations/global/collections/default_collection/dataStores/my-acl-ds-id1"
  display_name: "my-acl-datastore"
  industry_vertical: GENERIC
  create_time {
    seconds: 1760906997
    nanos: 192641000
  }
  default_schema_id: "default_schema"
  acl_enabled: true
  identity_mapping_store: "projects/ <Project Number>/locations/global/identityMappingStores/your-unique-ims-id17".
  Uploaded 20 documents inline.
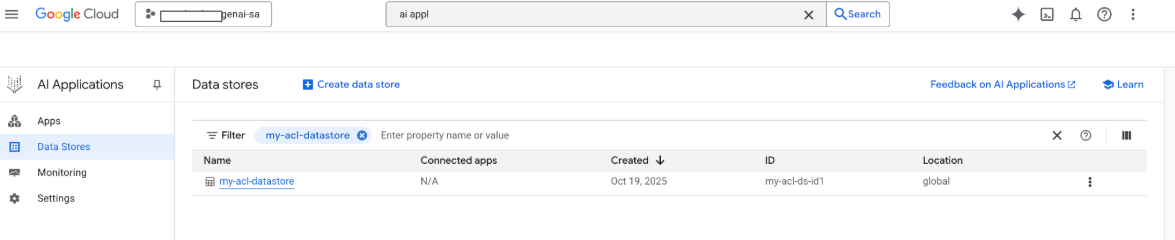
この時点で、Google Google Cloud コンソールでデータストアを確認することもできます。
Google Cloud ストレージ アップロードでコネクタを作成する
インライン インポートは開発には適していますが、本番環境のコネクタでは、拡張性を高め、完全な調整モードを有効にするために Google Cloud Storage を使用する必要があります。このアプローチでは、大規模なデータセットを効率的に処理し、サードパーティのデータソースに存在しなくなったドキュメントの自動削除をサポートします。
ドキュメントを JSONL に変換する
Discovery Engine に一括インポートするドキュメントを準備するには、JSON Lines 形式に変換します。
Python
    def convert_documents_to_jsonl(
        documents: List[discoveryengine.Document],
    ) -> str:
        """Serialize Document messages to JSONL."""
        return "\n".join(
            discoveryengine.Document.to_json(doc, indent=None)
            for doc in documents
        ) + "\n"
convert_documents_to_jsonl 関数は、次の変数を使用します。
documents: 変換する discoveryengine.Document オブジェクトのリスト。
Google Cloud Storage にアップロードする
効率的な一括インポートを有効にするには、 Google Cloud Storage にデータをステージングします。
Python
    def upload_jsonl_to_gcs(jsonl: str, bucket_name: str, blob_name: str) -> str:
        """Upload JSONL content to Google Cloud Storage."""
        client = storage.Client()
        bucket = client.bucket(bucket_name)
        blob = bucket.blob(blob_name)
        blob.upload_from_string(jsonl, content_type="application/json")
        return f"gs://{bucket_name}/{blob_name}"
upload_jsonl_to_gcs 関数は、次の主要な変数を使用します。
jsonl: アップロードする JSONL 形式の文字列コンテンツ。bucket_name: Google Cloud Storage バケットの名前。blob_name: 指定されたバケット内の blob(オブジェクト)の名前。
完全な調整で Google Cloud Storage からインポートする
完全な調整モードを使用して完全なデータ同期を実行するには、このメソッドを使用します。これにより、データストアにサードパーティのデータソースが正確に反映され、存在しなくなったドキュメントが自動的に削除されます。
Python
    def import_documents_from_gcs(
        project_id: str,
        location: str,
        data_store_id: str,
        branch_id: str,
        gcs_uri: str,
    ) -> discoveryengine.ImportDocumentsMetadata:
        """Bulk-import documents from Google Cloud Storage with FULL reconciliation mode."""
        client = discoveryengine.DocumentServiceClient()
        parent = client.branch_path(
            project=project_id,
            location=location,
            data_store=data_store_id,
            branch=branch_id,
        )
        gcs_source = discoveryengine.GcsSource(input_uris=[gcs_uri])
        request = discoveryengine.ImportDocumentsRequest(
            parent=parent,
            gcs_source=gcs_source,
            reconciliation_mode=
                discoveryengine.ImportDocumentsRequest
                .ReconciliationMode.FULL,
        )
        operation = client.import_documents(request=request)
        operation.result()
        return operation.metadata
import_documents_from_gcs 関数では、次の主要な変数を使用します。
project_id: 実際の Google Cloud プロジェクト ID。location: データストアの Google Cloud ロケーション。data_store_id: データストアの ID。branch_id: データストア内のブランチの ID(通常は「0」)。gcs_uri: JSONL ファイルを指す Google Cloud Storage URI。
Google Cloud Storage のアップロードをテストする
Google Cloud Storage ベースのインポート ワークフローを確認するには、次のコマンドを実行します。
Python
  BUCKET = "your-existing-bucket"
  BLOB = "path-to-any-blob/wp/posts.jsonl"
  SITE = "https://altostrat.com"
  PROJECT_ID = "ucs-3p-connectors-testing"
  LOCATION = "global"
  IDENTITY_MAPPING_STORE_ID = "your-unique-ims-id17" # A unique ID for your new store
  DATA_STORE_ID = "your-data-store-id"
  BRANCH_ID = "0"
  jsonl_payload = convert_documents_to_jsonl(docs)
  gcs_uri = upload_jsonl_to_gcs(jsonl_payload, BUCKET, BLOB)
  posts = fetch_posts(SITE)
  docs = convert_posts_to_documents(posts)
  print(f"Fetched {len(posts)} posts and converted to {len(docs)} documents.")
  print("Uploaded to:", gcs_uri)

  metadata = import_documents_from_gcs(
      PROJECT_ID, LOCATION, DATA_STORE_ID, BRANCH_ID, gcs_uri
  )
  print(f"Imported: {metadata.success_count} documents")
Google Cloud Storage アップロードのテストでは、次の主要な変数を使用します。
BUCKET: Google Cloud Storage バケットの名前。BLOB: バケット内の blob へのパス。SITE: サードパーティ データソースのベース URL。PROJECT_ID: 実際の Google Cloud プロジェクト ID。LOCATION: リソースの Google Cloud ロケーション(例: 「global」)。IDENTITY_MAPPING_STORE_ID: ID マッピング ストアの一意の ID。DATA_STORE_ID: データストアの一意の ID。BRANCH_ID: データストア内のブランチの ID(通常は「0」)。jsonl_payload: JSONL 形式に変換されたドキュメント。gcs_uri: アップロードされた JSONL ファイルの Google Cloud Storage URI。
予想される出力:
Shell
    Fetched 20 posts and converted to 20 documents.
    Uploaded to: gs://alex-de-bucket/wp/posts.jsonl
    Imported: 20 documents
権限を管理
エンタープライズ環境でドキュメント レベルのアクセスを管理するために、Gemini Enterprise はアクセス制御リスト(ACL)と ID マッピングをサポートしています。これにより、ユーザーが表示できるコンテンツを制限できます。
データストアで ACL を有効にする
データストアの作成時に ACL を有効にするには、次のコマンドを実行します。
Python
  # get_or_create_data_store()
  "data_store": discoveryengine.DataStore(
      display_name=data_store_id,
      industry_vertical=discoveryengine.IndustryVertical.GENERIC,
      acl_enabled=True, # ADDED
  )
ドキュメントに ACL を追加する
ドキュメントの変換時に AclInfo を計算して含めるには、次のコマンドを実行します。
Python
  # convert_posts_to_documents()
  doc = discoveryengine.Document(
      id=str(post["id"]),
      json_data=json.dumps(payload),
      acl_info=discoveryengine.Document.AclInfo(
          readers=[{
              "principals": [
                  {"user_id": "baklavainthebalkans@gmail.com"},
                  {"user_id": "cloudysanfrancisco@gmail.com"}
              ]
          }]
      ),
  )
コンテンツを公開する
ドキュメントを一般公開するには、readers フィールドを次のように設定します。
Python
readers=[{"idp_wide": True}]
ACL を検証する
ACL 構成が想定どおりに動作していることを検証するには、次の点を考慮してください。
ドキュメントへのアクセス権がないユーザーとして検索します。
Cloud Storage にアップロードされたドキュメントの構造を検査し、参照と比較します。
JSON
  {
    "id": "108",
    "jsonData": "{...}",
    "aclInfo": {
      "readers": [
        {
          "principals": [
            { "userId": "baklavainthebalkans@gmail.com" },
            { "userId": "cloudysanfrancisco@gmail.com" }
          ],
          "idpWide": false
        }
      ]
    }
  }
ID マッピングを使用する
ID マッピングは、次のシナリオで使用します。
サードパーティのデータソースで Google 以外の ID が使用されている
個々のユーザーではなくカスタム グループ(wp-admins など)を参照する必要がある
API がグループ名のみを返す
規模や整合性のためにユーザーを手動でグループ化する必要がある
ID マッピングを行う手順は次のとおりです。
- ID データストアを作成してリンクします。
外部 ID をインポートします(例: external_group:wp-admins)。インポート時に external_group: 接頭辞を含めないでください。次に例を示します。
JSON
{ "externalIdentity": "wp-admins", "userId": "user@example.com" }ドキュメントの ACL 情報で、
principal identifierに外部エンティティ ID を定義します。カスタム グループを参照する場合は、groupIdフィールドでexternal_group:接頭辞を使用します。インポート時にドキュメントの ACL 情報内のグループ ID に
external_group:接頭辞が必要ですが、ID をマッピング ストアにインポートする際には使用されません。ID マッピングを含むドキュメントの例:JSON
  {
    "id": "108",
    "aclInfo": {
      "readers": [
        {
          "principals": [
            {
              "userId": "cloudysanfrancisco@gmail.com"
            },
            {
              "groupId": "external_group:wp-admins"
            }
          ]
        }
      ]
    },
    "structData": {
      "id": 108,
      "date": "2025-04-24T18:16:04",
      ...
    }
  }