Prima di iniziare
Prima di iniziare a utilizzare Cloud Workstations, assicurati di disporre delle autorizzazioni richieste e di completare i seguenti passaggi di configurazione obbligatori:
- Sign in to your Google Cloud account. If you're new to Google Cloud, create an account to evaluate how our products perform in real-world scenarios. New customers also get $300 in free credits to run, test, and deploy workloads.
-
In the Google Cloud console, on the project selector page, select or create a Google Cloud project.
Roles required to select or create a project
- Select a project: Selecting a project doesn't require a specific IAM role—you can select any project that you've been granted a role on.
-
Create a project: To create a project, you need the Project Creator
(
roles/resourcemanager.projectCreator), which contains theresourcemanager.projects.createpermission. Learn how to grant roles.
-
Verify that billing is enabled for your Google Cloud project.
-
Enable the Cloud Workstations API.
Roles required to enable APIs
To enable APIs, you need the Service Usage Admin IAM role (
roles/serviceusage.serviceUsageAdmin), which contains theserviceusage.services.enablepermission. Learn how to grant roles. -
Se sei un amministratore, assicurati di disporre di un ruolo IAM Amministratore Cloud Workstations sul progetto in modo da poter creare configurazioni di workstation.
Se sei uno sviluppatore e non hai configurazioni della workstation disponibili nella consoleGoogle Cloud , chiedi all'amministratore di Cloud Workstations della tua organizzazione di creare una configurazione della workstation per te o assicurati di disporre di un ruolo IAM Amministratore Cloud Workstations nel progetto in modo da poter creare queste risorse autonomamente. Per controllare i tuoi ruoli IAM, vai alla pagina IAM nella console Google Cloud :
Trova il codice licenza di Posit Workbench e tienilo a portata di mano perché ti servirà in un passaggio successivo. Se hai bisogno di una codice licenza Posit Workbench, contatta il tuo rappresentante Customer Success di Posit o invia un'email all'indirizzo sales@posit.co.
Segui le istruzioni per creare una configurazione della workstation.
Quando arrivi al passaggio Personalizzazione dell'ambiente, seleziona Editor di codice su immagini di base.
Nel menu Editor di codice, seleziona 'Posit Workbench (incluso RStudio Pro) fornito da terze parti'.
Fai clic sulla freccia di espansione arrow_drop_down nella sezione Opzioni container avanzate.
Vai alla sezione Variabili di ambiente e poi fai clic su Aggiungi variabile.
Inserisci
RSW_LICENSEnel campo Chiave e incolla la codice licenza di Posit Workbench nel campo Valore.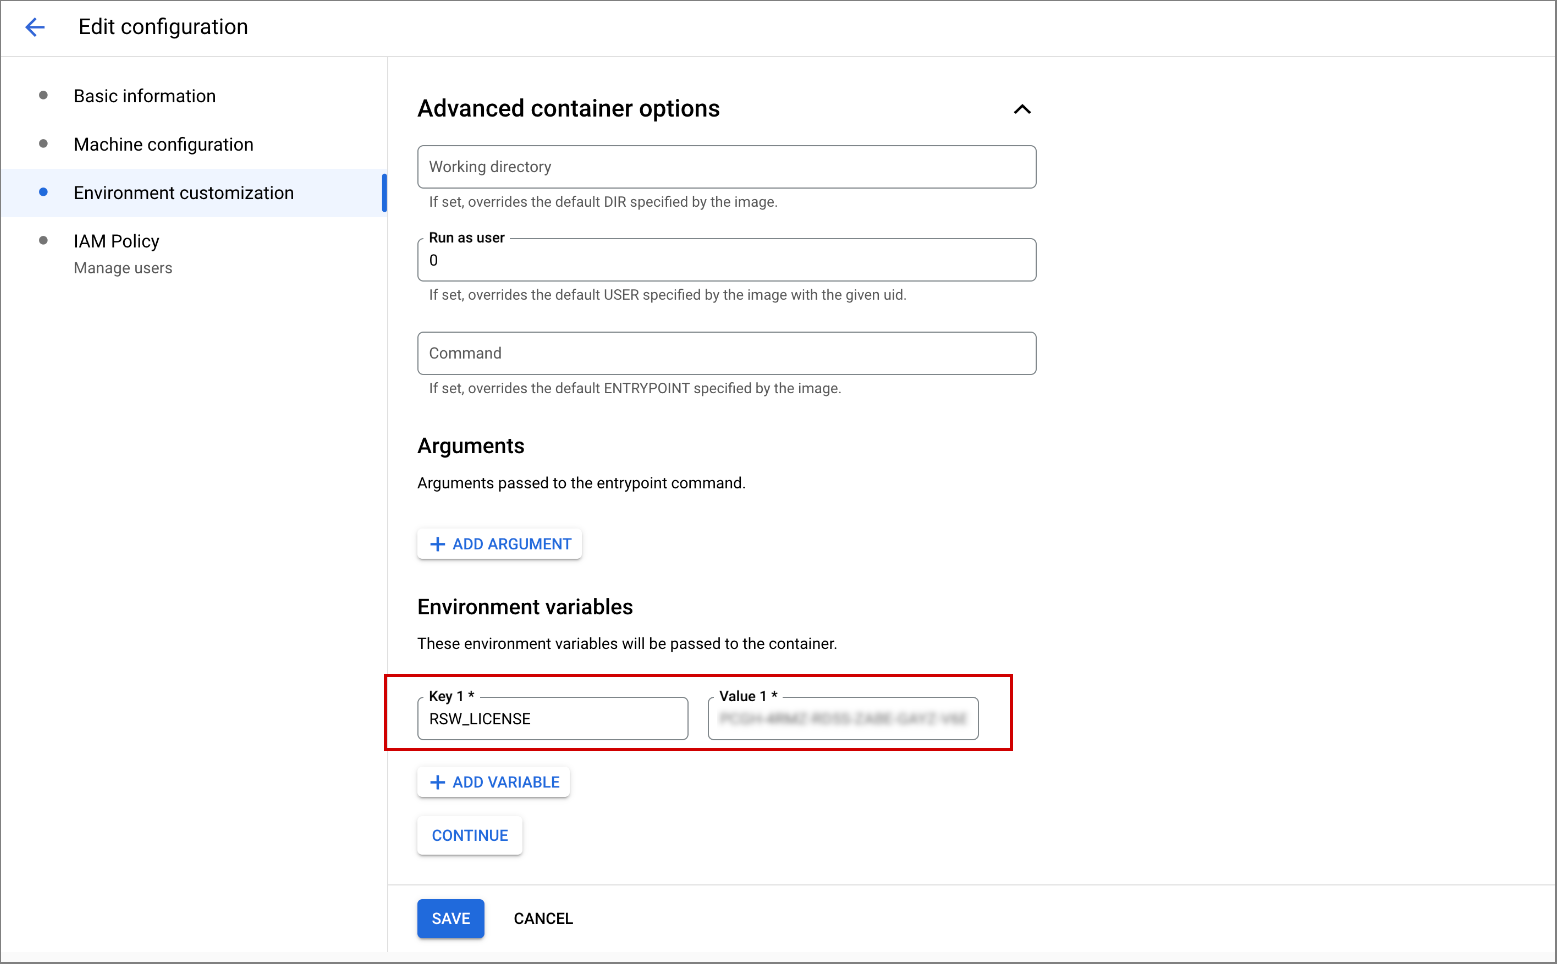
Fai clic su Continua.
Quando arrivi al passaggio Aggiungi utenti, concedi agli sviluppatori autorizzazioni di accesso IAM di Cloud Workstations alla configurazione della workstation.
Per creare la configurazione di workstation e aggiungervi utenti, fai clic su Crea.
Se hai scelto di creare un nuovo cluster, questa operazione può richiedere fino a 20 minuti.
Gli sviluppatori del tuo team ora dovrebbero essere in grado di creare workstation con Posit Workbench.
Nella console Google Cloud , vai alla pagina Cloud Workstations > Workstation.
Fai clic su add_boxCrea.
Il link Crea potrebbe essere disabilitato se non esistono configurazioni nel progetto o se non hai le autorizzazioni per visualizzarle. Chiedi all'amministratore di Cloud Workstations della tua organizzazione di creare per te una configurazione della workstation.
Inserisci il nome della workstation.
Segui le convenzioni di denominazione delle risorse Compute Engine e scegli un nome univoco all'interno del cluster di workstation.
Fai clic sulla arrow_drop_downfreccia di espansione nel campo Configurazione e seleziona la configurazione della workstation Posit Workbench (terze parti).
Fai clic su
Crea per creare la workstation.- Fai clic su Postazioni di lavoro.
- Trova la workstation che hai creato nell'elenco delle workstation disponibili, seleziona la casella di controllo accanto e poi fai clic su Avvia. La workstation viene avviata e abbinata alla configurazione della workstation padre.
- Se ti viene chiesto di avviare la workstation, fai clic su Avvia per confermare. Lo stato diventa In fase di avvio e l'icona di stato refresh (aggiorna)gira mentre è in corso l'operazione di avvio. L'avvio della workstation potrebbe richiedere alcuni minuti.
- Quando la workstation è pronta, lo stato diventa In esecuzione e l'icona di stato check_circle diventa un segno di spunta.
- Fai clic su Launch .
L'esempio seguente mostra la pagina di benvenuto di Posit Workbench. L'aspetto della pagina potrebbe variare a seconda di come la tua organizzazione definisce la configurazione della workstation:
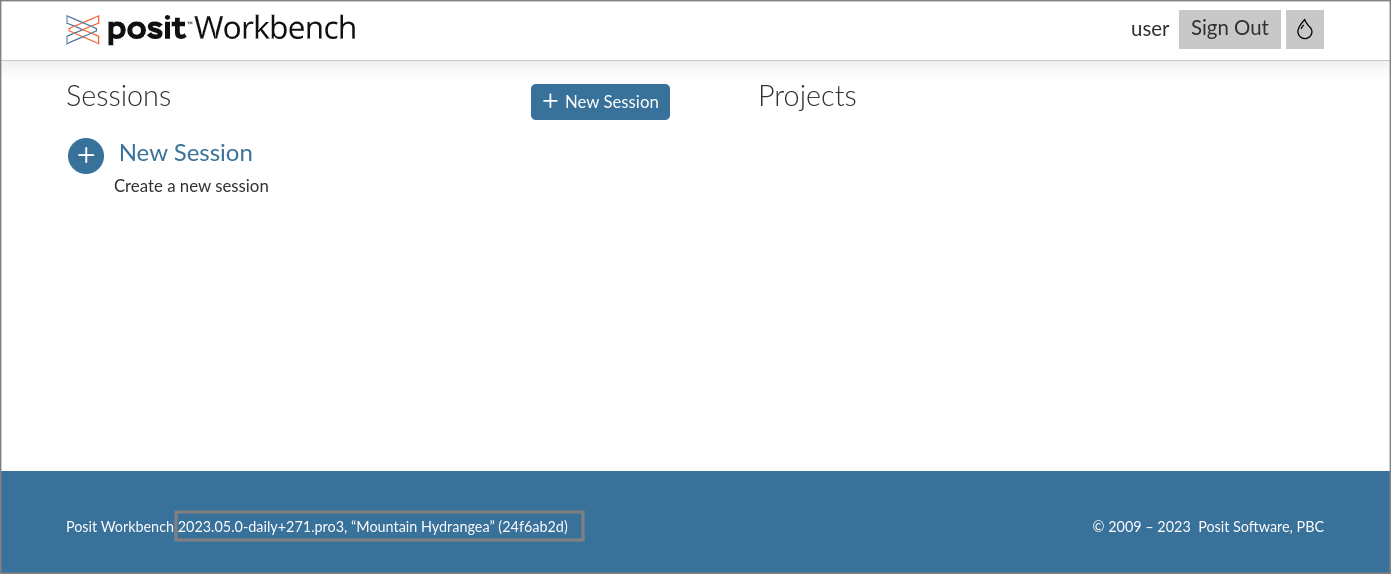
Fai clic su Nuova sessione.
Seleziona RStudio Pro come IDE e lascia Cluster impostato su Locale.
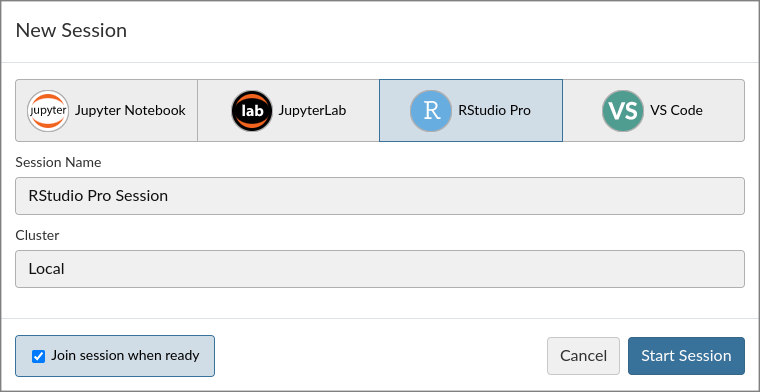
Per saperne di più su Posit Workbench e sugli IDE che supporta, come Jupyter Notebook, JupyterLab e VS Code, consulta la documentazione di Posit.
Fai clic su Avvia sessione.
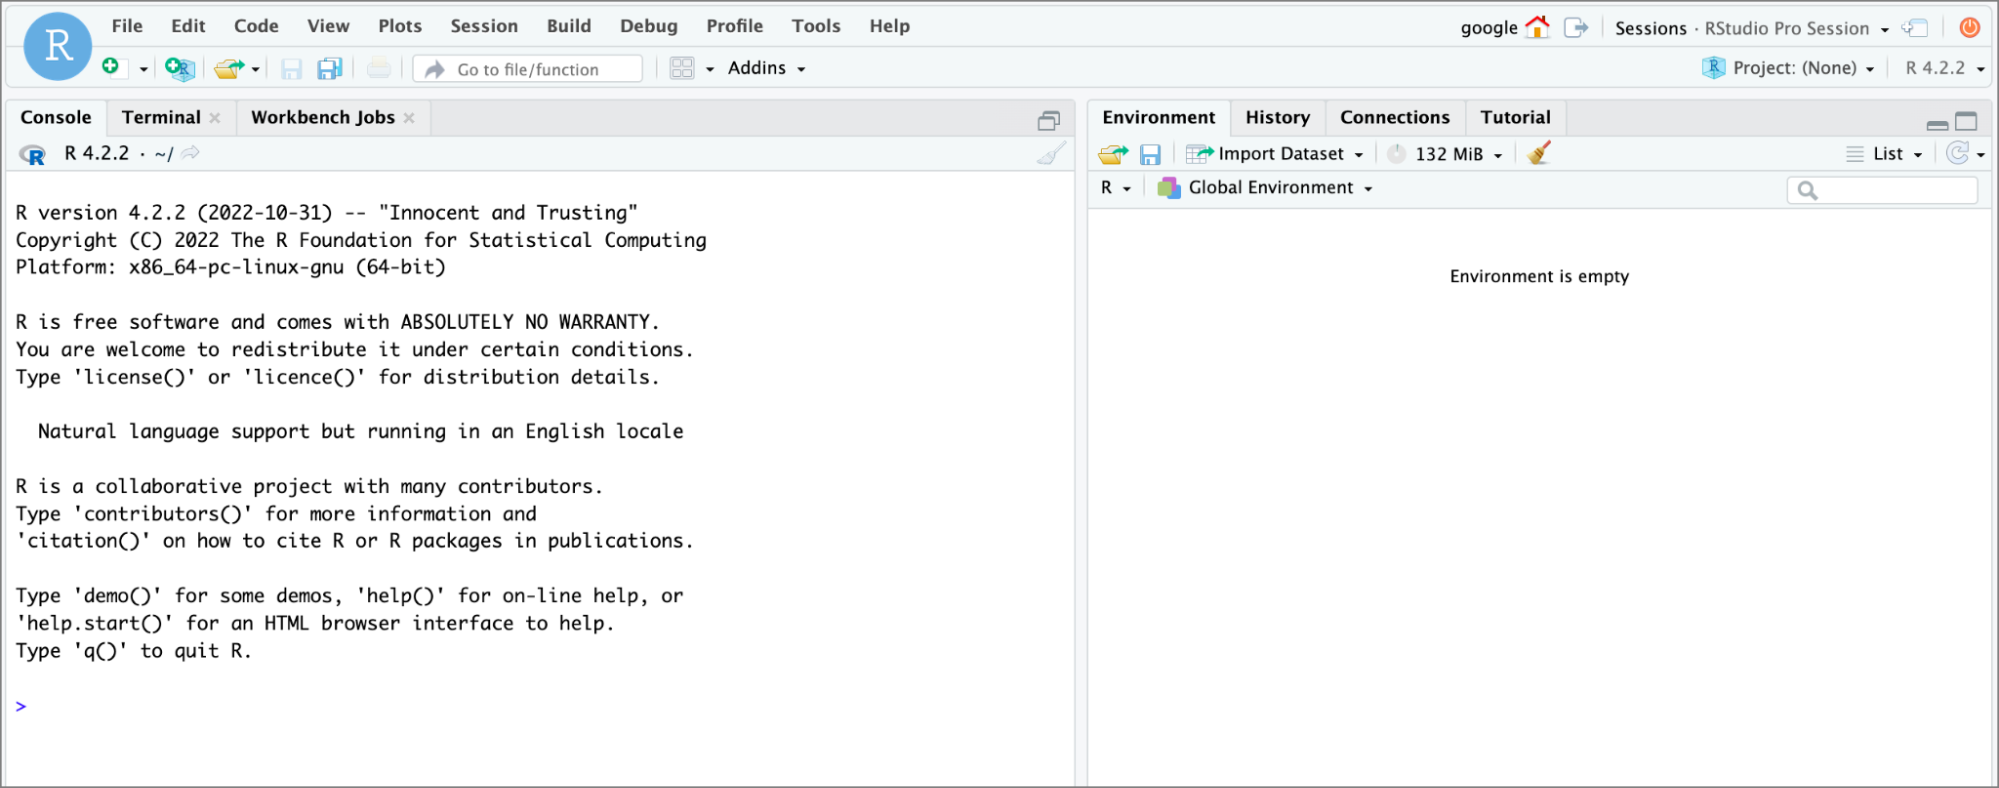
Attendi l'avvio della sessione e inizia a programmare.
Per caricare file dalla tua macchina locale alla tua workstation, fai clic su Carica.
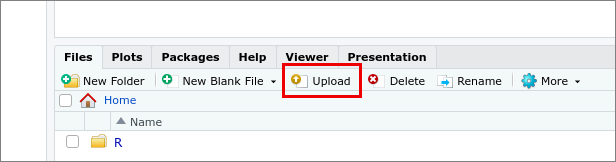
Seleziona la directory di destinazione in cui vuoi archiviare i file sulla tua workstation.
Fai clic su Scegli file per selezionare il file da caricare.
Per iniziare il caricamento, fai clic su Ok.
Per importare file dalla tua workstation, fai clic su Importa set di dati e seleziona il tipo di set di dati.
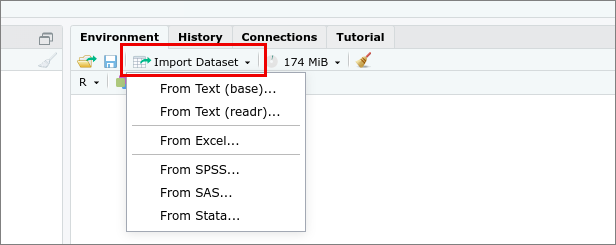
Vai al set di dati da importare e selezionalo dalla workstation.
L'IDE Posit Workbench dipende da vari pacchetti R per diverse funzionalità. Ad esempio, se carichi un file Excel, è necessario installare determinati pacchetti. Se ti viene chiesto di installare i pacchetti richiesti, fai clic su Sì.
Per avviare l'importazione, fai clic su Importa.
Scopri come personalizzare le immagini container in base alle esigenze della tua organizzazione.
Consulta l'hub di documentazione di Posit Software per scoprire di più su Posit Workbench.
Crea la configurazione della workstation
Per utilizzare Posit Workbench (incluso RStudio Pro), devi creare una configurazione di workstation per gli sviluppatori della tua organizzazione:
Configurare la workstation
Per creare una workstation:
Avvia la workstation
Ora che hai creato la workstation, puoi avviarla e poi lanciarla per iniziare lo sviluppo:
Avviare una sessione di RStudio Pro di Posit Workbench
Caricare i file sulla workstation
Per caricare più file o una directory, crea un file ZIP. Il file ZIP viene espanso dopo il caricamento.
Importare file dalla workstation
Ricevere assistenza per problemi relativi a Posit Workbench
Se riscontri problemi con Posit Workbench o con l'immagine container di Posit Workbench, segnalali a Posit all'indirizzo support@posit.co.