ライブ ストリームに広告を挿入する

このページでは、Video Stitcher API と curl、PowerShell、またはクライアント ライブラリを使用して、ライブ ストリームに広告を挿入する方法について説明します。

始める前に

Video Stitcher API を呼び出す前に、次の手順を行います。

  1. Sign in to your Google Cloud account. If you're new to Google Cloud, create an account to evaluate how our products perform in real-world scenarios. New customers also get $300 in free credits to run, test, and deploy workloads.
  2. Google Cloud CLI をインストールします。
  3. gcloud CLI を初期化するには:

    gcloud init
  4. Google Cloud プロジェクトを作成または選択します

    • Google Cloud プロジェクトを作成します。

      gcloud projects create PROJECT_ID

      PROJECT_ID は、作成する Google Cloud プロジェクトの名前に置き換えます。

    • 作成した Google Cloud プロジェクトを選択します。

      gcloud config set project PROJECT_ID

      PROJECT_ID は、実際の Google Cloud プロジェクト名に置き換えます。

  5. Google Cloud プロジェクトで課金が有効になっていることを確認します

  6. Video Stitcher API を有効にします。

    gcloud services enable videostitcher.googleapis.com
  7. Google アカウントのローカル認証情報を作成します。

    gcloud auth application-default login
  8. Google アカウントにロールを付与します。次の IAM ロールごとに次のコマンドを 1 回実行します。 roles/videostitcher.admin

    gcloud projects add-iam-policy-binding PROJECT_ID --member="user:EMAIL_ADDRESS" --role=ROLE
    • PROJECT_ID は、実際のプロジェクト ID に置き換えます。
    • EMAIL_ADDRESS は実際のメールアドレスに置き換えます。
    • ROLE は、個々のロールに置き換えます。
  9. Google Cloud CLI をインストールします。
  10. gcloud CLI を初期化するには:

    gcloud init
  11. Google Cloud プロジェクトを作成または選択します

    • Google Cloud プロジェクトを作成します。

      gcloud projects create PROJECT_ID

      PROJECT_ID は、作成する Google Cloud プロジェクトの名前に置き換えます。

    • 作成した Google Cloud プロジェクトを選択します。

      gcloud config set project PROJECT_ID

      PROJECT_ID は、実際の Google Cloud プロジェクト名に置き換えます。

  12. Google Cloud プロジェクトで課金が有効になっていることを確認します

  13. Video Stitcher API を有効にします。

    gcloud services enable videostitcher.googleapis.com
  14. Google アカウントのローカル認証情報を作成します。

    gcloud auth application-default login
  15. Google アカウントにロールを付与します。次の IAM ロールごとに次のコマンドを 1 回実行します。 roles/videostitcher.admin

    gcloud projects add-iam-policy-binding PROJECT_ID --member="user:EMAIL_ADDRESS" --role=ROLE
    • PROJECT_ID は、実際のプロジェクト ID に置き換えます。
    • EMAIL_ADDRESS は実際のメールアドレスに置き換えます。
    • ROLE は、個々のロールに置き換えます。
  16. このクイックスタートでは、MPEG-DASH または HTTP Live Streaming(HLS)マニフェスト ファイルが必要です。生成されたライブ ストリームを再生するのセクションの Live Stream API クイックスタートのいずれかに沿って作成できます。
  17. オプションとして、このクイックスタートではコンテンツ配信ネットワーク(CDN)を使用できます。CDN を構成していない場合は、メディア CDN のクイックスタートの手順に沿って次の変更を加えます。
    1. MPEG-DASH または HLS マニフェスト ファイルとメディア セグメントを Cloud Storage バケットにアップロードします。
    2. Cloud Storage バケットを一般公開にする必要はありません。
    3. 署名付き URL または署名なし URLを使用できます。

CDN キーを作成する

Video Stitcher API では、コンテンツ配信ネットワーク(CDN)から動画を取得できます。動画アセットが URL 署名で保護されている場合は、Video Stitcher API で CDN キーを登録する必要があります。

CDN キーを登録するには、projects.locations.cdnKeys.create メソッドを使用します。

REST(メディア CDN)

リクエストのデータを使用する前に、次のように置き換えます。

  • PROJECT_NUMBER: IAM 設定ページの [プロジェクト番号] フィールドにある Google Cloud プロジェクト番号
  • LOCATION: CDN キーを作成するロケーション。サポートされているリージョンのいずれかを使用します。
    3~7 つの店舗を表示
    • us-central1
    • us-east1
    • us-west1
    • asia-east1
    • asia-south1
    • asia-southeast1
    • europe-west1
    • southamerica-east1
  • CDN_KEY_ID: CDN キーのユーザー定義 ID。CDN キーのリソース名の最終的なコンポーネントになります。この ID に使用できるのは、小文字、数字、ハイフンに限られます。 最初の文字は英字で、最後の文字は英字または数字で、ID 全体は最大 63 文字です。
  • HOSTNAME: この CDN キーに関連付ける CDN のホスト名(35.190.60.252 などの IP アドレスや cdn.example.com などのドメイン名)
  • MEDIA_CDN_KEYNAME: メディア CDN キーのキーセット名
  • MEDIA_CDN_PRIVATE_KEY: base64 でエンコードされた文字列としての 64 バイトの Ed25519 秘密鍵。詳細については、Media CDN の秘密鍵を作成するをご覧ください。

リクエストを送信するには、次のいずれかのオプションを展開します。

次のような JSON レスポンスが返されます。

{
  "name": "projects/PROJECT_NUMBER/locations/LOCATION/operations/OPERATION_ID",
  "metadata": {
    "@type": "type.googleapis.com/google.cloud.common.OperationMetadata",
    "createTime": CREATE_TIME,
    "target": "projects/PROJECT_NUMBER/locations/LOCATION/cdnKeys/CDN_KEY_ID",
    "verb": "create",
    "cancelRequested": false,
    "apiVersion": "v1"
  },
  "done": false
}
このコマンドは、進行状況を追跡するためにクエリできる長時間実行オペレーション(LRO)を作成します。次のセクションで使用するために、返された OPERATION_IDname フィールドの最後の部分)をコピーします。

REST(Cloud CDN)

リクエストのデータを使用する前に、次のように置き換えます。

  • PROJECT_NUMBER: IAM 設定ページの [プロジェクト番号] フィールドにある Google Cloud プロジェクト番号
  • LOCATION: CDN キーを作成するロケーション。サポートされているリージョンのいずれかを使用します。
    3~7 つの店舗を表示
    • us-central1
    • us-east1
    • us-west1
    • asia-east1
    • asia-south1
    • asia-southeast1
    • europe-west1
    • southamerica-east1
  • CDN_KEY_ID: CDN キーのユーザー定義 ID。CDN キーのリソース名の最終的なコンポーネントになります。この ID に使用できるのは、小文字、数字、ハイフンに限られます。 最初の文字は英字で、最後の文字は英字または数字で、ID 全体は最大 63 文字です。
  • HOSTNAME: この CDN キーに関連付ける CDN のホスト名(35.190.60.252 などの IP アドレスや cdn.example.com などのドメイン名)
  • GCDN_KEYNAME: Cloud CDN 鍵の名前
  • GCDN_PRIVATE_KEY: Cloud CDN 鍵の base64 エンコード文字列 Secret

リクエストを送信するには、次のいずれかのオプションを展開します。

次のような JSON レスポンスが返されます。

{
  "name": "projects/PROJECT_NUMBER/locations/LOCATION/operations/OPERATION_ID",
  "metadata": {
    "@type": "type.googleapis.com/google.cloud.common.OperationMetadata",
    "createTime": CREATE_TIME,
    "target": "projects/PROJECT_NUMBER/locations/LOCATION/cdnKeys/CDN_KEY_ID",
    "verb": "create",
    "cancelRequested": false,
    "apiVersion": "v1"
  },
  "done": false
}
このコマンドは、進行状況を追跡するためにクエリできる長時間実行オペレーション(LRO)を作成します。次のセクションで使用するために、返された OPERATION_IDname フィールドの最後の部分)をコピーします。

REST(Akamai CDN)

リクエストのデータを使用する前に、次のように置き換えます。

  • PROJECT_NUMBER: IAM 設定ページの [プロジェクト番号] フィールドにある Google Cloud プロジェクト番号
  • LOCATION: CDN キーを作成するロケーション。サポートされているリージョンのいずれかを使用します。
    3~7 つの店舗を表示
    • us-central1
    • us-east1
    • us-west1
    • asia-east1
    • asia-south1
    • asia-southeast1
    • europe-west1
    • southamerica-east1
  • CDN_KEY_ID: CDN キーのユーザー定義 ID。CDN キーのリソース名の最終的なコンポーネントになります。この ID に使用できるのは、小文字、数字、ハイフンに限られます。 最初の文字は英字で、最後の文字は英字または数字で、ID 全体は最大 63 文字です。
  • HOSTNAME: この CDN キーに関連付ける CDN のホスト名(35.190.60.252 などの IP アドレスや cdn.example.com などのドメイン名)
  • AKAMAI_TOKEN_KEY: Akamai CDN エッジ構成の Base64 でエンコードされた文字列トークンキー

リクエストを送信するには、次のいずれかのオプションを展開します。

次のような JSON レスポンスが返されます。

{
  "name": "projects/PROJECT_NUMBER/locations/LOCATION/operations/OPERATION_ID",
  "metadata": {
    "@type": "type.googleapis.com/google.cloud.common.OperationMetadata",
    "createTime": CREATE_TIME,
    "target": "projects/PROJECT_NUMBER/locations/LOCATION/cdnKeys/CDN_KEY_ID",
    "verb": "create",
    "cancelRequested": false,
    "apiVersion": "v1"
  },
  "done": false
}
このコマンドは、進行状況を追跡するためにクエリできる長時間実行オペレーション(LRO)を作成します。次のセクションで使用するために、返された OPERATION_IDname フィールドの最後の部分)をコピーします。

C#

このサンプルを試す前に、クライアント ライブラリを使用した Video Stitcher API クイックスタートにある C# の設定手順を実施してください。詳細については、Video Stitcher API C# API リファレンス ドキュメントをご覧ください。

Video Stitcher API への認証を行うには、アプリケーションのデフォルト認証情報を設定します。 詳細については、ローカル開発環境の認証の設定をご覧ください。


using Google.Api.Gax.ResourceNames;
using Google.Cloud.Video.Stitcher.V1;
using Google.LongRunning;
using Google.Protobuf;
using System.Threading.Tasks;

public class CreateCdnKeySample
{
    public async Task<CdnKey> CreateCdnKeyAsync(
    string projectId, string location, string cdnKeyId, string hostname,
    string keyName, string privateKey, bool isMediaCdn)
    {
        // Create the client.
        VideoStitcherServiceClient client = VideoStitcherServiceClient.Create();

        CdnKey cdnKey = new CdnKey
        {
            Hostname = hostname
        };

        if (isMediaCdn)
        {
            cdnKey.MediaCdnKey = new MediaCdnKey
            {
                KeyName = keyName,
                PrivateKey = ByteString.CopyFromUtf8(privateKey)
            };
        }
        else
        {
            cdnKey.GoogleCdnKey = new GoogleCdnKey
            {
                KeyName = keyName,
                PrivateKey = ByteString.CopyFromUtf8(privateKey)
            };
        }

        CreateCdnKeyRequest request = new CreateCdnKeyRequest
        {
            ParentAsLocationName = LocationName.FromProjectLocation(projectId, location),
            CdnKeyId = cdnKeyId,
            CdnKey = cdnKey
        };

        // Make the request.
        Operation<CdnKey, OperationMetadata> response = await client.CreateCdnKeyAsync(request);

        // Poll until the returned long-running operation is complete.
        Operation<CdnKey, OperationMetadata> completedResponse = await response.PollUntilCompletedAsync();

        // Retrieve the operation result.
        return completedResponse.Result;
    }
}

Go

このサンプルを試す前に、クライアント ライブラリを使用した Video Stitcher API クイックスタートにある Go の設定手順を実施してください。詳細については、Video Stitcher API Go API リファレンス ドキュメントをご覧ください。

Video Stitcher API への認証を行うには、アプリケーションのデフォルト認証情報を設定します。 詳細については、ローカル開発環境の認証の設定をご覧ください。

import (
	"context"
	"fmt"
	"io"

	stitcher "cloud.google.com/go/video/stitcher/apiv1"
	stitcherstreampb "cloud.google.com/go/video/stitcher/apiv1/stitcherpb"
)

// createCDNKey creates a CDN key. A CDN key is used to retrieve protected media.
// If isMediaCDN is true, create a Media CDN key. If false, create a Cloud
// CDN key. To create a privateKey value for Media CDN, see
// https://cloud.google.com/video-stitcher/docs/how-to/managing-cdn-keys#create-private-key-media-cdn.
func createCDNKey(w io.Writer, projectID, keyID, privateKey string, isMediaCDN bool) error {
	// projectID := "my-project-id"
	// keyID := "my-cdn-key"
	// privateKey := "my-private-key"
	// isMediaCDN := true
	location := "us-central1"
	hostname := "cdn.example.com"
	keyName := "cdn-key"
	ctx := context.Background()
	client, err := stitcher.NewVideoStitcherClient(ctx)
	if err != nil {
		return fmt.Errorf("stitcher.NewVideoStitcherClient: %w", err)
	}
	defer client.Close()

	var req *stitcherstreampb.CreateCdnKeyRequest
	if isMediaCDN {
		req = &stitcherstreampb.CreateCdnKeyRequest{
			Parent:   fmt.Sprintf("projects/%s/locations/%s", projectID, location),
			CdnKeyId: keyID,
			CdnKey: &stitcherstreampb.CdnKey{
				CdnKeyConfig: &stitcherstreampb.CdnKey_MediaCdnKey{
					MediaCdnKey: &stitcherstreampb.MediaCdnKey{
						KeyName:    keyName,
						PrivateKey: []byte(privateKey),
					},
				},
				Hostname: hostname,
			},
		}
	} else {
		req = &stitcherstreampb.CreateCdnKeyRequest{
			Parent:   fmt.Sprintf("projects/%s/locations/%s", projectID, location),
			CdnKeyId: keyID,
			CdnKey: &stitcherstreampb.CdnKey{
				CdnKeyConfig: &stitcherstreampb.CdnKey_GoogleCdnKey{
					GoogleCdnKey: &stitcherstreampb.GoogleCdnKey{
						KeyName:    keyName,
						PrivateKey: []byte(privateKey),
					},
				},
				Hostname: hostname,
			},
		}
	}

	// Creates the CDN key.
	op, err := client.CreateCdnKey(ctx, req)
	if err != nil {
		return fmt.Errorf("client.CreateCdnKey: %w", err)
	}
	response, err := op.Wait(ctx)
	if err != nil {
		return err
	}

	fmt.Fprintf(w, "CDN key: %v", response.GetName())
	return nil
}

Java

このサンプルを試す前に、クライアント ライブラリを使用した Video Stitcher API クイックスタートにある Java の設定手順を実施してください。詳細については、Video Stitcher API Java API リファレンス ドキュメントをご覧ください。

Video Stitcher API への認証を行うには、アプリケーションのデフォルト認証情報を設定します。 詳細については、ローカル開発環境の認証の設定をご覧ください。


import com.google.cloud.video.stitcher.v1.CdnKey;
import com.google.cloud.video.stitcher.v1.CreateCdnKeyRequest;
import com.google.cloud.video.stitcher.v1.GoogleCdnKey;
import com.google.cloud.video.stitcher.v1.LocationName;
import com.google.cloud.video.stitcher.v1.MediaCdnKey;
import com.google.cloud.video.stitcher.v1.VideoStitcherServiceClient;
import com.google.protobuf.ByteString;
import java.io.IOException;
import java.util.concurrent.ExecutionException;
import java.util.concurrent.TimeUnit;
import java.util.concurrent.TimeoutException;

public class CreateCdnKey {

  private static final int TIMEOUT_IN_MINUTES = 2;

  public static void main(String[] args) throws Exception {
    // TODO(developer): Replace these variables before running the sample.
    String projectId = "my-project-id";
    String location = "us-central1";
    String cdnKeyId = "my-cdn-key-id";
    String hostname = "cdn.example.com";
    String keyName = "my-key";
    // To create a privateKey value for Media CDN, see
    // https://cloud.google.com/video-stitcher/docs/how-to/managing-cdn-keys#create-private-key-media-cdn.
    String privateKey = "my-private-key"; // will be converted to a byte string
    Boolean isMediaCdn = true;

    createCdnKey(projectId, location, cdnKeyId, hostname, keyName, privateKey, isMediaCdn);
  }

  // createCdnKey creates a Media CDN key or a Cloud CDN key. A CDN key is used to retrieve
  // protected media.
  public static void createCdnKey(
      String projectId,
      String location,
      String cdnKeyId,
      String hostname,
      String keyName,
      String privateKey,
      Boolean isMediaCdn)
      throws IOException, ExecutionException, InterruptedException, TimeoutException {
    // Initialize client that will be used to send requests. This client only needs to be created
    // once, and can be reused for multiple requests. After completing all of your requests, call
    // the "close" method on the client to safely clean up any remaining background resources.
    VideoStitcherServiceClient videoStitcherServiceClient = VideoStitcherServiceClient.create();
    CdnKey cdnKey;
    if (isMediaCdn) {
      cdnKey =
          CdnKey.newBuilder()
              .setHostname(hostname)
              .setMediaCdnKey(
                  MediaCdnKey.newBuilder()
                      .setKeyName(keyName)
                      .setPrivateKey(ByteString.copyFromUtf8(privateKey))
                      .build())
              .build();
    } else {
      cdnKey =
          CdnKey.newBuilder()
              .setHostname(hostname)
              .setGoogleCdnKey(
                  GoogleCdnKey.newBuilder()
                      .setKeyName(keyName)
                      .setPrivateKey(ByteString.copyFromUtf8(privateKey))
                      .build())
              .build();
    }

    CreateCdnKeyRequest createCdnKeyRequest =
        CreateCdnKeyRequest.newBuilder()
            .setParent(LocationName.of(projectId, location).toString())
            .setCdnKeyId(cdnKeyId)
            .setCdnKey(cdnKey)
            .build();

    CdnKey result =
        videoStitcherServiceClient
            .createCdnKeyAsync(createCdnKeyRequest)
            .get(TIMEOUT_IN_MINUTES, TimeUnit.MINUTES);
    System.out.println("Created new CDN key: " + result.getName());
    videoStitcherServiceClient.close();
  }
}

Node.js

このサンプルを試す前に、クライアント ライブラリを使用した Video Stitcher API クイックスタートにある Node.js の設定手順を実施してください。詳細については、Video Stitcher API Node.js API リファレンス ドキュメントをご覧ください。

Video Stitcher API への認証を行うには、アプリケーションのデフォルト認証情報を設定します。 詳細については、ローカル開発環境の認証の設定をご覧ください。

const location = 'us-central1';
const hostname = 'cdn.example.com';
const keyName = 'cdn-key';
/**
 * TODO(developer): Uncomment these variables before running the sample.
 */
// projectId = 'my-project-id';
// cdnKeyId = 'my-cdn-key';
// privateKey = 'my-private-key';

// Imports the Video Stitcher library
const {VideoStitcherServiceClient} =
  require('@google-cloud/video-stitcher').v1;
// Instantiates a client
const stitcherClient = new VideoStitcherServiceClient();

async function createCdnKey() {
  // Construct request
  const request = {
    parent: stitcherClient.locationPath(projectId, location),
    cdnKey: {
      hostname: hostname,
    },
    cdnKeyId: cdnKeyId,
  };

  if (isMediaCdn === 'true') {
    request.cdnKey.mediaCdnKey = {
      keyName: keyName,
      privateKey: privateKey,
    };
  } else {
    request.cdnKey.googleCdnKey = {
      keyName: keyName,
      privateKey: privateKey,
    };
  }

  const [operation] = await stitcherClient.createCdnKey(request);
  const [response] = await operation.promise();
  console.log(`CDN key: ${response.name}`);
}

createCdnKey();

PHP

このサンプルを試す前に、クライアント ライブラリを使用した Video Stitcher API クイックスタートにある PHP の設定手順を実施してください。詳細については、Video Stitcher API PHP API リファレンス ドキュメントをご覧ください。

Video Stitcher API への認証を行うには、アプリケーションのデフォルト認証情報を設定します。 詳細については、ローカル開発環境の認証の設定をご覧ください。

use Google\Cloud\Video\Stitcher\V1\CdnKey;
use Google\Cloud\Video\Stitcher\V1\Client\VideoStitcherServiceClient;
use Google\Cloud\Video\Stitcher\V1\CreateCdnKeyRequest;
use Google\Cloud\Video\Stitcher\V1\GoogleCdnKey;
use Google\Cloud\Video\Stitcher\V1\MediaCdnKey;

/**
 * Creates a CDN key. Cloud CDN keys and Media CDN keys are supported.
 *
 * @param string  $callingProjectId   The project ID to run the API call under
 * @param string  $location           The location of the CDN key
 * @param string  $cdnKeyId           The ID of the CDN key to be created
 * @param string  $hostname           The hostname of the CDN key
 * @param string  $keyName            For a Media CDN key, this is the keyset name.
 *                                    For a Cloud CDN key, this is the public name of the
 *                                    CDN key.
 * @param string  $privateKey         For a Media CDN key, this is a 64-byte Ed25519 private
 *                                    key encoded as a base64-encoded string. See
 *                                    https://cloud.google.com/video-stitcher/docs/how-to/managing-cdn-keys#create-private-key-media-cdn
 *                                    for more information. For a Cloud CDN key,
 *                                    this is a base64-encoded string secret.
 * @param bool    $isMediaCdn         If true, create a Media CDN key. If false,
 *                                    create a Cloud CDN key.
 */
function create_cdn_key(
    string $callingProjectId,
    string $location,
    string $cdnKeyId,
    string $hostname,
    string $keyName,
    string $privateKey,
    bool $isMediaCdn
): void {
    // Instantiate a client.
    $stitcherClient = new VideoStitcherServiceClient();

    $parent = $stitcherClient->locationName($callingProjectId, $location);
    $cdnKey = new CdnKey();
    $cdnKey->setHostname($hostname);

    if ($isMediaCdn == true) {
        $cloudCdn = new MediaCdnKey();
        $cdnKey->setMediaCdnKey($cloudCdn);
    } else {
        $cloudCdn = new GoogleCdnKey();
        $cdnKey->setGoogleCdnKey($cloudCdn);
    }
    $cloudCdn->setKeyName($keyName);
    $cloudCdn->setPrivateKey($privateKey);

    // Run CDN key creation request
    $request = (new CreateCdnKeyRequest())
        ->setParent($parent)
        ->setCdnKey($cdnKey)
        ->setCdnKeyId($cdnKeyId);
    $operationResponse = $stitcherClient->createCdnKey($request);
    $operationResponse->pollUntilComplete();
    if ($operationResponse->operationSucceeded()) {
        $result = $operationResponse->getResult();
        // Print results
        printf('CDN key: %s' . PHP_EOL, $result->getName());
    } else {
        $error = $operationResponse->getError();
        // handleError($error)
    }
}

Python

このサンプルを試す前に、クライアント ライブラリを使用した Video Stitcher API クイックスタートにある Python の設定手順を実施してください。詳細については、Video Stitcher API Python API リファレンス ドキュメントをご覧ください。

Video Stitcher API への認証を行うには、アプリケーションのデフォルト認証情報を設定します。 詳細については、ローカル開発環境の認証の設定をご覧ください。


import argparse

from google.cloud.video import stitcher_v1
from google.cloud.video.stitcher_v1.services.video_stitcher_service import (
    VideoStitcherServiceClient,
)

def create_cdn_key(
    project_id: str,
    location: str,
    cdn_key_id: str,
    hostname: str,
    key_name: str,
    private_key: str,
    is_cloud_cdn: bool,
) -> stitcher_v1.types.CdnKey:
    """Creates a Cloud CDN or Media CDN key.
    Args:
        project_id: The GCP project ID.
        location: The location in which to create the CDN key.
        cdn_key_id: The user-defined CDN key ID.
        hostname: The hostname to which this CDN key applies.
        key_name: For a Media CDN key, this is the keyset name.
                  For a Cloud CDN key, this is the public name of the CDN key.
        private_key: For a Media CDN key, this is a 64-byte Ed25519 private
                     key encoded as a base64-encoded string.
                     See https://cloud.google.com/video-stitcher/docs/how-to/managing-cdn-keys#create-private-key-media-cdn
                     for more information. For a Cloud CDN key, this is a base64-encoded string secret.
        is_cloud_cdn: If true, create a Cloud CDN key. If false, create a Media CDN key.

    Returns:
        The CDN key resource.
    """

    client = VideoStitcherServiceClient()

    parent = f"projects/{project_id}/locations/{location}"

    cdn_key = stitcher_v1.types.CdnKey(
        name=cdn_key_id,
        hostname=hostname,
    )

    if is_cloud_cdn:
        cdn_key.google_cdn_key = stitcher_v1.types.GoogleCdnKey(
            key_name=key_name,
            private_key=private_key,
        )
    else:
        cdn_key.media_cdn_key = stitcher_v1.types.MediaCdnKey(
            key_name=key_name,
            private_key=private_key,
        )

    operation = client.create_cdn_key(
        parent=parent, cdn_key_id=cdn_key_id, cdn_key=cdn_key
    )
    response = operation.result()
    print(f"CDN key: {response.name}")
    return response

Ruby

このサンプルを試す前に、クライアント ライブラリを使用した Video Stitcher API クイックスタートにある Ruby の設定手順を実施してください。詳細については、Video Stitcher API Ruby API リファレンス ドキュメントをご覧ください。

Video Stitcher API への認証を行うには、アプリケーションのデフォルト認証情報を設定します。 詳細については、ローカル開発環境の認証の設定をご覧ください。

require "google/cloud/video/stitcher"

##
# Create a Media CDN or Cloud CDN key
#
# @param project_id [String] Your Google Cloud project (e.g. "my-project")
# @param location [String] The location (e.g. "us-central1")
# @param cdn_key_id [String] The user-defined CDN key ID
# @param hostname [String] The hostname to which this CDN key applies
# @param key_name [String] For a Media CDN key, this is the keyset name.
#   For a Cloud CDN key, this is the public name of the CDN key.
# @param private_key [String] For a Media CDN key, this is a 64-byte Ed25519
#   private key encoded as a base64-encoded string. See
#   https://cloud.google.com/video-stitcher/docs/how-to/managing-cdn-keys#create-private-key-media-cdn
#   for more information. For a Cloud CDN key, this is a base64-encoded string
#   secret.
# @param is_media_cdn [Boolean] If true, create a Media CDN key. If false,
#  create a Cloud CDN key.
#
def create_cdn_key project_id:, location:, cdn_key_id:, hostname:, key_name:,
                   private_key:, is_media_cdn:
  # Create a Video Stitcher client.
  client = Google::Cloud::Video::Stitcher.video_stitcher_service

  # Build the resource name of the parent.
  parent = client.location_path project: project_id, location: location
  # Build the path for the CDN key resource.
  cdn_key_path = client.cdn_key_path project: project_id, location: location,
                                     cdn_key: cdn_key_id

  # Set the CDN key fields.
  new_cdn_key = if is_media_cdn
                  {
                    name: cdn_key_path,
                    hostname: hostname,
                    media_cdn_key: {
                      key_name: key_name,
                      private_key: private_key
                    }
                  }
                else
                  {
                    name: cdn_key_path,
                    hostname: hostname,
                    google_cdn_key: {
                      key_name: key_name,
                      private_key: private_key
                    }
                  }
                end

  operation = client.create_cdn_key parent: parent, cdn_key: new_cdn_key,
                                    cdn_key_id: cdn_key_id

  # The returned object is of type Gapic::Operation. You can use this
  # object to check the status of an operation, cancel it, or wait
  # for results. Here is how to block until completion:
  operation.wait_until_done!

  # Print the CDN key name.
  puts "CDN key: #{operation.response.name}"
end

結果を確認する

CDN キーが作成されたかどうかを確認するには、projects.locations.operations.get メソッドを使用します。レスポンスに "done: false" が含まれている場合は、レスポンスに "done: true" が含まれるまでコマンドを繰り返します。

リクエストのデータを使用する前に、次のように置き換えます。

  • PROJECT_NUMBER: IAM 設定ページの [プロジェクト番号] フィールドにある Google Cloud プロジェクト番号
  • LOCATION: データのロケーション。サポートされているリージョンのいずれかを使用します。
    3~7 つの店舗を表示
    • us-central1
    • us-east1
    • us-west1
    • asia-east1
    • asia-south1
    • asia-southeast1
    • europe-west1
    • southamerica-east1
  • OPERATION_ID: オペレーションの ID。

リクエストを送信するには、次のいずれかのオプションを展開します。

次のような JSON レスポンスが返されます。

{
  "name": "projects/PROJECT_NUMBER/locations/LOCATION/operations/OPERATION_ID",
  "metadata": {
    "@type": "type.googleapis.com/google.cloud.common.OperationMetadata",
    "createTime": CREATE_TIME,
    "endTime": END_TIME,
    "target": "projects/PROJECT_NUMBER/locations/LOCATION/cdnKeys/CDN_KEY_ID",
    "verb": "create",
    "cancelRequested": false,
    "apiVersion": "v1"
  },
  "done": true,
  "response": {
    "@type": "type.googleapis.com/google.cloud.video.stitcher.v1.CdnKey",
    "name": "projects/PROJECT_NUMBER/locations/LOCATION/cdnKeys/CDN_KEY_ID",
    "hostname": "HOSTNAME",
    "mediaCdnKey": {
      "keyName": "MEDIA_CDN_KEYNAME"
    }
  }
}

スレートを作成する

Video Stitcher API は、広告を挿入できない場合に、デフォルトのスレート動画を挿入します。スレート動画を Video Stitcher API に登録し、広告がない場合に使用するスレートを指定する必要があります。スレート動画には、少なくとも 1 つの音声トラックがある任意の MP4 ファイルを使用できます。

スレートを作成するには、projects.locations.slates.create メソッドを使用します。

REST

リクエストのデータを使用する前に、次のように置き換えます。

  • PROJECT_NUMBER: IAM 設定ページの [プロジェクト番号] フィールドにある Google Cloud プロジェクト番号
  • LOCATION: スレートを作成するロケーション。サポートされているリージョンのいずれかを使用します。
    3~7 つの店舗を表示
    • us-central1
    • us-east1
    • us-west1
    • asia-east1
    • asia-south1
    • asia-southeast1
    • europe-west1
    • southamerica-east1
  • SLATE_ID: スレートのユーザー定義 ID。 この ID に使用できるのは、小文字、数字、ハイフンに限られます。最初の文字は英字で、最後の文字は英字または数字で、ID 全体は最大 63 文字です。
  • SLATE_URL: 音声トラックが少なくとも 1 つある MP4 動画の公開 URI(サンプル動画

リクエストを送信するには、次のいずれかのオプションを展開します。

次のような JSON レスポンスが返されます。

{
  "name": "projects/PROJECT_NUMBER/locations/LOCATION/operations/OPERATION_ID",
  "metadata": {
    "@type": "type.googleapis.com/google.cloud.common.OperationMetadata",
    "createTime": CREATE_TIME,
    "target": "projects/PROJECT_NUMBER/locations/LOCATION/slates/SLATE_ID",
    "verb": "create",
    "cancelRequested": false,
    "apiVersion": "v1"
  },
  "done": false
}
このコマンドは、進行状況を追跡するためにクエリできる長時間実行オペレーション(LRO)を作成します。次のセクションで使用するために、返された OPERATION_IDname フィールドの最後の部分)をコピーします。

C#

このサンプルを試す前に、クライアント ライブラリを使用した Video Stitcher API クイックスタートにある C# の設定手順を実施してください。詳細については、Video Stitcher API C# API リファレンス ドキュメントをご覧ください。

Video Stitcher API への認証を行うには、アプリケーションのデフォルト認証情報を設定します。 詳細については、ローカル開発環境の認証の設定をご覧ください。


using Google.Api.Gax.ResourceNames;
using Google.Cloud.Video.Stitcher.V1;
using Google.LongRunning;
using System.Threading.Tasks;

public class CreateSlateSample
{
    public async Task<Slate> CreateSlateAsync(
        string projectId, string location, string slateId, string slateUri)
    {
        // Create the client.
        VideoStitcherServiceClient client = VideoStitcherServiceClient.Create();

        CreateSlateRequest request = new CreateSlateRequest
        {
            ParentAsLocationName = LocationName.FromProjectLocation(projectId, location),
            SlateId = slateId,
            Slate = new Slate
            {
                Uri = slateUri
            }
        };

        // Make the request.
        Operation<Slate, OperationMetadata> response = await client.CreateSlateAsync(request);

        // Poll until the returned long-running operation is complete.
        Operation<Slate, OperationMetadata> completedResponse = await response.PollUntilCompletedAsync();

        // Retrieve the operation result.
        return completedResponse.Result;
    }
}

Go

このサンプルを試す前に、クライアント ライブラリを使用した Video Stitcher API クイックスタートにある Go の設定手順を実施してください。詳細については、Video Stitcher API Go API リファレンス ドキュメントをご覧ください。

Video Stitcher API への認証を行うには、アプリケーションのデフォルト認証情報を設定します。 詳細については、ローカル開発環境の認証の設定をご覧ください。

import (
	"context"
	"fmt"
	"io"

	stitcher "cloud.google.com/go/video/stitcher/apiv1"
	stitcherstreampb "cloud.google.com/go/video/stitcher/apiv1/stitcherpb"
)

// createSlate creates a slate. A slate is displayed when ads are not available.
func createSlate(w io.Writer, projectID, slateID, slateURI string) error {
	// projectID := "my-project-id"
	// slateID := "my-slate-id"
	// slateURI := "https://my-slate-uri/test.mp4"
	location := "us-central1"
	ctx := context.Background()
	client, err := stitcher.NewVideoStitcherClient(ctx)
	if err != nil {
		return fmt.Errorf("stitcher.NewVideoStitcherClient: %w", err)
	}
	defer client.Close()

	req := &stitcherstreampb.CreateSlateRequest{
		Parent:  fmt.Sprintf("projects/%s/locations/%s", projectID, location),
		SlateId: slateID,
		Slate: &stitcherstreampb.Slate{
			Uri: slateURI,
		},
	}
	// Creates the slate.
	op, err := client.CreateSlate(ctx, req)
	if err != nil {
		return fmt.Errorf("client.CreateSlate: %w", err)
	}
	response, err := op.Wait(ctx)
	if err != nil {
		return err
	}

	fmt.Fprintf(w, "Slate: %v", response.GetName())
	return nil
}

Java

このサンプルを試す前に、クライアント ライブラリを使用した Video Stitcher API クイックスタートにある Java の設定手順を実施してください。詳細については、Video Stitcher API Java API リファレンス ドキュメントをご覧ください。

Video Stitcher API への認証を行うには、アプリケーションのデフォルト認証情報を設定します。 詳細については、ローカル開発環境の認証の設定をご覧ください。


import com.google.cloud.video.stitcher.v1.CreateSlateRequest;
import com.google.cloud.video.stitcher.v1.LocationName;
import com.google.cloud.video.stitcher.v1.Slate;
import com.google.cloud.video.stitcher.v1.VideoStitcherServiceClient;
import java.io.IOException;
import java.util.concurrent.ExecutionException;
import java.util.concurrent.TimeUnit;
import java.util.concurrent.TimeoutException;

public class CreateSlate {

  private static final int TIMEOUT_IN_MINUTES = 2;

  public static void main(String[] args) throws Exception {
    // TODO(developer): Replace these variables before running the sample.
    String projectId = "my-project-id";
    String location = "us-central1";
    String slateId = "my-slate-id";
    String slateUri =
        "https://my-slate-uri/test.mp4"; // URI of an MP4 video with at least one audio track

    createSlate(projectId, location, slateId, slateUri);
  }

  public static void createSlate(String projectId, String location, String slateId, String slateUri)
      throws IOException, ExecutionException, InterruptedException, TimeoutException {
    // Initialize client that will be used to send requests. This client only needs to be created
    // once, and can be reused for multiple requests. After completing all of your requests, call
    // the "close" method on the client to safely clean up any remaining background resources.
    VideoStitcherServiceClient videoStitcherServiceClient = VideoStitcherServiceClient.create();
    CreateSlateRequest createSlateRequest =
        CreateSlateRequest.newBuilder()
            .setParent(LocationName.of(projectId, location).toString())
            .setSlateId(slateId)
            .setSlate(Slate.newBuilder().setUri(slateUri).build())
            .build();

    Slate response =
        videoStitcherServiceClient
            .createSlateAsync(createSlateRequest)
            .get(TIMEOUT_IN_MINUTES, TimeUnit.MINUTES);
    System.out.println("Created new slate: " + response.getName());
    videoStitcherServiceClient.close();
  }
}

Node.js

このサンプルを試す前に、クライアント ライブラリを使用した Video Stitcher API クイックスタートにある Node.js の設定手順を実施してください。詳細については、Video Stitcher API Node.js API リファレンス ドキュメントをご覧ください。

Video Stitcher API への認証を行うには、アプリケーションのデフォルト認証情報を設定します。 詳細については、ローカル開発環境の認証の設定をご覧ください。

/**
 * TODO(developer): Uncomment these variables before running the sample.
 */
// projectId = 'my-project-id';
// location = 'us-central1';
// slateId = 'my-slate';
// slateUri = 'https://my-slate-uri/test.mp4';

// Imports the Video Stitcher library
const {VideoStitcherServiceClient} =
  require('@google-cloud/video-stitcher').v1;
// Instantiates a client
const stitcherClient = new VideoStitcherServiceClient();

async function createSlate() {
  // Construct request
  const request = {
    parent: stitcherClient.locationPath(projectId, location),
    slate: {
      uri: slateUri,
    },
    slateId: slateId,
  };
  const [operation] = await stitcherClient.createSlate(request);
  const [response] = await operation.promise();
  console.log(`response.name: ${response.name}`);
}

createSlate();

PHP

このサンプルを試す前に、クライアント ライブラリを使用した Video Stitcher API クイックスタートにある PHP の設定手順を実施してください。詳細については、Video Stitcher API PHP API リファレンス ドキュメントをご覧ください。

Video Stitcher API への認証を行うには、アプリケーションのデフォルト認証情報を設定します。 詳細については、ローカル開発環境の認証の設定をご覧ください。

use Google\Cloud\Video\Stitcher\V1\Client\VideoStitcherServiceClient;
use Google\Cloud\Video\Stitcher\V1\CreateSlateRequest;
use Google\Cloud\Video\Stitcher\V1\Slate;

/**
 * Creates a slate. A slate is displayed when ads are not available.
 *
 * @param string $callingProjectId     The project ID to run the API call under
 * @param string $location             The location of the slate
 * @param string $slateId              The name of the slate to be created
 * @param string $slateUri             The public URI for an MP4 video with at least one audio track
 */
function create_slate(
    string $callingProjectId,
    string $location,
    string $slateId,
    string $slateUri
): void {
    // Instantiate a client.
    $stitcherClient = new VideoStitcherServiceClient();

    $parent = $stitcherClient->locationName($callingProjectId, $location);
    $slate = new Slate();
    $slate->setUri($slateUri);

    // Run slate creation request
    $request = (new CreateSlateRequest())
        ->setParent($parent)
        ->setSlateId($slateId)
        ->setSlate($slate);
    $operationResponse = $stitcherClient->createSlate($request);
    $operationResponse->pollUntilComplete();
    if ($operationResponse->operationSucceeded()) {
        $result = $operationResponse->getResult();
        // Print results
        printf('Slate: %s' . PHP_EOL, $result->getName());
    } else {
        $error = $operationResponse->getError();
        // handleError($error)
    }
}

Python

このサンプルを試す前に、クライアント ライブラリを使用した Video Stitcher API クイックスタートにある Python の設定手順を実施してください。詳細については、Video Stitcher API Python API リファレンス ドキュメントをご覧ください。

Video Stitcher API への認証を行うには、アプリケーションのデフォルト認証情報を設定します。 詳細については、ローカル開発環境の認証の設定をご覧ください。


import argparse

from google.cloud.video import stitcher_v1
from google.cloud.video.stitcher_v1.services.video_stitcher_service import (
    VideoStitcherServiceClient,
)

def create_slate(
    project_id: str, location: str, slate_id: str, slate_uri: str
) -> stitcher_v1.types.Slate:
    """Creates a slate.
    Args:
        project_id: The GCP project ID.
        location: The location in which to create the slate.
        slate_id: The user-defined slate ID.
        slate_uri: Uri of the video slate; must be an MP4 video with at least one audio track.

    Returns:
        The slate resource.
    """

    client = VideoStitcherServiceClient()

    parent = f"projects/{project_id}/locations/{location}"

    slate = stitcher_v1.types.Slate(
        uri=slate_uri,
    )

    operation = client.create_slate(parent=parent, slate_id=slate_id, slate=slate)
    response = operation.result()
    print(f"Slate: {response.name}")
    return response

Ruby

このサンプルを試す前に、クライアント ライブラリを使用した Video Stitcher API クイックスタートにある Ruby の設定手順を実施してください。詳細については、Video Stitcher API Ruby API リファレンス ドキュメントをご覧ください。

Video Stitcher API への認証を行うには、アプリケーションのデフォルト認証情報を設定します。 詳細については、ローカル開発環境の認証の設定をご覧ください。

require "google/cloud/video/stitcher"

##
# Create a slate
#
# @param project_id [String] Your Google Cloud project (e.g. "my-project")
# @param location [String] The location (e.g. "us-central1")
# @param slate_id [String] Your slate name (e.g. "my-slate")
# @param slate_uri [String] The URI of an MP4 video with at least one audio
#   track (e.g. "https://my-slate-uri/test.mp4")
#
def create_slate project_id:, location:, slate_id:, slate_uri:
  # Create a Video Stitcher client.
  client = Google::Cloud::Video::Stitcher.video_stitcher_service

  # Build the resource name of the parent.
  parent = client.location_path project: project_id, location: location

  # Set the slate fields.
  new_slate = {
    uri: slate_uri
  }

  operation = client.create_slate parent: parent, slate_id: slate_id,
                                  slate: new_slate

  # The returned object is of type Gapic::Operation. You can use this
  # object to check the status of an operation, cancel it, or wait
  # for results. Here is how to block until completion:
  operation.wait_until_done!

  # Print the slate name.
  puts "Slate: #{operation.response.name}"
end

結果を確認する

スレートが作成されたかどうかを確認するには、projects.locations.operations.get メソッドを使用します。レスポンスに "done: false" が含まれている場合は、レスポンスに "done: true" が含まれるまでコマンドを繰り返します。

リクエストのデータを使用する前に、次のように置き換えます。

  • PROJECT_NUMBER: IAM 設定ページの [プロジェクト番号] フィールドにある Google Cloud プロジェクト番号
  • LOCATION: データのロケーション。サポートされているリージョンのいずれかを使用します。
    3~7 つの店舗を表示
    • us-central1
    • us-east1
    • us-west1
    • asia-east1
    • asia-south1
    • asia-southeast1
    • europe-west1
    • southamerica-east1
  • OPERATION_ID: オペレーションの ID。

リクエストを送信するには、次のいずれかのオプションを展開します。

次のような JSON レスポンスが返されます。

{
  "name": "projects/PROJECT_NUMBER/locations/LOCATION/operations/OPERATION_ID",
  "metadata": {
    "@type": "type.googleapis.com/google.cloud.common.OperationMetadata",
    "createTime": CREATE_TIME,
    "endTime": END_TIME,
    "target": "projects/PROJECT_NUMBER/locations/LOCATION/slates/SLATE_ID",
    "verb": "create",
    "cancelRequested": false,
    "apiVersion": "v1"
  },
  "done": true,
  "response": {
    "@type": "type.googleapis.com/google.cloud.video.stitcher.v1.Slate",
    "name": "projects/PROJECT_NUMBER/locations/LOCATION/slates/SLATE_ID",
    "uri": "SLATE_URL"
  }
}

ライブ構成ファイルを作成する

ライブ セッションを作成する前に、構成を作成する必要があります。多くのライブ セッションで同じ構成を共有できます。

構成を作成するには、projects.locations.liveConfigs.create メソッドを使用します。

REST

リクエストのデータを使用する前に、次のように置き換えます。

  • PROJECT_NUMBER: IAM 設定ページの [プロジェクト番号] フィールドにある Google Cloud プロジェクト番号
  • LOCATION: ライブ構成ファイルを作成するロケーション。サポートされているリージョンのいずれかを使用します。
    3~7 つの店舗を表示
    • us-central1
    • us-east1
    • us-west1
    • asia-east1
    • asia-south1
    • asia-southeast1
    • europe-west1
    • southamerica-east1
  • LIVE_CONFIG_ID: ライブ構成のユーザー定義の識別子。この ID に使用できるのは、小文字、数字、ハイフンに限られます。 最初の文字は英字で、最後の文字は英字または数字で、ID 全体は最大 63 文字です。
  • SOURCE_LIVESTREAM_URI: ライブ ストリーム マニフェストの URI。CDN 鍵を登録した公開 URI または署名されていない URI を使用します。
  • AD_TAG_URI: デフォルト広告タグの公開 URI。サンプルがない場合は、単一インライン線形のサンプルを使用できます。
  • SLATE_ID: 合成された広告がない場合に使用するスレートの ID

リクエストを送信するには、次のいずれかのオプションを展開します。

次のような JSON レスポンスが返されます。

{
  "name": "projects/PROJECT_NUMBER/locations/LOCATION/operations/OPERATION_ID",
  "metadata": {
    "@type": "type.googleapis.com/google.cloud.common.OperationMetadata",
    "createTime": CREATE_TIME,
    "target": "projects/PROJECT_NUMBER/locations/LOCATION/liveConfigs/LIVE_CONFIG_ID",
    "verb": "create",
    "cancelRequested": false,
    "apiVersion": "v1"
  },
  "done": false
}
このコマンドは、進行状況を追跡するためにクエリできる長時間実行オペレーション(LRO)を作成します。詳細については、結果を確認するをご覧ください。

C#

このサンプルを試す前に、クライアント ライブラリを使用した Video Stitcher API クイックスタートにある C# の設定手順を実施してください。詳細については、Video Stitcher API C# API リファレンス ドキュメントをご覧ください。

Video Stitcher API への認証を行うには、アプリケーションのデフォルト認証情報を設定します。 詳細については、ローカル開発環境の認証の設定をご覧ください。


using Google.Api.Gax.ResourceNames;
using Google.Cloud.Video.Stitcher.V1;
using Google.LongRunning;
using System.Threading.Tasks;

public class CreateLiveConfigSample
{
    public async Task<LiveConfig> CreateLiveConfigAsync(
        string projectId, string location, string liveConfigId, string sourceUri, string adTagUri, string slateId)
    {
        // Create the client.
        VideoStitcherServiceClient client = VideoStitcherServiceClient.Create();

        CreateLiveConfigRequest request = new CreateLiveConfigRequest
        {
            ParentAsLocationName = LocationName.FromProjectLocation(projectId, location),
            LiveConfigId = liveConfigId,
            LiveConfig = new LiveConfig
            {
                SourceUri = sourceUri,
                AdTagUri = adTagUri,
                DefaultSlate = SlateName.FormatProjectLocationSlate(projectId, location, slateId),
                AdTracking = AdTracking.Server,
                StitchingPolicy = LiveConfig.Types.StitchingPolicy.CutCurrent
            }
        };

        // Make the request.
        Operation<LiveConfig, OperationMetadata> response = await client.CreateLiveConfigAsync(request);

        // Poll until the returned long-running operation is complete.
        Operation<LiveConfig, OperationMetadata> completedResponse = await response.PollUntilCompletedAsync();

        // Retrieve the operation result.
        return completedResponse.Result;
    }
}

Go

このサンプルを試す前に、クライアント ライブラリを使用した Video Stitcher API クイックスタートにある Go の設定手順を実施してください。詳細については、Video Stitcher API Go API リファレンス ドキュメントをご覧ください。

Video Stitcher API への認証を行うには、アプリケーションのデフォルト認証情報を設定します。 詳細については、ローカル開発環境の認証の設定をご覧ください。

import (
	"context"
	"fmt"
	"io"

	stitcher "cloud.google.com/go/video/stitcher/apiv1"
	stitcherstreampb "cloud.google.com/go/video/stitcher/apiv1/stitcherpb"
)

// createLiveConfig creates a live config. Live configs are used to configure live sessions.
func createLiveConfig(w io.Writer, projectID, liveConfigID, sourceURI, slateID string) error {
	// projectID := "my-project-id"
	// liveConfigID := "my-live-config-id"

	// Uri of the media to stitch; this URI must reference either an MPEG-DASH
	// manifest (.mpd) file or an M3U playlist manifest (.m3u8) file.
	// sourceURI := "https://storage.googleapis.com/my-bucket/main.mpd"

	// See https://cloud.google.com/video-stitcher/docs/concepts for information
	// on ad tags and ad metadata. This sample uses an ad tag URL that displays
	// a Single Inline Linear ad
	// (https://developers.google.com/interactive-media-ads/docs/sdks/html5/client-side/tags).
	adTagURI := "https://pubads.g.doubleclick.net/gampad/ads?iu=/21775744923/external/single_ad_samples&sz=640x480&cust_params=sample_ct%3Dlinear&ciu_szs=300x250%2C728x90&gdfp_req=1&output=vast&unviewed_position_start=1&env=vp&impl=s&correlator="
	// slateID := "my-slate-id"
	location := "us-central1"
	ctx := context.Background()
	client, err := stitcher.NewVideoStitcherClient(ctx)
	if err != nil {
		return fmt.Errorf("stitcher.NewVideoStitcherClient: %w", err)
	}
	defer client.Close()

	req := &stitcherstreampb.CreateLiveConfigRequest{
		Parent:       fmt.Sprintf("projects/%s/locations/%s", projectID, location),
		LiveConfigId: liveConfigID,
		LiveConfig: &stitcherstreampb.LiveConfig{
			SourceUri:       sourceURI,
			AdTagUri:        adTagURI,
			AdTracking:      stitcherstreampb.AdTracking_SERVER,
			StitchingPolicy: stitcherstreampb.LiveConfig_CUT_CURRENT,
			DefaultSlate:    fmt.Sprintf("projects/%s/locations/%s/slates/%s", projectID, location, slateID),
		},
	}
	// Creates the live config.
	op, err := client.CreateLiveConfig(ctx, req)
	if err != nil {
		return fmt.Errorf("client.createLiveConfig: %w", err)
	}
	response, err := op.Wait(ctx)
	if err != nil {
		return err
	}

	fmt.Fprintf(w, "Live config: %v", response.GetName())
	return nil
}

Java

このサンプルを試す前に、クライアント ライブラリを使用した Video Stitcher API クイックスタートにある Java の設定手順を実施してください。詳細については、Video Stitcher API Java API リファレンス ドキュメントをご覧ください。

Video Stitcher API への認証を行うには、アプリケーションのデフォルト認証情報を設定します。 詳細については、ローカル開発環境の認証の設定をご覧ください。


import com.google.cloud.video.stitcher.v1.AdTracking;
import com.google.cloud.video.stitcher.v1.CreateLiveConfigRequest;
import com.google.cloud.video.stitcher.v1.LiveConfig;
import com.google.cloud.video.stitcher.v1.LiveConfig.StitchingPolicy;
import com.google.cloud.video.stitcher.v1.LocationName;
import com.google.cloud.video.stitcher.v1.SlateName;
import com.google.cloud.video.stitcher.v1.VideoStitcherServiceClient;
import java.io.IOException;
import java.util.concurrent.ExecutionException;
import java.util.concurrent.TimeUnit;
import java.util.concurrent.TimeoutException;

public class CreateLiveConfig {

  private static final int TIMEOUT_IN_MINUTES = 2;

  public static void main(String[] args) throws Exception {
    // TODO(developer): Replace these variables before running the sample.
    String projectId = "my-project-id";
    String location = "us-central1";
    String liveConfigId = "my-live-config-id";
    // Uri of the live stream to stitch; this URI must reference either an MPEG-DASH
    // manifest (.mpd) file or an M3U playlist manifest (.m3u8) file.
    String sourceUri = "https://storage.googleapis.com/my-bucket/main.mpd";
    // See Single Inline Linear
    // (https://developers.google.com/interactive-media-ads/docs/sdks/html5/client-side/tags)
    String adTagUri = "https://pubads.g.doubleclick.net/gampad/ads...";
    String slateId = "my-slate-id";

    createLiveConfig(projectId, location, liveConfigId, sourceUri, adTagUri, slateId);
  }

  public static void createLiveConfig(
      String projectId,
      String location,
      String liveConfigId,
      String sourceUri,
      String adTagUri,
      String slateId)
      throws IOException, ExecutionException, InterruptedException, TimeoutException {
    // Initialize client that will be used to send requests. This client only needs to be created
    // once, and can be reused for multiple requests. After completing all of your requests, call
    // the "close" method on the client to safely clean up any remaining background resources.
    VideoStitcherServiceClient videoStitcherServiceClient = VideoStitcherServiceClient.create();
    CreateLiveConfigRequest createLiveConfigRequest =
        CreateLiveConfigRequest.newBuilder()
            .setParent(LocationName.of(projectId, location).toString())
            .setLiveConfigId(liveConfigId)
            .setLiveConfig(
                LiveConfig.newBuilder()
                    .setSourceUri(sourceUri)
                    .setAdTagUri(adTagUri)
                    .setDefaultSlate(SlateName.format(projectId, location, slateId))
                    .setAdTracking(AdTracking.SERVER)
                    .setStitchingPolicy(StitchingPolicy.CUT_CURRENT)
                    .build())
            .build();

    LiveConfig response =
        videoStitcherServiceClient
            .createLiveConfigAsync(createLiveConfigRequest)
            .get(TIMEOUT_IN_MINUTES, TimeUnit.MINUTES);
    System.out.println("Created new live config: " + response.getName());
    videoStitcherServiceClient.close();
  }
}

Node.js

このサンプルを試す前に、クライアント ライブラリを使用した Video Stitcher API クイックスタートにある Node.js の設定手順を実施してください。詳細については、Video Stitcher API Node.js API リファレンス ドキュメントをご覧ください。

Video Stitcher API への認証を行うには、アプリケーションのデフォルト認証情報を設定します。 詳細については、ローカル開発環境の認証の設定をご覧ください。

/**
 * TODO(developer): Uncomment these variables before running the sample.
 */
// projectId = 'my-project-id';
// location = 'us-central1';
// liveConfigId = 'my-live-config-id';
// sourceUri = 'https://storage.googleapis.com/my-bucket/main.mpd';
// See Single Inline Linear
// (https://developers.google.com/interactive-media-ads/docs/sdks/html5/client-side/tags)
// adTagUri = 'https://pubads.g.doubleclick.net/gampad/ads...';
// slateId = 'my-slate';

// Imports the Video Stitcher library
const {VideoStitcherServiceClient} =
  require('@google-cloud/video-stitcher').v1;
// Instantiates a client
const stitcherClient = new VideoStitcherServiceClient();

async function createLiveConfig() {
  // Construct request
  const request = {
    parent: stitcherClient.locationPath(projectId, location),
    liveConfig: {
      sourceUri: sourceUri,
      adTagUri: adTagUri,
      adTracking: 'SERVER',
      stitchingPolicy: 'CUT_CURRENT',
      defaultSlate: stitcherClient.slatePath(projectId, location, slateId),
    },
    liveConfigId: liveConfigId,
  };
  const [operation] = await stitcherClient.createLiveConfig(request);
  const [response] = await operation.promise();
  console.log(`response.name: ${response.name}`);
}

createLiveConfig();

PHP

このサンプルを試す前に、クライアント ライブラリを使用した Video Stitcher API クイックスタートにある PHP の設定手順を実施してください。詳細については、Video Stitcher API PHP API リファレンス ドキュメントをご覧ください。

Video Stitcher API への認証を行うには、アプリケーションのデフォルト認証情報を設定します。 詳細については、ローカル開発環境の認証の設定をご覧ください。

use Google\Cloud\Video\Stitcher\V1\AdTracking;
use Google\Cloud\Video\Stitcher\V1\Client\VideoStitcherServiceClient;
use Google\Cloud\Video\Stitcher\V1\CreateLiveConfigRequest;
use Google\Cloud\Video\Stitcher\V1\LiveConfig;

/**
 * Creates a live config. Live configs are used to configure live sessions.
 *
 * @param string $callingProjectId     The project ID to run the API call under
 * @param string $location             The location of the live config
 * @param string $liveConfigId         The name of the live config to be created
 * @param string $sourceUri            Uri of the media to stitch; this URI must
 *                                     reference either an MPEG-DASH manifest
 *                                     (.mpd) file or an M3U playlist manifest
 *                                     (.m3u8) file.
 * @param string $adTagUri             The Uri of the ad tag
 * @param string $slateId              The user-defined slate ID of the default
 *                                     slate to use when no slates are specified
 *                                     in an ad break's message
 */
function create_live_config(
    string $callingProjectId,
    string $location,
    string $liveConfigId,
    string $sourceUri,
    string $adTagUri,
    string $slateId
): void {
    // Instantiate a client.
    $stitcherClient = new VideoStitcherServiceClient();

    $parent = $stitcherClient->locationName($callingProjectId, $location);
    $defaultSlate = $stitcherClient->slateName($callingProjectId, $location, $slateId);

    $liveConfig = (new LiveConfig())
        ->setSourceUri($sourceUri)
        ->setAdTagUri($adTagUri)
        ->setAdTracking(AdTracking::SERVER)
        ->setStitchingPolicy(LiveConfig\StitchingPolicy::CUT_CURRENT)
        ->setDefaultSlate($defaultSlate);

    // Run live config creation request
    $request = (new CreateLiveConfigRequest())
        ->setParent($parent)
        ->setLiveConfigId($liveConfigId)
        ->setLiveConfig($liveConfig);
    $operationResponse = $stitcherClient->createLiveConfig($request);
    $operationResponse->pollUntilComplete();
    if ($operationResponse->operationSucceeded()) {
        $result = $operationResponse->getResult();
        // Print results
        printf('Live config: %s' . PHP_EOL, $result->getName());
    } else {
        $error = $operationResponse->getError();
        // handleError($error)
    }
}

Python

このサンプルを試す前に、クライアント ライブラリを使用した Video Stitcher API クイックスタートにある Python の設定手順を実施してください。詳細については、Video Stitcher API Python API リファレンス ドキュメントをご覧ください。

Video Stitcher API への認証を行うには、アプリケーションのデフォルト認証情報を設定します。 詳細については、ローカル開発環境の認証の設定をご覧ください。


import argparse

from google.cloud.video import stitcher_v1
from google.cloud.video.stitcher_v1.services.video_stitcher_service import (
    VideoStitcherServiceClient,
)

def create_live_config(
    project_id: str,
    location: str,
    live_config_id: str,
    live_stream_uri: str,
    ad_tag_uri: str,
    slate_id: str,
) -> stitcher_v1.types.LiveConfig:
    """Creates a live config.
    Args:
        project_id: The GCP project ID.
        location: The location in which to create the live config.
        live_config_id: The user-defined live config ID.
        live_stream_uri: Uri of the livestream to stitch; this URI must reference either an MPEG-DASH
                    manifest (.mpd) file or an M3U playlist manifest (.m3u8) file.
        ad_tag_uri: Uri of the ad tag.
        slate_id: The user-defined slate ID of the default slate to use when no slates are specified in an ad break's message.

    Returns:
        The live config resource.
    """

    client = VideoStitcherServiceClient()

    parent = f"projects/{project_id}/locations/{location}"
    default_slate = f"projects/{project_id}/locations/{location}/slates/{slate_id}"

    live_config = stitcher_v1.types.LiveConfig(
        source_uri=live_stream_uri,
        ad_tag_uri=ad_tag_uri,
        ad_tracking="SERVER",
        stitching_policy="CUT_CURRENT",
        default_slate=default_slate,
    )

    operation = client.create_live_config(
        parent=parent, live_config_id=live_config_id, live_config=live_config
    )
    response = operation.result()
    print(f"Live config: {response.name}")
    return response

Ruby

このサンプルを試す前に、クライアント ライブラリを使用した Video Stitcher API クイックスタートにある Ruby の設定手順を実施してください。詳細については、Video Stitcher API Ruby API リファレンス ドキュメントをご覧ください。

Video Stitcher API への認証を行うには、アプリケーションのデフォルト認証情報を設定します。 詳細については、ローカル開発環境の認証の設定をご覧ください。

require "google/cloud/video/stitcher"

##
# Create a live config
#
# @param project_id [String] Your Google Cloud project (e.g. "my-project")
# @param location [String] The location (e.g. "us-central1")
# @param live_config_id [String] Your live config name (e.g. "my-live-config")
# @param source_uri [String] Uri of the live stream to stitch
#   (e.g. "https://storage.googleapis.com/my-bucket/main.mpd")
# @param ad_tag_uri [String] Uri of the ad tag
#   (e.g. "https://pubads.g.doubleclick.net/gampad/ads...")
# @param slate_id [String] The default slate ID to use when no slates are
#   specified in an ad break's message (e.g. "my-slate-id")
#
def create_live_config project_id:, location:, live_config_id:, source_uri:,
                       ad_tag_uri:, slate_id:
  # Create a Video Stitcher client.
  client = Google::Cloud::Video::Stitcher.video_stitcher_service

  # Build the resource name of the parent.
  parent = client.location_path project: project_id, location: location

  # Build the resource name of the default slate.
  slate_name = client.slate_path project: project_id, location: location,
                                 slate: slate_id

  # Set the live config fields.
  new_live_config = {
    source_uri: source_uri,
    ad_tag_uri: ad_tag_uri,
    ad_tracking: Google::Cloud::Video::Stitcher::V1::AdTracking::SERVER,
    stitching_policy: Google::Cloud::Video::Stitcher::V1::LiveConfig::StitchingPolicy::CUT_CURRENT,
    default_slate: slate_name
  }

  operation = client.create_live_config parent: parent,
                                        live_config_id: live_config_id,
                                        live_config: new_live_config

  # The returned object is of type Gapic::Operation. You can use this
  # object to check the status of an operation, cancel it, or wait
  # for results. Here is how to block until completion:
  operation.wait_until_done!

  # Print the live config name.
  puts "Live config: #{operation.response.name}"
end

構成を取得する

構成を取得するには、projects.locations.liveConfigs.get メソッドを使用します。

REST

リクエストのデータを使用する前に、次のように置き換えます。

  • PROJECT_NUMBER: IAM 設定ページの [プロジェクト番号] フィールドにある Google Cloud プロジェクト番号
  • LOCATION: ライブ構成ファイルのロケーション。サポートされているリージョンのいずれかを使用します。
    3~7 つの店舗を表示
    • us-central1
    • us-east1
    • us-west1
    • asia-east1
    • asia-south1
    • asia-southeast1
    • europe-west1
    • southamerica-east1
  • LIVE_CONFIG_ID: ライブ構成ファイルのユーザー定義の識別子。

リクエストを送信するには、次のいずれかのオプションを展開します。

次のような JSON レスポンスが返されます。

{
  "name": "projects/PROJECT_NUMBER/locations/LOCATION/liveConfigs/LIVE_CONFIG_ID",
  "sourceUri": "SOURCE_LIVESTREAM_URI",
  "adTagUri": "AD_TAG_URI",
  "state": "READY",
  "adTracking": "SERVER",
  "defaultSlate": "projects/PROJECT_NUMBER/locations/LOCATION/slates/SLATE_ID",
  "stitchingPolicy": "CUT_CURRENT"
}

C#

このサンプルを試す前に、クライアント ライブラリを使用した Video Stitcher API クイックスタートにある C# の設定手順を実施してください。詳細については、Video Stitcher API C# API リファレンス ドキュメントをご覧ください。

Video Stitcher API への認証を行うには、アプリケーションのデフォルト認証情報を設定します。 詳細については、ローカル開発環境の認証の設定をご覧ください。


using Google.Cloud.Video.Stitcher.V1;

public class GetLiveConfigSample
{
    public LiveConfig GetLiveConfig(
        string projectId, string location, string liveConfigId)
    {
        // Create the client.
        VideoStitcherServiceClient client = VideoStitcherServiceClient.Create();

        GetLiveConfigRequest request = new GetLiveConfigRequest
        {
            LiveConfigName = LiveConfigName.FromProjectLocationLiveConfig(projectId, location, liveConfigId)
        };

        // Call the API.
        LiveConfig response = client.GetLiveConfig(request);

        // Return the result.
        return response;
    }
}

Go

このサンプルを試す前に、クライアント ライブラリを使用した Video Stitcher API クイックスタートにある Go の設定手順を実施してください。詳細については、Video Stitcher API Go API リファレンス ドキュメントをご覧ください。

Video Stitcher API への認証を行うには、アプリケーションのデフォルト認証情報を設定します。 詳細については、ローカル開発環境の認証の設定をご覧ください。

import (
	"context"
	"encoding/json"
	"fmt"
	"io"

	stitcher "cloud.google.com/go/video/stitcher/apiv1"
	stitcherstreampb "cloud.google.com/go/video/stitcher/apiv1/stitcherpb"
)

// getLiveConfig gets a previously-created live config.
func getLiveConfig(w io.Writer, projectID, liveConfigID string) error {
	// projectID := "my-project-id"
	// liveConfigID := "my-live-config-id"
	location := "us-central1"
	ctx := context.Background()
	client, err := stitcher.NewVideoStitcherClient(ctx)
	if err != nil {
		return fmt.Errorf("stitcher.NewVideoStitcherClient: %w", err)
	}
	defer client.Close()

	req := &stitcherstreampb.GetLiveConfigRequest{
		Name: fmt.Sprintf("projects/%s/locations/%s/liveConfigs/%s", projectID, location, liveConfigID),
	}

	response, err := client.GetLiveConfig(ctx, req)
	if err != nil {
		return fmt.Errorf("client.GetLiveConfig: %w", err)
	}
	b, err := json.MarshalIndent(response, "", " ")
	if err != nil {
		return fmt.Errorf("json.MarshalIndent: %w", err)
	}

	fmt.Fprintf(w, "Live config:\n%s", string(b))
	return nil
}

Java

このサンプルを試す前に、クライアント ライブラリを使用した Video Stitcher API クイックスタートにある Java の設定手順を実施してください。詳細については、Video Stitcher API Java API リファレンス ドキュメントをご覧ください。

Video Stitcher API への認証を行うには、アプリケーションのデフォルト認証情報を設定します。 詳細については、ローカル開発環境の認証の設定をご覧ください。


import com.google.cloud.video.stitcher.v1.GetLiveConfigRequest;
import com.google.cloud.video.stitcher.v1.LiveConfig;
import com.google.cloud.video.stitcher.v1.LiveConfigName;
import com.google.cloud.video.stitcher.v1.VideoStitcherServiceClient;
import java.io.IOException;

public class GetLiveConfig {

  public static void main(String[] args) throws Exception {
    // TODO(developer): Replace these variables before running the sample.
    String projectId = "my-project-id";
    String location = "us-central1";
    String liveConfigId = "my-live-config-id";

    getLiveConfig(projectId, location, liveConfigId);
  }

  public static void getLiveConfig(String projectId, String location, String liveConfigId)
      throws IOException {
    // Initialize client that will be used to send requests. This client only needs to be created
    // once, and can be reused for multiple requests. In this example, try-with-resources is used
    // which automatically calls close() on the client to clean up resources.
    try (VideoStitcherServiceClient videoStitcherServiceClient =
        VideoStitcherServiceClient.create()) {
      GetLiveConfigRequest getLiveConfigRequest =
          GetLiveConfigRequest.newBuilder()
              .setName(LiveConfigName.of(projectId, location, liveConfigId).toString())
              .build();

      LiveConfig response = videoStitcherServiceClient.getLiveConfig(getLiveConfigRequest);
      System.out.println("Live config: " + response.getName());
    }
  }
}

Node.js

このサンプルを試す前に、クライアント ライブラリを使用した Video Stitcher API クイックスタートにある Node.js の設定手順を実施してください。詳細については、Video Stitcher API Node.js API リファレンス ドキュメントをご覧ください。

Video Stitcher API への認証を行うには、アプリケーションのデフォルト認証情報を設定します。 詳細については、ローカル開発環境の認証の設定をご覧ください。

/**
 * TODO(developer): Uncomment these variables before running the sample.
 */
// projectId = 'my-project-id';
// location = 'us-central1';
// liveConfigId = 'my-live-config-id';

// Imports the Video Stitcher library
const {VideoStitcherServiceClient} =
  require('@google-cloud/video-stitcher').v1;
// Instantiates a client
const stitcherClient = new VideoStitcherServiceClient();

async function getLiveConfig() {
  // Construct request
  const request = {
    name: stitcherClient.liveConfigPath(projectId, location, liveConfigId),
  };
  const [liveConfig] = await stitcherClient.getLiveConfig(request);
  console.log(`Live config: ${liveConfig.name}`);
}

getLiveConfig();

PHP

このサンプルを試す前に、クライアント ライブラリを使用した Video Stitcher API クイックスタートにある PHP の設定手順を実施してください。詳細については、Video Stitcher API PHP API リファレンス ドキュメントをご覧ください。

Video Stitcher API への認証を行うには、アプリケーションのデフォルト認証情報を設定します。 詳細については、ローカル開発環境の認証の設定をご覧ください。

use Google\Cloud\Video\Stitcher\V1\Client\VideoStitcherServiceClient;
use Google\Cloud\Video\Stitcher\V1\GetLiveConfigRequest;

/**
 * Gets a live config.
 *
 * @param string $callingProjectId     The project ID to run the API call under
 * @param string $location             The location of the live config
 * @param string $liveConfigId         The ID of the live config
 */
function get_live_config(
    string $callingProjectId,
    string $location,
    string $liveConfigId
): void {
    // Instantiate a client.
    $stitcherClient = new VideoStitcherServiceClient();

    $formattedName = $stitcherClient->liveConfigName($callingProjectId, $location, $liveConfigId);
    $request = (new GetLiveConfigRequest())
        ->setName($formattedName);
    $liveConfig = $stitcherClient->getLiveConfig($request);

    // Print results
    printf('Live config: %s' . PHP_EOL, $liveConfig->getName());
}

Python

このサンプルを試す前に、クライアント ライブラリを使用した Video Stitcher API クイックスタートにある Python の設定手順を実施してください。詳細については、Video Stitcher API Python API リファレンス ドキュメントをご覧ください。

Video Stitcher API への認証を行うには、アプリケーションのデフォルト認証情報を設定します。 詳細については、ローカル開発環境の認証の設定をご覧ください。


import argparse

from google.cloud.video import stitcher_v1
from google.cloud.video.stitcher_v1.services.video_stitcher_service import (
    VideoStitcherServiceClient,
)

def get_live_config(
    project_id: str, location: str, live_config_id: str
) -> stitcher_v1.types.LiveConfig:
    """Gets a live config.
    Args:
        project_id: The GCP project ID.
        location: The location of the live config.
        live_config_id: The user-defined live config ID.

    Returns:
        The live config resource.
    """

    client = VideoStitcherServiceClient()

    name = f"projects/{project_id}/locations/{location}/liveConfigs/{live_config_id}"
    response = client.get_live_config(name=name)
    print(f"Live config: {response.name}")
    return response

Ruby

このサンプルを試す前に、クライアント ライブラリを使用した Video Stitcher API クイックスタートにある Ruby の設定手順を実施してください。詳細については、Video Stitcher API Ruby API リファレンス ドキュメントをご覧ください。

Video Stitcher API への認証を行うには、アプリケーションのデフォルト認証情報を設定します。 詳細については、ローカル開発環境の認証の設定をご覧ください。

require "google/cloud/video/stitcher"

##
# Get a live config
#
# @param project_id [String] Your Google Cloud project (e.g. "my-project")
# @param location [String] The location (e.g. "us-central1")
# @param live_config_id [String] Your live config name (e.g. "my-live-config")
#
def get_live_config project_id:, location:, live_config_id:
  # Create a Video Stitcher client.
  client = Google::Cloud::Video::Stitcher.video_stitcher_service

  # Build the resource name of the live config.
  name = client.live_config_path project: project_id, location: location,
                                 live_config: live_config_id

  # Get the live config.
  live_config = client.get_live_config name: name

  # Print the live config name.
  puts "Live config: #{live_config.name}"
end

状態が READY に設定されていることを確認します。表示されない場合、数秒待ってから、もう一度リクエストを送信します。

セッションを作成する

広告合成された動画のセッションを作成するには、projects.locations.liveSessions.create メソッドを使用します。

REST

リクエストのデータを使用する前に、次のように置き換えます。

  • PROJECT_NUMBER: IAM 設定ページの [プロジェクト番号] フィールドにある Google Cloud プロジェクト番号
  • LOCATION: セッションを作成するロケーション。サポートされているリージョンのいずれかを使用します。
    3~7 つの店舗を表示
    • us-central1
    • us-east1
    • us-west1
    • asia-east1
    • asia-south1
    • asia-southeast1
    • europe-west1
    • southamerica-east1
  • LIVE_CONFIG_ID: ライブ構成ファイルのユーザー定義の識別子。

リクエストを送信するには、次のいずれかのオプションを展開します。

次のような JSON レスポンスが返されます。

{
  "name": "projects/PROJECT_NUMBER/locations/LOCATION/liveSessions/SESSION_ID",
  "playUri": "PLAY_URI",
  "liveConfig": "projects/PROJECT_NUMBER/locations/LOCATION/liveConfigs/LIVE_CONFIG_ID",
}

C#

このサンプルを試す前に、クライアント ライブラリを使用した Video Stitcher API クイックスタートにある C# の設定手順を実施してください。詳細については、Video Stitcher API C# API リファレンス ドキュメントをご覧ください。

Video Stitcher API への認証を行うには、アプリケーションのデフォルト認証情報を設定します。 詳細については、ローカル開発環境の認証の設定をご覧ください。


using Google.Cloud.Video.Stitcher.V1;

public class CreateLiveSessionSample
{
    public LiveSession CreateLiveSession(
        string projectId, string location, string liveConfigId)
    {
        // Create the client.
        VideoStitcherServiceClient client = VideoStitcherServiceClient.Create();

        CreateLiveSessionRequest request = new CreateLiveSessionRequest
        {
            Parent = $"projects/{projectId}/locations/{location}",
            LiveSession = new LiveSession
            {
                LiveConfig = LiveConfigName.FormatProjectLocationLiveConfig(projectId, location, liveConfigId)
            }
        };

        // Call the API.
        LiveSession session = client.CreateLiveSession(request);

        // Return the result.
        return session;
    }
}

Go

このサンプルを試す前に、クライアント ライブラリを使用した Video Stitcher API クイックスタートにある Go の設定手順を実施してください。詳細については、Video Stitcher API Go API リファレンス ドキュメントをご覧ください。

Video Stitcher API への認証を行うには、アプリケーションのデフォルト認証情報を設定します。 詳細については、ローカル開発環境の認証の設定をご覧ください。

import (
	"context"
	"fmt"
	"io"

	stitcher "cloud.google.com/go/video/stitcher/apiv1"
	"cloud.google.com/go/video/stitcher/apiv1/stitcherpb"
)

// createLiveSession creates a livestream session in which to insert ads.
// Live sessions are ephemeral resources that expire after a few minutes.
func createLiveSession(w io.Writer, projectID, liveConfigID string) error {
	// projectID := "my-project-id"
	// liveConfigID := "my-live-config"
	location := "us-central1"
	ctx := context.Background()
	client, err := stitcher.NewVideoStitcherClient(ctx)
	if err != nil {
		return fmt.Errorf("stitcher.NewVideoStitcherClient: %w", err)
	}
	defer client.Close()

	req := &stitcherpb.CreateLiveSessionRequest{
		Parent: fmt.Sprintf("projects/%s/locations/%s", projectID, location),
		LiveSession: &stitcherpb.LiveSession{
			LiveConfig: fmt.Sprintf("projects/%s/locations/%s/liveConfigs/%s", projectID, location, liveConfigID),
		},
	}
	// Creates the live session.
	response, err := client.CreateLiveSession(ctx, req)
	if err != nil {
		return fmt.Errorf("client.CreateLiveSession: %w", err)
	}

	fmt.Fprintf(w, "Live session: %v\n", response.GetName())
	fmt.Fprintf(w, "Play URI: %v", response.GetPlayUri())
	return nil
}

Java

このサンプルを試す前に、クライアント ライブラリを使用した Video Stitcher API クイックスタートにある Java の設定手順を実施してください。詳細については、Video Stitcher API Java API リファレンス ドキュメントをご覧ください。

Video Stitcher API への認証を行うには、アプリケーションのデフォルト認証情報を設定します。 詳細については、ローカル開発環境の認証の設定をご覧ください。


import com.google.cloud.video.stitcher.v1.CreateLiveSessionRequest;
import com.google.cloud.video.stitcher.v1.LiveConfigName;
import com.google.cloud.video.stitcher.v1.LiveSession;
import com.google.cloud.video.stitcher.v1.LocationName;
import com.google.cloud.video.stitcher.v1.VideoStitcherServiceClient;
import java.io.IOException;

public class CreateLiveSession {

  public static void main(String[] args) throws Exception {
    // TODO(developer): Replace these variables before running the sample.
    String projectId = "my-project-id";
    String location = "us-central1";
    String liveConfigId = "my-live-config-id";

    createLiveSession(projectId, location, liveConfigId);
  }

  public static void createLiveSession(String projectId, String location, String liveConfigId)
      throws IOException {
    // Initialize client that will be used to send requests. This client only needs to be created
    // once, and can be reused for multiple requests. In this example, try-with-resources is used
    // which automatically calls close() on the client to clean up resources.
    try (VideoStitcherServiceClient videoStitcherServiceClient =
        VideoStitcherServiceClient.create()) {
      CreateLiveSessionRequest createLiveSessionRequest =
          CreateLiveSessionRequest.newBuilder()
              .setParent(LocationName.of(projectId, location).toString())
              .setLiveSession(
                  LiveSession.newBuilder()
                      .setLiveConfig(LiveConfigName.format(projectId, location, liveConfigId)))
              .build();

      LiveSession response = videoStitcherServiceClient.createLiveSession(createLiveSessionRequest);
      System.out.println("Created live session: " + response.getName());
      System.out.println("Play URI: " + response.getPlayUri());
    }
  }
}

Node.js

このサンプルを試す前に、クライアント ライブラリを使用した Video Stitcher API クイックスタートにある Node.js の設定手順を実施してください。詳細については、Video Stitcher API Node.js API リファレンス ドキュメントをご覧ください。

Video Stitcher API への認証を行うには、アプリケーションのデフォルト認証情報を設定します。 詳細については、ローカル開発環境の認証の設定をご覧ください。

/**
 * TODO(developer): Uncomment these variables before running the sample.
 */
// projectId = 'my-project-id';
// location = 'us-central1';
// liveConfigId = 'my-live-config-id';

// Imports the Video Stitcher library
const {VideoStitcherServiceClient} =
  require('@google-cloud/video-stitcher').v1;
// Instantiates a client
const stitcherClient = new VideoStitcherServiceClient();

async function createLiveSession() {
  // Construct request
  const request = {
    parent: stitcherClient.locationPath(projectId, location),
    liveSession: {
      liveConfig: stitcherClient.liveConfigPath(
        projectId,
        location,
        liveConfigId
      ),
    },
  };

  const [session] = await stitcherClient.createLiveSession(request);
  console.log(`Live session: ${session.name}`);
  console.log(`Play URI: ${session.playUri}`);
}

createLiveSession();

PHP

このサンプルを試す前に、クライアント ライブラリを使用した Video Stitcher API クイックスタートにある PHP の設定手順を実施してください。詳細については、Video Stitcher API PHP API リファレンス ドキュメントをご覧ください。

Video Stitcher API への認証を行うには、アプリケーションのデフォルト認証情報を設定します。 詳細については、ローカル開発環境の認証の設定をご覧ください。

use Google\Cloud\Video\Stitcher\V1\Client\VideoStitcherServiceClient;
use Google\Cloud\Video\Stitcher\V1\CreateLiveSessionRequest;
use Google\Cloud\Video\Stitcher\V1\LiveSession;

/**
 * Creates a live session. Live sessions are ephemeral resources that expire
 * after a few minutes.
 *
 * @param string $callingProjectId     The project ID to run the API call under
 * @param string $location             The location of the session
 * @param string $liveConfigId         The live config ID to use to create the
 *                                     live session
 */
function create_live_session(
    string $callingProjectId,
    string $location,
    string $liveConfigId
): void {
    // Instantiate a client.
    $stitcherClient = new VideoStitcherServiceClient();

    $parent = $stitcherClient->locationName($callingProjectId, $location);
    $liveConfig = $stitcherClient->liveConfigName($callingProjectId, $location, $liveConfigId);
    $liveSession = new LiveSession();
    $liveSession->setLiveConfig($liveConfig);

    // Run live session creation request
    $request = (new CreateLiveSessionRequest())
        ->setParent($parent)
        ->setLiveSession($liveSession);
    $response = $stitcherClient->createLiveSession($request);

    // Print results
    printf('Live session: %s' . PHP_EOL, $response->getName());
}

Python

このサンプルを試す前に、クライアント ライブラリを使用した Video Stitcher API クイックスタートにある Python の設定手順を実施してください。詳細については、Video Stitcher API Python API リファレンス ドキュメントをご覧ください。

Video Stitcher API への認証を行うには、アプリケーションのデフォルト認証情報を設定します。 詳細については、ローカル開発環境の認証の設定をご覧ください。


import argparse

from google.cloud.video import stitcher_v1
from google.cloud.video.stitcher_v1.services.video_stitcher_service import (
    VideoStitcherServiceClient,
)

def create_live_session(
    project_id: str, location: str, live_config_id: str
) -> stitcher_v1.types.LiveSession:
    """Creates a live session. Live sessions are ephemeral resources that expire
    after a few minutes.
    Args:
        project_id: The GCP project ID.
        location: The location in which to create the session.
        live_config_id: The user-defined live config ID.

    Returns:
        The live session resource.
    """

    client = VideoStitcherServiceClient()

    parent = f"projects/{project_id}/locations/{location}"
    live_config = (
        f"projects/{project_id}/locations/{location}/liveConfigs/{live_config_id}"
    )

    live_session = stitcher_v1.types.LiveSession(live_config=live_config)

    response = client.create_live_session(parent=parent, live_session=live_session)
    print(f"Live session: {response.name}")
    return response

Ruby

このサンプルを試す前に、クライアント ライブラリを使用した Video Stitcher API クイックスタートにある Ruby の設定手順を実施してください。詳細については、Video Stitcher API Ruby API リファレンス ドキュメントをご覧ください。

Video Stitcher API への認証を行うには、アプリケーションのデフォルト認証情報を設定します。 詳細については、ローカル開発環境の認証の設定をご覧ください。

require "google/cloud/video/stitcher"

##
# Create a live stream session. Live sessions are ephemeral resources
# that expire after a few minutes.
#
# @param project_id [String] Your Google Cloud project (e.g. "my-project")
# @param location [String] The location (e.g. "us-central1")
# @param live_config_id [String] Your live config name (e.g. "my-live-config")
#
def create_live_session project_id:, location:, live_config_id:
  # Create a Video Stitcher client.
  client = Google::Cloud::Video::Stitcher.video_stitcher_service

  # Build the resource name of the parent.
  parent = client.location_path project: project_id, location: location

  # Build the resource name of the live config.
  live_config_name = client.live_config_path project: project_id,
                                             location: location,
                                             live_config: live_config_id

  # Set the session fields.
  new_live_session = {
    live_config: live_config_name
  }

  response = client.create_live_session parent: parent,
                                        live_session: new_live_session

  # Print the live session name.
  puts "Live session: #{response.name}"
end

レスポンスの受信後、レスポンス オブジェクトの playUri フィールドの URI を参照して、広告合成されたライブ ストリームを再生できます。

Video Stitcher API は、リクエストごとに一意のセッション ID を生成します。過去 5 分以内に playUri のリクエストがない場合、セッションは期限切れとなります。

広告合成されたライブ ストリームを再生する

レスポンス オブジェクトの playUri フィールドの URI を使用して、広告合成されたライブ ストリームを再生します。Shaka Player でこのライブ ストリームを再生するには、次の手順に従います。

  1. オンライン メディア プレーヤーの Shaka Player に移動します。
  2. 上部のナビゲーション バーにある [CUSTOM CONTENT](カスタム コンテンツ)をクリックします。
  3. [+] ボタンをクリックします。
  4. playUri フィールド(PLAY_URI)の値を [マニフェスト URL] ボックスに貼り付けます。

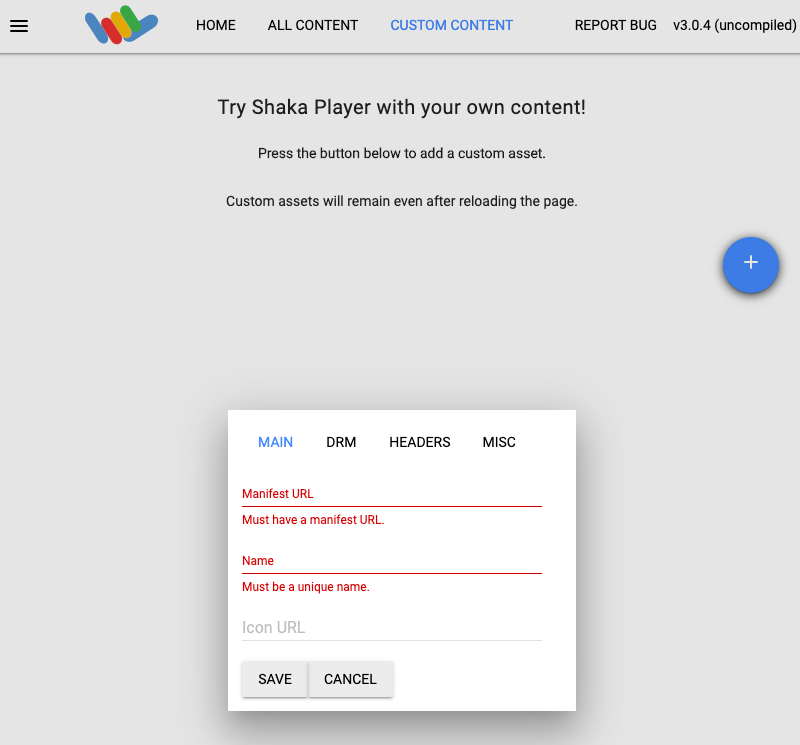
  5. [Name] ボックスに名前を入力します。

  6. [保存] をクリックします。

  7. [Play] をクリックします。

ミッドロール挿入点を挿入する

Video Stitcher API は、ミッドロール挿入点ごとに広告タグから取得された広告を挿入します。ミッドロール挿入点は、マニフェストで広告マーカーを使用して示されます。広告マーカーは、ライブ ストリーム エンコーダによって挿入されます。サポートされている HLS と DASH の広告マーカーについて詳しくは、広告マーカーのドキュメントをご覧ください。

Live Stream API を使用してライブ ストリームを作成した場合は、チャンネル イベントを使用してミッドロール挿入点を挿入することができます。

広告の挿入を確認する

ライブ セッションに広告を合成する前にエンコードする必要があります。広告の代わりにスレート動画が表示される場合は、広告がエンコードされるまで待機してから、別のミッドロール挿入点を挿入します。

クリーンアップ

このページで使用したリソースに対して Google Cloud アカウントで課金されないようにするには、Google Cloud プロジェクトとそのリソースを削除します。

ライブ構成ファイルを削除する

ライブ構成を削除するには、次のコマンドを実行します。

REST

リクエストのデータを使用する前に、次のように置き換えます。

  • PROJECT_NUMBER: IAM 設定ページの [プロジェクト番号] フィールドにある Google Cloud プロジェクト番号
  • LOCATION: ライブ構成ファイルのロケーション。サポートされているリージョンのいずれかを使用します。
    3~7 つの店舗を表示
    • us-central1
    • us-east1
    • us-west1
    • asia-east1
    • asia-south1
    • asia-southeast1
    • europe-west1
    • southamerica-east1
  • LIVE_CONFIG_ID: ライブ構成ファイルのユーザー定義の識別子。

リクエストを送信するには、次のいずれかのオプションを展開します。

次のような JSON レスポンスが返されます。

{
  "name": "projects/PROJECT_NUMBER/locations/LOCATION/operations/OPERATION_ID",
  "metadata": {
    "@type": "type.googleapis.com/google.cloud.common.OperationMetadata",
    "createTime": CREATE_TIME,
    "target": "projects/PROJECT_NUMBER/locations/LOCATION/liveConfigs/LIVE_CONFIG_ID",
    "verb": "delete",
    "cancelRequested": false,
    "apiVersion": "v1"
  },
  "done": false
}
このコマンドは、進行状況を追跡するためにクエリできる長時間実行オペレーション(LRO)を作成します。詳細については、結果を確認するをご覧ください。

C#

このサンプルを試す前に、クライアント ライブラリを使用した Video Stitcher API クイックスタートにある C# の設定手順を実施してください。詳細については、Video Stitcher API C# API リファレンス ドキュメントをご覧ください。

Video Stitcher API への認証を行うには、アプリケーションのデフォルト認証情報を設定します。 詳細については、ローカル開発環境の認証の設定をご覧ください。


using Google.Cloud.Video.Stitcher.V1;
using Google.LongRunning;
using Google.Protobuf.WellKnownTypes;
using System.Threading.Tasks;

public class DeleteLiveConfigSample
{
    public async Task DeleteLiveConfigAsync(
        string projectId, string location, string liveConfigId)
    {
        // Create the client.
        VideoStitcherServiceClient client = VideoStitcherServiceClient.Create();

        DeleteLiveConfigRequest request = new DeleteLiveConfigRequest
        {
            LiveConfigName = LiveConfigName.FromProjectLocationLiveConfig(projectId, location, liveConfigId)
        };

        // Make the request.
        Operation<Empty, OperationMetadata> response = await client.DeleteLiveConfigAsync(request);

        // Poll until the returned long-running operation is complete.
        await response.PollUntilCompletedAsync();
    }
}

Go

このサンプルを試す前に、クライアント ライブラリを使用した Video Stitcher API クイックスタートにある Go の設定手順を実施してください。詳細については、Video Stitcher API Go API リファレンス ドキュメントをご覧ください。

Video Stitcher API への認証を行うには、アプリケーションのデフォルト認証情報を設定します。 詳細については、ローカル開発環境の認証の設定をご覧ください。

import (
	"context"
	"fmt"
	"io"

	stitcher "cloud.google.com/go/video/stitcher/apiv1"
	stitcherstreampb "cloud.google.com/go/video/stitcher/apiv1/stitcherpb"
)

// deleteLiveConfig deletes a previously-created live config.
func deleteLiveConfig(w io.Writer, projectID, liveConfigID string) error {
	// projectID := "my-project-id"
	// liveConfigID := "my-live-config-id"
	location := "us-central1"
	ctx := context.Background()
	client, err := stitcher.NewVideoStitcherClient(ctx)
	if err != nil {
		return fmt.Errorf("stitcher.NewVideoStitcherClient: %w", err)
	}
	defer client.Close()

	req := &stitcherstreampb.DeleteLiveConfigRequest{
		Name: fmt.Sprintf("projects/%s/locations/%s/liveConfigs/%s", projectID, location, liveConfigID),
	}
	// Deletes the live config.
	op, err := client.DeleteLiveConfig(ctx, req)
	if err != nil {
		return fmt.Errorf("client.DeleteLiveConfig: %w", err)
	}
	err = op.Wait(ctx)
	if err != nil {
		return err
	}

	fmt.Fprintf(w, "Deleted live config")
	return nil
}

Java

このサンプルを試す前に、クライアント ライブラリを使用した Video Stitcher API クイックスタートにある Java の設定手順を実施してください。詳細については、Video Stitcher API Java API リファレンス ドキュメントをご覧ください。

Video Stitcher API への認証を行うには、アプリケーションのデフォルト認証情報を設定します。 詳細については、ローカル開発環境の認証の設定をご覧ください。


import com.google.cloud.video.stitcher.v1.DeleteLiveConfigRequest;
import com.google.cloud.video.stitcher.v1.LiveConfigName;
import com.google.cloud.video.stitcher.v1.VideoStitcherServiceClient;
import java.io.IOException;
import java.util.concurrent.ExecutionException;
import java.util.concurrent.TimeUnit;
import java.util.concurrent.TimeoutException;

public class DeleteLiveConfig {

  private static final int TIMEOUT_IN_MINUTES = 2;

  public static void main(String[] args) throws Exception {
    // TODO(developer): Replace these variables before running the sample.
    String projectId = "my-project-id";
    String location = "us-central1";
    String liveConfigId = "my-live-config-id";

    deleteLiveConfig(projectId, location, liveConfigId);
  }

  public static void deleteLiveConfig(String projectId, String location, String liveConfigId)
      throws IOException, ExecutionException, InterruptedException, TimeoutException {
    // Initialize client that will be used to send requests. This client only needs to be created
    // once, and can be reused for multiple requests. After completing all of your requests, call
    // the "close" method on the client to safely clean up any remaining background resources.
    VideoStitcherServiceClient videoStitcherServiceClient = VideoStitcherServiceClient.create();
    DeleteLiveConfigRequest deleteLiveConfigRequest =
        DeleteLiveConfigRequest.newBuilder()
            .setName(LiveConfigName.of(projectId, location, liveConfigId).toString())
            .build();

    videoStitcherServiceClient
        .deleteLiveConfigAsync(deleteLiveConfigRequest)
        .get(TIMEOUT_IN_MINUTES, TimeUnit.MINUTES);
    System.out.println("Deleted live config");
    videoStitcherServiceClient.close();
  }
}

Node.js

このサンプルを試す前に、クライアント ライブラリを使用した Video Stitcher API クイックスタートにある Node.js の設定手順を実施してください。詳細については、Video Stitcher API Node.js API リファレンス ドキュメントをご覧ください。

Video Stitcher API への認証を行うには、アプリケーションのデフォルト認証情報を設定します。 詳細については、ローカル開発環境の認証の設定をご覧ください。

/**
 * TODO(developer): Uncomment these variables before running the sample.
 */
// projectId = 'my-project-id';
// location = 'us-central1';
// liveConfigId = 'my-live-config-id';

// Imports the Video Stitcher library
const {VideoStitcherServiceClient} =
  require('@google-cloud/video-stitcher').v1;
// Instantiates a client
const stitcherClient = new VideoStitcherServiceClient();

async function deleteLiveConfig() {
  // Construct request
  const request = {
    name: stitcherClient.liveConfigPath(projectId, location, liveConfigId),
  };
  const [operation] = await stitcherClient.deleteLiveConfig(request);
  await operation.promise();
  console.log('Deleted live config');
}

deleteLiveConfig();

PHP

このサンプルを試す前に、クライアント ライブラリを使用した Video Stitcher API クイックスタートにある PHP の設定手順を実施してください。詳細については、Video Stitcher API PHP API リファレンス ドキュメントをご覧ください。

Video Stitcher API への認証を行うには、アプリケーションのデフォルト認証情報を設定します。 詳細については、ローカル開発環境の認証の設定をご覧ください。

use Google\Cloud\Video\Stitcher\V1\Client\VideoStitcherServiceClient;
use Google\Cloud\Video\Stitcher\V1\DeleteLiveConfigRequest;

/**
 * Deletes a live config.
 *
 * @param string $callingProjectId     The project ID to run the API call under
 * @param string $location             The location of the live config
 * @param string $liveConfigId         The ID of the live config
 */
function delete_live_config(
    string $callingProjectId,
    string $location,
    string $liveConfigId
): void {
    // Instantiate a client.
    $stitcherClient = new VideoStitcherServiceClient();

    $formattedName = $stitcherClient->liveConfigName($callingProjectId, $location, $liveConfigId);
    $request = (new DeleteLiveConfigRequest())
        ->setName($formattedName);
    $operationResponse = $stitcherClient->deleteLiveConfig($request);
    $operationResponse->pollUntilComplete();
    if ($operationResponse->operationSucceeded()) {
        // Print status
        printf('Deleted live config %s' . PHP_EOL, $liveConfigId);
    } else {
        $error = $operationResponse->getError();
        // handleError($error)
    }
}

Python

このサンプルを試す前に、クライアント ライブラリを使用した Video Stitcher API クイックスタートにある Python の設定手順を実施してください。詳細については、Video Stitcher API Python API リファレンス ドキュメントをご覧ください。

Video Stitcher API への認証を行うには、アプリケーションのデフォルト認証情報を設定します。 詳細については、ローカル開発環境の認証の設定をご覧ください。


import argparse

from google.cloud.video.stitcher_v1.services.video_stitcher_service import (
    VideoStitcherServiceClient,
)
from google.protobuf import empty_pb2 as empty

def delete_live_config(
    project_id: str, location: str, live_config_id: str
) -> empty.Empty:
    """Deletes a live config.
    Args:
        project_id: The GCP project ID.
        location: The location of the live config.
        live_config_id: The user-defined live config ID."""

    client = VideoStitcherServiceClient()

    name = f"projects/{project_id}/locations/{location}/liveConfigs/{live_config_id}"
    operation = client.delete_live_config(name=name)
    response = operation.result()
    print("Deleted live config")
    return response

Ruby

このサンプルを試す前に、クライアント ライブラリを使用した Video Stitcher API クイックスタートにある Ruby の設定手順を実施してください。詳細については、Video Stitcher API Ruby API リファレンス ドキュメントをご覧ください。

Video Stitcher API への認証を行うには、アプリケーションのデフォルト認証情報を設定します。 詳細については、ローカル開発環境の認証の設定をご覧ください。

require "google/cloud/video/stitcher"

##
# Delete a live config
#
# @param project_id [String] Your Google Cloud project (e.g. "my-project")
# @param location [String] The location (e.g. "us-central1")
# @param live_config_id [String] Your live config name (e.g. "my-live-config")
#
def delete_live_config project_id:, location:, live_config_id:
  # Create a Video Stitcher client.
  client = Google::Cloud::Video::Stitcher.video_stitcher_service

  # Build the resource name of the live config.
  name = client.live_config_path project: project_id, location: location,
                                 live_config: live_config_id

  # Delete the live config.
  operation = client.delete_live_config name: name

  # The returned object is of type Gapic::Operation. You can use this
  # object to check the status of an operation, cancel it, or wait
  # for results. Here is how to block until completion:
  operation.wait_until_done!

  # Print a success message.
  puts "Deleted live config"
end

スレートを削除する

スレート構成を削除するには、次のコマンドを実行します。

REST

リクエストのデータを使用する前に、次のように置き換えます。

  • PROJECT_NUMBER: IAM 設定ページの [プロジェクト番号] フィールドにある Google Cloud プロジェクト番号
  • LOCATION: スレートが配置されているロケーション。サポートされているリージョンのいずれかを使用します。
    3~7 つの店舗を表示
    • us-central1
    • us-east1
    • us-west1
    • asia-east1
    • asia-south1
    • asia-southeast1
    • europe-west1
    • southamerica-east1
  • SLATE_ID: スレートのユーザー定義 ID。

リクエストを送信するには、次のいずれかのオプションを展開します。

次のような JSON レスポンスが返されます。

{
  "name": "projects/PROJECT_NUMBER/locations/LOCATION/operations/OPERATION_ID",
  "metadata": {
    "@type": "type.googleapis.com/google.cloud.common.OperationMetadata",
    "createTime": CREATE_TIME,
    "target": "projects/PROJECT_NUMBER/locations/LOCATION/slates/SLATE_ID",
    "verb": "delete",
    "cancelRequested": false,
    "apiVersion": "v1"
  },
  "done": false
}
このコマンドは、進行状況を追跡するためにクエリできる長時間実行オペレーション(LRO)を作成します。詳細については、結果を確認するをご覧ください。

C#

このサンプルを試す前に、クライアント ライブラリを使用した Video Stitcher API クイックスタートにある C# の設定手順を実施してください。詳細については、Video Stitcher API C# API リファレンス ドキュメントをご覧ください。

Video Stitcher API への認証を行うには、アプリケーションのデフォルト認証情報を設定します。 詳細については、ローカル開発環境の認証の設定をご覧ください。


using Google.Cloud.Video.Stitcher.V1;
using Google.LongRunning;
using Google.Protobuf.WellKnownTypes;
using System.Threading.Tasks;

public class DeleteSlateSample
{
    public async Task DeleteSlateAsync(
        string projectId, string location, string slateId)
    {
        // Create the client.
        VideoStitcherServiceClient client = VideoStitcherServiceClient.Create();

        DeleteSlateRequest request = new DeleteSlateRequest
        {
            SlateName = SlateName.FromProjectLocationSlate(projectId, location, slateId)
        };

        // Make the request.
        Operation<Empty, OperationMetadata> response = await client.DeleteSlateAsync(request);

        // Poll until the returned long-running operation is complete.
        await response.PollUntilCompletedAsync();
    }
}

Go

このサンプルを試す前に、クライアント ライブラリを使用した Video Stitcher API クイックスタートにある Go の設定手順を実施してください。詳細については、Video Stitcher API Go API リファレンス ドキュメントをご覧ください。

Video Stitcher API への認証を行うには、アプリケーションのデフォルト認証情報を設定します。 詳細については、ローカル開発環境の認証の設定をご覧ください。

import (
	"context"
	"fmt"
	"io"

	stitcher "cloud.google.com/go/video/stitcher/apiv1"
	stitcherstreampb "cloud.google.com/go/video/stitcher/apiv1/stitcherpb"
)

// deleteSlate deletes a previously-created slate.
func deleteSlate(w io.Writer, projectID, slateID string) error {
	// projectID := "my-project-id"
	// slateID := "my-slate-id"
	location := "us-central1"
	ctx := context.Background()
	client, err := stitcher.NewVideoStitcherClient(ctx)
	if err != nil {
		return fmt.Errorf("stitcher.NewVideoStitcherClient: %w", err)
	}
	defer client.Close()

	name := fmt.Sprintf("projects/%s/locations/%s/slates/%s", projectID, location, slateID)

	req := &stitcherstreampb.DeleteSlateRequest{
		Name: name,
	}
	// Deletes the slate.
	op, err := client.DeleteSlate(ctx, req)
	if err != nil {
		return fmt.Errorf("client.DeleteSlate: %w", err)
	}
	err = op.Wait(ctx)
	if err != nil {
		return err
	}

	fmt.Fprintf(w, "Deleted slate")
	return nil
}

Java

このサンプルを試す前に、クライアント ライブラリを使用した Video Stitcher API クイックスタートにある Java の設定手順を実施してください。詳細については、Video Stitcher API Java API リファレンス ドキュメントをご覧ください。

Video Stitcher API への認証を行うには、アプリケーションのデフォルト認証情報を設定します。 詳細については、ローカル開発環境の認証の設定をご覧ください。


import com.google.cloud.video.stitcher.v1.DeleteSlateRequest;
import com.google.cloud.video.stitcher.v1.SlateName;
import com.google.cloud.video.stitcher.v1.VideoStitcherServiceClient;
import java.io.IOException;
import java.util.concurrent.ExecutionException;
import java.util.concurrent.TimeUnit;
import java.util.concurrent.TimeoutException;

public class DeleteSlate {

  private static final int TIMEOUT_IN_MINUTES = 2;

  public static void main(String[] args) throws Exception {
    // TODO(developer): Replace these variables before running the sample.
    String projectId = "my-project-id";
    String location = "us-central1";
    String slateId = "my-slate-id";

    deleteSlate(projectId, location, slateId);
  }

  public static void deleteSlate(String projectId, String location, String slateId)
      throws IOException, ExecutionException, InterruptedException, TimeoutException {
    // Initialize client that will be used to send requests. This client only needs to be created
    // once, and can be reused for multiple requests. After completing all of your requests, call
    // the "close" method on the client to safely clean up any remaining background resources.
    VideoStitcherServiceClient videoStitcherServiceClient = VideoStitcherServiceClient.create();
    DeleteSlateRequest deleteSlateRequest =
        DeleteSlateRequest.newBuilder()
            .setName(SlateName.of(projectId, location, slateId).toString())
            .build();

    videoStitcherServiceClient
        .deleteSlateAsync(deleteSlateRequest)
        .get(TIMEOUT_IN_MINUTES, TimeUnit.MINUTES);
    System.out.println("Deleted slate");
    videoStitcherServiceClient.close();
  }
}

Node.js

このサンプルを試す前に、クライアント ライブラリを使用した Video Stitcher API クイックスタートにある Node.js の設定手順を実施してください。詳細については、Video Stitcher API Node.js API リファレンス ドキュメントをご覧ください。

Video Stitcher API への認証を行うには、アプリケーションのデフォルト認証情報を設定します。 詳細については、ローカル開発環境の認証の設定をご覧ください。

/**
 * TODO(developer): Uncomment these variables before running the sample.
 */
// projectId = 'my-project-id';
// location = 'us-central1';
// slateId = 'my-slate';

// Imports the Video Stitcher library
const {VideoStitcherServiceClient} =
  require('@google-cloud/video-stitcher').v1;
// Instantiates a client
const stitcherClient = new VideoStitcherServiceClient();

async function deleteSlate() {
  // Construct request
  const request = {
    name: stitcherClient.slatePath(projectId, location, slateId),
  };
  const [operation] = await stitcherClient.deleteSlate(request);
  await operation.promise();
  console.log('Deleted slate');
}

deleteSlate();

PHP

このサンプルを試す前に、クライアント ライブラリを使用した Video Stitcher API クイックスタートにある PHP の設定手順を実施してください。詳細については、Video Stitcher API PHP API リファレンス ドキュメントをご覧ください。

Video Stitcher API への認証を行うには、アプリケーションのデフォルト認証情報を設定します。 詳細については、ローカル開発環境の認証の設定をご覧ください。

use Google\Cloud\Video\Stitcher\V1\Client\VideoStitcherServiceClient;
use Google\Cloud\Video\Stitcher\V1\DeleteSlateRequest;

/**
 * Deletes a slate.
 *
 * @param string $callingProjectId     The project ID to run the API call under
 * @param string $location             The location of the slate
 * @param string $slateId              The ID of the slate
 */
function delete_slate(
    string $callingProjectId,
    string $location,
    string $slateId
): void {
    // Instantiate a client.
    $stitcherClient = new VideoStitcherServiceClient();

    $formattedName = $stitcherClient->slateName($callingProjectId, $location, $slateId);
    $request = (new DeleteSlateRequest())
        ->setName($formattedName);
    $operationResponse = $stitcherClient->deleteSlate($request);
    $operationResponse->pollUntilComplete();
    if ($operationResponse->operationSucceeded()) {
        // Print status
        printf('Deleted slate %s' . PHP_EOL, $slateId);
    } else {
        $error = $operationResponse->getError();
        // handleError($error)
    }
}

Python

このサンプルを試す前に、クライアント ライブラリを使用した Video Stitcher API クイックスタートにある Python の設定手順を実施してください。詳細については、Video Stitcher API Python API リファレンス ドキュメントをご覧ください。

Video Stitcher API への認証を行うには、アプリケーションのデフォルト認証情報を設定します。 詳細については、ローカル開発環境の認証の設定をご覧ください。


import argparse

from google.cloud.video.stitcher_v1.services.video_stitcher_service import (
    VideoStitcherServiceClient,
)
from google.protobuf import empty_pb2 as empty

def delete_slate(project_id: str, location: str, slate_id: str) -> empty.Empty:
    """Deletes a slate.
    Args:
        project_id: The GCP project ID.
        location: The location of the slate.
        slate_id: The user-defined slate ID."""

    client = VideoStitcherServiceClient()

    name = f"projects/{project_id}/locations/{location}/slates/{slate_id}"
    operation = client.delete_slate(name=name)
    response = operation.result()
    print("Deleted slate")
    return response

Ruby

このサンプルを試す前に、クライアント ライブラリを使用した Video Stitcher API クイックスタートにある Ruby の設定手順を実施してください。詳細については、Video Stitcher API Ruby API リファレンス ドキュメントをご覧ください。

Video Stitcher API への認証を行うには、アプリケーションのデフォルト認証情報を設定します。 詳細については、ローカル開発環境の認証の設定をご覧ください。

require "google/cloud/video/stitcher"

##
# Delete a slate
#
# @param project_id [String] Your Google Cloud project (e.g. "my-project")
# @param location [String] The location (e.g. "us-central1")
# @param slate_id [String] Your slate name (e.g. "my-slate")
#
def delete_slate project_id:, location:, slate_id:
  # Create a Video Stitcher client.
  client = Google::Cloud::Video::Stitcher.video_stitcher_service

  # Build the resource name of the slate.
  name = client.slate_path project: project_id, location: location,
                           slate: slate_id

  # Delete the slate.
  operation = client.delete_slate name: name

  # The returned object is of type Gapic::Operation. You can use this
  # object to check the status of an operation, cancel it, or wait
  # for results. Here is how to block until completion:
  operation.wait_until_done!

  # Print a success message.
  puts "Deleted slate"
end

CDN 鍵を削除する

CDN キーを削除するには、次のコマンドを実行します。

REST

リクエストのデータを使用する前に、次のように置き換えます。

  • PROJECT_NUMBER: IAM 設定ページの [プロジェクト番号] フィールドにある Google Cloud プロジェクト番号
  • LOCATION: CDN キーが配置されているロケーション。サポートされているリージョンのいずれかを使用します。
    3~7 つの店舗を表示
    • us-central1
    • us-east1
    • us-west1
    • asia-east1
    • asia-south1
    • asia-southeast1
    • europe-west1
    • southamerica-east1
  • CDN_KEY_ID: CDN 鍵のユーザー定義の識別子

リクエストを送信するには、次のいずれかのオプションを展開します。

次のような JSON レスポンスが返されます。

{
  "name": "projects/PROJECT_NUMBER/locations/LOCATION/operations/OPERATION_ID",
  "metadata": {
    "@type": "type.googleapis.com/google.cloud.common.OperationMetadata",
    "createTime": CREATE_TIME,
    "target": "projects/PROJECT_NUMBER/locations/LOCATION/cdnKeys/CDN_KEY_ID",
    "verb": "delete",
    "cancelRequested": false,
    "apiVersion": "v1"
  },
  "done": false
}
このコマンドは、進行状況を追跡するためにクエリできる長時間実行オペレーション(LRO)を作成します。詳細については、結果を確認するをご覧ください。

C#

このサンプルを試す前に、クライアント ライブラリを使用した Video Stitcher API クイックスタートにある C# の設定手順を実施してください。詳細については、Video Stitcher API C# API リファレンス ドキュメントをご覧ください。

Video Stitcher API への認証を行うには、アプリケーションのデフォルト認証情報を設定します。 詳細については、ローカル開発環境の認証の設定をご覧ください。


using Google.Cloud.Video.Stitcher.V1;
using Google.LongRunning;
using Google.Protobuf.WellKnownTypes;
using System.Threading.Tasks;

public class DeleteCdnKeySample
{
    public async Task DeleteCdnKeyAsync(
        string projectId, string location, string cdnKeyId)
    {
        // Create the client.
        VideoStitcherServiceClient client = VideoStitcherServiceClient.Create();

        DeleteCdnKeyRequest request = new DeleteCdnKeyRequest
        {
            CdnKeyName = CdnKeyName.FromProjectLocationCdnKey(projectId, location, cdnKeyId)
        };

        // Make the request.
        Operation<Empty, OperationMetadata> response = await client.DeleteCdnKeyAsync(request);

        // Poll until the returned long-running operation is complete.
        await response.PollUntilCompletedAsync();
    }
}

Go

このサンプルを試す前に、クライアント ライブラリを使用した Video Stitcher API クイックスタートにある Go の設定手順を実施してください。詳細については、Video Stitcher API Go API リファレンス ドキュメントをご覧ください。

Video Stitcher API への認証を行うには、アプリケーションのデフォルト認証情報を設定します。 詳細については、ローカル開発環境の認証の設定をご覧ください。

import (
	"context"
	"fmt"
	"io"

	stitcher "cloud.google.com/go/video/stitcher/apiv1"
	stitcherstreampb "cloud.google.com/go/video/stitcher/apiv1/stitcherpb"
)

// deleteCDNKey deletes a CDN key.
func deleteCDNKey(w io.Writer, projectID, keyID string) error {
	// projectID := "my-project-id"
	// keyID := "my-cdn-key"
	location := "us-central1"
	ctx := context.Background()
	client, err := stitcher.NewVideoStitcherClient(ctx)
	if err != nil {
		return fmt.Errorf("stitcher.NewVideoStitcherClient: %w", err)
	}
	defer client.Close()

	name := fmt.Sprintf("projects/%s/locations/%s/cdnKeys/%s", projectID, location, keyID)

	req := &stitcherstreampb.DeleteCdnKeyRequest{
		Name: name,
	}
	// Deletes the CDN key.
	op, err := client.DeleteCdnKey(ctx, req)
	if err != nil {
		return fmt.Errorf("client.DeleteCdnKey: %w", err)
	}
	err = op.Wait(ctx)
	if err != nil {
		return err
	}

	fmt.Fprintf(w, "Deleted CDN key")
	return nil
}

Java

このサンプルを試す前に、クライアント ライブラリを使用した Video Stitcher API クイックスタートにある Java の設定手順を実施してください。詳細については、Video Stitcher API Java API リファレンス ドキュメントをご覧ください。

Video Stitcher API への認証を行うには、アプリケーションのデフォルト認証情報を設定します。 詳細については、ローカル開発環境の認証の設定をご覧ください。


import com.google.cloud.video.stitcher.v1.CdnKeyName;
import com.google.cloud.video.stitcher.v1.DeleteCdnKeyRequest;
import com.google.cloud.video.stitcher.v1.VideoStitcherServiceClient;
import java.io.IOException;
import java.util.concurrent.ExecutionException;
import java.util.concurrent.TimeUnit;
import java.util.concurrent.TimeoutException;

public class DeleteCdnKey {

  private static final int TIMEOUT_IN_MINUTES = 2;

  public static void main(String[] args) throws Exception {
    // TODO(developer): Replace these variables before running the sample.
    String projectId = "my-project-id";
    String location = "us-central1";
    String cdnKeyId = "my-cdn-key-id";

    deleteCdnKey(projectId, location, cdnKeyId);
  }

  public static void deleteCdnKey(String projectId, String location, String cdnKeyId)
      throws InterruptedException, ExecutionException, TimeoutException, IOException {
    // Initialize client that will be used to send requests. This client only needs to be created
    // once, and can be reused for multiple requests. After completing all of your requests, call
    // the "close" method on the client to safely clean up any remaining background resources.
    VideoStitcherServiceClient videoStitcherServiceClient = VideoStitcherServiceClient.create();
    DeleteCdnKeyRequest deleteCdnKeyRequest =
        DeleteCdnKeyRequest.newBuilder()
            .setName(CdnKeyName.of(projectId, location, cdnKeyId).toString())
            .build();

    videoStitcherServiceClient
        .deleteCdnKeyAsync(deleteCdnKeyRequest)
        .get(TIMEOUT_IN_MINUTES, TimeUnit.MINUTES);
    System.out.println("Deleted CDN key");
    videoStitcherServiceClient.close();
  }
}

Node.js

このサンプルを試す前に、クライアント ライブラリを使用した Video Stitcher API クイックスタートにある Node.js の設定手順を実施してください。詳細については、Video Stitcher API Node.js API リファレンス ドキュメントをご覧ください。

Video Stitcher API への認証を行うには、アプリケーションのデフォルト認証情報を設定します。 詳細については、ローカル開発環境の認証の設定をご覧ください。

/**
 * TODO(developer): Uncomment these variables before running the sample.
 */
// projectId = 'my-project-id';
// location = 'us-central1';
// cdnKeyId = 'my-cdn-key';

// Imports the Video Stitcher library
const {VideoStitcherServiceClient} =
  require('@google-cloud/video-stitcher').v1;
// Instantiates a client
const stitcherClient = new VideoStitcherServiceClient();

async function deleteCdnKey() {
  // Construct request
  const request = {
    name: stitcherClient.cdnKeyPath(projectId, location, cdnKeyId),
  };
  const [operation] = await stitcherClient.deleteCdnKey(request);
  await operation.promise();
  console.log('Deleted CDN key');
}

deleteCdnKey();

PHP

このサンプルを試す前に、クライアント ライブラリを使用した Video Stitcher API クイックスタートにある PHP の設定手順を実施してください。詳細については、Video Stitcher API PHP API リファレンス ドキュメントをご覧ください。

Video Stitcher API への認証を行うには、アプリケーションのデフォルト認証情報を設定します。 詳細については、ローカル開発環境の認証の設定をご覧ください。

use Google\Cloud\Video\Stitcher\V1\Client\VideoStitcherServiceClient;
use Google\Cloud\Video\Stitcher\V1\DeleteCdnKeyRequest;

/**
 * Deletes a CDN key.
 *
 * @param string $callingProjectId     The project ID to run the API call under
 * @param string $location             The location of the CDN key
 * @param string $cdnKeyId             The ID of the CDN key
 */
function delete_cdn_key(
    string $callingProjectId,
    string $location,
    string $cdnKeyId
): void {
    // Instantiate a client.
    $stitcherClient = new VideoStitcherServiceClient();

    $formattedName = $stitcherClient->cdnKeyName($callingProjectId, $location, $cdnKeyId);
    $request = (new DeleteCdnKeyRequest())
        ->setName($formattedName);
    $operationResponse = $stitcherClient->deleteCdnKey($request);
    $operationResponse->pollUntilComplete();
    if ($operationResponse->operationSucceeded()) {
        // Print status
        printf('Deleted CDN key %s' . PHP_EOL, $cdnKeyId);
    } else {
        $error = $operationResponse->getError();
        // handleError($error)
    }
}

Python

このサンプルを試す前に、クライアント ライブラリを使用した Video Stitcher API クイックスタートにある Python の設定手順を実施してください。詳細については、Video Stitcher API Python API リファレンス ドキュメントをご覧ください。

Video Stitcher API への認証を行うには、アプリケーションのデフォルト認証情報を設定します。 詳細については、ローカル開発環境の認証の設定をご覧ください。


import argparse

from google.cloud.video.stitcher_v1.services.video_stitcher_service import (
    VideoStitcherServiceClient,
)
from google.protobuf import empty_pb2 as empty

def delete_cdn_key(project_id: str, location: str, cdn_key_id: str) -> empty.Empty:
    """Deletes a CDN key.
    Args:
        project_id: The GCP project ID.
        location: The location of the CDN key.
        cdn_key_id: The user-defined CDN key ID."""

    client = VideoStitcherServiceClient()

    name = f"projects/{project_id}/locations/{location}/cdnKeys/{cdn_key_id}"
    operation = client.delete_cdn_key(name=name)
    response = operation.result()
    print("Deleted CDN key")
    return response

Ruby

このサンプルを試す前に、クライアント ライブラリを使用した Video Stitcher API クイックスタートにある Ruby の設定手順を実施してください。詳細については、Video Stitcher API Ruby API リファレンス ドキュメントをご覧ください。

Video Stitcher API への認証を行うには、アプリケーションのデフォルト認証情報を設定します。 詳細については、ローカル開発環境の認証の設定をご覧ください。

require "google/cloud/video/stitcher"

##
# Delete a CDN key
#
# @param project_id [String] Your Google Cloud project (e.g. "my-project")
# @param location [String] The location (e.g. "us-central1")
# @param cdn_key_id [String] Your CDN key name (e.g. "my-cdn-key")
#
def delete_cdn_key project_id:, location:, cdn_key_id:
  # Create a Video Stitcher client.
  client = Google::Cloud::Video::Stitcher.video_stitcher_service

  # Build the resource name of the CDN key.
  name = client.cdn_key_path project: project_id, location: location,
                             cdn_key: cdn_key_id

  # Delete the CDN key.
  operation = client.delete_cdn_key name: name

  # The returned object is of type Gapic::Operation. You can use this
  # object to check the status of an operation, cancel it, or wait
  # for results. Here is how to block until completion:
  operation.wait_until_done!

  # Print a success message.
  puts "Deleted CDN key"
end

認証情報を取り消す

  1. 作成した認証情報を取り消して、ローカル認証情報ファイルを削除します。

    gcloud auth application-default revoke
  2. (省略可)gcloud CLI から認証情報を取り消します。

    gcloud auth revoke

次のステップ

Video Stitcher API のリファレンス ドキュメントを確認する。