Mit Sammlungen den Überblick behalten
Sie können Inhalte basierend auf Ihren Einstellungen speichern und kategorisieren.
Mit der Console Audioinhalte aus Text erstellen
In dieser Kurzanleitung wird die Cloud Text-to-Speech-Konsole vorgestellt. In dieser Kurzanleitung erstellen Sie Audioinhalte aus Text und erfahren, wie Sie diese Audioinhalte für Ihre eigenen Anwendungen wiedergeben, herunterladen und aktualisieren.
Weitere Informationen zu den grundlegenden Konzepten von Text-to-Speech finden Sie unter Grundlagen von Text-to-Speech.
Hinweise
Bevor Sie die Text-to-Speech-Konsole verwenden können, müssen Sie die API in der Google Cloud -Konsole aktivieren. Die unten stehenden Schritte führen Sie durch die folgenden Aktionen:
Text-to-Speech für ein Projekt aktivieren.
Die Abrechnung muss für Text-to-Speech aktiviert sein.
Sie können entweder ein vorhandenes Projekt auswählen oder ein neues erstellen. Weitere Informationen zum Erstellen eines Projekts finden Sie in der Google Cloud Platform-Dokumentation.
Wenn Sie ein neues Projekt erstellen, werden Sie aufgefordert, ein Abrechnungskonto mit diesem Projekt zu verknüpfen. Wenn Sie ein bereits vorhandenes Projekt verwenden, muss die Abrechnung aktiviert sein.
Nachdem Sie ein Projekt ausgewählt und mit einem Rechnungskonto verknüpft haben, können Sie die Text-to-Speech API aktivieren. Öffnen Sie oben auf der Seite die Leiste Produkte und Ressourcen suchen und geben Sie "text-to-speech" ein.
Wählen Sie aus der Liste der Ergebnisse die Cloud Text-to-Speech API aus.
Wenn Sie Text-to-Speech testen möchten, ohne es mit Ihrem Projekt zu verknüpfen, wählen Sie die Option DIESE API TESTEN. Klicken Sie auf AKTIVIEREN, um die Text-to-Speech API für Ihr Projekt zu aktivieren.
Audio aus Text erstellen
So erstellen Sie mit der Google Cloud Console Audioinhalte aus Text:
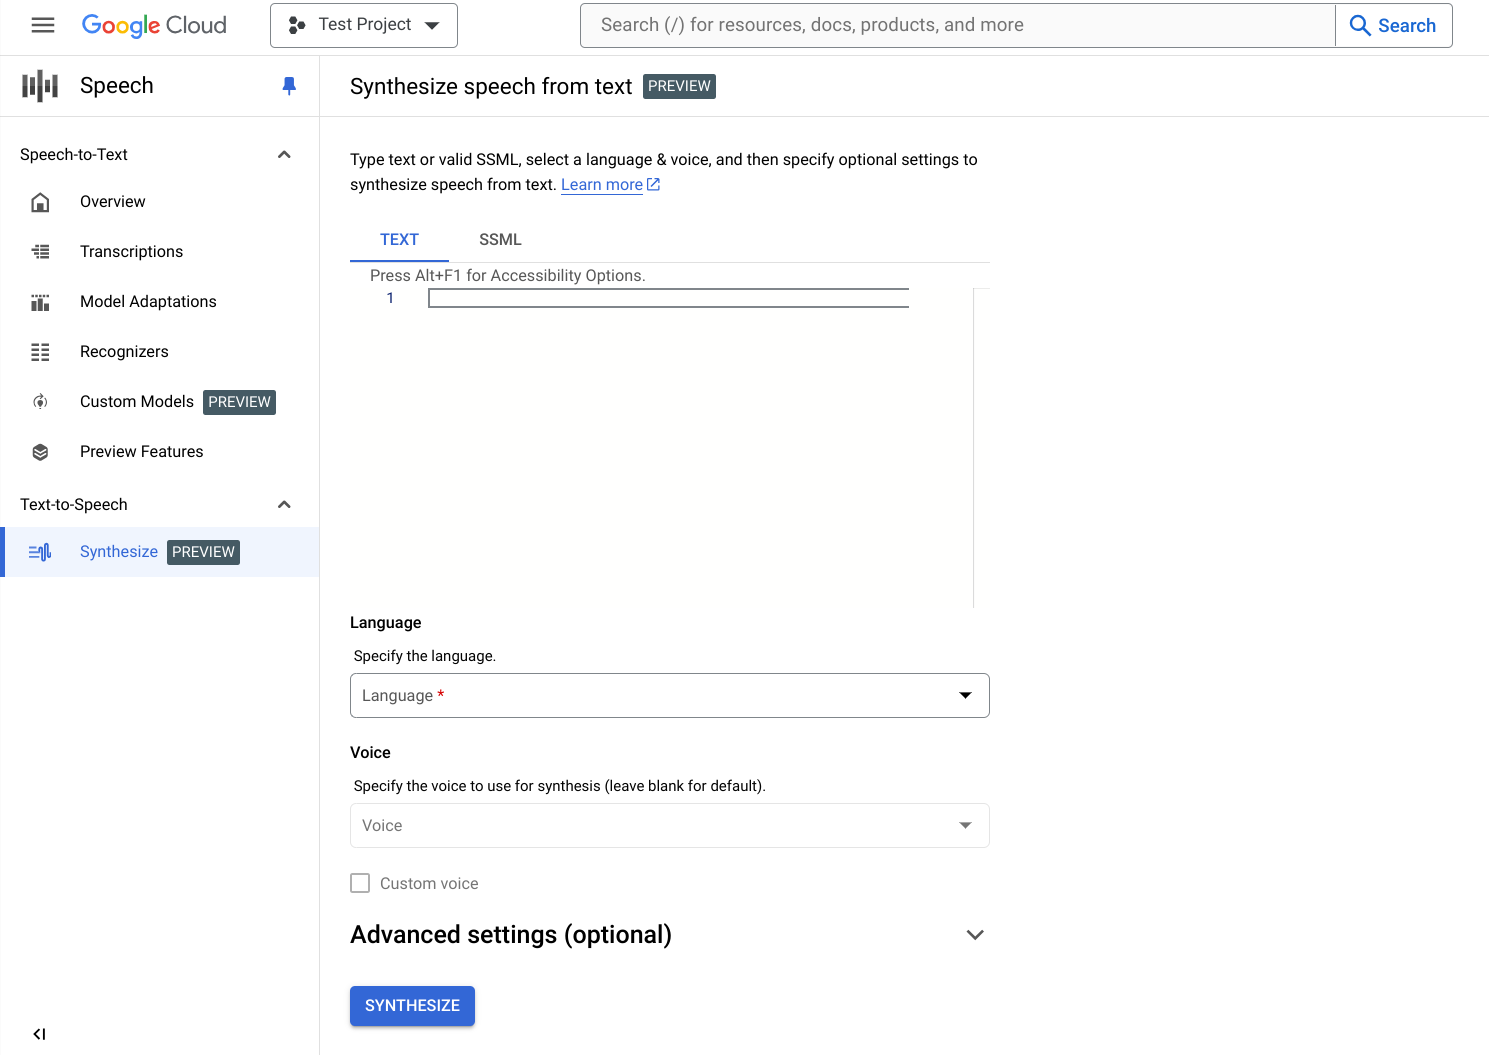
Geben Sie Text oder SSML ein. Sie können entweder Nur-Text-Dateien synthetisieren oder die Speech Synthesis Markup Language (SSML) verwenden, um die Audio-Antwort benutzerdefiniert anzupassen.
Wählen Sie die Sprache für Ihren Text oder Ihre SSML aus. Dies ist die Sprache, die für die Synthese verwendet wird.
Wählen Sie die Stimme aus, die für die Synthese verwendet werden soll. Die Sprachfunktionen, -merkmale und -kosten können variieren.
Erweiterte Einstellungen (optional)
Optional können Sie den Abschnitt Erweiterte Einstellungen maximieren, um weitere Eigenschaften des zu erstellenden Audios zu konfigurieren.
Geben Sie zusätzliche Merkmale der synthetisierten Audioinhalte an, z. B. Sprache und Tonhöhe.
Klicken Sie unten auf Synthetisieren, um die synthetisierten Audioinhalte zu erstellen.
Audio überprüfen
Je nach Eingabe kann es Sekunden bis Minuten dauern, bis die synthetische Audioausgabe erstellt ist. Nachdem die Audioinhalte erstellt wurden, kann sie überprüft werden.
Klicken Sie auf die Player-Steuerelemente, um das Audio abzuspielen.
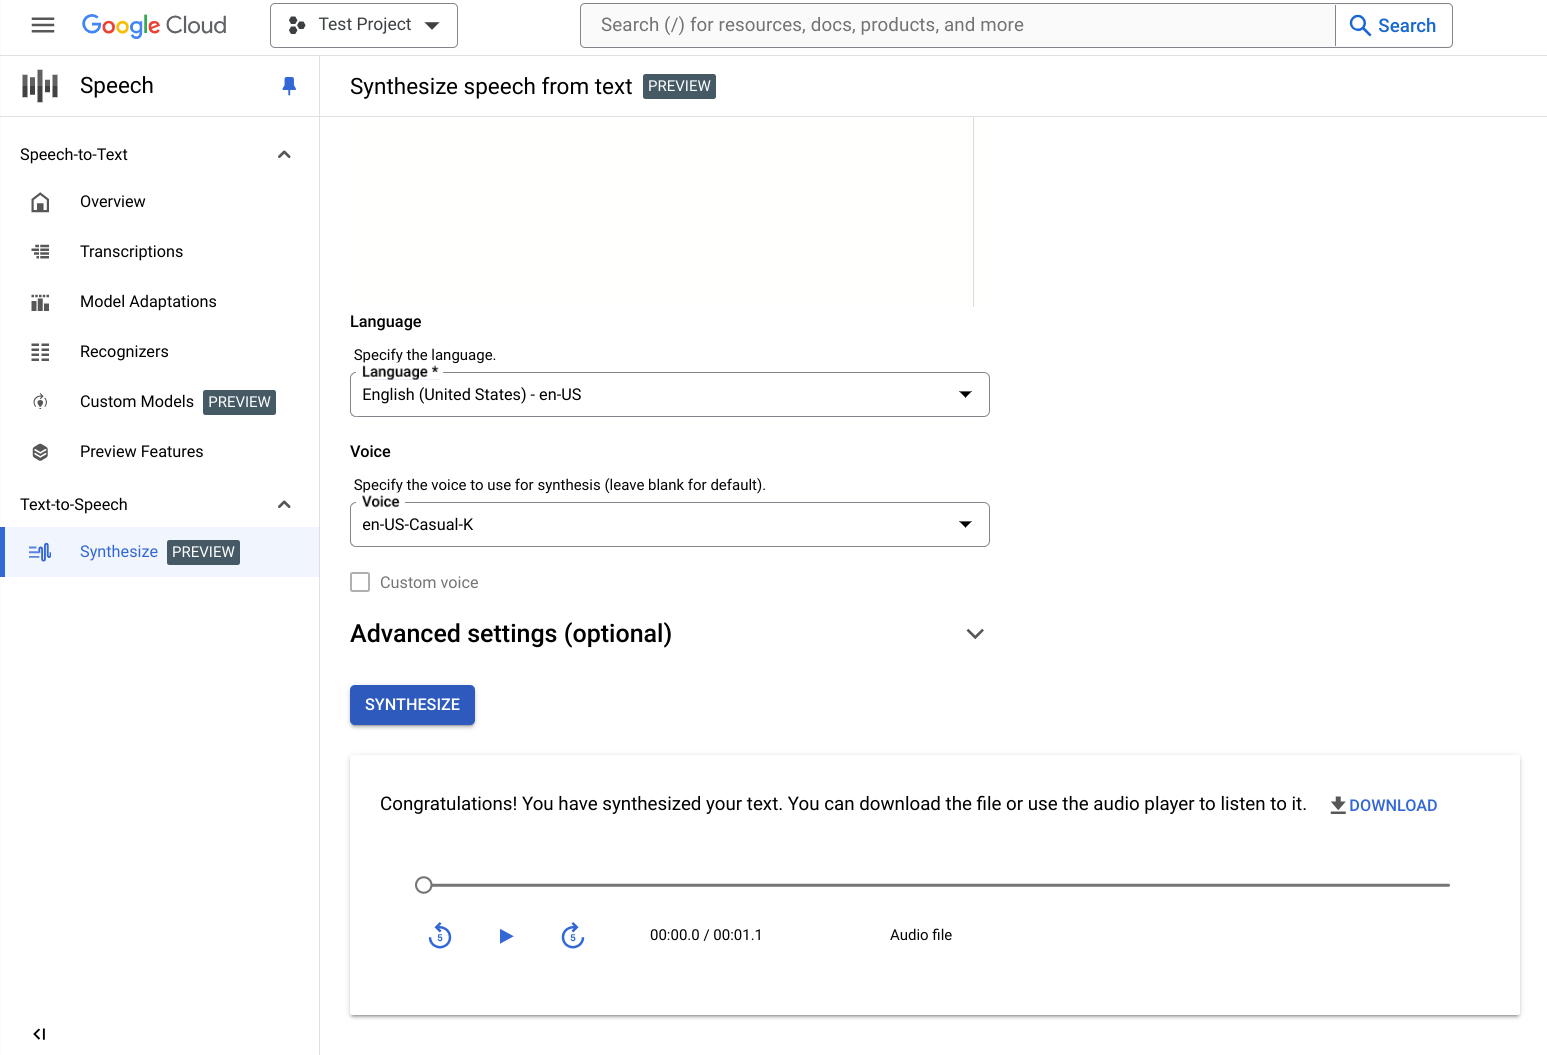
Klicken Sie auf Herunterladen, um die Audiodatei lokal herunterzuladen.
Bereinigen
Löschen Sie das Projekt mit Google Cloud console , wenn Sie es nicht benötigen, um unnötige Google Cloud Kosten zu vermeiden.
[[["Leicht verständlich","easyToUnderstand","thumb-up"],["Mein Problem wurde gelöst","solvedMyProblem","thumb-up"],["Sonstiges","otherUp","thumb-up"]],[["Schwer verständlich","hardToUnderstand","thumb-down"],["Informationen oder Beispielcode falsch","incorrectInformationOrSampleCode","thumb-down"],["Benötigte Informationen/Beispiele nicht gefunden","missingTheInformationSamplesINeed","thumb-down"],["Problem mit der Übersetzung","translationIssue","thumb-down"],["Sonstiges","otherDown","thumb-down"]],["Zuletzt aktualisiert: 2025-09-04 (UTC)."],[],[],null,["# Quickstart: Create audio from text by using the Google Cloud console\n\nCreate audio from text by using the console\n===========================================\n\n|\n| **Preview**\n|\n|\n| This product or feature is subject to the \"Pre-GA Offerings Terms\" in the General Service Terms section\n| of the [Service Specific Terms](/terms/service-terms#1).\n|\n| Pre-GA products and features are available \"as is\" and might have limited support.\n|\n| For more information, see the\n| [launch stage descriptions](/products#product-launch-stages).\n\nThis quickstart introduces you to the\n[Cloud\nText-to-Speech Console](https://console.cloud.google.com/speech/text-to-speech/). In this quickstart, you will create audio from\ntext and learn how to playback, download, and update this audio for your own\napplications.\n\nTo learn more about the fundamental concepts in Text-to-Speech, read\n[Text-to-Speech Basics](/text-to-speech/docs/basics).\n\nBefore you begin\n----------------\n\nBefore you can begin using the Text-to-Speech console, you must enable the\nAPI in the Google Cloud console. The steps below walk you through the following\nactions:\n\n- Enable Text-to-Speech on a project.\n- Make sure billing is enabled for Text-to-Speech.\n\n### Set up your Google Cloud project\n\n1. [Sign\n in to the Google Cloud console](https://console.cloud.google.com/)\n\n2. [Go\n to the project selector page](https://console.cloud.google.com/projectselector2/home/dashboard)\n\n You can either choose an existing project or create a new one. For more\n details about creating a project, see\n [Google\n Cloud Platform documentation](/resource-manager/docs/creating-managing-projects).\n3. If you create a new project, you will be prompted to link a billing account\n to this project. If you are using a pre-existing project, make sure that you\n have billing enabled.\n\n [Learn\n how to confirm that billing is enabled for your project](/billing/docs/how-to/modify-project)\n | **Note:** You must enable billing to use Text-to-Speech API, however you will not be charged unless you exceed the free quota. See the [pricing](/text-to-speech/pricing) page for more details.\n4. Once you have selected a project and linked it to a billing account, you can\n enable the Text-to-Speech API. Go to the **Search products and resources** bar\n at the top of the page and type in **\"text-to-speech\"**.\n\n5. Select the **Cloud Text-to-Speech API** from the list of results.\n\n6. To try Text-to-Speech without linking it to your project, choose the\n **TRY THIS API** option. To enable the Text-to-Speech API for use with your\n project, click **ENABLE**.\n\nCreate Audio from Text\n----------------------\n\nUse the Google Cloud console to create audio from text:\n\n### Enter Text or SSML\n\n1. Open the\n [**Text-to-Speech**\n Synthesize](https://console.cloud.google.com/speech/text-to-speech) page.\n\n \u003cbr /\u003e\n\n2. Enter your **Text or SSML** . You can synthesize either plain text or use\n [Speech Synthesis Markup Language (SSML)](https://www.w3.org/TR/speech-synthesis/)\n to allow for more customization in your audio response.\n\n3. Select the **language** of your text or SSML. This is the language that will\n be used for synthesis.\n\n4. Select the **voice** that you want to use for synthesis. Note that voice\n features, characteristics, and costs vary.\n\n### Advanced settings (optional)\n\n1. Optionally, expand the **Advanced settings** section to configure more\n properties of the audio you will create.\n\n2. Specify additional characteristics of your synthesized audio such as\n **speed** and **pitch**.\n\n \u003cbr /\u003e\n\n3. At the bottom, click **Synthesize** to create your synthesized audio.\n\n### Review your audio\n\nDepending on your input, the synthesized audio may take from seconds to minutes\nto create. Once your audio has been created, it's ready for review.\n\n1. Click on the player controls to play the audio.\n\n \u003cbr /\u003e\n\n2. Click on **Download** to download the audio file locally.\n\nClean up\n--------\n\nTo avoid unnecessary Google Cloud charges, use the [Google Cloud console](https://console.cloud.google.com/) to\ndelete your project if you do not need it.\n\nWhat's next\n-----------\n\n\n- Learn more about Cloud Text-to-Speech by reading the [basics](/text-to-speech/docs/basics).\n- Review the list of [available voices](/text-to-speech/docs/voices) you can use for synthetic speech.\n\n\u003cbr /\u003e"]]