Configurer la validation des points de terminaison sur vos appareils
Ce document de démarrage rapide vous explique comment configurer la validation des points de terminaison sur vos appareils pour comprendre leur état de sécurité.
Avant de commencer
- Vous devez disposer d'un compte administrateur Google Workspace disposant du droit Paramètres du service.
-
Connectez-vous à la console d'administration Google à l'aide de votre compte administrateur Google Workspace.
Vous devez disposer d'une unité organisationnelle avec au moins un appareil exécutant l'un des systèmes d'exploitation suivants:
- ChromeOS
- Apple® Mac® OS X® El Capitan (10.11) ou version ultérieure
- Microsoft® Windows® 10 et 11
- Linux® Debian® et Ubuntu®
- Vous devez utiliser Chrome 110 ou une version ultérieure. Bien que vous puissiez installer Endpoint Verification sur n'importe quel navigateur Chromium, il n'est compatible qu'avec le navigateur Chrome.
Activer la validation des points de terminaison
Pour collecter des informations sur les appareils accédant aux ressources de votre organisation, la validation des points de terminaison doit être activée pour votre unité organisationnelle. Par défaut, Endpoint Verification est activé.
Pour vérifier si la validation des points de terminaison est activée, procédez comme suit:
-
Sur la page d'accueil de la console d'administration, accédez à Appareils.
- Dans le menu de navigation, cliquez sur Mobiles et points de terminaison > Paramètres > Paramètres universels.
- Cliquez sur Accès aux données > Validation des points de terminaison.
- Dans le volet Unités organisationnelles, sélectionnez votre unité organisationnelle.
- Assurez-vous que la case Déterminer les appareils ayant accès aux données de l'organisation est cochée.
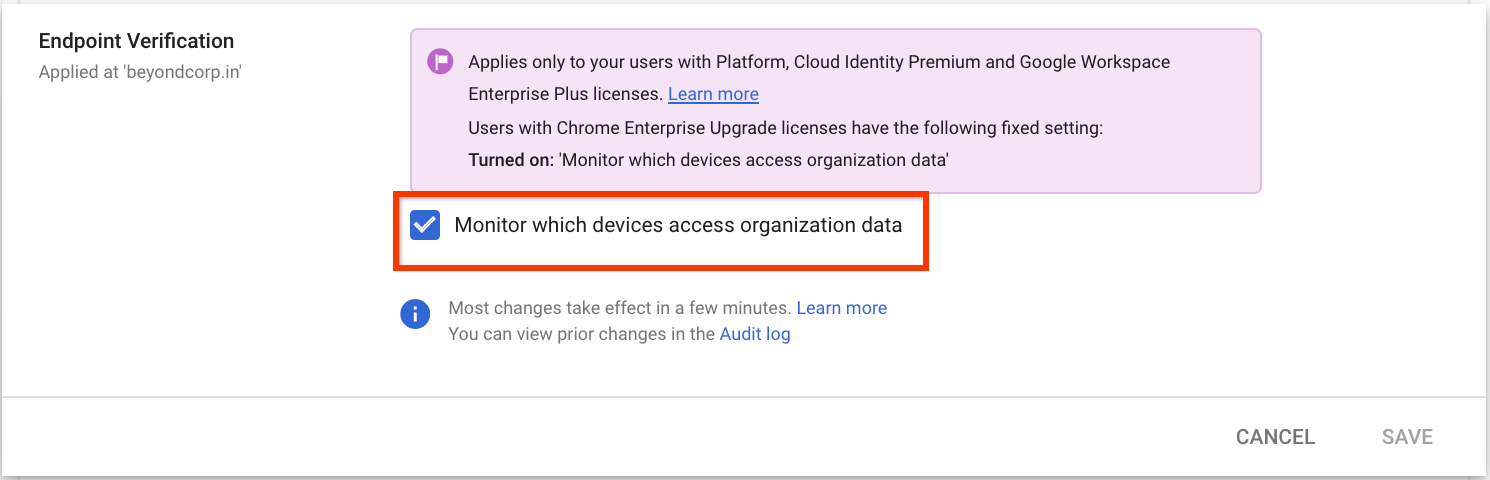
- Cliquez sur Enregistrer. Si vous avez configuré une unité organisationnelle enfant, vous pourrez peut-être hériter des paramètres d'une unité organisationnelle parente ou les remplacer.
Installer Endpoint Verification sur vos appareils
-
Sur la page d'accueil de la console d'administration, accédez à Appareils.
- Dans le menu de navigation, cliquez sur Chrome > Applications et extensions > Utilisateurs et navigateurs.
- Dans le volet Unités organisationnelles, sélectionnez l'unité organisationnelle pour laquelle vous souhaitez installer l'extension de validation des points de terminaison.
Pointez sur Ajouter, puis cliquez sur Ajouter à partir du Chrome Web Store.
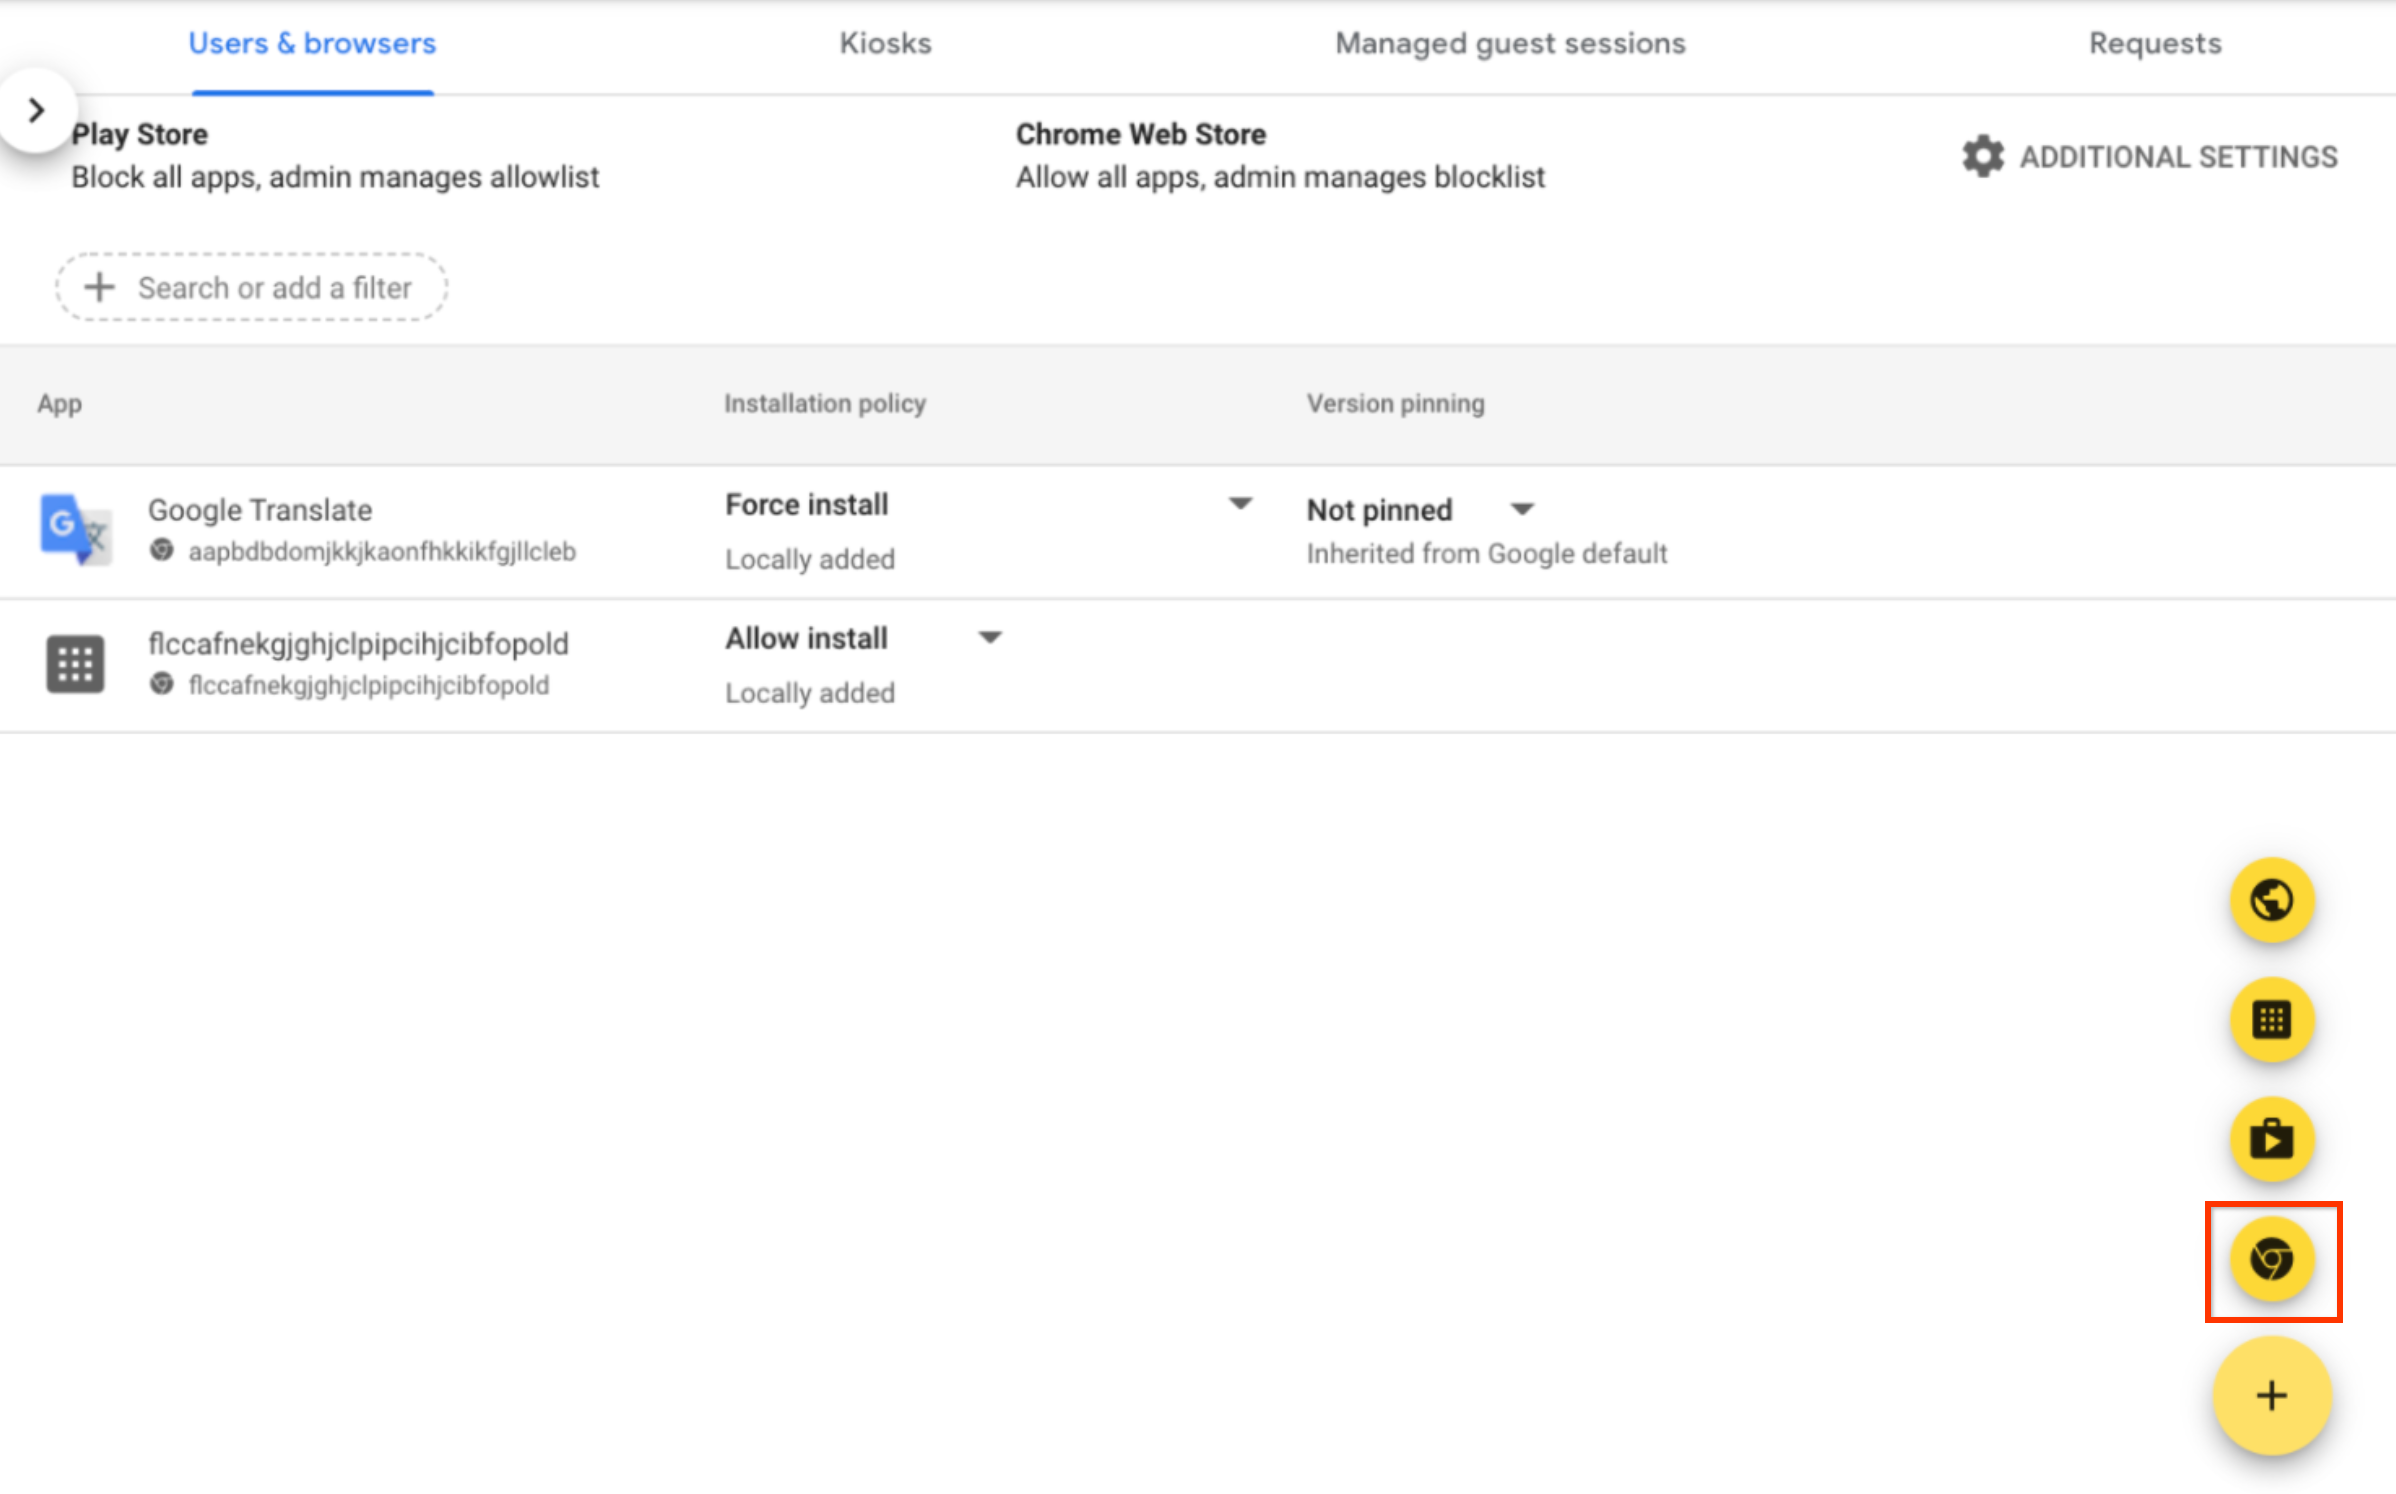
- Dans le champ Rechercher dans la boutique, saisissez Endpoint Verification.
- Cliquez sur Validation des points de terminaison, puis sur Sélectionner.
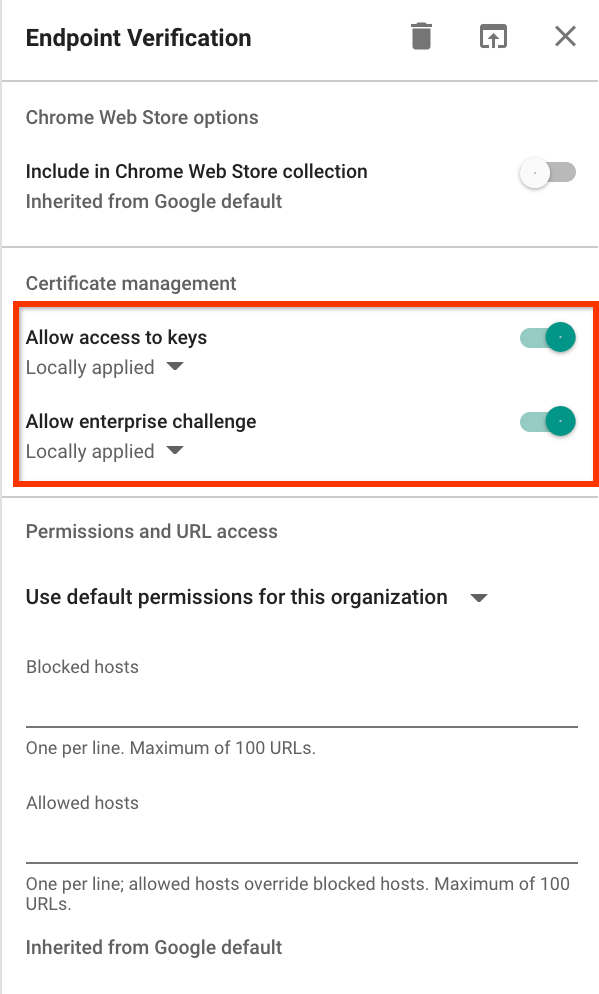
- Dans la boîte de dialogue Endpoint Verification (Validation des points de terminaison), assurez-vous que les options Allow access to keys (Autoriser l'accès aux clés) et Allow enterprise challenge (Autoriser la demande des clés d'entreprise) sont activées.
- Autoriser l'accès aux clés: permet à l'extension Endpoint Verification d'accéder aux certificats client et aux clés sur ChromeOS.
- Autoriser la demande d'entreprise: permet à l'extension Endpoint Verification d'utiliser la fonctionnalité d'accès validé sur ChromeOS. Pour en savoir plus, consultez la page Présentation de l'accès authentifié Chrome.
Cliquez sur la liste déroulante Règles d'installation pour Endpoint Verification, puis sélectionnez Forcer l'installation.
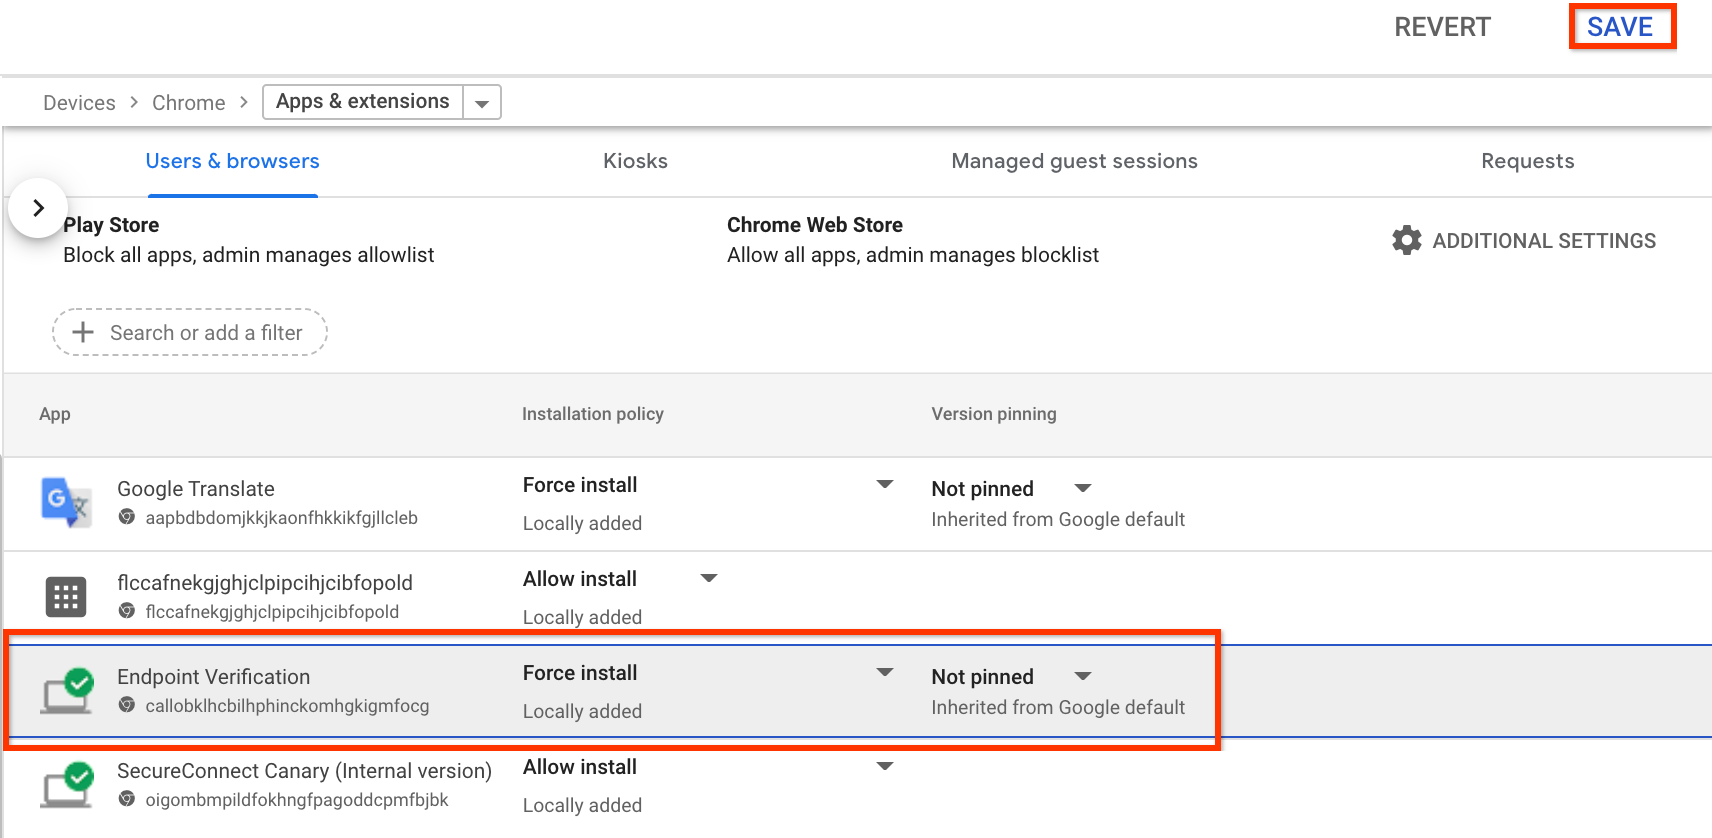
- Cliquez sur Enregistrer.
Afficher les informations sur vos appareils
- Sur la page d'accueil de la console d'administration, accédez à Appareils > Vue d'ensemble.
-
Cliquez sur Points de terminaison.
La liste des appareils de votre organisation s'affiche.
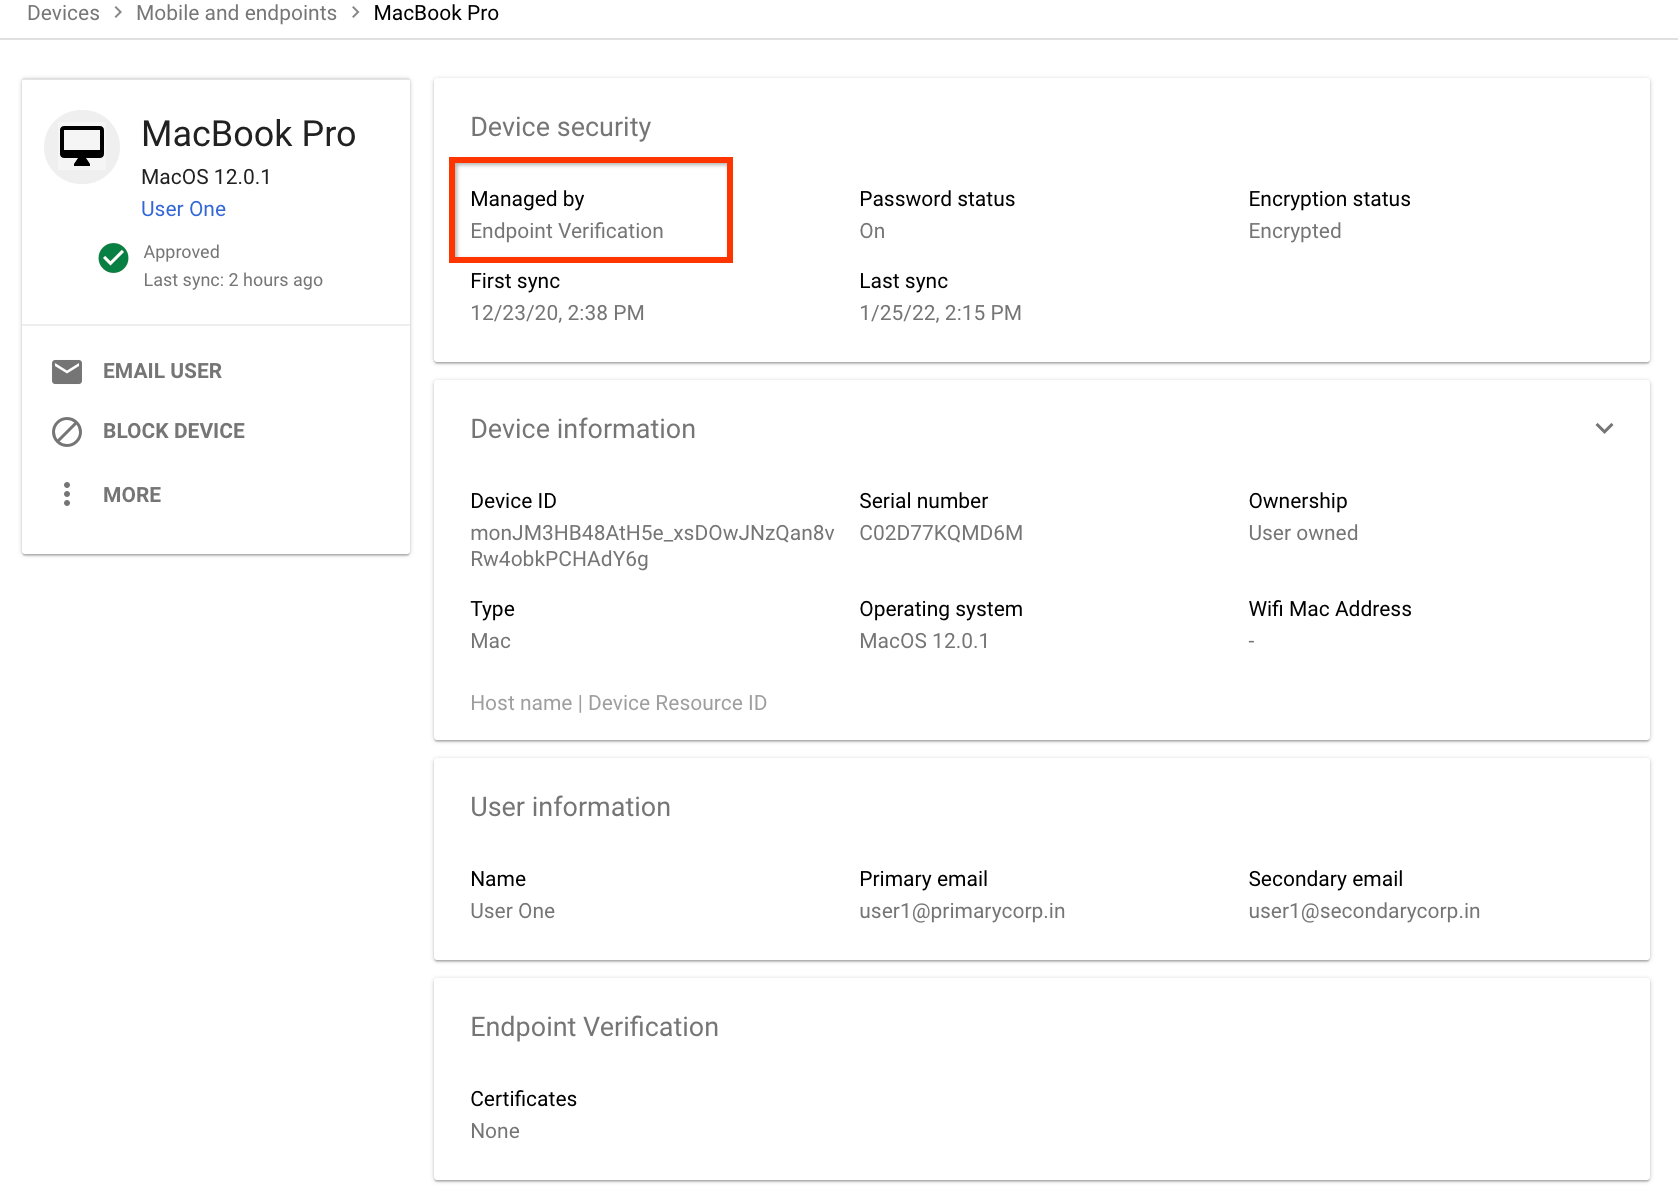
Pour obtenir plus d'informations sur un appareil, cliquez dessus. Les informations de l'appareil s'affichent pour cet appareil spécifique.
Les informations sur l'appareil indiquent qu'il est géré par Endpoint Verification.
Effectuer un nettoyage
Si vous ne souhaitez pas que Endpoint Verification gère vos appareils, procédez comme suit:
-
Sur la page d'accueil de la console d'administration, accédez à Appareils.
- Dans le menu de navigation, cliquez sur Mobiles et points de terminaison > Paramètres > Paramètres universels.
- Cliquez sur Accès aux données > Validation des points de terminaison.
- Dans le volet Unités organisationnelles, sélectionnez votre unité organisationnelle.
- Décochez la case Surveiller les appareils qui accèdent aux données de l'organisation.
- Cliquez sur Enregistrer.