Mantenha tudo organizado com as coleções
Salve e categorize o conteúdo com base nas suas preferências.
Criar e executar um build em um pool particular
Nesta página, explicamos como criar um pool particular do Cloud Build conectado
à rede do produtor de serviços e como executar uma versão no pool particular.
A rede do produtor de serviços é a rede que hospeda o pool particular.
Por padrão, um pool particular é configurado para usar a rede do produtor de serviços, que fornece um ambiente de build com:
Tipos de máquina configuráveis
Tamanhos de disco configuráveis
Acesso a recursos na Internet pública, como recursos em um repositório ou registro
Para seguir as instruções da tarefa diretamente no editor do
Cloud Shell, clique em Orientação:
Sign in to your Google Cloud account. If you're new to
Google Cloud,
create an account to evaluate how our products perform in
real-world scenarios. New customers also get $300 in free credits to
run, test, and deploy workloads.
In the Google Cloud console, on the project selector page,
select or create a Google Cloud project.
No painel Criar pool particular, insira as seguintes configurações:
No campo Nome, digite
my-first-privatepool.
No campo Região, selecione us-central1.
No campo Tipo de máquina, selecione e2-standard-2.
No campo Tamanho do disco disponível, digite 800.
Deixe o campo Número do projeto de rede em branco.
Deixe o campo Rede em branco.
Verifique se a opção Atribuir IPs externos está selecionada.
Clique em Criar para criar o pool particular.
Aguarde um pouco para que o pool particular seja criado. Depois que o pool particular é criado, ele é listado na guia Pool de workers.
Executar um build em um pool particular
Abra uma janela de terminal.
Crie um novo diretório chamado quickstart-private-pool e navegue até ele:
mkdir quickstart-private-pool
cd quickstart-private-pool
Crie um arquivo chamado cloudbuild.yaml com o seguinte conteúdo:
steps:
- name: "bash"
script: echo "I am running in a private pool!"
options:
pool:
name: "projects/$PROJECT_ID/locations/us-central1/workerPools/my-first-privatepool"
Inicie a compilação usando o arquivo de configuração da compilação:
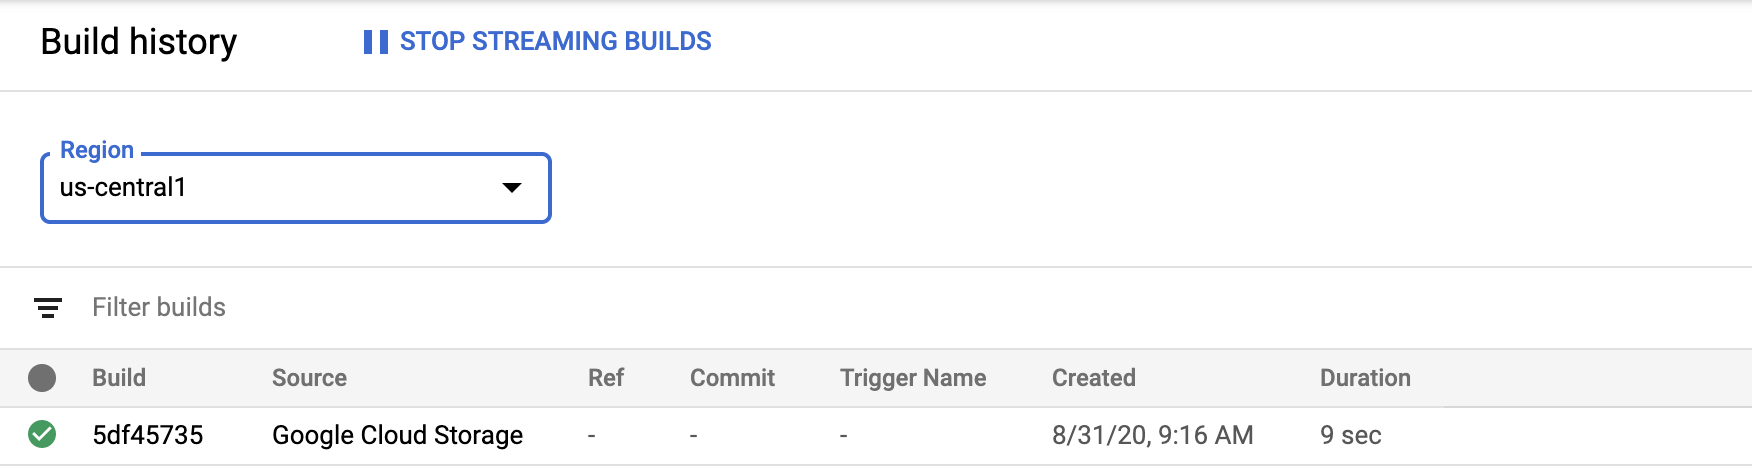
gcloudbuildssubmit
Quando o build for concluído, você verá um resultado semelhante a este:
I am running in a private pool!PUSHDONE------------------------------------------------------------------------------------------------------------------------------------------------------------------------------------------------------------ID CREATE_TIME DURATION SOURCE IMAGES STATUS5df45735-6414-40b7-9e10-e6d2023c8cea 2020-08-31T13:16:18+00:00 10S gs://private-pool-test_cloudbuild/source/1598879777.206444- 58901ecbd14e431f8cdacc85d5dd0fc3.tgz - SUCCESS
Ver detalhes do build
Abra a página Histórico do build no console do Google Cloud .
Na linha do pool particular, clique no ícone da lixeira.
Na caixa pop-up Excluir pool particular?, clique em Excluir.
O pool particular que você criou como parte deste guia de início rápido foi excluído.
Observação: pode ser necessário atualizar a tela para excluir o pool particular da página
Pool de workers.
[[["Fácil de entender","easyToUnderstand","thumb-up"],["Meu problema foi resolvido","solvedMyProblem","thumb-up"],["Outro","otherUp","thumb-up"]],[["Difícil de entender","hardToUnderstand","thumb-down"],["Informações incorretas ou exemplo de código","incorrectInformationOrSampleCode","thumb-down"],["Não contém as informações/amostras de que eu preciso","missingTheInformationSamplesINeed","thumb-down"],["Problema na tradução","translationIssue","thumb-down"],["Outro","otherDown","thumb-down"]],["Última atualização 2025-09-04 UTC."],[[["\u003cp\u003eThis guide details the process of creating a Cloud Build private pool, which is hosted on the service producer network, offering configurable machine types, disk sizes, and access to public internet resources.\u003c/p\u003e\n"],["\u003cp\u003eYou can create a private pool by navigating to the Cloud Build Worker pool tab in the Google Cloud console, specifying settings like name, region, machine type, and disk size.\u003c/p\u003e\n"],["\u003cp\u003eTo run a build in the private pool, you need to create a \u003ccode\u003ecloudbuild.yaml\u003c/code\u003e file specifying the pool name, and then initiate the build using the \u003ccode\u003egcloud builds submit\u003c/code\u003e command.\u003c/p\u003e\n"],["\u003cp\u003eAfter running a build, you can view the build details, including the build summary and artifacts, by navigating to the Build history page in the Google Cloud console and selecting the appropriate region.\u003c/p\u003e\n"],["\u003cp\u003eTo avoid charges, you should delete the private pool by clicking the trash icon next to it in the Worker Pool page, and confirming the action.\u003c/p\u003e\n"]]],[],null,["# Quickstart: Create and run a build in a private pool\n\nCreate and run a build in a private pool\n========================================\n\nThis page explains how to create a Cloud Build private pool connected\nto the service producer network, and run a build in the private pool.\n\nThe service producer network is the network that hosts the private pool.\nBy default, a private pool is set up to use the service producer network,\nwhich provides a build environment with:\n\n- Configurable machine types\n- Configurable disk sizes\n- Access to resources in the public internet, such as resources in a repository or a registry\n\n*** ** * ** ***\n\nTo follow step-by-step guidance for this task directly in the\nCloud Shell Editor, click **Guide me**:\n\n[Guide me](https://console.cloud.google.com/freetrial?redirectPath=/getting-started?walkthrough_tutorial_id=build__quickstart-private-pools)\n\n*** ** * ** ***\n\nBefore you begin\n----------------\n\n- Sign in to your Google Cloud account. If you're new to Google Cloud, [create an account](https://console.cloud.google.com/freetrial) to evaluate how our products perform in real-world scenarios. New customers also get $300 in free credits to run, test, and deploy workloads.\n- In the Google Cloud console, on the project selector page,\n select or create a Google Cloud project.\n\n | **Note**: If you don't plan to keep the resources that you create in this procedure, create a project instead of selecting an existing project. After you finish these steps, you can delete the project, removing all resources associated with the project.\n\n [Go to project selector](https://console.cloud.google.com/projectselector2/home/dashboard)\n-\n [Verify that billing is enabled for your Google Cloud project](/billing/docs/how-to/verify-billing-enabled#confirm_billing_is_enabled_on_a_project).\n\n-\n\n\n Enable the Cloud Build API.\n\n\n [Enable the API](https://console.cloud.google.com/flows/enableapi?apiid=cloudbuild.googleapis.com&redirect=https://cloud.google.com/cloud-build/docs/quickstart-private-pools)\n-\n [Install](/sdk/docs/install) the Google Cloud CLI.\n\n- If you're using an external identity provider (IdP), you must first\n [sign in to the gcloud CLI with your federated identity](/iam/docs/workforce-log-in-gcloud).\n\n-\n To [initialize](/sdk/docs/initializing) the gcloud CLI, run the following command:\n\n ```bash\n gcloud init\n ```\n\n- In the Google Cloud console, on the project selector page,\n select or create a Google Cloud project.\n\n | **Note**: If you don't plan to keep the resources that you create in this procedure, create a project instead of selecting an existing project. After you finish these steps, you can delete the project, removing all resources associated with the project.\n\n [Go to project selector](https://console.cloud.google.com/projectselector2/home/dashboard)\n-\n [Verify that billing is enabled for your Google Cloud project](/billing/docs/how-to/verify-billing-enabled#confirm_billing_is_enabled_on_a_project).\n\n-\n\n\n Enable the Cloud Build API.\n\n\n [Enable the API](https://console.cloud.google.com/flows/enableapi?apiid=cloudbuild.googleapis.com&redirect=https://cloud.google.com/cloud-build/docs/quickstart-private-pools)\n-\n [Install](/sdk/docs/install) the Google Cloud CLI.\n\n- If you're using an external identity provider (IdP), you must first\n [sign in to the gcloud CLI with your federated identity](/iam/docs/workforce-log-in-gcloud).\n\n-\n To [initialize](/sdk/docs/initializing) the gcloud CLI, run the following command:\n\n ```bash\n gcloud init\n ```\n\n| If you've already installed Google Cloud CLI previously, make sure you have the\n| latest available version by running `gcloud components update`.\n\nCreate a private pool\n---------------------\n\n1. In the Google Cloud console, open the **Cloud Build Worker pool** tab:\n\n [Open the Cloud Build worker pool tab](https://console.cloud.google.com/cloud-build/settings/worker-pool)\n2. Click **Create**.\n\n3. In the **Create private pool** panel, enter the following settings:\n\n 1. In the **Name** field, enter\n `my-first-privatepool`.\n\n 2. In the **Region** field, select `us-central1`.\n\n 3. In the **Machine type** field, select `e2-standard-2`.\n\n 4. In the **Available disk size** field, enter `800`.\n\n 5. Leave the **Network project number** field blank.\n\n 6. Leave the **Network** field blank.\n\n 7. Make sure **Assign external IPs** is selected.\n\nClick **Create** to create the private pool.\n\nAllow a short time for the private pool to be created. After the private pool\nis created, it is listed on the **Worker pool** tab.\n\n\u003cbr /\u003e\n\nRun a build in a private pool\n-----------------------------\n\n1. Open a terminal window.\n\n2. Create a new directory named `quickstart-private-pool` and navigate into it:\n\n mkdir quickstart-private-pool\n cd quickstart-private-pool\n\n3. Create a file named `cloudbuild.yaml` with the following contents:\n\n steps:\n - name: \"bash\"\n script: echo \"I am running in a private pool!\"\n options:\n pool:\n name: \"projects/$PROJECT_ID/locations/us-central1/workerPools/my-first-privatepool\"\n\n4. Start the build using the build config file:\n\n gcloud builds submit\n\nWhen the build is complete, you'll see an output similar to the following: \n\n I am running in a private pool!\n PUSH\n DONE\n ------------------------------------------------------------------------------------------------------------------------------------ ------------------------------------------------------------------------\n\n ID CREATE_TIME DURATION SOURCE IMAGES STATUS\n 5df45735-6414-40b7-9e10-e6d2023c8cea 2020-08-31T13:16:18+00:00 10S gs://private-pool-test_cloudbuild/source/1598879777.206444- 58901ecbd14e431f8cdacc85d5dd0fc3.tgz - SUCCESS\n\nView build details\n------------------\n\n1. Open the **Build history** page in the Google Cloud console.\n\n [Open the Cloud Build page](https://console.cloud.google.com/cloud-build)\n2. In the **Region** drop-down box, select **us-central1**.\n\n You will see the build that you ran in the private pool.\n3. Click on the build to view the build details, such as build summary and artifacts.\n\nClean up\n--------\n\n\nTo avoid incurring charges to your Google Cloud account for\nthe resources used on this page, follow these steps.\n\n1. Open the **Worker pool** page in the Google Cloud console:\n\n [Open the Cloud Build private pool page](https://console.cloud.google.com/cloud-build/settings/worker-pool)\n2. In the row with your private pool, click the trash icon.\n\n3. In the **Delete private pool?** pop-up box, click **Delete**.\n\nThe private pool that you created as part of this quickstart is now deleted.\nYou might need to refresh your screen to delete the private pool from the\n**Worker pool** page.\n\nWhat's next\n-----------\n\n- Learn how to [create a private VPC peering connection](/build/docs/private-pools/set-up-private-pool-environment#setup-private-connection).\n- Learn more about [private pools](/build/docs/private-pools/private-pools-overview)."]]