Antes de começar
Antes de começar a usar o Cloud Workstations, verifique se você tem as permissões necessárias e conclua estas etapas de configuração obrigatórias:
- Sign in to your Google Cloud account. If you're new to Google Cloud, create an account to evaluate how our products perform in real-world scenarios. New customers also get $300 in free credits to run, test, and deploy workloads.
-
In the Google Cloud console, on the project selector page, select or create a Google Cloud project.
Roles required to select or create a project
- Select a project: Selecting a project doesn't require a specific IAM role—you can select any project that you've been granted a role on.
-
Create a project: To create a project, you need the Project Creator
(
roles/resourcemanager.projectCreator), which contains theresourcemanager.projects.createpermission. Learn how to grant roles.
-
Verify that billing is enabled for your Google Cloud project.
-
Enable the Cloud Workstations API.
Roles required to enable APIs
To enable APIs, you need the Service Usage Admin IAM role (
roles/serviceusage.serviceUsageAdmin), which contains theserviceusage.services.enablepermission. Learn how to grant roles. -
Se você for administrador, verifique se tem o papel do IAM Administrador do Cloud Workstations no projeto para criar configurações de estação de trabalho.
Se você for um desenvolvedor e não tiver configurações de estação de trabalho disponíveis no consoleGoogle Cloud , peça ao administrador do Cloud Workstations da sua organização para criar uma configuração de estação de trabalho para você ou verifique se você tem uma função do IAM de administrador do Cloud Workstations no projeto para poder criar esses recursos por conta própria. Para verificar seus papéis do IAM, acesse a página do IAM no console do Google Cloud :
Encontre sua chave de licença do Posit Workbench e deixe-a por perto, porque você vai precisar dela em uma etapa posterior. Se você precisar de uma chave de licença do Posit Workbench, entre em contato com seu representante de sucesso do cliente da Posit ou envie um e-mail para sales@posit.co.
Siga as instruções para criar uma configuração de estação de trabalho.
Na etapa Personalização do ambiente, selecione Editores de código em imagens de base.
No menu Editores de código, selecione Posit Workbench (incluindo RStudio Pro) fornecido por terceiros.
Clique na seta arrow_drop_downde expansão na seção Opções avançadas de contêiner.
Acesse a seção Variáveis de ambiente e clique em Adicionar variável.
Insira
RSW_LICENSEno campo Chave e cole sua chave de licença do Posit Workbench no campo Valor.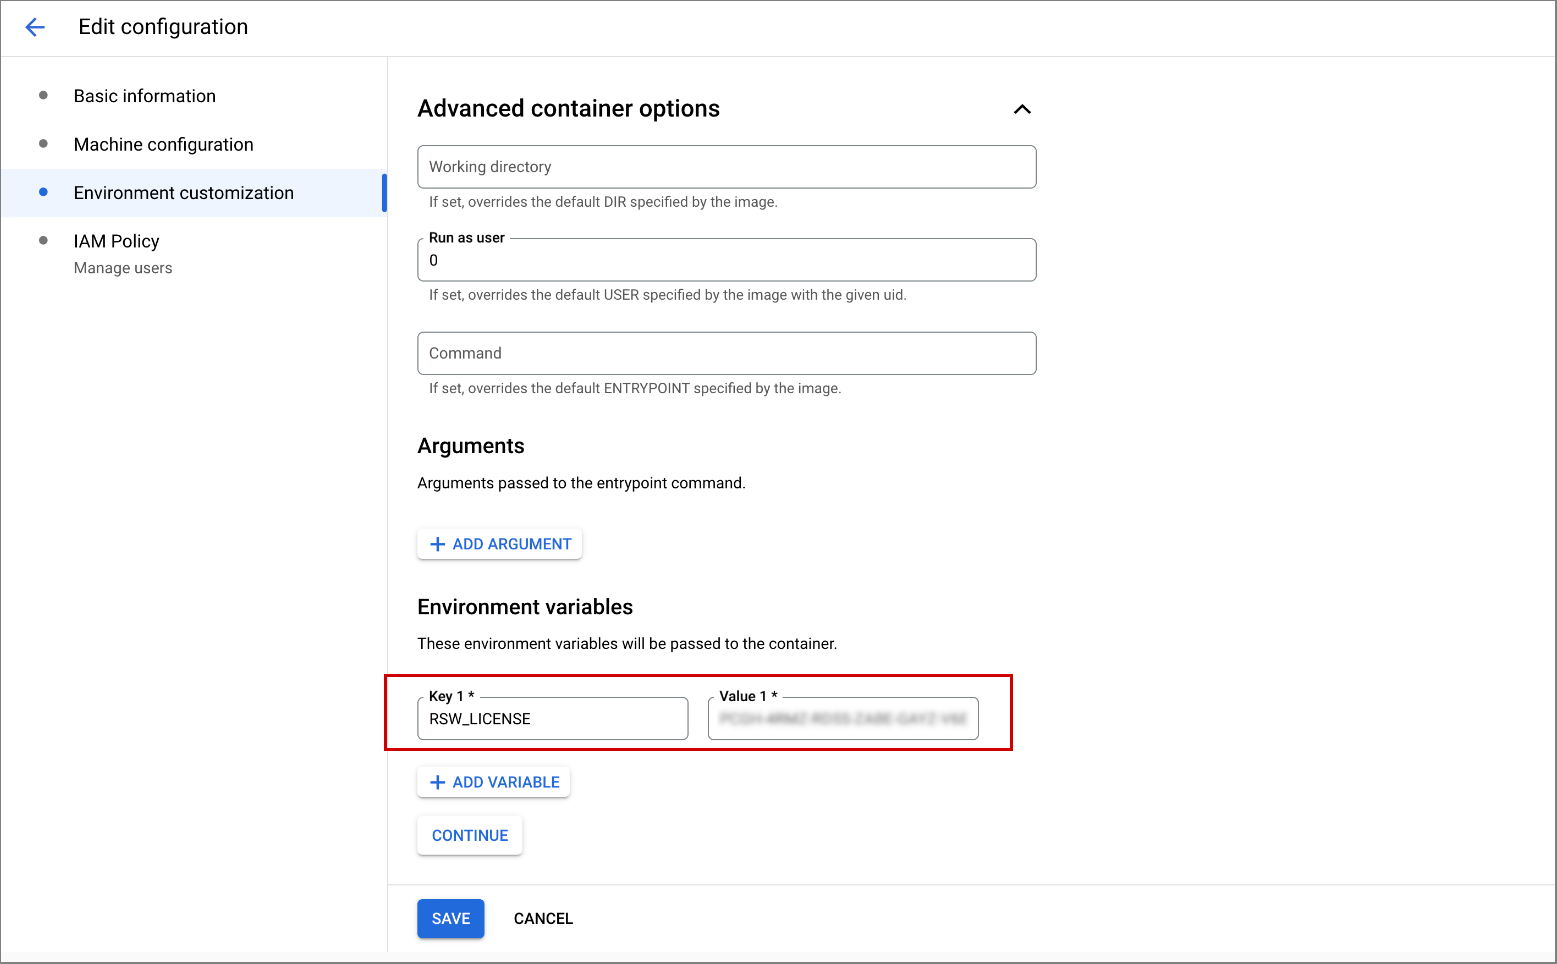
Clique em Continuar.
Na etapa Adicionar usuários, conceda aos desenvolvedores permissões de acesso do IAM do Cloud Workstations à configuração da estação de trabalho.
Para criar a configuração da estação de trabalho e adicionar esses usuários, clique em Criar.
Se você também optou por criar um novo cluster, a criação do cluster pode levar até 20 minutos.
Os desenvolvedores da sua equipe agora podem criar estações de trabalho com o Posit Workbench.
No Google Cloud console, navegue até a página Cloud Workstations > Workstations.
Clique em add_boxCriar.
O link Criar poderá ser desativado se não houver configurações no projeto ou se você não tiver permissões para visualizá-las. Peça ao administrador do Cloud Workstations da organização para criar uma configuração de estação de trabalho para você.
Insira o Nome da estação de trabalho.
Siga as convenções de nomenclatura de recursos do Compute Engine e escolha um nome exclusivo no cluster de estações de trabalho.
Clique na seta arrow_drop_downde expansão no campo Configuração e selecione a configuração da estação de trabalho Posit Workbench (terceiro).
Clique em
Criar para criar sua estação de trabalho.- Clique em Estações de trabalho.
- Encontre a estação de trabalho que você criou na lista de estações disponíveis, marque a caixa de seleção ao lado dela e clique em Iniciar. Isso inicia sua estação de trabalho e faz a correspondência com a configuração da estação de trabalho principal.
- Se for solicitado a iniciar a estação de trabalho, clique em Iniciar para confirmar. O status muda para Iniciando, e o ícone de status gira enquanto a operação de início está em andamento. Pode levar alguns minutos para iniciar sua estação de trabalho.
- Quando a estação de trabalho estiver pronta, o status mudará para Em execução e o ícone de status mudará para uma marca de seleção check_circle.
- Clique em Iniciar.
O exemplo a seguir mostra a página de boas-vindas do Posit Workbench. A aparência da página pode variar dependendo de como sua organização define a configuração da estação de trabalho:
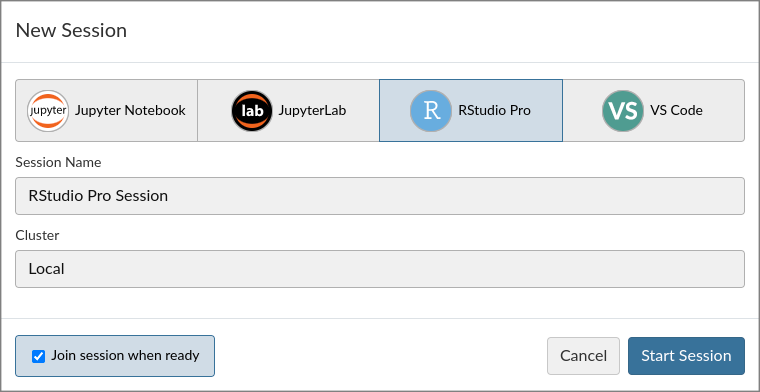
Clique em Nova sessão.
Selecione RStudio Pro como o ambiente de desenvolvimento integrado e deixe Cluster definido como Local.
Para mais informações sobre o Posit Workbench e os IDEs compatíveis, como Jupyter Notebook, JupyterLab e VS Code, consulte a documentação do Posit.
Clique em Iniciar sessão.
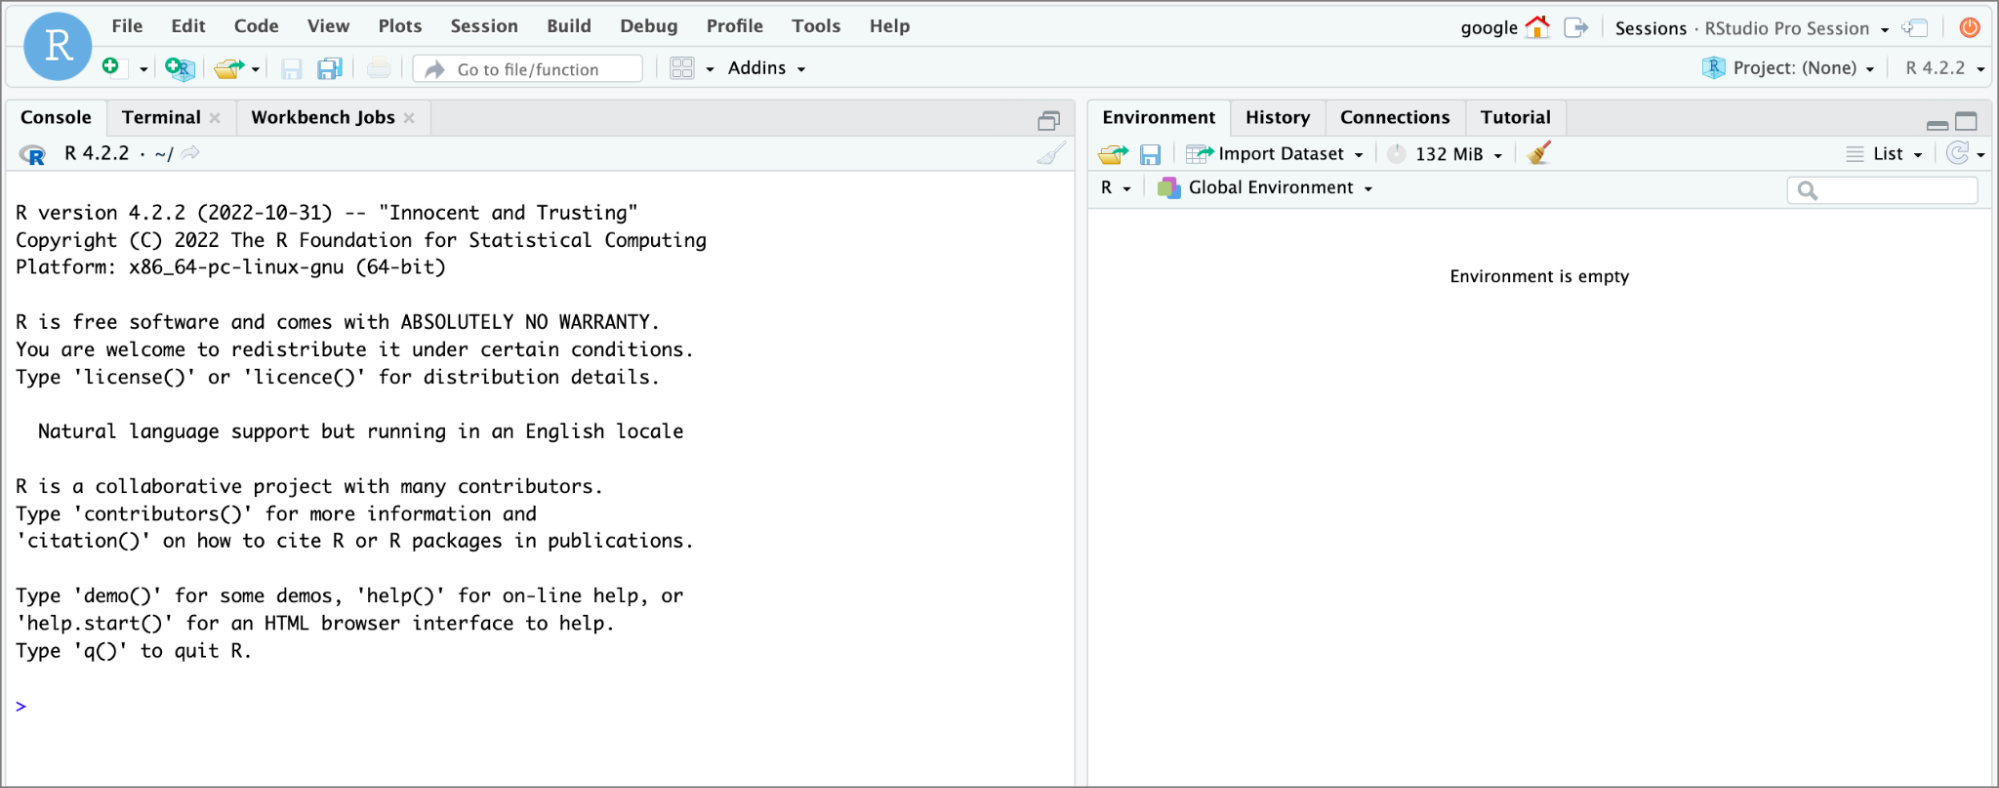
Aguarde o início da sessão e comece a programar.
Para fazer upload de arquivos da máquina local para a estação de trabalho, clique em Fazer upload.
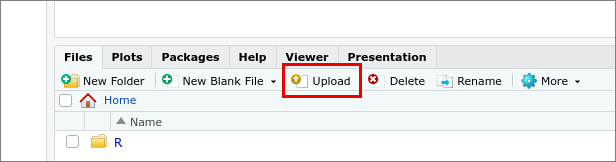
Selecione o Diretório de destino onde você quer armazenar os arquivos na sua estação de trabalho.
Clique em Escolher arquivo para selecionar o arquivo que você quer enviar.
Para iniciar o upload, clique em OK.
Para importar arquivos da sua estação de trabalho, clique em Importar conjunto de dados e selecione o tipo de conjunto de dados.
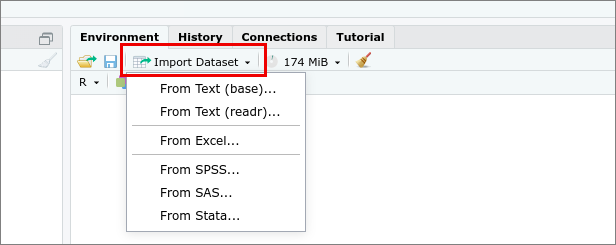
Navegue até o conjunto de dados na sua estação de trabalho e selecione-o para importar.
O ambiente de desenvolvimento integrado do Posit Workbench tem dependências em vários pacotes R para diferentes partes de recursos. Por exemplo, se você estiver enviando um arquivo do Excel, será necessário instalar determinados pacotes. Se for solicitado que você instale os pacotes necessários, clique em Sim.
Para iniciar a importação, clique em Importar.
Saiba como personalizar imagens de contêiner de acordo com as necessidades da sua organização.
Consulte o hub de documentação da Posit Software para saber mais sobre o Posit Workbench.
Criar a configuração da estação de trabalho
Para usar o Posit Workbench (incluindo o RStudio Pro), crie uma configuração de estação de trabalho para os desenvolvedores da sua organização:
Configurar a estação de trabalho
Para criar uma estação de trabalho, siga estas etapas.
Lançar sua estação de trabalho
Agora que você criou a estação de trabalho, inicie-a para começar o desenvolvimento:
Iniciar uma sessão do Posit Workbench RStudio Pro
Fazer upload de arquivos para sua estação de trabalho
Para fazer upload de vários arquivos ou um diretório, crie um arquivo ZIP. O arquivo ZIP é expandido após o envio.
Importar arquivos da sua estação de trabalho
Receber suporte para problemas do Posit Workbench
Se você encontrar problemas com o Posit Workbench ou com a imagem do contêiner dele, informe a Posit em support@posit.co.