Architecture
The following diagram shows the high-level architecture of a serverless extract, load, and transform (ELT) pipeline using Workflows.

In the preceding diagram, consider a retail platform that periodically collects sales events as files from various stores, and then writes the files to a Cloud Storage bucket. The events are used to provide business metrics by importing and processing in BigQuery. This architecture provides a reliable and serverless orchestration system to import your files into BigQuery, and is divided into the following two modules:
- File list: Maintains the list of unprocessed files added to a
Cloud Storage bucket in a Firestore collection.
This module works through a Cloud Run function that is triggered by
an
Object Finalize
storage event, which is generated when a new file is added to the
Cloud Storage bucket. The filename is appended to the
filesarray of the collection namednewin Firestore. Workflow: Runs the scheduled workflows. Cloud Scheduler triggers a workflow that runs a series of steps according to a YAML-based syntax to orchestrate loading, and then transforming the data in BigQuery by calling Cloud Run functions. The steps in the workflow call Cloud Run functions to run the following tasks:
- Create and start a BigQuery load job.
- Poll the load job status.
- Create and start the transform query job.
- Poll the transform job status.
Using transactions to maintain the list of new files in Firestore helps ensure that no file is missed when a workflow imports them into BigQuery. Separate runs of the workflow are made idempotent by storing job metadata and status in Firestore.
Objectives
- Create a Firestore database.
- Set up a Cloud Run function trigger to track files added to the Cloud Storage bucket in Firestore.
- Deploy Cloud Run functions to run and monitor BigQuery jobs.
- Deploy and run a workflow to automate the process.
Costs
In this document, you use the following billable components of Google Cloud:
To generate a cost estimate based on your projected usage,
use the pricing calculator.
When you finish the tasks that are described in this document, you can avoid continued billing by deleting the resources that you created. For more information, see Clean up.
Before you begin
-
In the Google Cloud console, on the project selector page, select or create a Google Cloud project.
Roles required to select or create a project
- Select a project: Selecting a project doesn't require a specific IAM role—you can select any project that you've been granted a role on.
-
Create a project: To create a project, you need the Project Creator role
(
roles/resourcemanager.projectCreator), which contains theresourcemanager.projects.createpermission. Learn how to grant roles.
-
Verify that billing is enabled for your Google Cloud project.
-
Enable the Cloud Build, Cloud Run functions, Identity and Access Management, Resource Manager, and Workflows APIs.
Roles required to enable APIs
To enable APIs, you need the Service Usage Admin IAM role (
roles/serviceusage.serviceUsageAdmin), which contains theserviceusage.services.enablepermission. Learn how to grant roles. Go to the Welcome page and make a note of the Project ID to use in a later step.
In the Google Cloud console, activate Cloud Shell.
Prepare your environment
To prepare your environment, create a Firestore database, clone the code samples from the GitHub repo, create resources using Terraform, edit the Workflows YAML file, and install requirements for the file generator.
To create a Firestore database, do the following:
In the Google Cloud console, go to the Firestore page.
Click Select native mode.
In the Select a location menu, select the region where you want to host the Firestore database. We recommend picking a region that is close to your physical location.
Click Create database.
In Cloud Shell, clone the source repository:
cd $HOME && git clone https://github.com/GoogleCloudPlatform/workflows-demos
cd workflows-demos/workflows-bigquery-load
In Cloud Shell, create the following resources using Terraform:
terraform init
terraform apply \
    -var project_id=PROJECT_ID \
    -var region=REGION \
    -var zone=ZONE \
    --auto-approve
Replace the following:
PROJECT_ID: your Google Cloud project IDREGION: a specific Google Cloud geographical location to host your resources—for example,us-central1ZONE: a location within a region to host your resources—for example,us-central1-b
You should see a message similar to the following:
Apply complete! Resources: 7 added, 0 changed, 1 destroyed.Terraform can help you create, change, and upgrade infrastructure at scale safely and predictably. The following resources are created in your project:
- Service accounts with the required privileges to ensure secure access to your resources.
- A BigQuery dataset named
serverless_elt_datasetand a table namedword_countto load the incoming files. - A Cloud Storage bucket named
${project_id}-ordersbucketfor staging input files. - The following five Cloud Run functions:
file_add_handleradds the name of the files that are added to the Cloud Storage bucket to the Firestore collection.create_jobcreates a new BigQuery load job and associates files in the Firebase collection with the job.create_querycreates a new BigQuery query job.poll_bigquery_jobgets the status of a BigQuery job.run_bigquery_jobstarts a BigQuery job.
Get the URLs for the
create_job,create_query,poll_job, andrun_bigquery_jobCloud Run functions that you deployed in the previous step.gcloud functions describe create_job | grep url gcloud functions describe poll_bigquery_job | grep url gcloud functions describe run_bigquery_job | grep url gcloud functions describe create_query | grep url
The output is similar to the following:
url: https://REGION-PROJECT_ID.cloudfunctions.net/create_job
url: https://REGION-PROJECT_ID.cloudfunctions.net/poll_bigquery_job
url: https://REGION-PROJECT_ID.cloudfunctions.net/run_bigquery_job
url: https://REGION-PROJECT_ID.cloudfunctions.net/create_query
Make a note of these URLs as they are needed when you deploy your workflow.
Create and deploy a workflow
In Cloud Shell, open the source file for the workflow,
workflow.yaml:Replace the following:
CREATE_JOB_URL: the URL of the function to create a new jobPOLL_BIGQUERY_JOB_URL: the URL of the function to poll the status of a running jobRUN_BIGQUERY_JOB_URL: the URL of the function to start a BigQuery load jobCREATE_QUERY_URL: the URL of the function to start a BigQuery query jobBQ_REGION: the BigQuery region where data is stored—for example,USBQ_DATASET_TABLE_NAME: the BigQuery dataset table name in the formatPROJECT_ID.serverless_elt_dataset.word_count
Deploy the
workflowfile:gcloud workflows deploy WORKFLOW_NAME \ --location=WORKFLOW_REGION \ --description='WORKFLOW_DESCRIPTION' \ --service-account=workflow-runner@PROJECT_ID.iam.gserviceaccount.com \ --source=workflow.yamlReplace the following:
WORKFLOW_NAME: the unique name of the workflowWORKFLOW_REGION: the region in which the workflow is deployed—for example,us-central1WORKFLOW_DESCRIPTION: the description of the workflow
Create a Python 3 virtual environment and install requirements for the file generator:
sudo apt-get install -y python3-venv
python3 -m venv env
. env/bin/activate
cd generator
pip install -r requirements.txt
Generate files to import
The gen.py Python script generates random content in
Avro format. The schema is the same as
the BigQuery word_count table. These Avro files are copied to
the specified Cloud Storage bucket.
In Cloud Shell, generate the files:
python gen.py -p PROJECT_ID \
    -o PROJECT_ID-ordersbucket \
    -n RECORDS_PER_FILE \
    -f NUM_FILES \
    -x FILE_PREFIX
Replace the following:
RECORDS_PER_FILE: the number of records in a single fileNUM_FILES: the total number of files to be uploadedFILE_PREFIX: the prefix for the names of the generated files
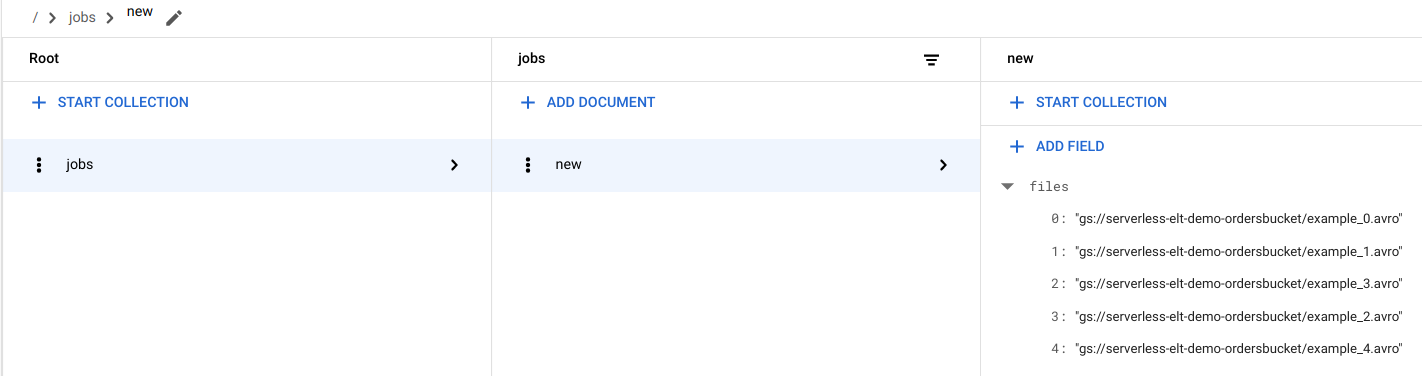
View file entries in Firestore
When the files are copied to Cloud Storage, the
handle_new_file Cloud Run function is triggered. This function adds
the file list to the file list array in the new document in the
Firestore jobs collection.
To view the file list, in the Google Cloud console, go to the Firestore Data page.
Trigger the workflow
Workflows links a series of serverless tasks together from Google Cloud and API services. Individual steps in this workflow run as Cloud Run functions and the state is stored in Firestore. All calls to Cloud Run functions are authenticated by using the service account of the workflow.
In Cloud Shell, run the workflow:
gcloud workflows execute WORKFLOW_NAME
The following diagram shows the steps used in the workflow:

The workflow is split into two parts: the main workflow and the sub workflow. The main workflow handles job creation and conditional execution while the sub workflow executes a BigQuery job. The workflow performs the following operations:
- The
create_jobCloud Run function creates a new job object, gets the list of files added to Cloud Storage from the Firestore document, and associates the files with the load job. If there are no files to load, the function doesn't create a new job. - The
create_queryCloud Run function takes the query that needs to be executed along with the BigQuery region that the query should be executed in. The function creates the job in Firestore and returns the job ID. - The
run_bigquery_jobCloud Run function gets the ID of the job that needs to be executed, and then calls the BigQuery API to submit the job. - Instead of waiting for the job to complete in the
Cloud Run function, you can periodically poll the status of the job.
- The
poll_bigquery_jobCloud Run function provides the status of the job. It is called repeatedly until the job completes. - To add a delay between calls to the
poll_bigquery_jobCloud Run function, asleeproutine is called from Workflows.
- The
View the job status
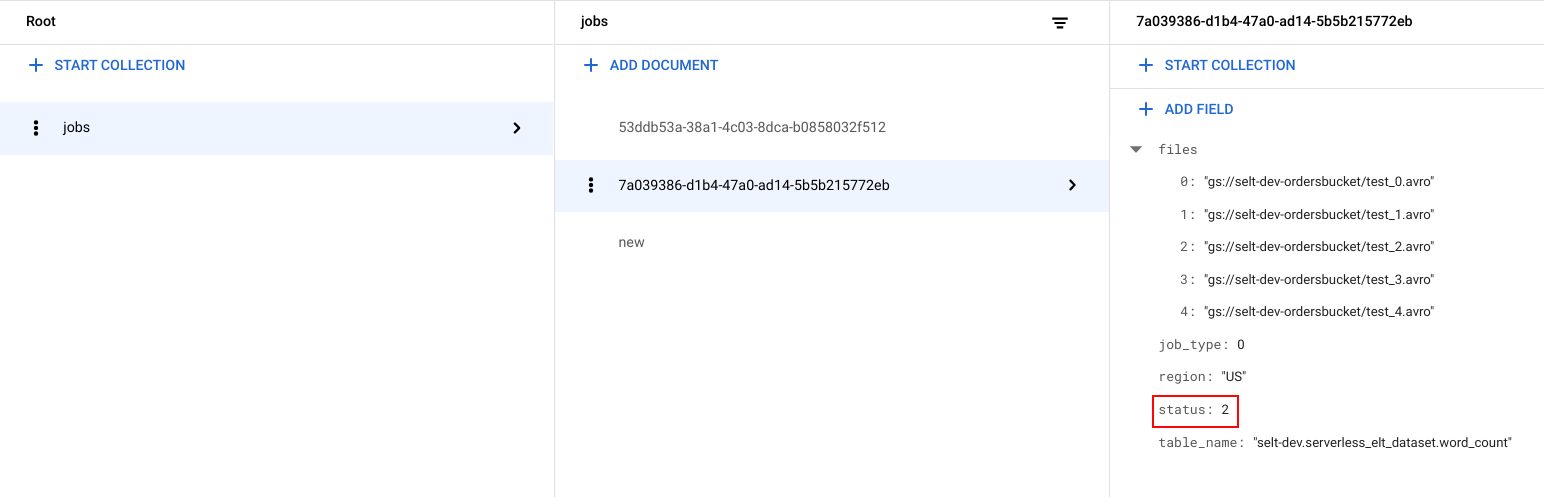
You can view the file list and the status of the job.
In the Google Cloud console, go to the Firestore Data page.
A unique identifier (UUID) is generated for each job. To view the
job_typeandstatus, click the job ID. Each job might have one of the following types and statuses:job_type: The type of job that is being run by the workflow with one of the following values:- 0: Load data into BigQuery.
- 1: Run a query in BigQuery.
status: The current state of the job with one of the following values:- 0: The job has been created, but not started.
- 1: The job is running.
- 2: The job completed its execution successfully.
- 3: There was an error and the job did not complete successfully.
The job object also contains metadata attributes such as the region of the BigQuery dataset, the name of the BigQuery table, and if it's a query job, the query string being run.
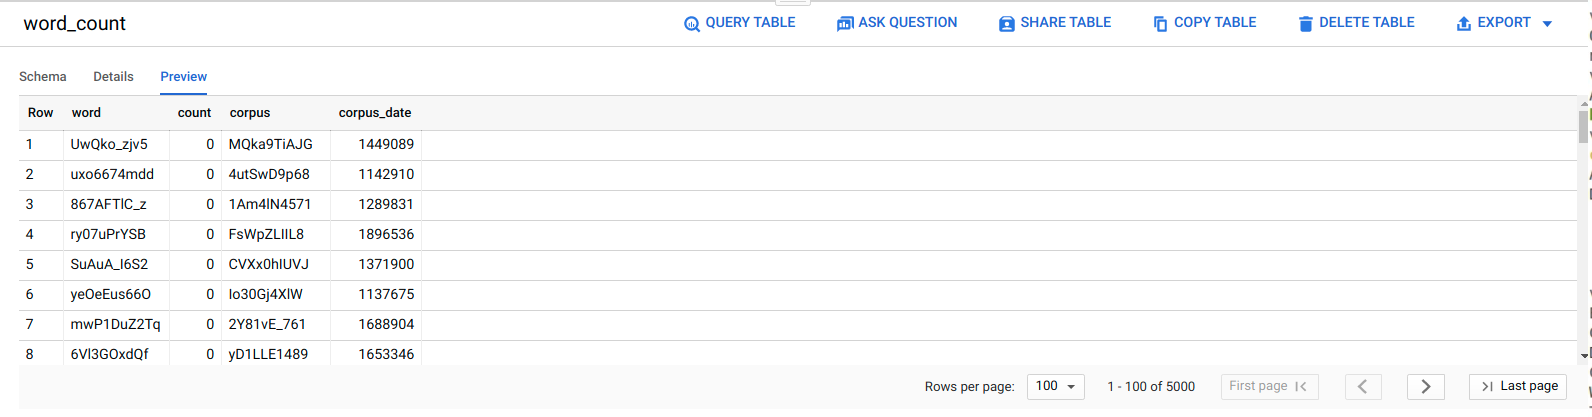
View data in BigQuery
To confirm that the ELT job was successful, verify that the data appears in the table.
In the Google Cloud console, go to the BigQuery Editor page.
Click the
serverless_elt_dataset.word_counttable.Click the Preview tab.
Schedule the workflow
To periodically run the workflow on a schedule, you can use Cloud Scheduler.
Clean up
The easiest way to eliminate billing is to delete the Google Cloud project that you created for the tutorial. Alternatively, you can delete the individual resources.Delete the individual resources
In Cloud Shell, remove all resources created using Terraform:
cd $HOME/bigquery-workflows-load
terraform destroy \
-var project_id=PROJECT_ID \
-var region=REGION \
-var zone=ZONE \
--auto-approve
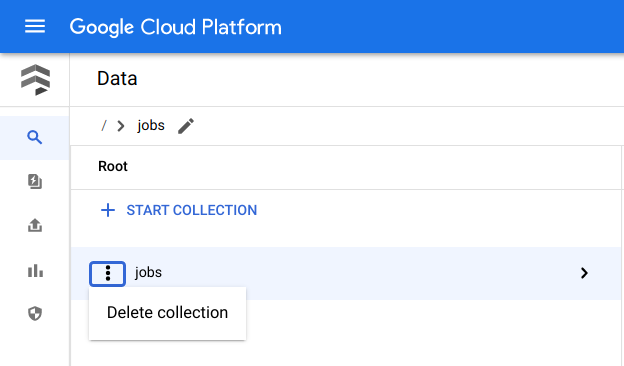
In the Google Cloud console, go to the Firestore Data page.
Next to Jobs, click Menu and select Delete.
Delete the project
- In the Google Cloud console, go to the Manage resources page.
- In the project list, select the project that you want to delete, and then click Delete.
- In the dialog, type the project ID, and then click Shut down to delete the project.
What's next
- To learn more about BigQuery, see the BigQuery documentation.
- Learn how to build serverless custom machine learning pipelines.
- For more reference architectures, diagrams, and best practices, explore the Cloud Architecture Center.