Authored by Christopher Seymour, Sr. Data Analyst and Dean Hicks, Developer Relations Engineer
Introduction
Looker's embed feature is one of the most powerful and valuable features of the Looker product. If you're reading this guide, it's likely that you're already embedding Looker content into your application or that you intend to do so in the near future.
This guide is meant to help you better understand the design of Looker's embed feature so that you can build a powerful and secure application for delivering data to your users. As a deep dive into the topic, it's a bit of a lengthy read — so keep in mind that this guide is not meant to be a quick fix for a straightforward problem, but rather a building block to help you better manage your entire Looker embed use case.
Use case overview
This guide describes a common use case where your company is embedding Looker content within your product.
For this signed embed use case, assume that you are the Admin of your Looker instance. You work with two types of embed users: customers (or "brand users"), who should only be able to access data that pertains to their company, and account owners, who will be able to access data for multiple, specific customers. You have a dashboard with a few tiles that you show to every customer who uses your product, but you need the dashboard to automatically be filtered for each customer so that the dashboards will display only the data that is specific to that customer. The examples in this document use two fictional companies — Hooli and Pied Piper.
You have a table called products, which shows some product metrics for different brands. Each brand corresponds to a different embed user (with a different external_user_id) in the signed embed application. Since each embed user should be able to see only the data for their own brand, you have a simple Explore that uses an access filter on a brand user attribute:
explore: products {
  access_filter: {
    field: products.brand
    user_attribute: brand
  }
}
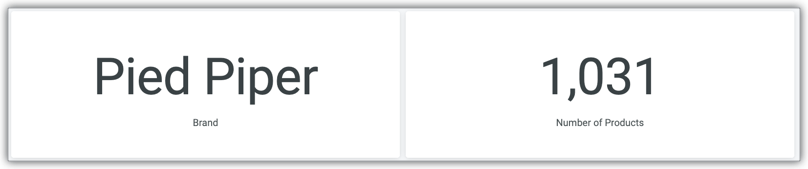
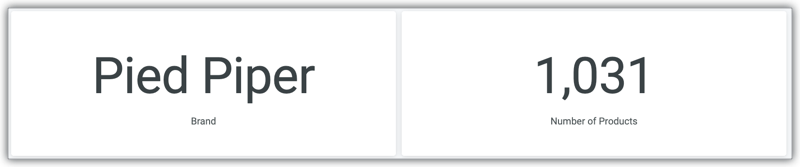
You have a simple dashboard that is based on this Explore and that has two tiles: One shows the name of the brand, and the other shows the number of products for that brand.

You use the create_sso_embed_url endpoint to generate embed URLs of this dashboard for each embed user.
This example uses two brands: Pied Piper and Hooli. Here's the request body that you use in the create_sso_embed_url call for Pied Piper, with external_user_id pied_piper:
{
  "target_url": "https://mylookerinstance.cloud.looker.com/embed/dashboards/17",
  "session_length": 300,
  "force_logout_login": true,
  "external_user_id": "pied_piper",
  "first_name": "PiedPiper",
  "last_name": "User",
  "permissions": ["access_data","see_user_dashboards"],
  "models": ["thelook"],
  "user_attributes": {"brand":"Pied Piper"}
}
The URL that you generated for Pied Piper displays the dashboard this way:
Here's the request body used in the create_sso_embed_url call for Hooli, with external_user_id hooli:
{
  "target_url": "https://mylookerinstance.cloud.looker.com/embed/dashboards/17",
  "session_length": 300,
  "force_logout_login": true,
  "external_user_id": "hooli",
  "first_name": "Hooli",
  "last_name": "User",
  "permissions": ["access_data","see_user_dashboards"],
  "models": ["thelook"],
  "user_attributes": {"brand":"Hooli"}
}
The URL that was generated for Hooli displays the dashboard this way:
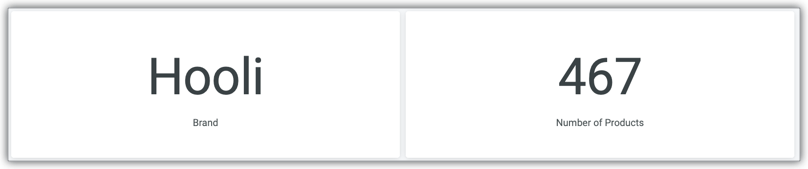
Voilà! The dashboard gets filtered according to each embed user's value for the brand user attribute.
Digging deeper
Very cool! But what if I want to give one account owner access to multiple brands? How can I make sure my data is only seen by relevant users?
Good news! Looker's signed embed feature has been designed to empower developers to create powerful, bespoke data experiences for users while ensuring that the data governance defined by your data model and content access policies is maintained.
Making sure that data governance is airtight is paramount to delivering that powerful data experience. Read on to explore some concepts and best practices that you can use to design the experience that works best for you. First is a brief overview of how all this works.
The basics of Looker signed embed
It's important to keep in mind that Looker's user authentication and management in the embed context works in fundamentally the same way as in the non-embed context and in fundamentally the same way as most other web applications.
This can be confusing in the Looker signed embed context, because the signed authentication step, user settings, and the dashboard itself are all combined into one long, complex URL. However, that URL is used to establish the session, which still applies even after the URL is shortened. Keeping this concept in mind will go a long way towards your success in building great data experiences.
Signed embed URL structure
Here's one of the signed embed authentication URLs generated by the create_sso_embed_url call with the request body for Pied Piper:
https://mylookerinstance.cloud.looker.com/login/embed/%2Fembed%2Fdashboards%2F17?permissions=%5B%22access_data%22%2C%22see_user_dashboards%22%5D&models=%5B%22thelook%22%5D&signature=iG6vcKBgnA50jaL2iShFeQHwFPN7wvTx7Rz6r%2FtFuvE%3D&nonce=%22967729518a7dbb8a178f1c03a3511dd1%22&time=1696013242&session_length=300&external_user_id=%22pied_piper%22&access_filters=%7B%7D&first_name=%22Pied%22&last_name=%22Piper%22&user_attributes=%7B%22brand%22%3A%22Pied+Piper%22%7D&force_logout_login=true
Here's the same URL decoded and broken out into individual lines:
https://mylookerinstance.cloud.looker.com/login/embed/
/embed/dashboards/17
?permissions=["access_data","see_user_dashboards"]
&models=["thelook"]
&signature=iG6vcKBgnA50jaL2iShFeQHwFPN7wvTx7Rz6r/tFuvE=
&nonce="967729518a7dbb8a178f1c03a3511dd1"
&time=1696013242
&session_length=300
&external_user_id="pied_piper"
&access_filters={}
&first_name="PiedPiper"
&last_name="User"
&user_attributes={"brand":"Pied Piper"}
&force_logout_login=true
When you access this URL, a few things happen:
Looker looks for an existing user account with
external_user_id= pied_piper. If none exists, Looker creates a new user account with thatexternal_user_id.The existing user's account details, including permissions, models, groups (if specified), user attribute values (if specified), are overwritten with the account details that are specified in the URL.
Looker authenticates the user and establishes a session for that user by storing a session cookie in the browser.
Looker then redirects to the target URL, or redirect URL, that is specified in the
create_sso_embed_urlcall:https://mylookerinstance.cloud.looker.com/embed/dashboards/17.You can see this redirect URL as an encoded relative URL in the original signed embed URL:
%2Fembed%2Fdashboards%2F17
Although steps 1-3 happen in the background automatically, and all the end user sees is the final result (the dashboard itself), these steps are fundamentally the same as the steps a regular, non-embed Looker user authenticates with. Suppose you want a user to sign in with user and password credentials. The process would look something like this:
You (the Looker Admin) navigate to the Admin - Users panel and use the search bar to check to see if a user account already exists for this user. If not, you create a new user account.
You (the Looker Admin) hit Edit next to the user from the Admin - Users panel and provision the user with permissions, models, groups, user attribute values, and other values.
The user goes to the login page at
https://mylookerinstance.cloud.looker.com/loginand enters their username and password. Looker authenticates the user and establishes a session for that user by storing a session cookie in the browser.Looker then redirects to the landing page (usually
https://mylookerinstance.cloud.looker.com/browse).
Note that the session cookie will apply to every tab in the browser window. If the user starts on https://mylookerinstance.cloud.looker.com/browse, opens a new browser tab, and navigates to any page that their permissions give them access to, the page will load as expected using the session cookie that was already established in the original browser tab.
The same goes for embed users. Embed users are a bit more limited in which pages they can access in the UI—they can only access Look, dashboard, and Explore URLs with the /embed prefix. But they are still free to navigate manually to any dashboard that their user account details grant them access to. Suppose the original signed embed URL redirects you to https://mylookerinstance.cloud.looker.com/embed/dashboards/17 in one browser tab. You then open a new browser tab and load a different embed dashboard that lives in the same folder (and therefore has the same access restrictions):
https://mylookerinstance.cloud.looker.com/embed/dashboards/19.
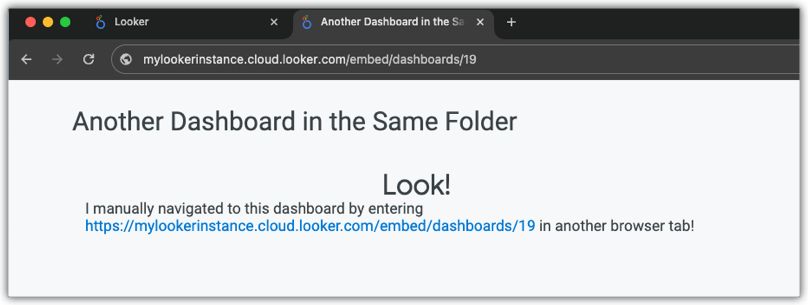
Although the redirect URL that was specified in the original signed embed URL was for dashboard 17, you can see that dashboard 19 loads as expected if you manually enter the URL in a browser tab. Note that another signed embed URL was not needed to load a different dashboard.
The key insight here is that all the user account details established in the URL (permissions, user attributes, etc.) are applied to the entire user session, not just to the particular dashboard specified in the original signed URL. In other words, as the name implies, user attributes are a feature of the user, not a feature of the dashboard, and they should be used for determining a specific user's access levels across the entire application, not just in one specific tab.
The account owner use case
As with any customizable solution, there are certain approaches that you should avoid. With that in mind, consider that you also have account owners who may own or manage multiple brands. In this example, an account owner manages both the Pied Piper and the Hooli brands. Therefore, your app generates the URLs for both external_user_ids using the same inputs in the create_sso_embed_url call shown previously, and creates a new tab in the app to load each dashboard that the account owner wants to access. We've commonly seen developers implement solutions like this, which results in an incorrect workflow for the user:
- Navigate to the Pied Piper dashboard tab.
- Navigate to the Hooli dashboard tab.
- Navigate back to the Pied Piper dashboard tab.
- Hit the Reload button on the Pied Piper dashboard.
…the Pied Piper dashboard displays the Hooli data!
You might try a similar approach, but instead use the same external_user_id test_user for both create_sso_embed_url calls:
{
  "target_url": "https://mylookerinstance.cloud.looker.com/embed/dashboards/17",
  "session_length": 300,
  "force_logout_login": true,
  "external_user_id": "test_user",
  "first_name": "Test",
  "last_name": "User",
  "permissions": ["access_data","see_user_dashboards"],
  "models": ["thelook"],
  "user_attributes": {"brand":"Pied Piper"}
}

{
  "target_url": "https://mylookerinstance.cloud.looker.com/embed/dashboards/17",
  "session_length": 300,
  "force_logout_login": true,
  "external_user_id": "test_user",
  "first_name": "Test",
  "last_name": "User",
  "permissions": ["access_data","see_user_dashboards"],
  "models": ["thelook"],
  "user_attributes": {"brand":"Hooli"}
}
But the behavior is exactly the same—once the tab is reloaded with the Pied Piper dashboard, it shows the data for Hooli instead.
What's going on here? How can I make sure each brand's dashboard displays only the data for that brand?
The same approach from a non-embed perspective
As discussed in the previous section, signed embed user sessions work fundamentally the same way as regular, non-embed Looker user sessions, so it can be helpful to reframe the problematic approach described previously in the context of a regular, non-embed Looker user session and break down those steps to help understand how to implement this solution in a more robust way. Here's what that workflow would look like if you were giving instructions to a standard BI user who has access to the Looker UI:
- You create two different user accounts on the Admin - Users page.
- On the edit page for the first user account, you set the brand user attribute value to pied_piper.
- On the edit page for the second user account, you set the brand user attribute value to hooli.
- You send account setup emails for both user accounts to the account owner.
- The account owner sets up separate email and password credentials for each account.
- You give the account owner the link to the dashboard. (
https://mylookerinstance.cloud.looker.com/dashboards/17) and tell them that, in order to switch the dashboard between brands, they will need to go back to the login page in another tab and enter the email and password credentials for their other user account, and then load the dashboard again in that tab.
The account owner follows the instructions. However, after entering the Hooli user account's username and password in the second browser tab and then navigating back to the first tab where the Pied Piper dashboard was already loaded, the account owner hits the Reload button. To the account owner's surprise, the dashboard displays the Hooli data! This shouldn't be surprising, because that same scenario just played out in an embed context.
You can quickly break down the latter implementation (using the same external_user_id test_user with different sets of user attributes) the same way. The UI equivalent of that workflow would look like this:
- You create one user account for the account owner.
- You set pied_piper as the brand attribute value for that user account.
- You tell the account owner that to switch the dashboard from Pied Piper to Hooli, they will need to reach out to you so that you can go to the edit page for that user account and change their brand attribute value from pied_piper to hooli mid-session.
- After you edit their user attribute, they can load the dashboard again in a new tab to see the Hooli data.
So by now you might be thinking:
Wait…this seems like a lot of work! Isn't there a way we can give them a single user account and allow them to filter the data on the dashboard discretely for each brand?
There sure is! What these scenarios help illustrate is a principle that is already trivial in the non-embed context but that can be obscured by the abstractions of the embed context: A single human user should be associated with a single Looker user account with a single set of user attribute values. This is also made clear in our explanation of the external_user_id in our Signed embedding documentation.
Looker uses external_user_id to differentiate signed embed users, so each user must have a unique ID assigned to them.
You can create an external_user_id for a user with any string you like, as long as it's unique to that user. Each ID is associated with a set of permissions, user attributes, and models. A single browser can support only one external_user_id, or user session, at a time. No changes can be made to a user's permissions or user attributes mid-session.
Putting these best practices to use
Applying these principles to our example, you will need a single user attribute value that grants access to ALL of the data that the account owner should have access to across the application. You can do this by using a comma-separated value for the brand attribute Pied Piper,Hooli:
{
  "target_url": "https://mylookerinstance.cloud.looker.com/embed/dashboards/17",
  "session_length": 300,
  "force_logout_login": true,
  "external_user_id": "test_user",
  "first_name": "Test",
  "last_name": "User",
  "permissions": ["access_data","see_user_dashboards"],
  "models": ["thelook"],
  "user_attributes": {"brand":"Pied Piper,Hooli"}
}
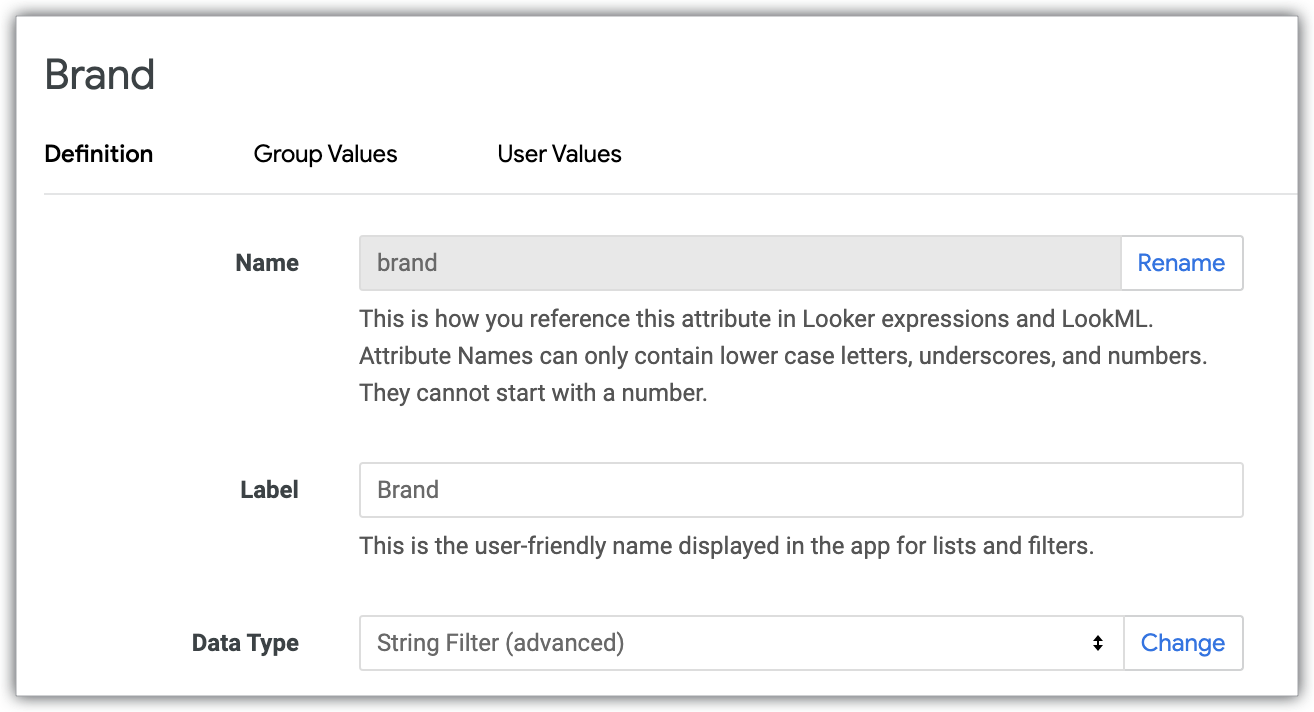
For this syntax to work, you will need to make sure that your user attribute is set as String Filter (advanced):
Note that you can still change the set of user attributes for a user if something changes in their data access levels. For example, if the account owner takes ownership of a third brand, then you could add that third brand to the comma-separated list that you've specified for their brand user attribute. That way, when they log out and back in, the changes will be applied.
Filtering the dashboard results
Okay, I get that the user attributes need to specify all of the data a user can access across the application. But if I specify the user attributes this way, it will show the data for all of those brands on my dashboard! How do I narrow a particular dashboard's results to a specific brand?
The correct way to filter a particular dashboard is to use regular ol' dashboard filters! (This may seem obvious now, but we have seen some people get stuck on user attributes as the only way to apply filters in the embed context — perhaps because user_attributes is a parameter in the signed embed URL and filters is not.)
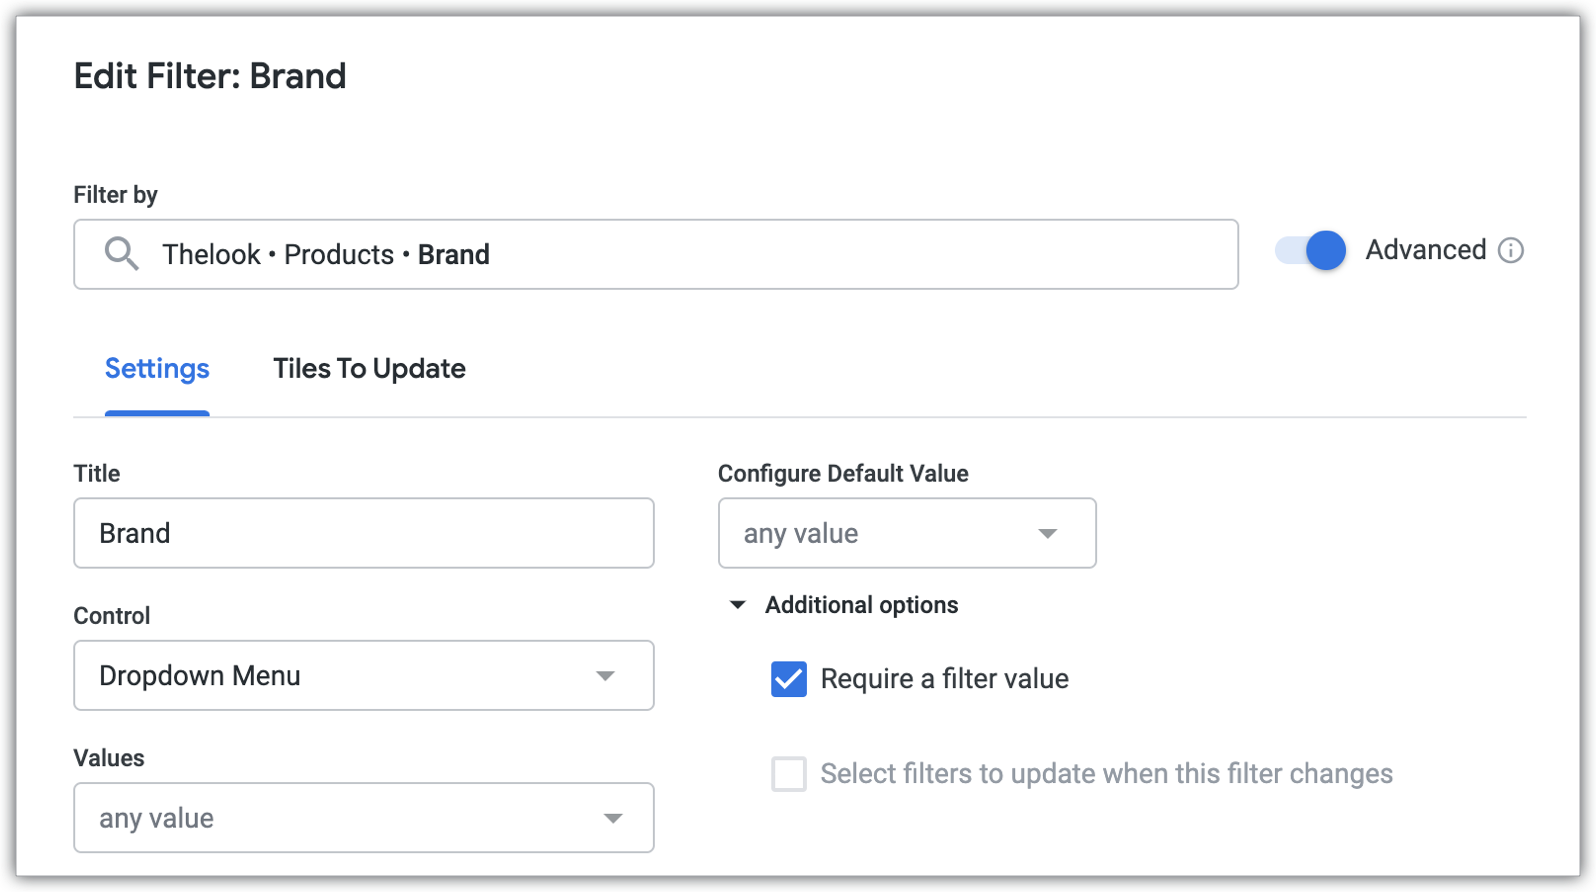
Make sure to require a filter value and use one of the Single Selection control options, such as drop-down:
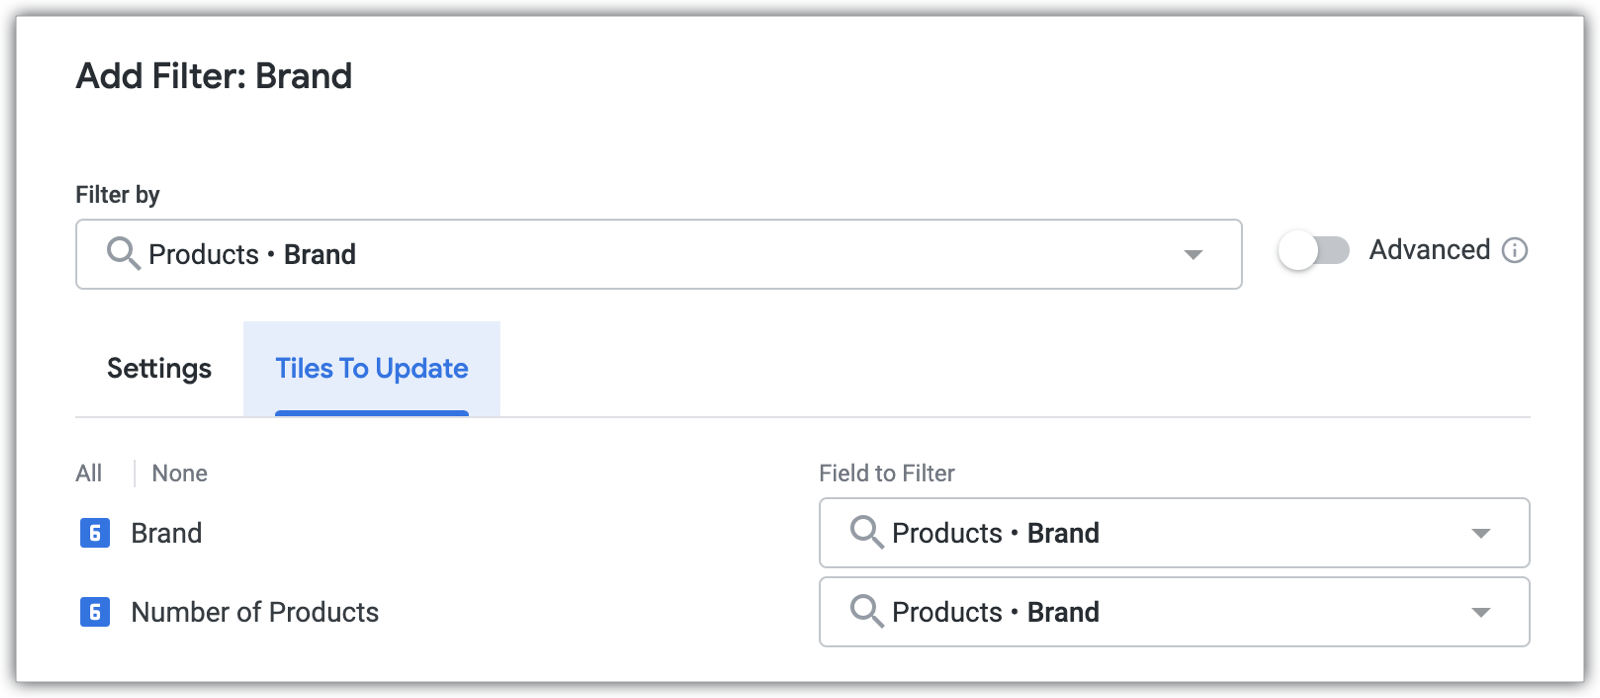
Make sure that the filter is applied to the correct field on all of the necessary tiles:
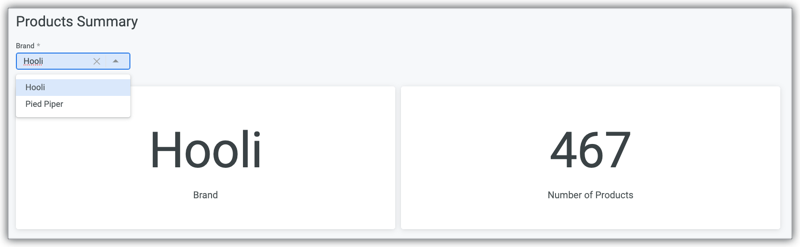
Now your account owner can select between those two (and only those two) values, because the available options in the drop-down are limited by the user attributes:
Pre-populating the dashboard filters
Okay, so now the dashboard can be filtered to a specific brand, but I'd like the filter value to already be set to a specific brand when the user loads the dashboard for that brand in my app.
Again, it's helpful to think about how this works in the non-embed context. How do you send someone a link to a dashboard that has a specific filter value already applied? Well, you may have noticed that when you select a filter value, that filter value appears in the URL for the dashboard:
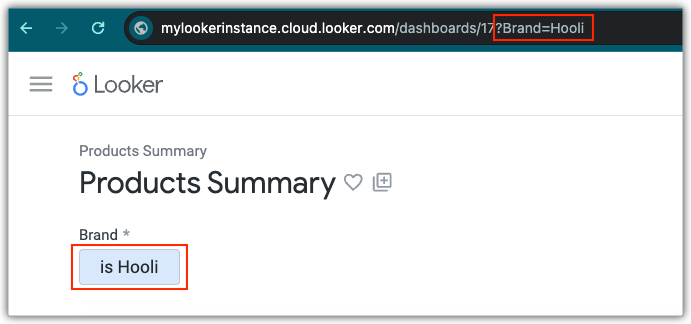
Include that part of the URL in your target_url for the create_sso_embed_url call:
{
  "target_url": "https://mylookerinstance.cloud.looker.com/embed/dashboards/17?Brand=Hooli",
  "session_length": 300,
  "force_logout_login": true,
  "external_user_id": "test_user",
  "first_name": "Test",
  "last_name": "User",
  "permissions": ["access_data","see_user_dashboards"],
  "models": ["thelook"],
  "user_attributes": {"brand":"Pied Piper,Hooli"}
}
If you are using the embed SDK, you can use withFilters to specify initial filters to apply to the embedded content:
https://looker-open-source.github.io/embed-sdk/classes/EmbedBuilder.html#withFilters
If you are using your own custom script, you'll want to make sure that you are adding the filter to the URL before the path gets encoded. Some values may already be encoded in the filter string (for example, there is a space encoded as + in ?Brand=Pied+Piper), so those values will be double-encoded in the final URL. You can check out the "SO embedded dashboard - set dashboard filter as part of URL?" Looker Community post for some discussion of these nuances. If you still have any trouble getting the filters to apply, that Community post would also be a good place to add any questions.
Hiding the dashboard filters
Okay, I see how to set the initial filters on my dashboards, but I also don't want the account owner to change the dashboard filters themselves—the filter value should be determined ONLY by which dashboard the account owner has navigated to in my app. How can I hide the dashboard filters?
You can use themes for this. Themes are a paid feature, so, if you don't already have this enabled on your Looker instance, you should reach out to your Looker Sales team to have it enabled.
Once that feature is enabled, navigate to the Dashboard Controls section of the Admin - Themes page, where you can clear the Display Filters Bar option:
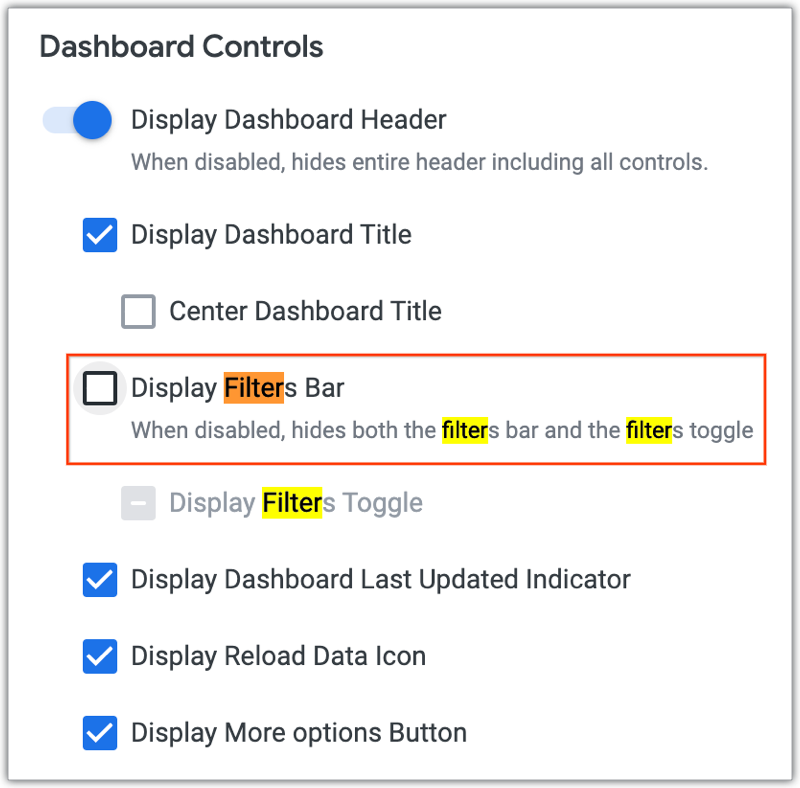
Then you can either set your theme as default or apply the theme in the URL of your specific dashboards. Again, this would go into the target_url of the create_sso_embed_url call:
{
  "target_url": "https://mylookerinstance.cloud.looker.com/embed/dashboards/17?Brand=Hooli&theme=test_theme",
  "session_length": 300,
  "force_logout_login": true,
  "external_user_id": "test_user",
  "first_name": "Test",
  "last_name": "User",
  "permissions": ["access_data","see_user_dashboards"],
  "models": ["thelook"],
  "user_attributes": {"brand":"Pied Piper,Hooli"}
}
There is more info on hiding embed dashboard filters, including some embed SDK code snippets, in this YouTube tutorial, Embed Looker with custom filters.
The final result should look identical to the user experience from the original question:
But now, because the filter values are encoded in the respective target URLs that are embedded in the app, each brand's dashboard will always show the dashboard filtered to the correct brand even when you switch back and forth between tabs.
Sudoing as other users
Now the user experience does look very close to what I'd originally envisioned. But in my use case, the account owner has different permissions and other user settings that the individual users with external_user_id=pied_piper and external_user_id=hooli do not have, which leads to different options available in the UI and just a slightly different user experience overall. I want the account owner to see everything exactly as the pied_piper and hooli users see it, as if the account owner had actually logged in as those users. How can I accomplish this?
What you are asking for is called "sudo". If you want your account owner to be able to "sudo" as each of the individual brand users, then you can build a similar sudo function in your app that will load the embed URLs for external_user_id=pied_piper when the account owner is sudoing as the Pied Piper user, and the embed URLs for external_user_id=hooli when the account owner is sudoing as the Hooli user. You can also use the login_user API endpoint to sudo as the brand user with the API if your app makes use of the API.
However, if you think about the non-embed context again: In the Admin - Users page, you cannot simultaneously sudo as multiple non-embed users in multiple tabs—the sudo session will apply to the entire browser window, just like all other user sessions. Therefore, you should design sudo to sudo as only one user at a time. And, if you think about it, this design is more consistent with perfectly mimicking the experience of the users you are sudoing as. The pied_piper user, for example, has access to only the Pied Piper dashboard and does not have access to open additional dashboards in additional tabs. Therefore, you shouldn't be able to open different dashboards in different tabs when you're sudoing as this user either.
Conclusion
We hope that you found this guide helpful and that you are feeling well prepared to move forward with building out your Looker signed embed content! We are continually working to make Looker the most flexible and robust embedded data analytics offering, and we want to hear your feedback! If you have questions or want to learn more, you can engage with us at the Looker Community and attend our Community events.