Build a document processing pipeline with Workflows
If you are using Document AI to build workflows that involve several steps to process documents, you might want to use serverless orchestration to manage your workflow.
Workflows links a series of tasks together in an order you define. It requires no infrastructure management and scales seamlessly on demand, including scaling down to zero. With its pay-per-use pricing model, you only pay for execution time.
Workflows provides a built-in connector for the Document AI API. Connectors don't require additional code aside from defining the steps using a config file. Connectors handle the formatting of requests, hiding the details of the API. Connectors also provide built-in behavior for authentication, handling retries and long-running operations.
For more information, see Understand connectors.
This guide processes a set of sample invoices using the Invoice Parser processor with batch processing
To follow step-by-step guidance for this task directly in the Google Cloud console, click Guide me:
Before you begin
- Sign in to your Google Cloud account. If you're new to Google Cloud, create an account to evaluate how our products perform in real-world scenarios. New customers also get $300 in free credits to run, test, and deploy workloads.
-
In the Google Cloud console, on the project selector page, select or create a Google Cloud project.
Roles required to select or create a project
- Select a project: Selecting a project doesn't require a specific IAM role—you can select any project that you've been granted a role on.
-
Create a project: To create a project, you need the Project Creator
(
roles/resourcemanager.projectCreator), which contains theresourcemanager.projects.createpermission. Learn how to grant roles.
-
Verify that billing is enabled for your Google Cloud project.
-
Enable the Document AI, Cloud Storage, Workflows APIs.
Roles required to enable APIs
To enable APIs, you need the Service Usage Admin IAM role (
roles/serviceusage.serviceUsageAdmin), which contains theserviceusage.services.enablepermission. Learn how to grant roles. -
In the Google Cloud console, on the project selector page, select or create a Google Cloud project.
Roles required to select or create a project
- Select a project: Selecting a project doesn't require a specific IAM role—you can select any project that you've been granted a role on.
-
Create a project: To create a project, you need the Project Creator
(
roles/resourcemanager.projectCreator), which contains theresourcemanager.projects.createpermission. Learn how to grant roles.
-
Verify that billing is enabled for your Google Cloud project.
-
Enable the Document AI, Cloud Storage, Workflows APIs.
Roles required to enable APIs
To enable APIs, you need the Service Usage Admin IAM role (
roles/serviceusage.serviceUsageAdmin), which contains theserviceusage.services.enablepermission. Learn how to grant roles.
Create an Invoice Parser
Use the Google Cloud console to create a new Invoice Parser. Refer to the creating and managing processors page for more information.
In the Google Cloud console navigation menu, click Document AI and select Processor Gallery.
In the Processor Gallery,
search for Invoice Parser and select Create.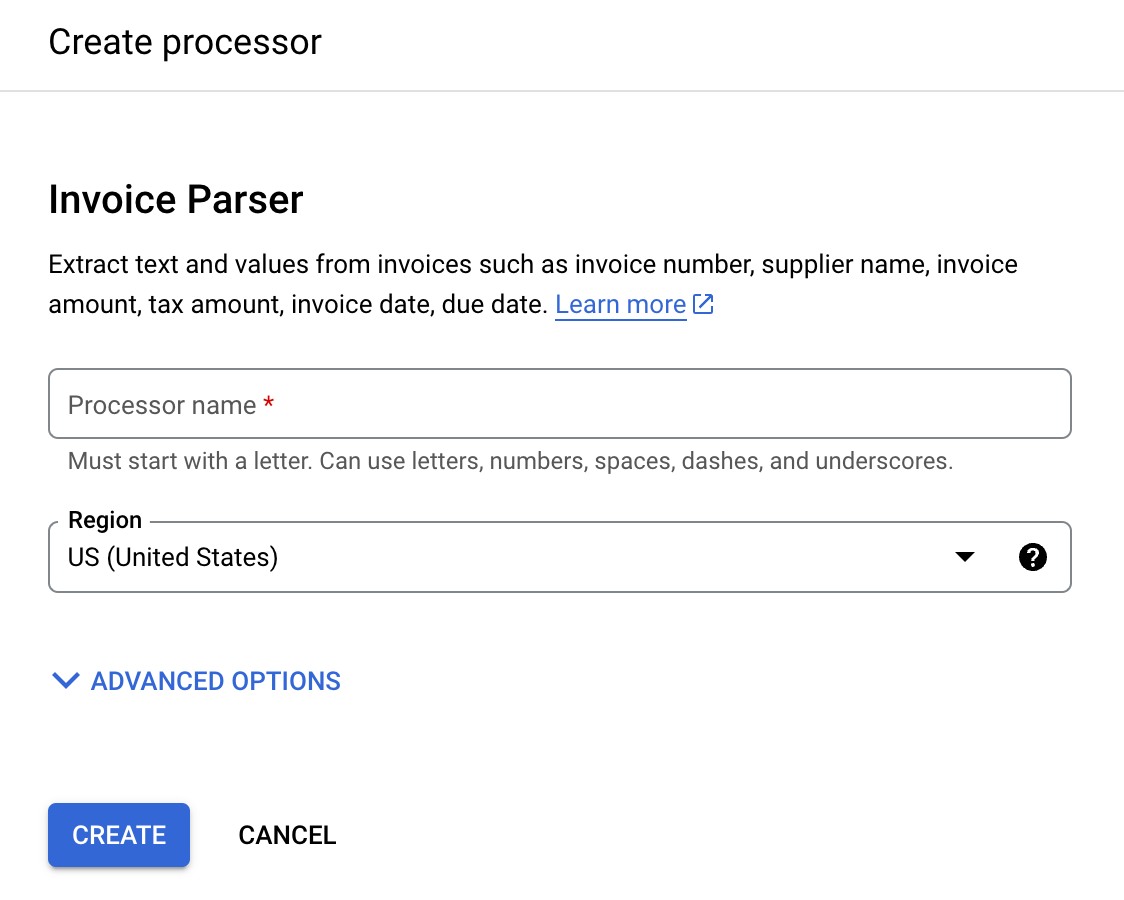
Enter a Processor name, such as
workflows-invoice-processor.Select the region (
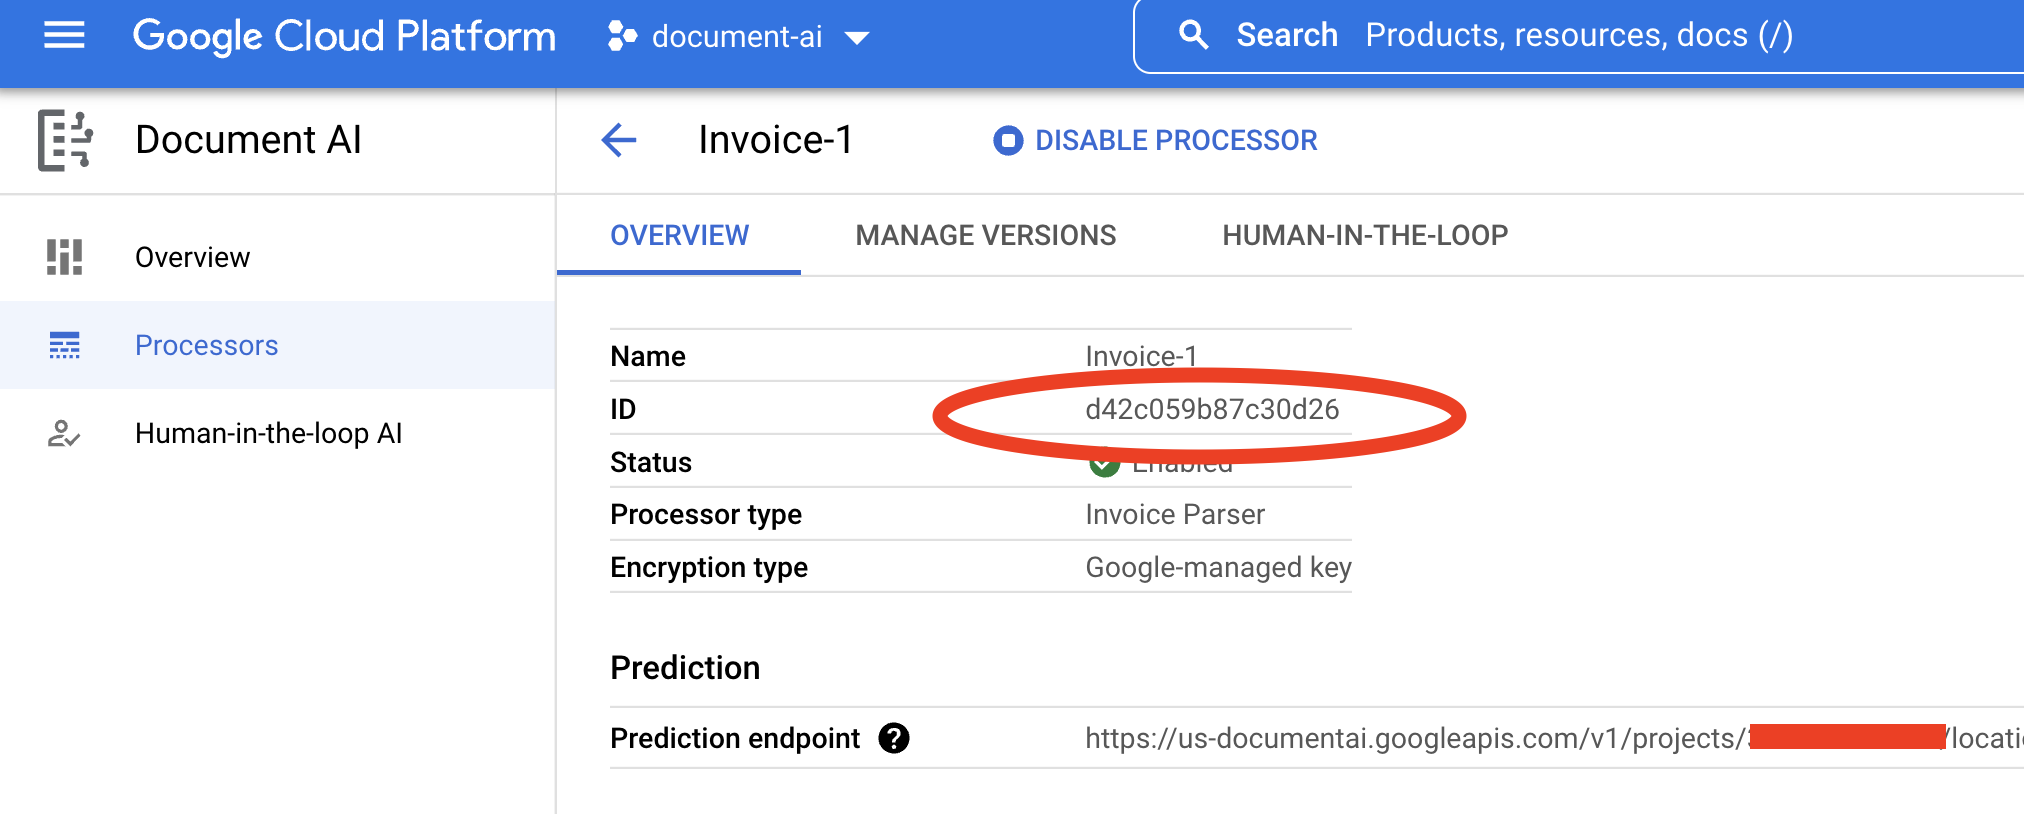
locationin the Document AI API) to host the processor.Click Create. The Processor Details tab appears.
Copy your Processor ID. You must use this in your code later.
Configure output bucket in Cloud Storage
When using batch (asynchronous) processing, the input and output files must be stored in Cloud Storage. The following bucket contains sample files to use as input for this guide:
gs://cloud-samples-data/documentai/workflows
Configure a bucket to store the output files in your project.
Follow the Create Buckets guide in the Cloud Storage documentation to create a bucket, or use a bucket that already exists.
Create a folder in the bucket (for example,
docai-workflows-output).
Create workflow
Open the Workflows dashboard in the Google Cloud console.
Click
Create to create your first workflow. The Create Workflow page appears.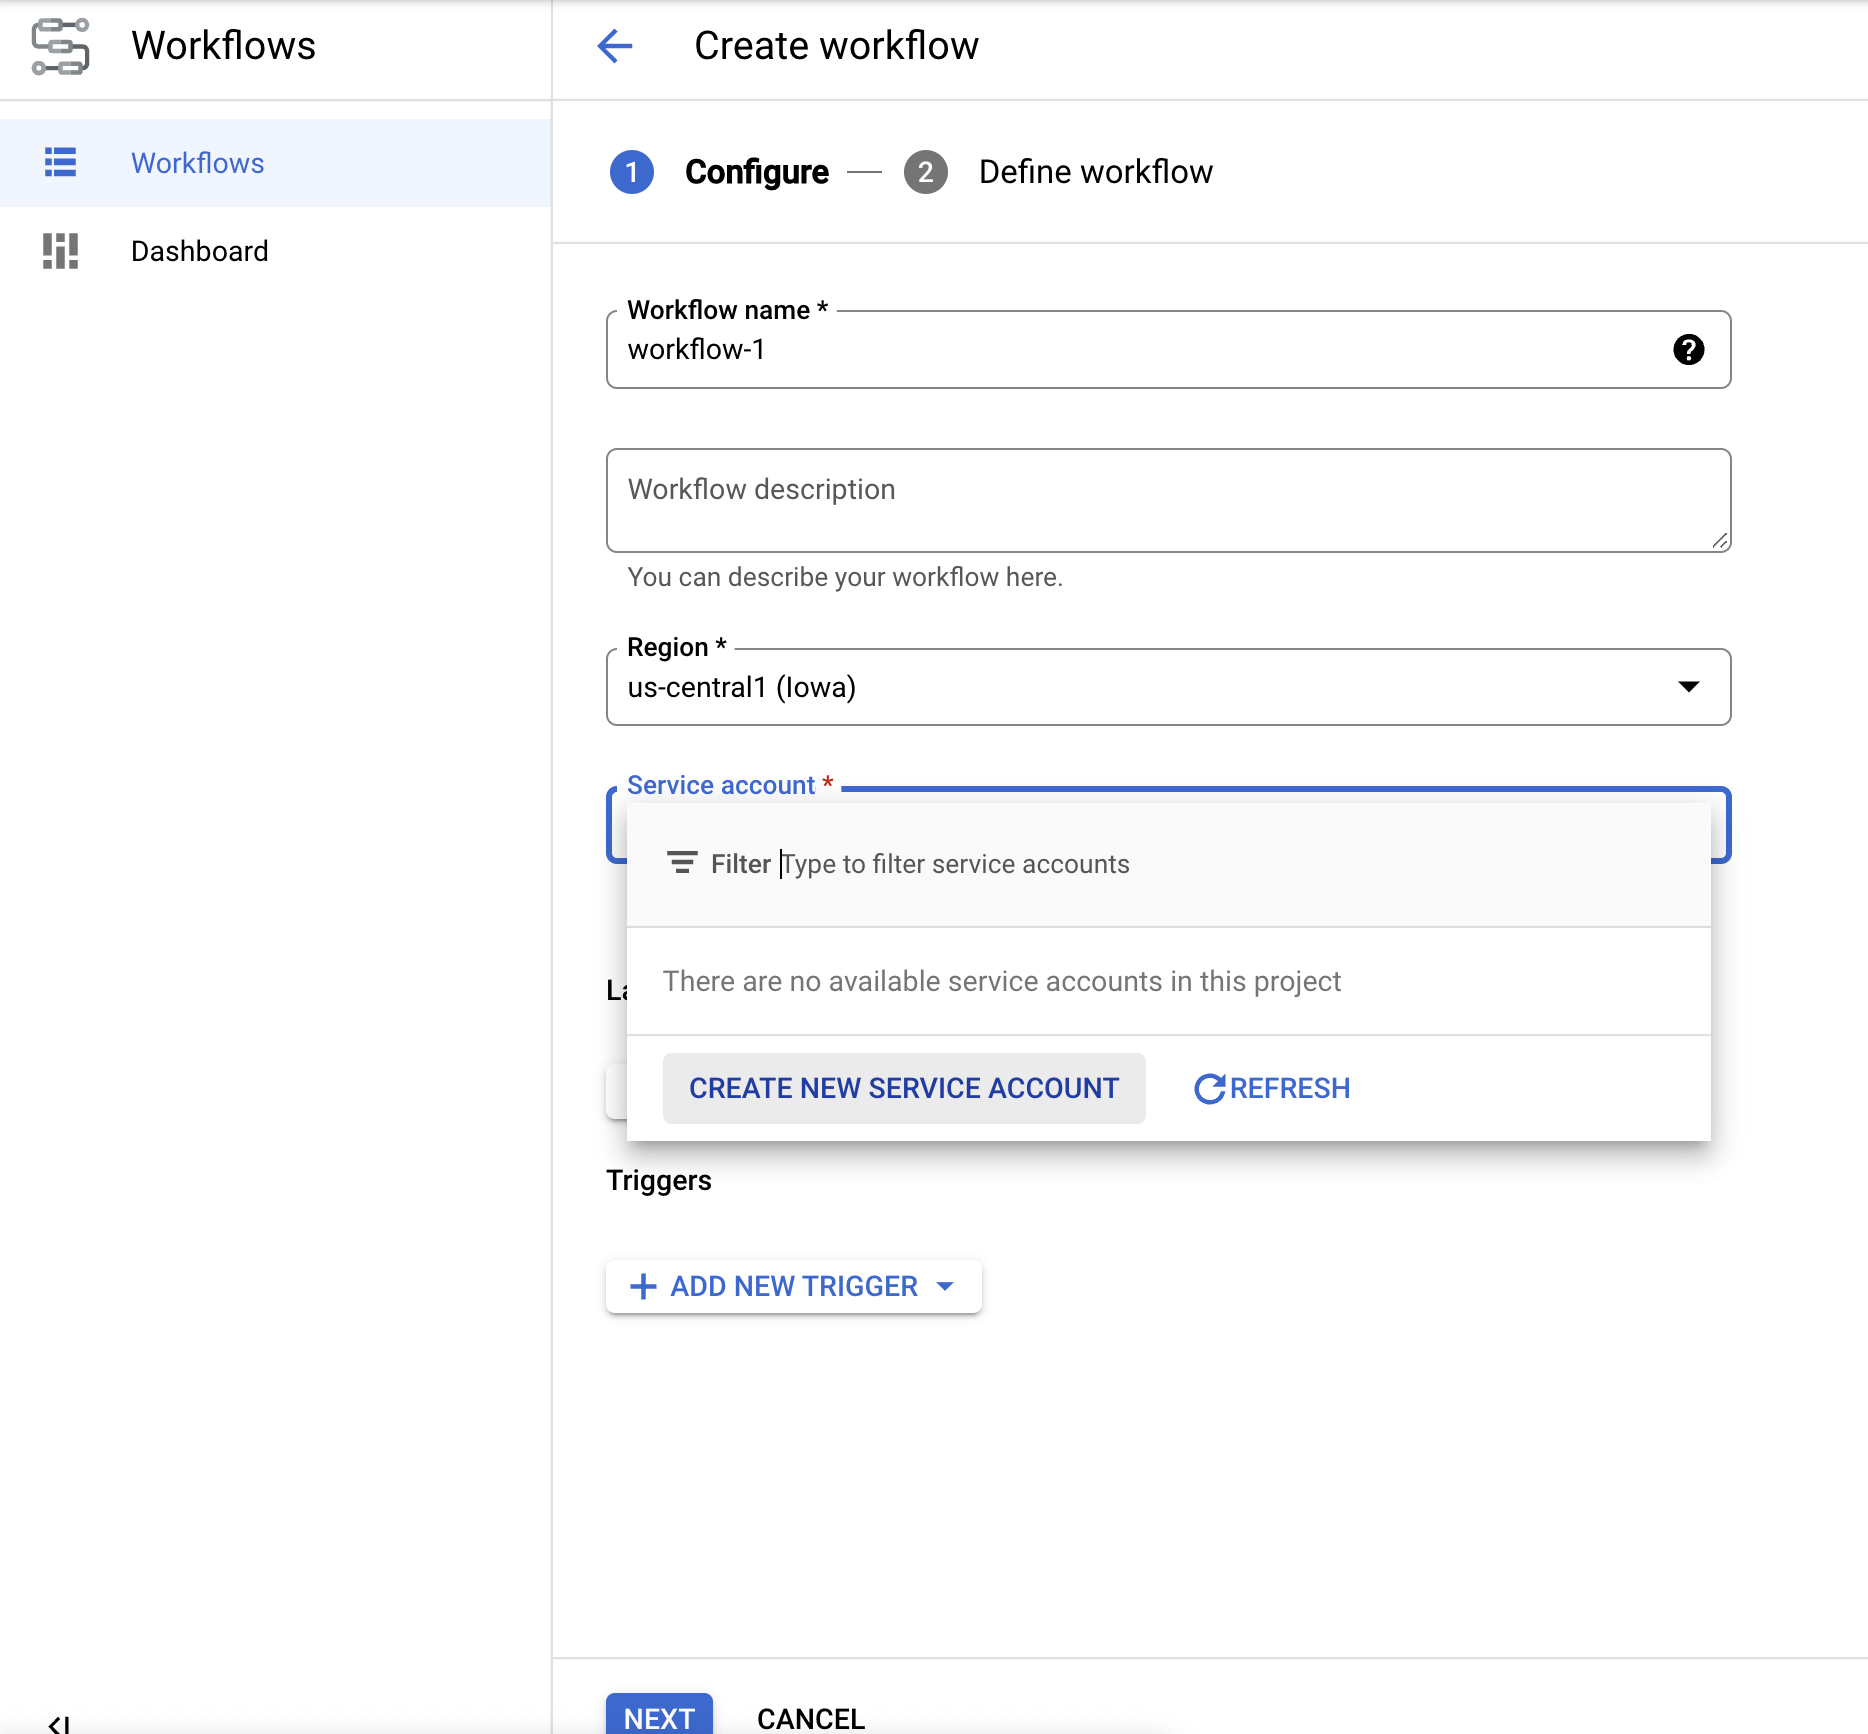
Rename the workflow todocai-workflows-quickstart.Add a description, and select a service account if you have one for this project.
- If you don't have a service account, select Create New Service Account.
- Name your service account, and select Create and Continue.
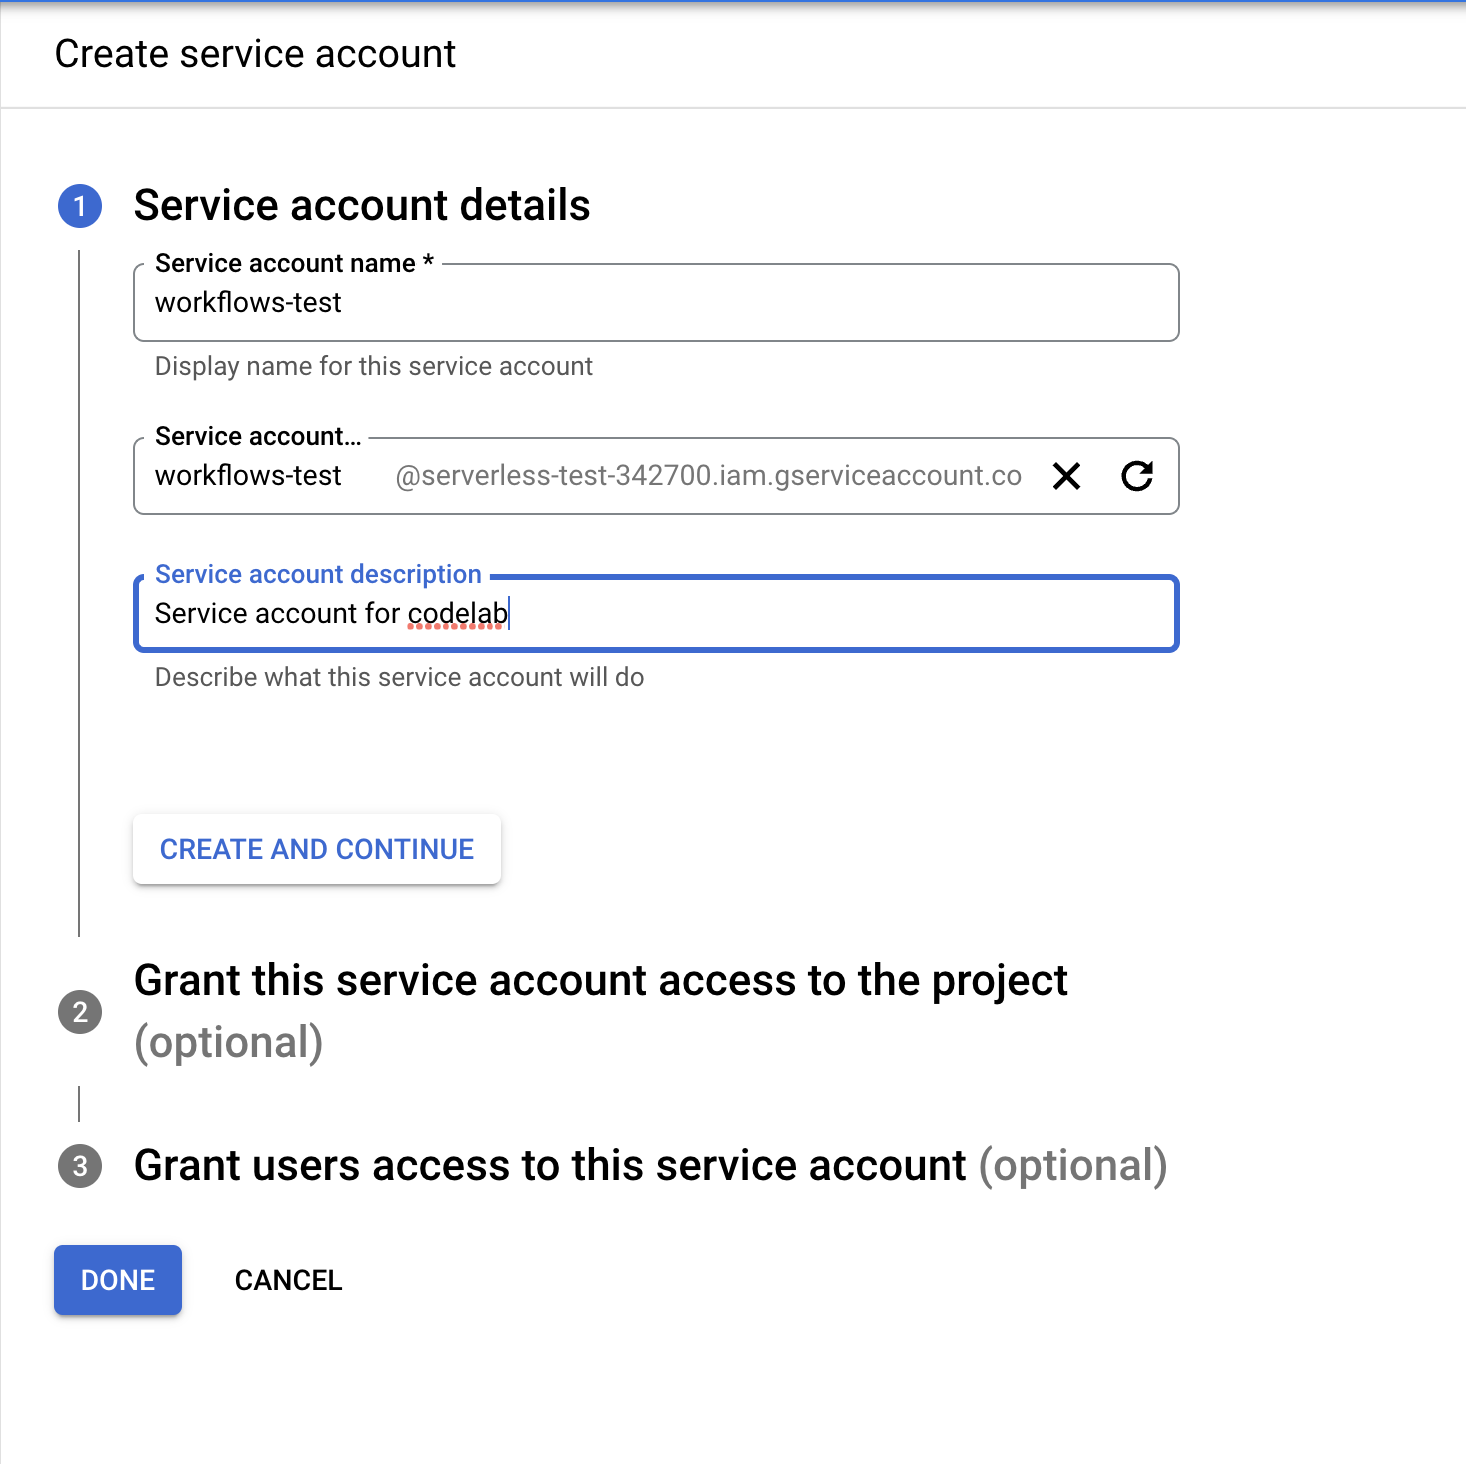
- Give it the following roles:
Document AI API UserWorkflows InvokerLogs WriterService Usage Consumer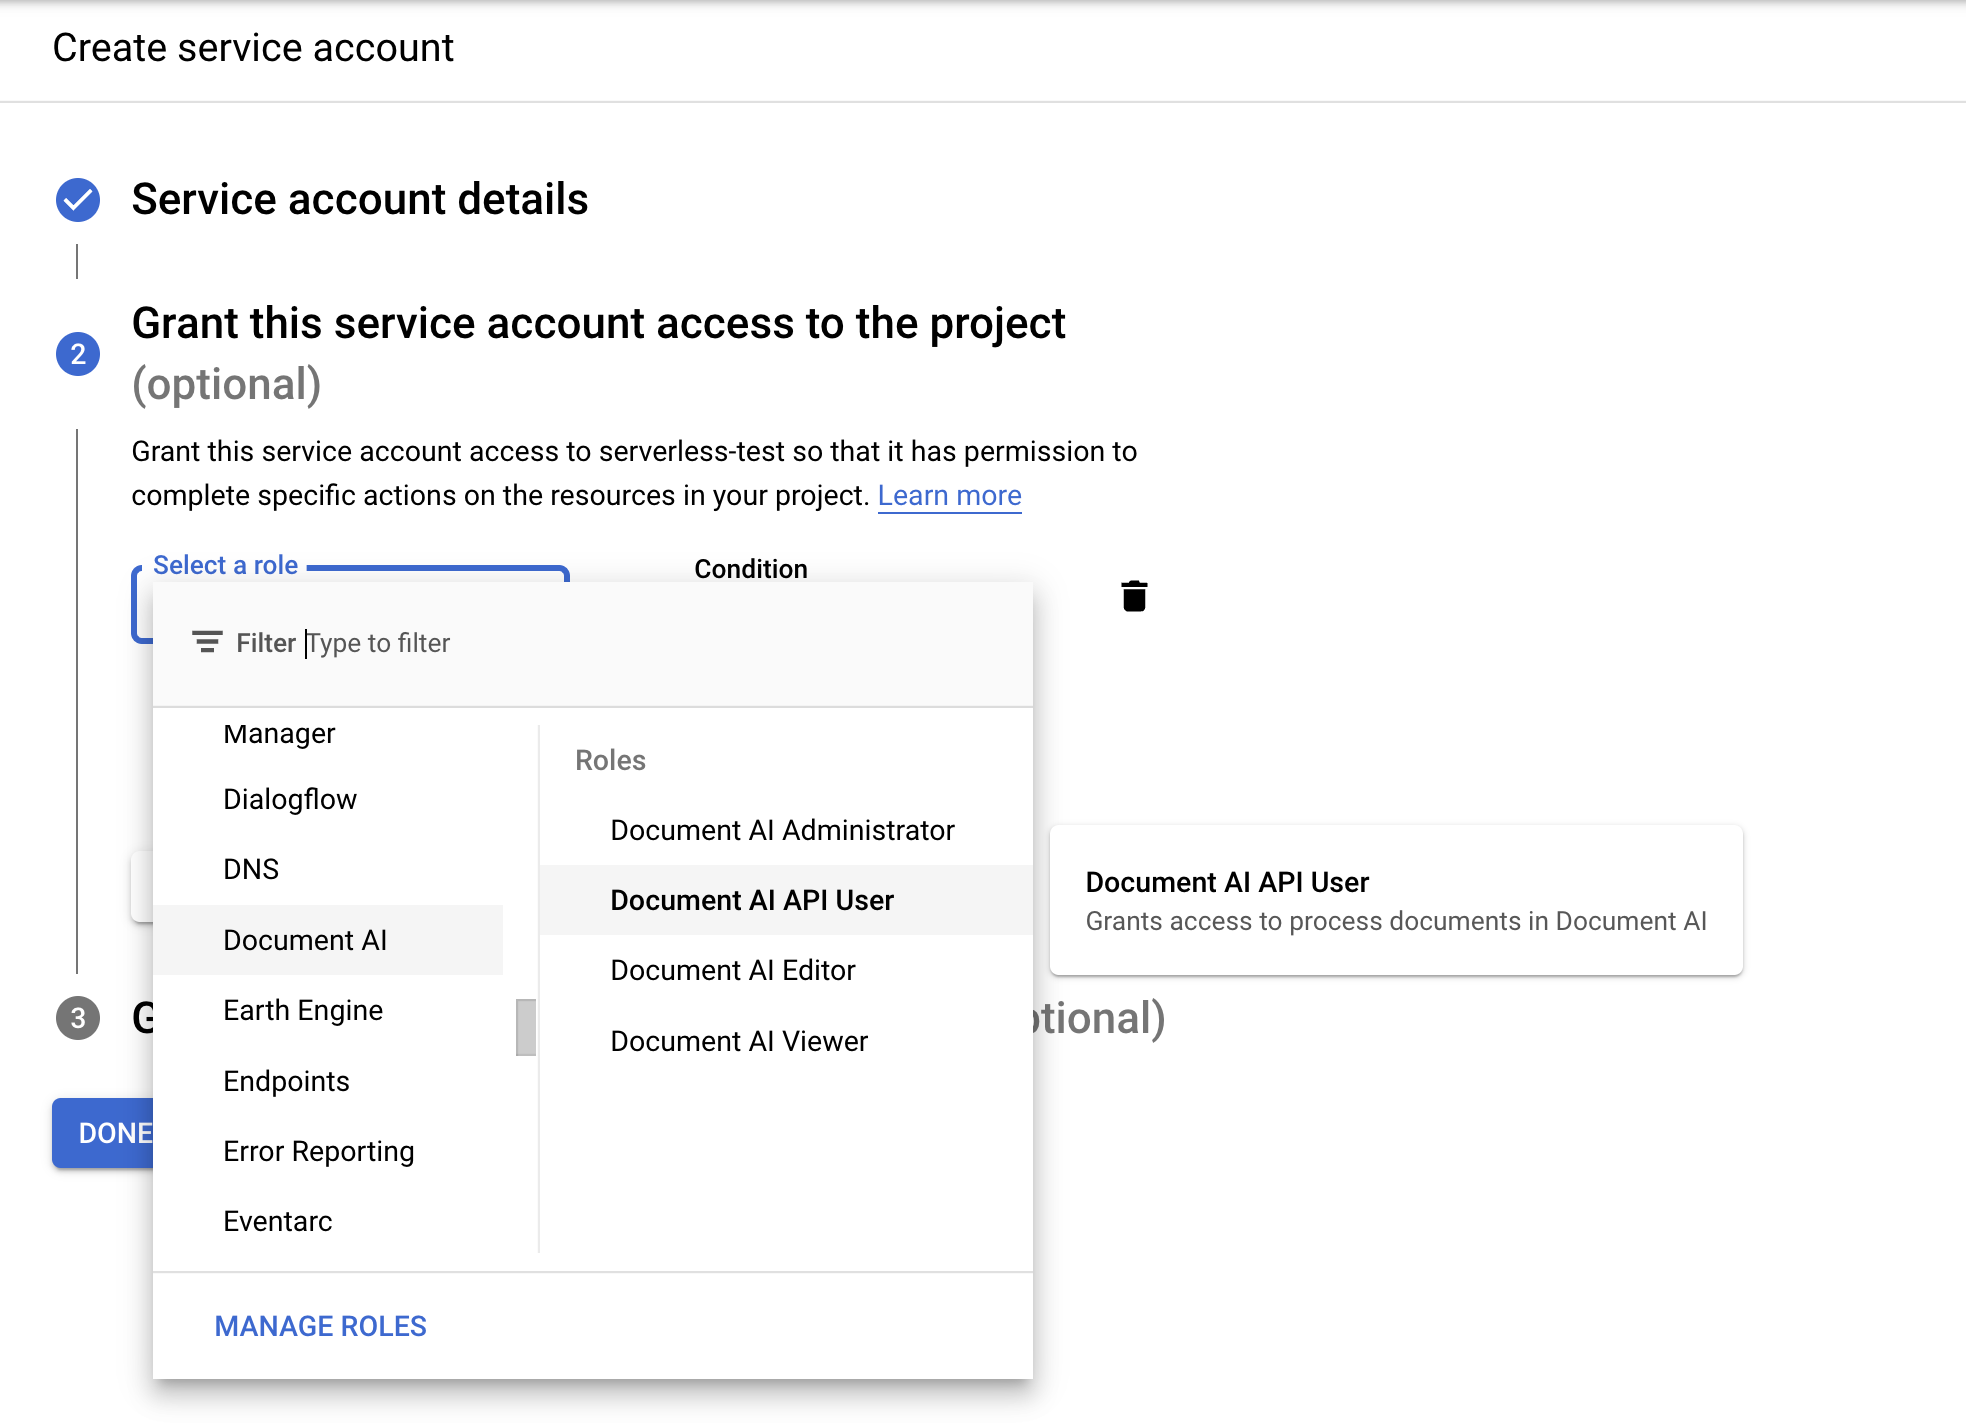
- Name your service account, and select Create and Continue.
- If you don't have a service account, select Create New Service Account.
On the Create Workflow page, click
Next .
Define workflow
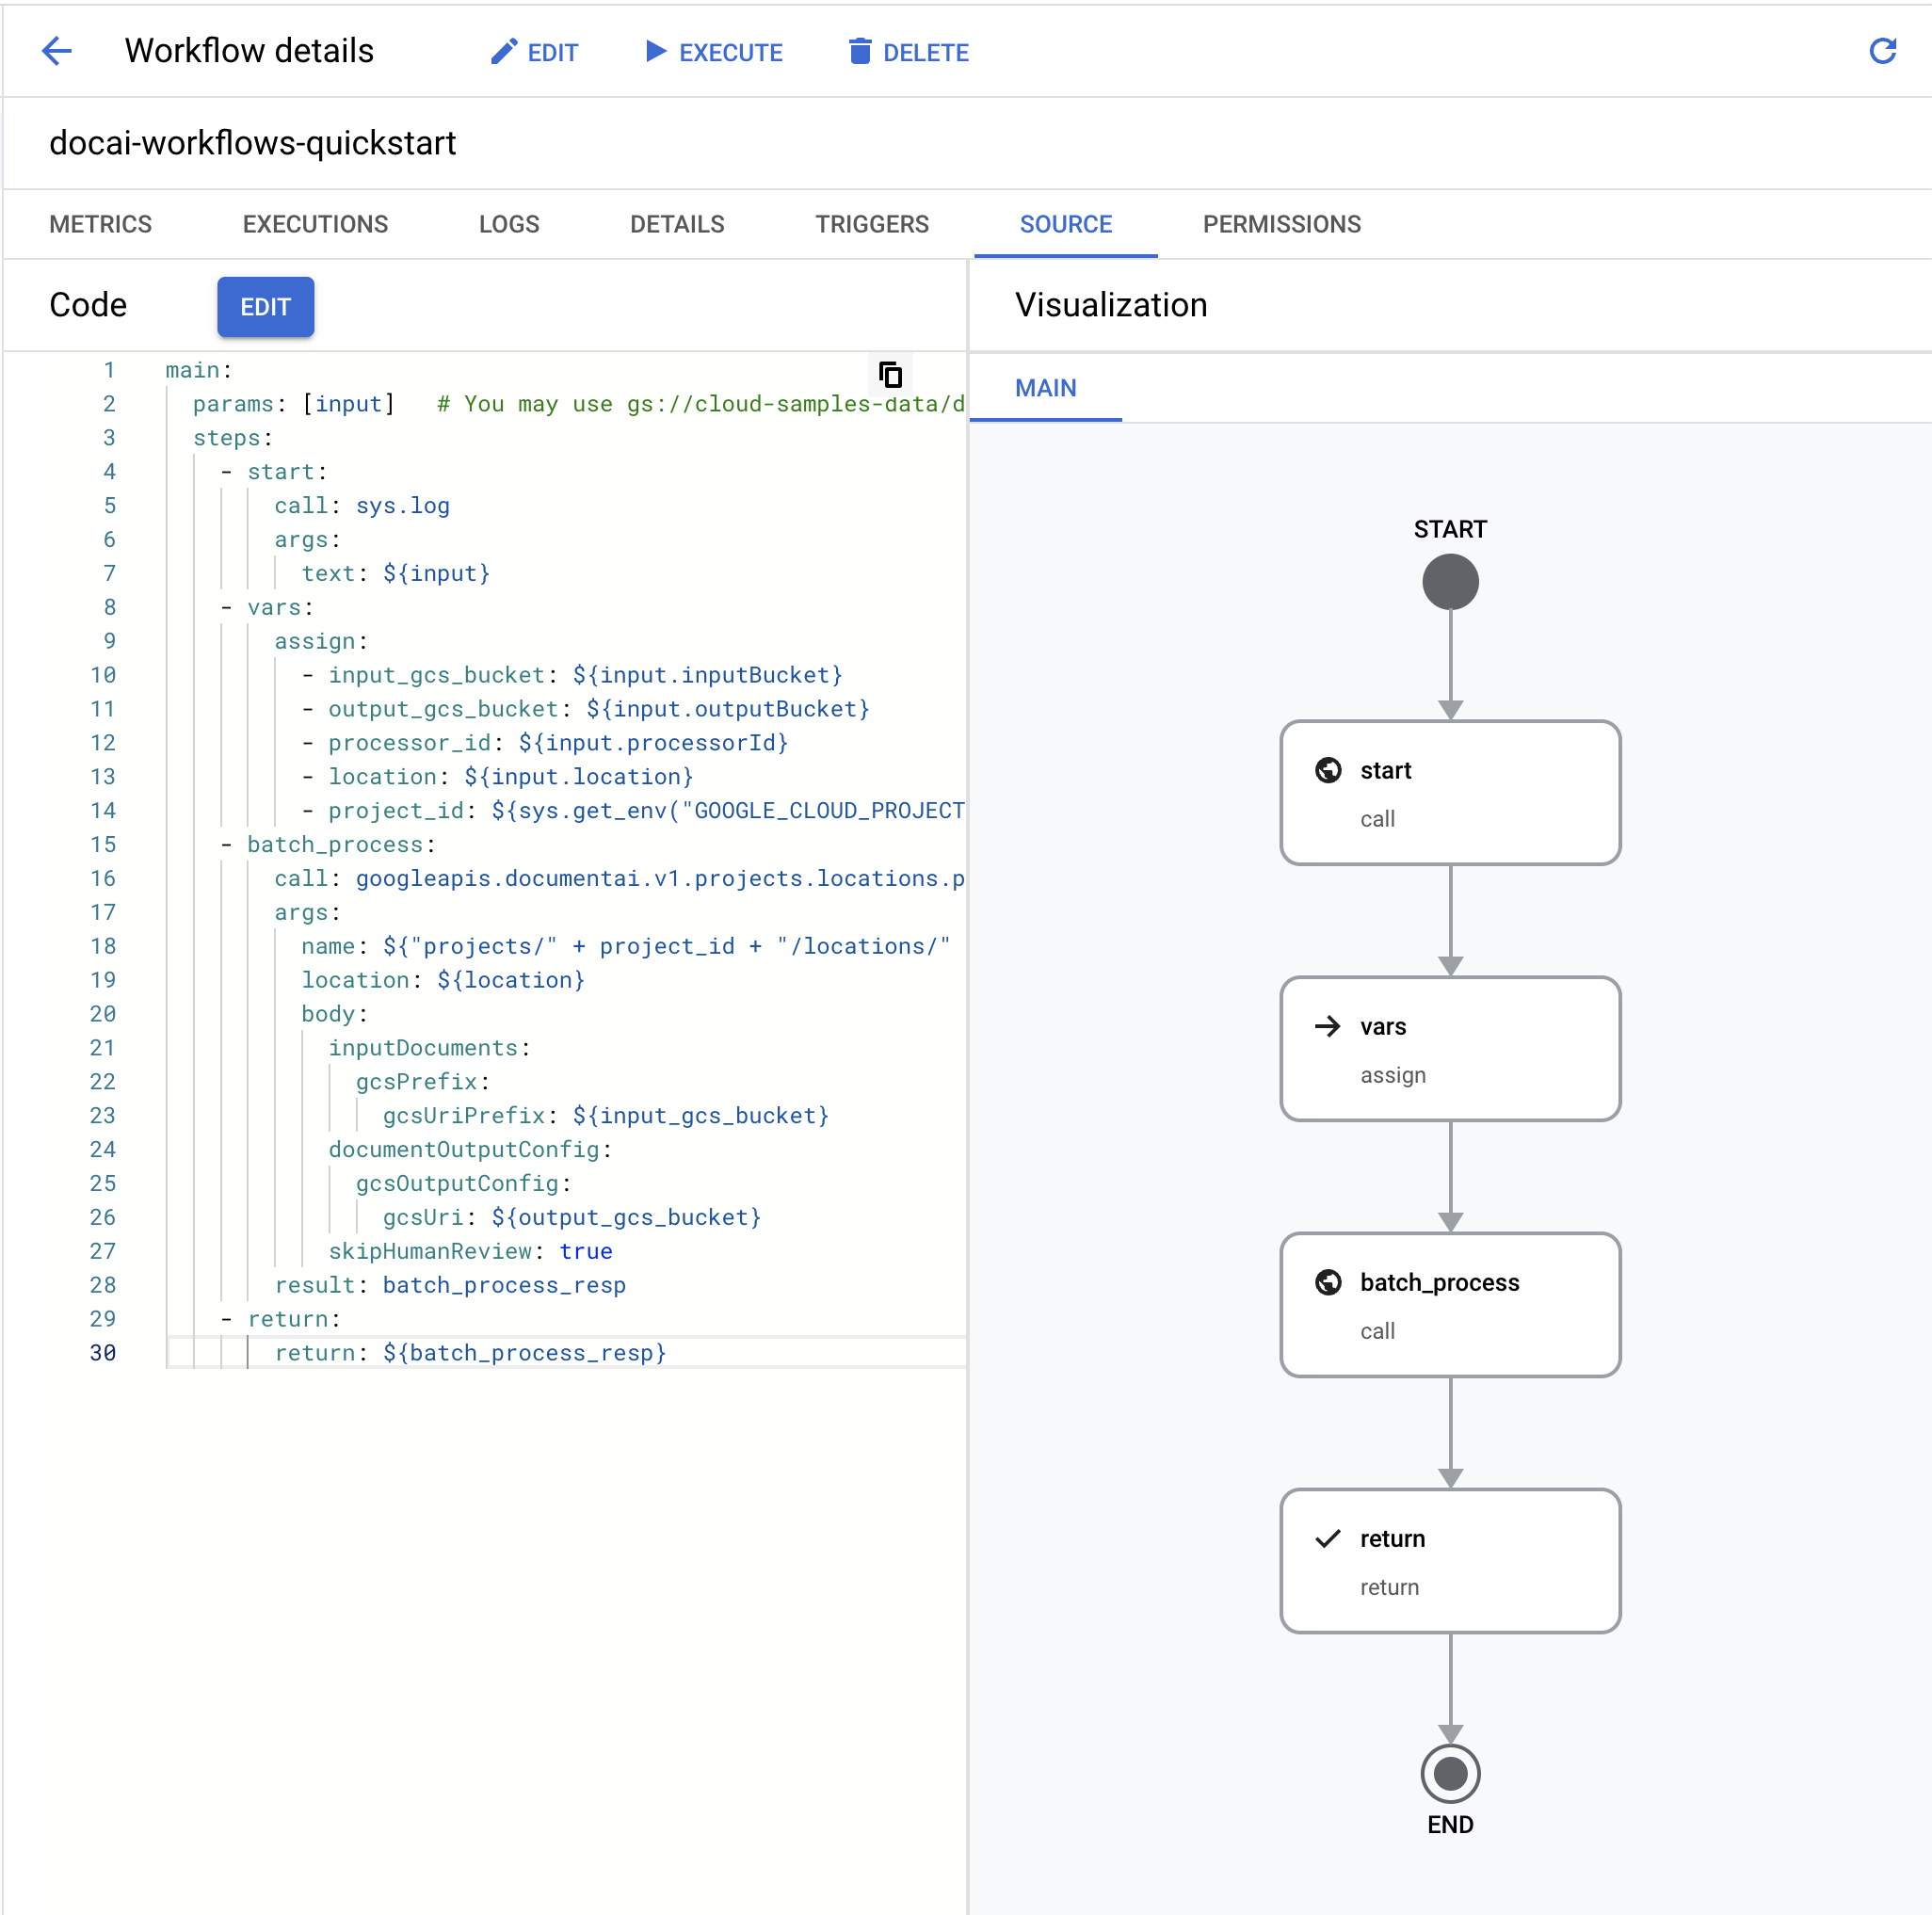
In the
Workflows editor , clear the default YAML and paste in the code below:main: params: [input] steps: - start: call: sys.log args: text: ${input} - vars: assign: - input_gcs_bucket: ${input.inputBucket} - output_gcs_bucket: ${input.outputBucket} - processor_id: ${input.processorId} - location: ${input.location} - project_id: ${sys.get_env("GOOGLE_CLOUD_PROJECT_ID")} - batch_process: call: googleapis.documentai.v1.projects.locations.processors.batchProcess args: name: ${"projects/" + project_id + "/locations/" + location + "/processors/" + processor_id} location: ${location} body: inputDocuments: gcsPrefix: gcsUriPrefix: ${input_gcs_bucket} documentOutputConfig: gcsOutputConfig: gcsUri: ${output_gcs_bucket} skipHumanReview: true result: batch_process_resp - return: return: ${batch_process_resp}
- Select
Deploy .
Test workflow
Now that the workflow has been deployed, you should be on the Workflow details page.
Click
Execute at the top of the page to go to the Execute workflow page. This page allows you to test your workflow in the console.Replace the placeholder variables in the following input JSON:
- OUTPUT_BUCKET_PATH: The full path to output bucket and folder created earlier.
- PROCESSOR_ID: The processor ID for the processor created earlier.
- LOCATION: The region for the processor created earlier.
{
  "inputBucket": "gs://cloud-samples-data/documentai/workflows",
  "outputBucket": "OUTPUT_BUCKET_PATH",
  "processorId": "PROCESSOR_ID",
  "location": "LOCATION"
}
Copy/Paste the JSON into the
input textbox .Click
Execute at the bottom of the workflow to test your input and wait for a moment for the process to complete.Once the workflow finishes, the output JSON should look something like this.
{
  "done": true,
  "metadata": {
    "@type": "type.googleapis.com/google.cloud.documentai.v1.BatchProcessMetadata",
    "createTime": "2023-02-24T18:31:18.521764Z",
    "individualProcessStatuses": [
      {
        "humanReviewStatus": {
          "state": "SKIPPED"
        },
        "inputGcsSource": "gs://cloud-samples-data/documentai/workflows/baking_technologies_invoice.pdf",
        "outputGcsDestination": "OUTPUT_BUCKET_PATH/11119195367705871803/0",
        "status": {}
      },
      {
        "humanReviewStatus": {
          "state": "SKIPPED"
        },
        "inputGcsSource": "gs://cloud-samples-data/documentai/workflows/generic_invoice.pdf",
        "outputGcsDestination": "OUTPUT_BUCKET_PATH/11119195367705871803/1",
        "status": {}
      },
      {
        "humanReviewStatus": {
          "state": "SKIPPED"
        },
        "inputGcsSource": "gs://cloud-samples-data/documentai/workflows/google_invoice.pdf",
        "outputGcsDestination": "OUTPUT_BUCKET_PATH/11119195367705871803/2",
        "status": {}
      }
    ],
    "state": "SUCCEEDED",
    "updateTime": "2023-02-24T18:31:52.543163Z"
  },
  "name": "projects/PROJECT_ID/locations/LOCATION/operations/11119195367705871803",
  "response": {
    "@type": "type.googleapis.com/google.cloud.documentai.v1.BatchProcessResponse"
  }
}
Open your output storage bucket, you will see the output for each invoice processed in a folder named after the Operation ID.

Within this folder there will be subfolders, one for each document processed from the input batch containing
DocumentJSON file(s).You may inspect each JSON file or write code to use the relevant fields for your use case. Refer to the handle the processing response guide for more information.
You can now link additional steps in the workflow to further process the output, such as inserting the extracted entities into a database for analytics.
Refer to the Workflows Documentation for more information on how to trigger workflows.
Clean up
To avoid incurring charges to your Google Cloud account for the resources used on this page, follow these steps.
To avoid unnecessary Google Cloud charges, use the Google Cloud console to delete your processor, bucket, workflow, and project if you do not need them.
What's next
- Learn more about Workflows
- Learn more about the Document AI Workflows Connector
- See a list and descriptions of currently available processors.
- Learn how to handle the processing response.