Su Compute Engine puoi gestire i sistemi operativi in esecuzione sulle tue macchine virtuali (VM) utilizzando VM Manager.
Puoi attivare VM Manager per singole VM, per un progetto o per tutti i progetti in una cartella o un'organizzazione. Per esaminare i passaggi necessari per configurare le VM per l'utilizzo di VM Manager, consulta la Panoramica della configurazione.
Dopo aver configurato VM Manager, puoi visualizzare gli audit log per le operazioni API eseguite con l'API OS Config, consulta Visualizzazione degli audit log di VM Manager.
Prima di iniziare
- Esamina le quote di OS Config per il tuo progetto.
-
Se non l'hai ancora fatto, configura l'autenticazione.
L'autenticazione è il processo mediante il quale la tua identità viene verificata per l'accesso a servizi e API di Google Cloud .
Per eseguire codice o esempi da un ambiente di sviluppo locale, puoi autenticarti su
Compute Engine selezionando una delle seguenti opzioni:
Select the tab for how you plan to use the samples on this page:
Console
When you use the Google Cloud console to access Google Cloud services and APIs, you don't need to set up authentication.
gcloud
-
Install the Google Cloud CLI. After installation, initialize the Google Cloud CLI by running the following command:
gcloud initIf you're using an external identity provider (IdP), you must first sign in to the gcloud CLI with your federated identity.
- Set a default region and zone.
REST
Per utilizzare gli esempi di API REST in questa pagina in un ambiente di sviluppo locale, devi utilizzare le credenziali che fornisci a gcloud CLI.
Install the Google Cloud CLI. After installation, initialize the Google Cloud CLI by running the following command:
gcloud initIf you're using an external identity provider (IdP), you must first sign in to the gcloud CLI with your federated identity.
Per saperne di più, consulta Autenticarsi per l'utilizzo di REST nella documentazione sull'autenticazione di Google Cloud .
Sistemi operativi supportati
Per l'elenco completo delle versioni del sistema operativo che supportano VM Manager, consulta Dettagli del sistema operativo. Se l'agente di configurazione del sistema operativo non è disponibile per un determinato sistema operativo, non puoi abilitare VM Manager per una VM che esegue questo sistema operativo.
Attiva VM Manager utilizzando una policy dell'organizzazione
Puoi abilitare automaticamente VM Manager per tutte le nuove VM nell'organizzazione, nella cartella o nel progetto utilizzando la policy dell'organizzazione Richiedi OS Config.
Quando è configurato il vincolo booleano Richiedi OS Config, vengono applicate le seguenti condizioni:
enable-osconfig=TRUEè incluso nei metadati del progetto per tutti i nuovi progetti.- Le richieste che impostano
enable-osconfigsuFALSEnei metadati di istanza o progetto vengono rifiutate per VM e progetti nuovi ed esistenti. - Questa policy dell'organizzazione non modifica il valore dei metadati
enable-osconfiginTRUEper le VM o per i progetti creati prima dell'attivazione della policy. Se vuoi attivare VM Manager su queste VM o su questi progetti, ti consigliamo di aggiornare i metadati. Per ulteriori informazioni, vedi Imposta i valori dei metadati.
Quando la policy dell'organizzazione OS Config è attivata, puoi comunque utilizzare i metadati di
osconfig-disabled-featuresper disattivare una o più funzionalità di VM Manager.Attiva la policy dell'organizzazione OS Config
Per attivare la policy di OS Config, puoi impostare il vincolo Richiedi OS Config su tutta l'organizzazione, su cartelle o su progetti specifici utilizzando la consoleGoogle Cloud o Google Cloud CLI.
Console
Per impostare la policy dell'organizzazione di OS Config dalla console, completa i seguenti passaggi:
Nella console Google Cloud , vai alla pagina Policy dell'organizzazione.
Nel selettore di progetti, seleziona il progetto, la cartella o l'organizzazione per cui vuoi modificare le policy dell'organizzazione.
La pagina Policy dell'organizzazione mostra un elenco filtrabile dei vincoli delle policy dell'organizzazione disponibili.
Seleziona il vincolo Richiedi OS Config dall'elenco dei vincoli. Nella pagina Dettagli della policy visualizzata viene descritto il vincolo e vengono fornite informazioni su come viene applicato.
Per aggiornare la policy dell'organizzazione per questa risorsa, fai clic su Gestisci policy.
Nella pagina Modifica policy, seleziona Override policy della risorsa padre.
Seleziona Aggiungi una regola.
In Applicazione, seleziona se attivare o meno l'applicazione di questa policy dell'organizzazione.
Per applicare la policy, fai clic su Imposta policy.
gcloud
Per impostare la policy dell'organizzazione di OS Config, utilizza il comando
gcloud beta resource-manager org-policies enable-enforce.Trova il tuo ID organizzazione.
gcloud organizations list
Imposta il vincolo nella tua organizzazione. Sostituisci
organization-idcon il tuo ID organizzazione.gcloud beta resource-manager org-policies enable-enforce compute.requireOsConfig \ --organization=organization-id
Puoi anche applicare la policy dell'organizzazione di OS Config a una cartella o a un progetto con i flag
--foldero--projecte, rispettivamente, l'ID cartella e l'ID progetto.Per le cartelle, esegui il seguente comando:
gcloud beta resource-manager org-policies enable-enforce compute.requireOsConfig \
    --folder=folder-id
Per i progetti, esegui il seguente comando:
gcloud beta resource-manager org-policies enable-enforce compute.requireOsConfig \
    --project=project-id
Sostituisci quanto segue:
folder-id: il tuo ID cartella.project-id: il tuo ID progetto.
Abilita VM Manager in un progetto
Per attivare VM Manager nel tuo progetto, hai due opzioni:
- Attivazione automatica: si applica all'intero progetto Google Cloud . In questo modo completati l'attivazione automatica dalla console Google Cloud . Potresti comunque dover completare manualmente alcuni passaggi.
Attivazione manuale: può essere eseguita per VM o per l'intero progetto Google Cloud .
Manuale
Per configurare manualmente VM Manager, completa i seguenti passaggi:
- Nel progetto Google Cloud , abilita l'API OS Config.
- In ogni VM, controlla se è installato l'agente OS Config. Se l'agente non è già installato, installa l'agente OS Config.
- Nel tuo progetto o in ogni VM, imposta i metadati dell'istanza per l'agente OS Config. Questo passaggio è necessario per attivare l'agente OS Config nella VM o nel progetto.
- Verifica che a tutte le VM sia collegato un service account. Non è necessario concedere alcun ruolo IAM a questo service account. VM Manager utilizza questo service account per firmare le richieste al servizio API.
- Se la tua VM è in esecuzione all'interno di una rete VPC privata e non dispone dell'accesso a internet pubblico, abilita l'accesso privato Google.
- Se utilizzi un proxy HTTP per le tue VM, configura un proxy HTTP.
- Facoltativo. Nel progetto o in ogni VM, disattiva le funzionalità che non ti servono.
Automatico
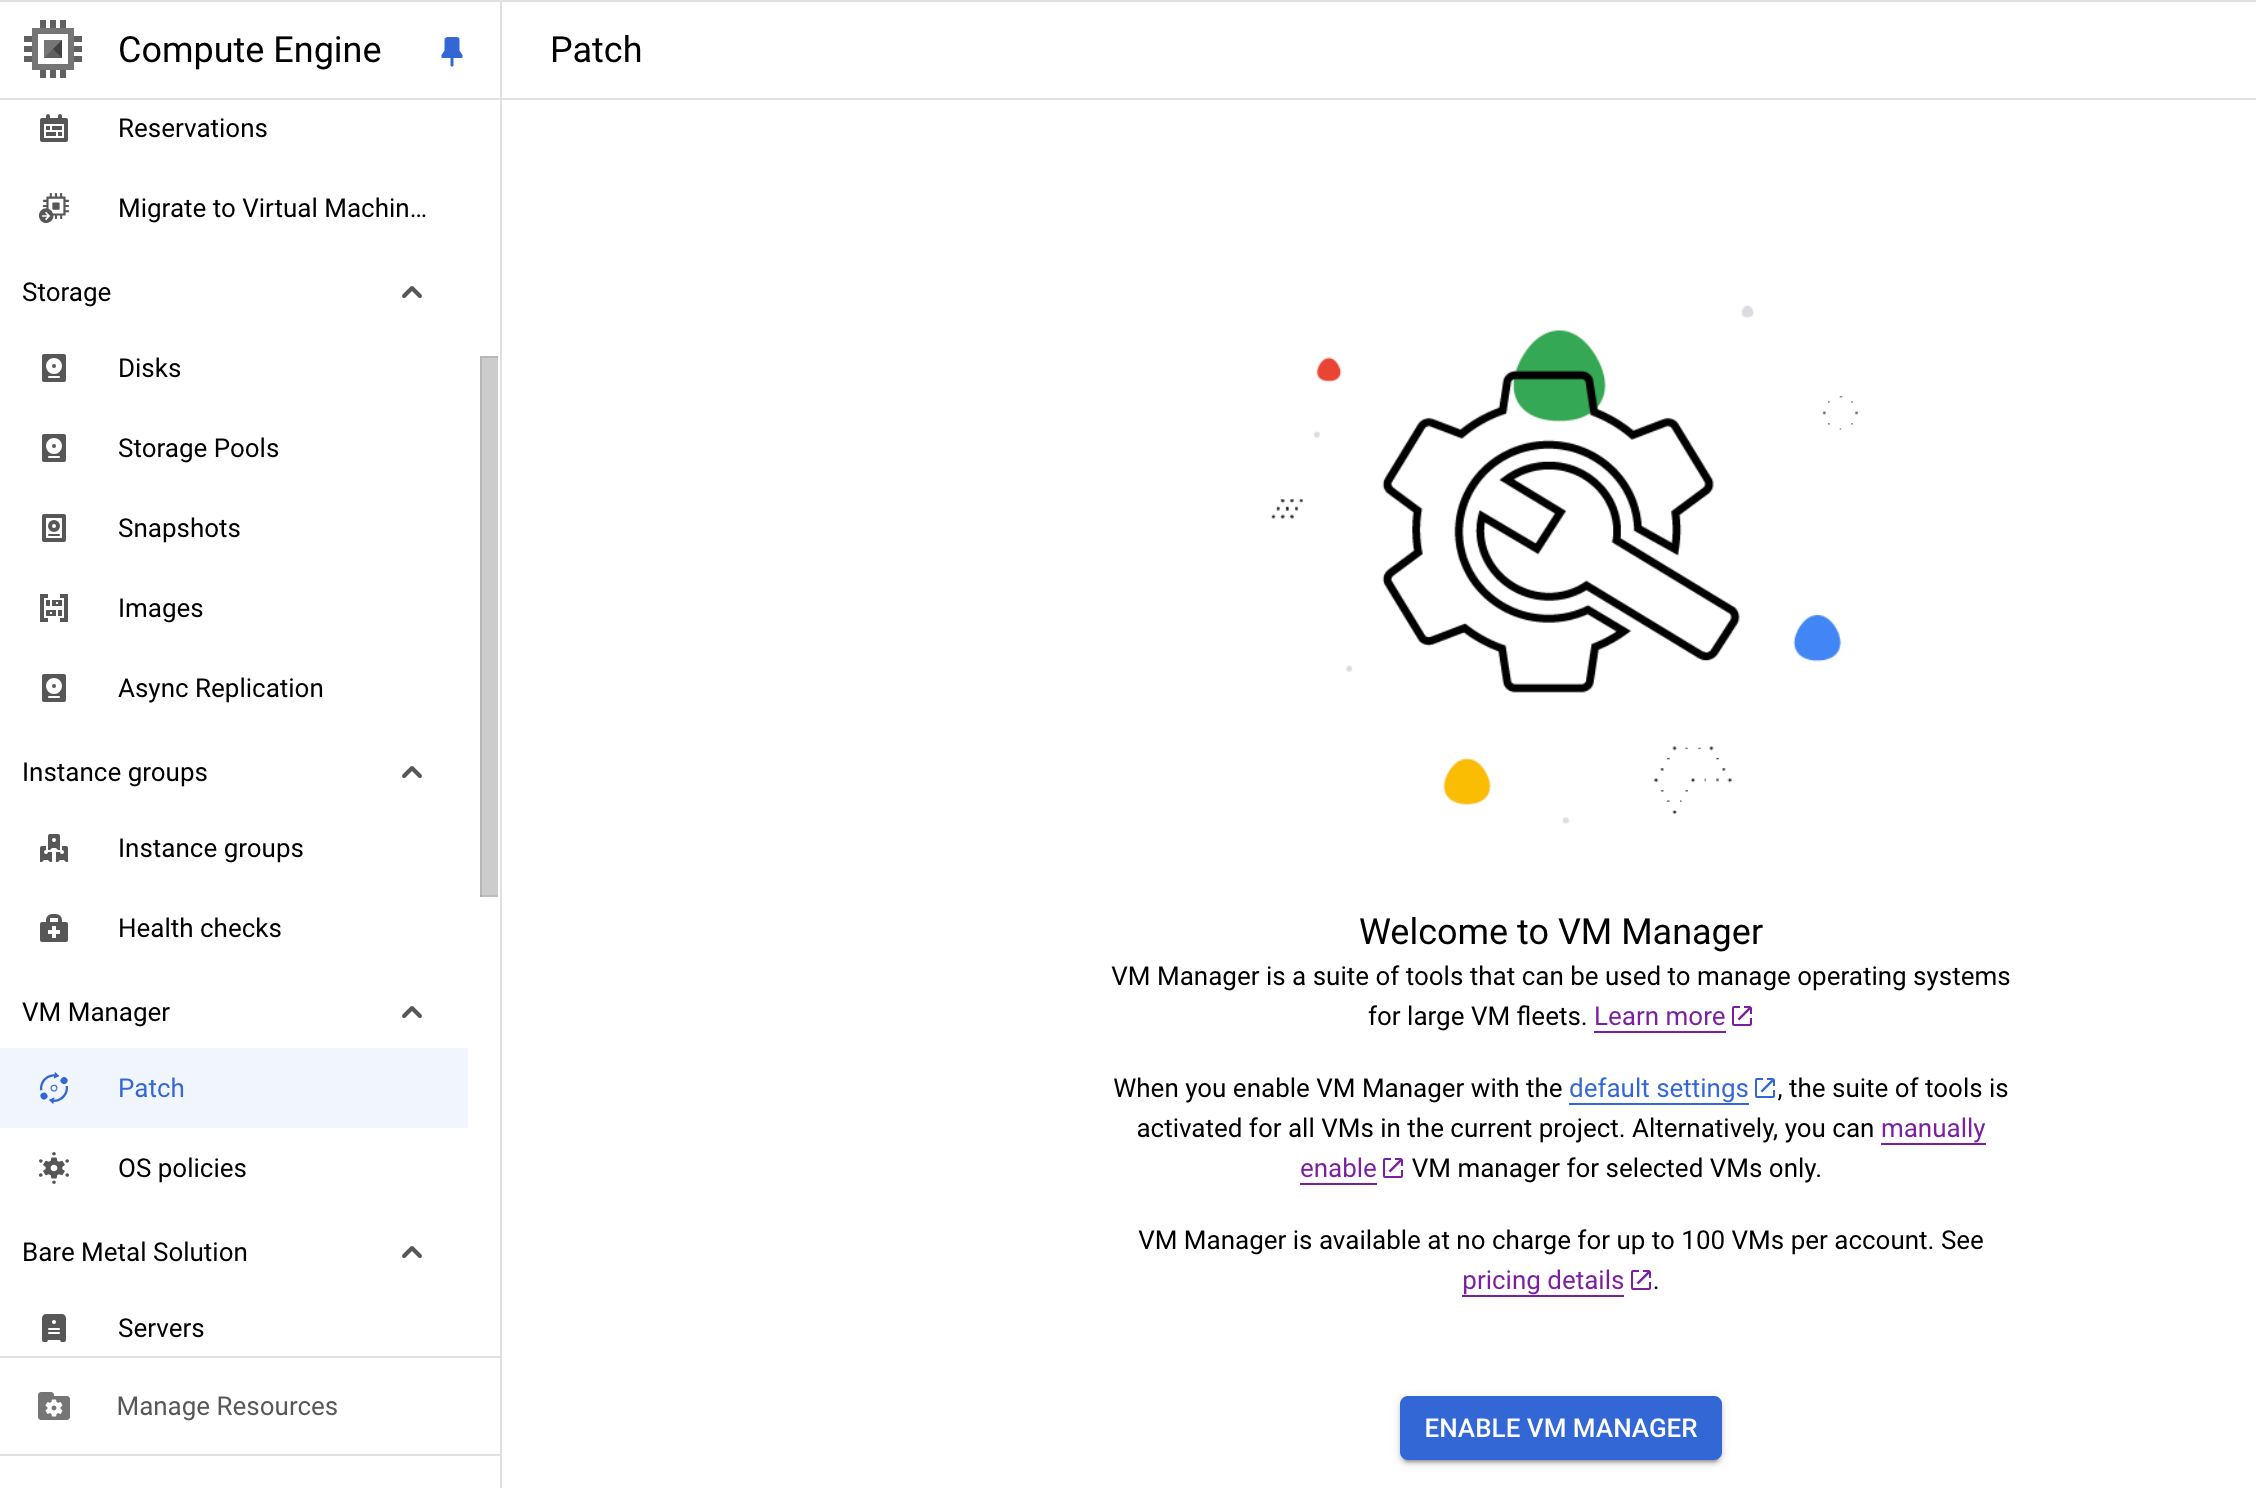
La prima volta che accedi a una delle pagine di VM Manager nella consoleGoogle Cloud , puoi scegliere di attivare automaticamente VM Manager.
Se segui la procedura guidata, puoi utilizzare l'attivazione automatica per completare quanto segue:
- Abilita VM Manager (API OS Config) nel progetto Google Cloud
- Attiva gli agenti OS Config su tutte le VM del progetto Google Cloud su cui è installato l'agente
Abilita l'API del servizio OS Config
Nel tuo progetto Google Cloud , abilita l'API OS Config.
Console
Nella console Google Cloud , abilita VM Manager (API OS Config).
gcloud
Per abilitare l'API, esegui il seguente comando:
gcloud services enable osconfig.googleapis.com
Verifica se l'agente OS Config è installato
L'agente OS Config è installato per impostazione predefinita su immagini CentOS, Container-Optimized OS (COS), Debian, Red Hat Enterprise Linux (RHEL), Rocky Linux, SLES, Ubuntu e Windows Server con data di creazione pari o successiva al giorno
v20200114. Per informazioni sulle versioni dei sistemi operativi su cui è installato l'agente OS Config, consulta Dettagli del sistema operativo. Questi agenti restano inattivi finché non attivi i metadati dell'agente e l'API di servizio.Linux
Per verificare se l'agente è installato nella VM Linux, esegui il seguente comando:
sudo systemctl status google-osconfig-agent
Se l'agente è installato ed è in esecuzione, l'output è simile al seguente:
google-osconfig-agent.service - Google OSConfig Agent
Loaded: loaded (/lib/systemd/system/google-osconfig-agent.service; enabled; vendor preset:
Active: active (running) since Wed 2020-01-15 00:14:22 UTC; 6min ago
Main PID: 369 (google_osconfig)
 Tasks: 8 (limit: 4374)
Memory: 102.7M
CGroup: /system.slice/google-osconfig-agent.service
        └─369 /usr/bin/google_osconfig_agent
Se l'agente non è installato, installa l'agente OS Config.
Windows
Per verificare se l'agente è installato nella VM Windows, esegui il seguente comando:
PowerShell Get-Service google_osconfig_agent
Se l'agente è installato ed è in esecuzione, l'output è simile al seguente:
Status   Name               DisplayName
------   ----               -----------
Running  google_osconfig... Google OSConfig Agent
Se l'agente non è installato, installa l'agente OS Config.
Installa l'agente OS Config
Prima di seguire questi passaggi per installare l'agente, verifica se l'agente è già in esecuzione sulla VM.
Installa l'agente OS Config su ogni VM. Puoi installare l'agente OS Config utilizzando una delle seguenti opzioni:
- Installa l'agente manualmente utilizzando il terminale.
- Utilizza uno script di avvio sulle tue VM.
- Automatizza l'installazione di OS Config su più VM utilizzando una policy dell'agente Google Cloud Observability.
Installa l'agente manualmente
Utilizza questa opzione per installare l'agente OS Config su una VM esistente.
Per installare l'agente, completa i seguenti passaggi:
Connettiti alla VM su cui vuoi installare l'agente OS Config.
Installa l'agente OS Config.
Windows Server
Per installare l'agente OS Config su un server Windows, esegui il seguente comando:
googet -noconfirm install google-osconfig-agent
Ubuntu
Per installare l'agente OS Config su una VM Ubuntu, esegui i seguenti comandi:
Configura il repository Ubuntu.
Per Ubuntu 20.04 e versioni successive, esegui i seguenti comandi:
Aggiungi il repository Ubuntu.
sudo su -c "echo 'deb http://packages.cloud.google.com/apt google-compute-engine-focal-stable main' > \
/etc/apt/sources.list.d/google-compute-engine.list"
Importa la chiave pubblica Google Cloud .
curl https://packages.cloud.google.com/apt/doc/apt-key.gpg | \
sudo apt-key add -
Per Ubuntu 18.04 e versioni successive, esegui i seguenti comandi:
Aggiungi il repository Ubuntu.
sudo su -c "echo 'deb http://packages.cloud.google.com/apt google-compute-engine-bionic-stable main' > \
/etc/apt/sources.list.d/google-compute-engine.list"
Importa la chiave pubblica Google Cloud .
curl https://packages.cloud.google.com/apt/doc/apt-key.gpg | \
sudo apt-key add -
Per Ubuntu 16.04, esegui i seguenti comandi:
Aggiungi il repository Ubuntu.
sudo su -c "echo 'deb http://packages.cloud.google.com/apt google-compute-engine-xenial-stable main'> \
/etc/apt/sources.list.d/google-compute-engine.list"
Importa la chiave pubblica Google Cloud .
curl https://packages.cloud.google.com/apt/doc/apt-key.gpg | \
sudo apt-key add -
Installa l'agente OS Config.
sudo apt update
sudo apt -y install google-osconfig-agent
Debian
Per installare l'agente OS Config su una VM Debian, esegui i seguenti comandi:
sudo apt update
sudo apt -y install google-osconfig-agent
Aggiunta del repository Google Cloud e della chiave pubblica
Se utilizzi un'istanza VM non creata da un'immagine fornita da Google o hai ricevuto il messaggio di errore "Impossibile trovare il pacchetto", completa i seguenti passaggi per aggiungere il repository Google Cloud e importare la chiave pubblica.
Dopo aver aggiunto il repository e importato la chiave, puoi eseguire i comandi per installare l'agente OS Config.
Per Debian 9 (Stretch), esegui i seguenti comandi:
Aggiungi il repository Debian.
sudo su -c "echo 'deb http://packages.cloud.google.com/apt \
google-compute-engine-stretch-stable main'> /etc/apt/sources.list.d/google-compute-engine.list"
Importa la chiave pubblica Google Cloud .
curl https://packages.cloud.google.com/apt/doc/apt-key.gpg | \
sudo apt-key add -
Per Debian 10 (Buster), esegui i seguenti comandi:
Aggiungi il repository Debian.
sudo su -c "echo 'deb http://packages.cloud.google.com/apt \
google-compute-engine-buster-stable main'> /etc/apt/sources.list.d/google-compute-engine.list"
Importa la chiave pubblica Google Cloud .
curl https://packages.cloud.google.com/apt/doc/apt-key.gpg | \
sudo apt-key add -
RHEL/CentOS/Rocky
Per installare l'agente OS Config su una VM RHEL 7/8, CentOS 7/8 o Rocky Linux 8/9, esegui il seguente comando:
sudo yum -y install google-osconfig-agent
SLES/openSUSE
Per installare l'agente OS Config su una VM SLES o openSUSE, esegui i seguenti comandi:
Configura il repository SLES.
Per SLES 12, esegui il seguente comando:
sudo su -c "cat > /etc/zypp/repos.d/google-compute-engine.repo <<EOM
[google-compute-engine]
name=Google Compute Engine
baseurl=https://packages.cloud.google.com/yum/repos/google-compute-engine-sles12-stable
enabled=1
gpgcheck=1
repo_gpgcheck=0
gpgkey=https://packages.cloud.google.com/yum/doc/yum-key.gpg
  https://packages.cloud.google.com/yum/doc/rpm-package-key.gpg
EOM"
Per SLES 15 e OpenSUSE 15, esegui il seguente comando:
sudo su -c "cat > /etc/zypp/repos.d/google-compute-engine.repo <<EOM
[google-compute-engine]
name=Google Compute Engine
baseurl=https://packages.cloud.google.com/yum/repos/google-compute-engine-sles15-stable
enabled=1
gpgcheck=1
repo_gpgcheck=0
gpgkey=https://packages.cloud.google.com/yum/doc/yum-key.gpg
  https://packages.cloud.google.com/yum/doc/rpm-package-key.gpg
EOM"
Importa le chiavi GPG per Google Cloud.
sudo rpm --import https://packages.cloud.google.com/yum/doc/yum-key.gpg \
--import https://packages.cloud.google.com/yum/doc/rpm-package-key.gpg
Installa l'agente OS Config.
sudo zypper -n --gpg-auto-import-keys install --from google-compute-engine google-osconfig-agent
Installa l'agente utilizzando uno script di avvio
Puoi anche utilizzare i comandi di installazione manuale per creare uno script di avvio che installa l'agente OS Config durante la creazione della VM.
- Copia i comandi manuali per il tuo sistema operativo.
Fornisci lo script di avvio al metodo di creazione della VM.
Ad esempio, se utilizzi il comando
gcloud compute instances createper creare una VM Debian 10, il comando sarà simile al seguente:gcloud compute instances create VM_NAME \ --image-family=debian-10 --image-project=debian-cloud \ --metadata startup-script='#! /bin/bash apt update apt -y install google-osconfig-agent'
Sostituisci
VM_NAMEcon il nome della VM.Verifica che lo script di avvio venga completato. Per verificare se lo script di avvio viene completato, controlla i log o verifica la console seriale.
Imposta i valori dei metadati
Puoi impostare i metadati dell'istanza su ogni VM o i metadati di progetto che si applicano a tutte le VM del progetto.
Nel progetto Google Cloud o nella VM, imposta il valore dei metadati
enable-osconfigsuTRUE. L'impostazione del valore dei metadatienable-osconfigsuTRUEconsente quanto segue:- Patch
- Policy del sistema operativo
- OS Inventory Management
- Per la versione precedente di OS Inventory Management, devi anche impostare
il valore dei metadati
enable-guest-attributessuTRUE. Se entrambi i valori dei metadati non sono impostati, la dashboard mostrano dataper la VM. Questa operazione non è necessaria per la versione successiva. Per informazioni sulle due versioni di OS Inventory Management, consulta Versioni di OS Inventory Management.
- Per la versione precedente di OS Inventory Management, devi anche impostare
il valore dei metadati
Console
Puoi applicare i valori dei metadati ai tuoi progetti Google Cloud o alle tue VM utilizzando una delle seguenti opzioni:
Opzione 1: imposta
enable-osconfignei metadati a livello di progetto, in modo che sia applicato a tutte le VM del progetto.Nella console Google Cloud , vai alla pagina Metadati
Fai clic su Modifica.
Aggiungi la seguente voce di metadati:
Chiave:
enable-osconfig
Valore:TRUEPer la versione precedente di OS Inventory Management, imposta sia
enable-osconfigsiaenable-guest-attributes:- Chiave:
enable-osconfig
Valore:TRUE - Chiave:
enable-guest-attributes
Valore:TRUE
- Chiave:
Fai clic su Salva per applicare le modifiche.
Opzione 2: imposta
enable-osconfignei metadati della VM quando crei un'istanza.Nella console Google Cloud , vai alla pagina Crea un'istanza.
Specifica i dettagli della VM.
Espandi la sezione Opzioni avanzate e segui questi passaggi:
- Espandi la sezione Gestione.
Nella sezione Metadati, fai clic su Aggiungi elemento e aggiungi le seguenti voci di metadati:
Chiave:
enable-osconfig
Valore:TRUE.Per la versione precedente di OS Inventory Management, imposta sia
enable-osconfigsiaenable-guest-attributes:- Chiave:
enable-osconfig
Valore:TRUE - Chiave:
enable-guest-attributes
Valore:TRUE
- Chiave:
Per creare la VM, fai clic su Crea.
Opzione 3: imposta
enable-osconfignei metadati di una VM esistente.Nella console Google Cloud , vai alla pagina Istanze VM.
Fai clic sul nome della VM per cui vuoi impostare il valore dei metadati.
Nella pagina Dettagli istanza, fai clic su Modifica per modificare le impostazioni.
In Metadati personalizzati, aggiungi le seguenti voci di metadati:
Chiave:
enable-osconfig
Valore:TRUE.Per la versione precedente di OS Inventory Management, imposta sia
enable-osconfigsiaenable-guest-attributes:- Chiave:
enable-osconfig
Valore:TRUE - Chiave:
enable-guest-attributes
Valore:TRUE
- Chiave:
Fai clic su Salva per applicare le modifiche alla VM.
gcloud
Utilizza il comando
project-info add-metadataoinstances add-metadatacon il flag--metadata=enable-osconfig=TRUE.Puoi applicare i valori dei metadati ai tuoi progettio alle tue VM utilizzando una delle seguenti opzioni:
Opzione 1: imposta
enable-osconfignei metadati a livello di progetto, in modo che sia applicato a tutte le istanze del progetto.gcloud compute project-info add-metadata \ --project PROJECT_ID \ --metadata=enable-osconfig=TRUE
Per la versione precedente di OS Inventory Management, imposta sia
enable-osconfigsiaenable-guest-attributes:gcloud compute project-info add-metadata \ --project PROJECT_ID \ --metadata=enable-guest-attributes=TRUE,enable-osconfig=TRUE
Sostituisci
PROJECT_IDcon l'ID progetto.Opzione 2: imposta
enable-osconfignei metadati di un'istanza esistente.gcloud compute instances add-metadata VM_NAME \ --metadata=enable-osconfig=TRUE
Per la versione precedente di OS Inventory Management, imposta sia
enable-osconfigsiaenable-guest-attributes:gcloud compute instances add-metadata VM_NAME \ --metadata=enable-guest-attributes=TRUE,enable-osconfig=TRUE
Sostituisci
VM_NAMEcon il nome della VM.Opzione 3: imposta
enable-osconfignei metadati dell'istanza quando crei un'istanza.gcloud compute instances create VM_NAME \ --metadata=enable-osconfig=TRUE
Per la versione precedente di OS Inventory Management, imposta sia
enable-osconfigsiaenable-guest-attributes:gcloud compute instances create VM_NAME \ --metadata=enable-guest-attributes=TRUE,enable-osconfig=TRUE
Sostituisci
VM_NAMEcon il nome della VM.
REST
Puoi impostare il valore dei metadati a livello di progetto o istanza Google Cloud .
- Per istruzioni su come impostare i metadati a livello di progetto, consulta Impostazione di metadati personalizzati a livello di progetto.
- Per istruzioni su come impostare i metadati dell'istanza, consulta Impostazione dei metadati dell'istanza.
La seguente coppia chiave-valore è obbligatoria all'interno della proprietà dei metadati:
- Chiave:
enable-osconfig
Valore:TRUE
Per la versione precedente di OS Inventory Management, aggiungi anche la seguente coppia chiave-valore:
- Chiave:
enable-guest-attributes
Valore:TRUE
Configura un proxy HTTP
Se utilizzi un proxy HTTP per le tue VM, esegui i comandi seguenti per impostare le variabili di ambiente
http_proxyehttps_proxy. Devi anche escludere il server di metadati (169.254.169.254) configurando la variabile di ambienteno_proxyin modo che l'agente OS Config possa accedere al server di metadati locale.Linux
Nelle distribuzioni Linux che utilizzano systemd, come utente
root, aggiungi le variabili di ambiente proxy all'unitàgoogle-osconfig-agent.service:mkdir -p /etc/systemd/system/google-osconfig-agent.service.d cat >/etc/systemd/system/google-osconfig-agent.service.d/override.conf <<EOF [Service] Environment="http_proxy=http://PROXY_IP:PROXY_PORT" \ "https_proxy=http://PROXY_IP:PROXY_PORT" \ "no_proxy=169.254.169.254,metadata,metadata.google.internal" EOF
Sostituisci
PROXY_IPePROXY_PORTcon l'indirizzo IP e il numero di porta del tuo server proxy, rispettivamente.Riavvia il servizio dell'agente OS Config:
systemctl daemon-reload
systemctl restart google-osconfig-agent
Per verificare che le variabili siano impostate correttamente, controlla le variabili di ambiente per l'agente in esecuzione:
tr '\0' '\n' < /proc/$(systemctl show -p MainPID --value google-osconfig-agent)/environWindows
Esegui i seguenti comandi da un prompt dei comandi di amministratore.
  setx http_proxy http://PROXY_IP:PROXY_PORT /m
  setx https_proxy http://PROXY_IP:PROXY_PORT /m
  setx no_proxy 169.254.169.254,metadata,metadata.google.internal /m
Sostituisci
PROXY_IPePROXY_PORTcon l'indirizzo IP e il numero di porta del tuo server proxy, rispettivamente.Google consiglia di escludere
*.googleapis.comaggiungendo la variabile di ambienteno_proxyper evitare problemi di connessione dall'agente di OS Config. Se vuoi connettere solo VM specifiche all'agente OS Config, anteponi la dicitura della zona in cui si trovano le VM e utilizza il formato[zone-name]-osconfig.googleapis.com. Ad esempio:us-central1-f-osconfig.googleapis.com.Disattiva le funzionalità non necessarie
Puoi disattivare le funzionalità che potresti non utilizzare impostando i seguenti valori dei metadati:
osconfig-disabled-features=FEATURE1,FEATURE2.Sostituisci
FEATURE1,FEATURE2con uno dei seguenti valori:- OS Inventory Management:
osinventory - Patch e policy del sistema operativo:
tasks - Policy relative a ospiti del sistema operativo (beta):
guestpolicies
Utilizza uno dei seguenti metodi per disattivare i valori dei metadati.
Console
Puoi disattivare i valori dei metadati nei tuoi progetti Google Cloud o nelle tue VM utilizzando una delle seguenti opzioni:
Opzione 1: disabilita la funzionalità nei metadati a livello di progetto in modo che venga applicata a tutte le istanze del progetto.
Nella console Google Cloud , vai alla pagina Metadati
Fai clic su Modifica.
Aggiungi la seguente voce di metadati:
Chiave:
osconfig-disabled-features
Valore:FEATURE1,FEATURE2Ad esempio:
Chiave:osconfig-disabled-features
Valore:osinventory,guestpoliciesFai clic su Salva per applicare le modifiche.
Opzione 2: disabilita la funzionalità nei metadati di una VM esistente.
Nella console Google Cloud , vai alla pagina Istanze VM.
Fai clic sul nome della VM su cui vuoi impostare il valore dei metadati.
Nella pagina Dettagli istanza, fai clic su Modifica per modificare le impostazioni della VM.
In Metadati personalizzati, aggiungi le seguenti voci di metadati:
Chiave:
osconfig-disabled-features
Valore:FEATURE1,FEATURE2Ad esempio:
Chiave:osconfig-disabled-features
Valore:osinventoryFai clic su Salva per applicare le modifiche alla VM.
gcloud
Utilizza il comando
project-info add-metadatao ilinstances add-metadatagcloudcon il flag--metadata=osconfig-disabled-features.Se disattivi più funzionalità, il flag deve avere il formato
--metadata=osconfig-disabled-features=FEATURE1,FEATURE2. Vedi l'Esempio 2.Esempi
Esempio 1 Per disattivare Patch a livello di progetto Google Cloud utilizzando la Google Cloud CLI, esegui il seguente comando:
gcloud compute project-info add-metadata \
    --project PROJECT_ID \
    --metadata=osconfig-disabled-features=tasks
Esempio 2 Per disattivare le policy del sistema operativo e OS Inventory Management a livello di progetto utilizzando la Google Cloud CLI, esegui il seguente comando:
gcloud compute project-info add-metadata \
    --project PROJECT_ID \
    --metadata=osconfig-disabled-features=osinventory,guestpolicies
Sostituisci
PROJECT_IDcon l'ID progetto.REST
Puoi impostare il valore dei metadati a livello di progetto o istanza Google Cloud .
- Per istruzioni su come impostare i metadati a livello di progetto, consulta Impostazione di metadati personalizzati a livello di progetto.
- Per istruzioni su come impostare i metadati dell'istanza, consulta Impostazione dei metadati dell'istanza.
La seguente coppia chiave-valore è obbligatoria all'interno della proprietà dei metadati:
- Chiave:
osconfig-disabled-features - Valore: può essere uno o una combinazione dei seguenti flag:
osinventorytasksguestpolicies
Requisiti per un agente OS Config attivo
Affinché l'agente OS Config operativo sia considerato attivo e fatturabile, deve soddisfare tutti i seguenti requisiti:
- VM Manager deve essere configurato.
La VM deve essere in stato
RUNNINGe l'agente OS Config deve comunicare con il servizio OS Config.Se una VM viene interrotta, sospesa o disconnessa dalla rete, l'agente su quella VM non viene conteggiato come agente attivo.
Verifica la configurazione
Dopo aver completato la procedura di configurazione, puoi verificare la configurazione.
Visualizza le impostazioni delle funzionalità di VM Manager per il tuo progetto
Per verificare se tutte le funzionalità di VM Manager sono abilitate nel tuo progetto, segui questi passaggi:
gcloud
Utilizza il comando
gcloud compute os-config project-feature-settings describecome segue:gcloud compute os-config project-feature-settings describe \ --project PROJECT_IDL'output di questo comando è simile al seguente:
name: projects/my-project/locations/global/projectFeatureSettings
patchAndConfigFeatureSet: OSCONFIG_C
Il valore
OSCONFIG_Crappresenta il set completo di funzionalità di VM Manager eOSCONFIG_Brappresenta il set di funzionalità limitato.REST
Per visualizzare le funzionalità di VM Manager nel progetto Google Cloud , crea una richiesta
GETal metodoprojects.locations.global.getProjectFeatureSettings.GET https://osconfig.googleapis.com/v1/projects/PROJECT_ID/locations/global/projectFeatureSettings
Sostituisci
PROJECT_IDcon l'ID progetto.In caso di esito positivo, il metodo restituisce le impostazioni delle funzionalità del progetto come mostrato nell'esempio seguente:
{
 "name": "projects/my-project/locations/global/projectFeatureSettings",
 "patchAndConfigFeatureSet": "OSCONFIG_C"
}
Il valore
OSCONFIG_Crappresenta il set completo di funzionalità di VM Manager eOSCONFIG_Brappresenta il set di funzionalità limitato.Abilita le funzionalità complete di VM Manager
Se VM Manager non è abilitato nel progetto e installi Ops Agent durante la creazione della VM, VM Manager viene abilitato in modalità limitata. In questa modalità, VM Manager offre un sottoinsieme di funzionalità per un numero illimitato di VM senza costi. Ad esempio, puoi visualizzare le assegnazioni delle policy del sistema operativo per le VM nella pagina delle policy del sistema operativo, ma non puoi creare o modificare le assegnazioni delle policy del sistema operativo.
Per attivare tutte le funzionalità di VM Manager per queste VM con Ops Agent installato, procedi nel seguente modo:
Console
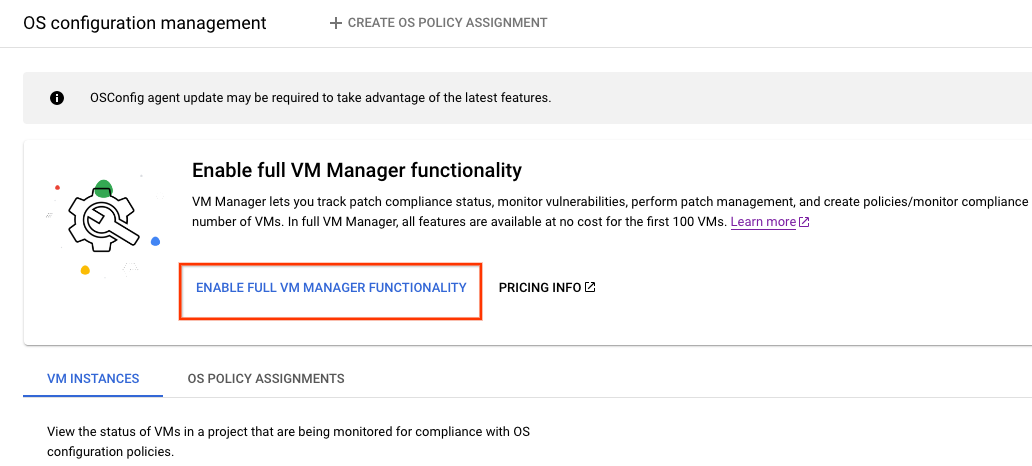
- Nella console Google Cloud , vai alla pagina Policy del sistema operativo.
Vai a Policy del sistema operativo
Fai clic su Abilita le funzionalità complete di VM Manager per attivare tutte le funzionalità di VM Manager.
gcloud
Per abilitare tutte le funzionalità di VM Manager per il progetto Google Cloud , utilizza il comando
gcloud compute os-config project-feature-settings update:gcloud compute os-config project-feature-settings update \ --project PROJECT_ID \ --patch-and-config-feature-set=fullREST
Per abilitare tutte le funzionalità di VM Manager a livello di progetto Google Cloud , invia una richiesta
PATCHal metodoprojprojects.locations.global.updateProjectFeatureSettings.PATCH https://osconfig.googleapis.com/v1/projects/PROJECT_ID/locations/global/projectFeatureSettings { "name": "projects/PROJECT_ID/locations/global/projectFeatureSettings", "patchAndConfigFeatureSet": "OSCONFIG_C" }Sostituisci
PROJECT_IDcon l'ID progetto. Il valoreOSCONFIG_Crappresenta il set completo di funzionalità di VM Manager.Disattiva l'agente OS Config
La disattivazione dell'agente OS Config non influisce sul comportamento della VM. Puoi disattivare l'agente nello stesso modo in cui interrompi gli altri servizi del sistema operativo.
Linux
Per disattivare l'agente utilizzando
systemctl, esegui i seguenti comandi:sudo systemctl stop google-osconfig-agent sudo systemctl disable google-osconfig-agent
Windows
Per disattivare l'agente utilizzando
powershell, esegui il seguente comando:PowerShell Stop-Service google_osconfig_agent [-StartupType disabled]
Passaggi successivi
- Crea un'assegnazione delle policy del sistema operativo.
- Visualizza i dettagli del sistema operativo.
- Crea job di applicazione patch.
- Scopri di più su VM Manager.
Salvo quando diversamente specificato, i contenuti di questa pagina sono concessi in base alla licenza Creative Commons Attribution 4.0, mentre gli esempi di codice sono concessi in base alla licenza Apache 2.0. Per ulteriori dettagli, consulta le norme del sito di Google Developers. Java è un marchio registrato di Oracle e/o delle sue consociate.
Ultimo aggiornamento 2025-09-15 UTC.
-