Run an Apache Airflow DAG in Cloud Composer 2
Cloud Composer 1 | Cloud Composer 2 | Cloud Composer 3
This quickstart guide shows you how to create a Cloud Composer environment and run an Apache Airflow DAG in Cloud Composer 2.
If you are new to Airflow, see the Airflow concepts tutorial in Apache Airflow documentation for more information about Airflow concepts, objects, and their usage.
If you want to use Google Cloud CLI instead, see Run an Apache Airflow DAG in Cloud Composer (Google Cloud CLI).
If you want to create an environment using Terraform, see Create environments (Terraform).
Before you begin
- Sign in to your Google Cloud account. If you're new to Google Cloud, create an account to evaluate how our products perform in real-world scenarios. New customers also get $300 in free credits to run, test, and deploy workloads.
-
In the Google Cloud console, on the project selector page, select or create a Google Cloud project.
-
Make sure that billing is enabled for your Google Cloud project.
-
In the Google Cloud console, on the project selector page, select or create a Google Cloud project.
-
Make sure that billing is enabled for your Google Cloud project.
-
Enable the Cloud Composer API.
-
To get the permissions that you need to complete this quickstart, ask your administrator to grant you the following IAM roles on your project:
-
To view create and manage the Cloud Composer environment:
-
Environment and Storage Object Administrator (
roles/composer.environmentAndStorageObjectAdmin) -
Service Account User (
roles/iam.serviceAccountUser)
-
Environment and Storage Object Administrator (
-
To view logs:
Logs Viewer (
roles/logging.viewer)
For more information about granting roles, see Manage access to projects, folders, and organizations.
You might also be able to get the required permissions through custom roles or other predefined roles.
-
To view create and manage the Cloud Composer environment:
Create an environment's service account
When you create an environment, you specify a service account. This service account is called environment's service account. Your environment uses this service account to perform most of the operations.
The service account for your environment is not a user account. A service account is a special kind of account used by an application or a virtual machine (VM) instance, not a person.
To create a service account for your environment:
Create a new service account, as described in the Identity and Access Management documentation.
Grant a role to it, as described in the Identity and Access Management documentation. The required role is Composer Worker (
composer.worker).
Create an environment
In the Google Cloud console, go to the Create environment page.
If this is the first environment in your project, then a Grant required permissions to Cloud Composer service account section appears.
You add Cloud Composer Service Agent account as a new principal on your environment's service account and grant the Cloud Composer v2 API Service Agent Extension role to it.
Confirm that you use the intended service account for your environment, and click Grant.
In the Name field, enter
example-environment.In the Location drop-down list, select a region for the Cloud Composer environment. This guide uses
us-central1region.For other environment configuration options, use the provided defaults.
Click Create and wait until the environment is created.
When done, a green check mark is displayed next to the environment name.
Create a DAG file
An Airflow DAG is a collection of organized tasks that you want to schedule and run. DAGs are defined in standard Python files.
This guide uses an example Airflow DAG defined in the quickstart.py file.
Python code in this file does the following:
- Creates a DAG,
composer_sample_dag. This DAG runs every day. - Executes one task,
print_dag_run_conf. The task prints the DAG run's configuration by using the bash operator.
Save a copy of the quickstart.py file on your local machine:
Upload the DAG file to your environment's bucket
Every Cloud Composer environment has a Cloud Storage
bucket associated with it. Airflow in Cloud Composer schedules only
DAGs that are located in the /dags folder in this bucket.
To schedule your DAG, upload quickstart.py from your local machine to your
environment's /dags folder:
In the Google Cloud console, go to the Environments page.
In the list of environments, click the name of your environment,
example-environment. The Environment details page opens.Click Open DAGs folder. The Bucket details page opens.
Click Upload files and then select your copy of
quickstart.py.To upload the file, click Open.
View the DAG
After you upload the DAG file, Airflow does the following:
- Parses the DAG file that you uploaded. It might take a few minutes for the DAG to become available to Airflow.
- Adds the DAG to the list of available DAGs.
- Executes the DAG according to the schedule you provided in the DAG file.
Check that your DAG is processed without errors and is available in Airflow by viewing it in DAG UI. DAG UI is Cloud Composer interface for viewing DAG information in Google Cloud console. Cloud Composer also provides access to Airflow UI, which is a native Airflow web interface.
Wait about five minutes to give Airflow time to process the DAG file that you uploaded previously, and to complete the first DAG run (explained later).
In the Google Cloud console, go to the Environments page.
In the list of environments, click the name of your environment,
example-environment. The Environment details page opens.Go to the DAGs tab.
Check that the
composer_quickstartDAG is present in the list of DAGs.
Figure 1. The list of DAGs displays the composer_quickstart DAG (click to enlarge)
View DAG run details
A single execution of a DAG is called a DAG run. Airflow immediately executes a DAG run for the example DAG because the start date in the DAG file is set to yesterday. In this way, Airflow catches up to the specified DAG's schedule.
The example DAG contains one task, print_dag_run_conf, which runs the echo
command in the console. This command outputs meta information about the DAG
(DAG run's numeric identifier).
On the DAGs tab, click
composer_quickstart. The Runs tab for the DAG opens.In the list of DAG runs, click the first entry.

Figure 2. The list of DAG runs for the composer_quickstart DAG (click to enlarge) DAG run details are displayed, detailing the information about individual tasks of the example DAG.
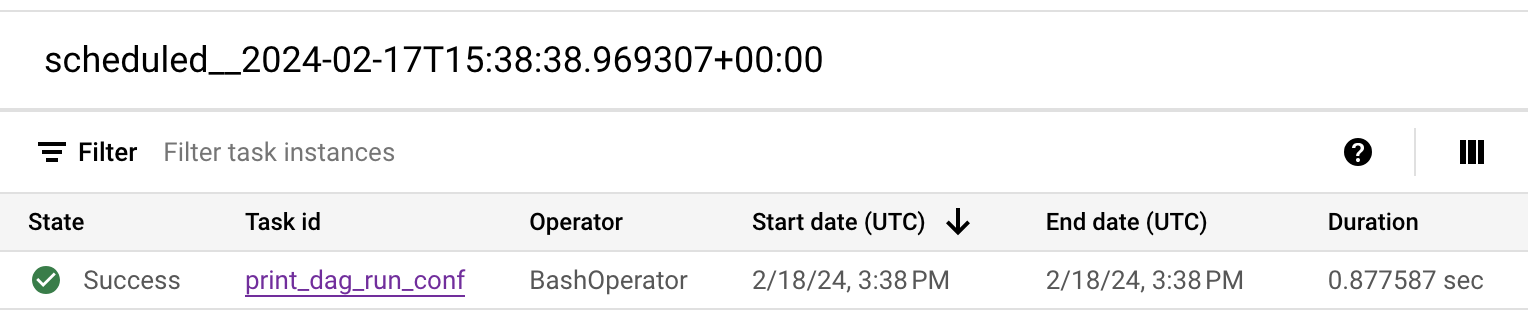
Figure 3. The list of tasks that were executed in the DAG run (click to enlarge) The Logs for DAG run section lists logs for all tasks in the DAG run. You can see the output of the
echocommand in the logs.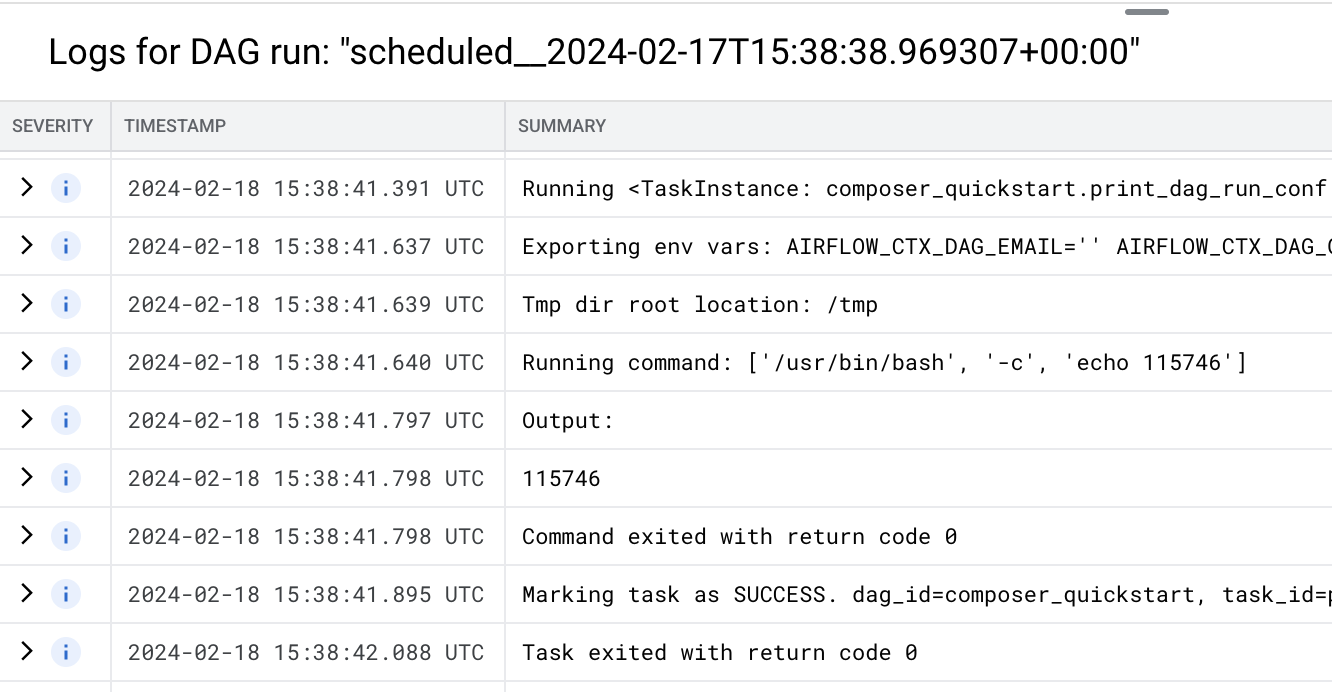
Figure 4. Logs of the print_dag_run_conf task (click to enlarge)
Clean up
To avoid incurring charges to your Google Cloud account for the resources used on this page, follow these steps.
Delete the resources used in this tutorial:
Delete the Cloud Composer environment:
In the Google Cloud console, go to the Environments page.
Select
example-environmentand click Delete.Wait until the environment is deleted.
Delete your environment's bucket. Deleting the Cloud Composer environment does not delete its bucket.
In the Google Cloud console, go to the Storage > Browser page.
Select the environment's bucket and click Delete. For example, this bucket can be named
us-central1-example-environ-c1616fe8-bucket.
Delete the persistent disk of your environment's Redis queue. Deleting the Cloud Composer environment does not delete its persistent disk.
In the Google Cloud console, go to the Compute Engine > Disks.
Select the environment's Redis queue persistent disk and click Delete.
For example, this disk can be named
pvc-02bc4842-2312-4347-8519-d87bdcd31115. Disks for Cloud Composer 2 always have theBalanced persistent disktype and the size of 2 GB.
What's next