Mit Sammlungen den Überblick behalten
Sie können Inhalte basierend auf Ihren Einstellungen speichern und kategorisieren.
Test erstellen
Auf dieser Seite erfahren Sie, wie Sie über die Seitenleiste in Colab Enterprise mit Vertex AI Experiments interagieren.
Wenn Sie über Code in Ihrem Colab Enterprise-Notebook auf Google Cloud Dienste und APIs zugreifen möchten, können Sie die Anmeldedaten verwenden, die mit Ihrem Google-Konto verknüpft sind. Weitere Informationen finden Sie unter Auf Google Cloud -Dienste und APIs zugreifen.
Die Seitenleiste bietet eine zusätzliche Möglichkeit, mit Vertex AI Experiments zu interagieren, ohne die Colab Enterprise-Oberfläche zu verlassen.
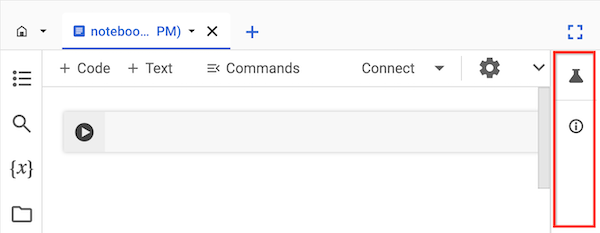
Die Seitenleiste wird rechts neben einem geöffneten Notebook angezeigt.
Hinweise
Sign in to your Google Cloud account. If you're new to
Google Cloud,
create an account to evaluate how our products perform in
real-world scenarios. New customers also get $300 in free credits to
run, test, and deploy workloads.
In the Google Cloud console, on the project selector page,
select or create a Google Cloud project.
Bitten Sie Ihren Administrator, Ihnen die folgenden IAM-Rollen für das Projekt zuzuweisen, damit Sie die Seitenleiste in einem Colab Enterprise-Notebook verwenden können:
Mit Vertex AI Experiments können Sie verschiedene Modellarchitekturen, Hyperparameter und Trainingsumgebungen verfolgen und analysieren, indem Sie die Schritte, Eingaben und Ausgaben einer Testausführung verfolgen.
Weitere Informationen finden Sie unter Einführung in Vertex AI Experiments.
Test erstellen und ansehen
Sie können Tests über die Seitenleiste in Colab Enterprise erstellen und die Ergebnisse ansehen.
Rufen Sie in der Google Cloud -Konsole die Colab Enterprise-Seite Meine Notebooks auf.
Wählen Sie im Menü Region die Region aus, in der sich Ihr Notebook befindet.
Klicken Sie auf das Notebook, das Sie öffnen möchten. Wenn Sie noch kein Notebook erstellt haben, erstellen Sie ein Notebook.
Klicken Sie rechts neben dem Notebook in der Seitenleiste auf die Schaltfläche Tests.
Die Seitenleiste wird maximiert und der Tab Tests wird angezeigt.
Klicken Sie auf die Schaltfläche Beispielcode einfügen.
In Colab Enterprise werden Codezellen in Ihr Notebook eingefügt, um mit einem Test zu interagieren.
Suchen Sie in Ihrem Notebook nach der Codezelle, in der die Parameterwerte gespeichert sind.
Sie verwenden diese Parameter für die Interaktion mit Vertex AI Experiments.
Aktualisieren Sie die Werte für die folgenden Parameter:
PROJECT_ID: Die ID des Projekts, in dem sich Ihr Notebook befindet.
REGION: Die Region, in der sich das Notebook befindet.
BUCKET_URI: Ein Cloud Storage-Bucket-URI im Format gs://BUCKET_NAME.
Das kann ein vorhandener Bucket sein oder Sie können ihn beim Ausführen des Codes erstellen. Dieser Bucket muss sich im selben Projekt und in derselben Region wie Ihr Colab Enterprise-Notebook befinden.
EXPERIMENT_NAME: Der Name Ihres Tests.
Wenn Ihr Test nicht vorhanden ist, wird er von Vertex AI Experiments erstellt.
Wenn Sie einen Cloud Storage-Bucket erstellen müssen, suchen Sie die folgende Codezeile und entfernen Sie die Kommentarzeichen:
Führen Sie die Codezellen aus, die der Seitenbereich Ihrem Notebook hinzugefügt hat.
Klicken Sie nach dem Ausführen der letzten Codezelle auf die Schaltfläche Test ansehen, die angezeigt wird.
Klicken Sie in der Seitenleiste auf den Tab Läufe oder Details, um Informationen zu Ihrem Test zu sehen.
Weitere Informationen finden Sie unter Testläufe erstellen und verwalten.
[[["Leicht verständlich","easyToUnderstand","thumb-up"],["Mein Problem wurde gelöst","solvedMyProblem","thumb-up"],["Sonstiges","otherUp","thumb-up"]],[["Schwer verständlich","hardToUnderstand","thumb-down"],["Informationen oder Beispielcode falsch","incorrectInformationOrSampleCode","thumb-down"],["Benötigte Informationen/Beispiele nicht gefunden","missingTheInformationSamplesINeed","thumb-down"],["Problem mit der Übersetzung","translationIssue","thumb-down"],["Sonstiges","otherDown","thumb-down"]],["Zuletzt aktualisiert: 2025-09-04 (UTC)."],[[["\u003cp\u003eThe Colab Enterprise side panel provides a way to interact with Vertex AI Experiments directly within the notebook interface.\u003c/p\u003e\n"],["\u003cp\u003eTo use the side panel, users must have the Colab Enterprise User and Vertex AI User IAM roles assigned to their project.\u003c/p\u003e\n"],["\u003cp\u003eVertex AI Experiments allows users to track and analyze various aspects of model development, such as architectures, hyperparameters, and training environments.\u003c/p\u003e\n"],["\u003cp\u003eCreating an experiment involves navigating to the Colab Enterprise My notebooks page, opening a notebook, and using the Experiments tab in the side panel to insert sample code.\u003c/p\u003e\n"],["\u003cp\u003eAfter running the code cells, users can view detailed information about their experiment runs within the side panel's Runs and Details tabs.\u003c/p\u003e\n"]]],[],null,["# Create an experiment\n====================\n\nThis page shows you how to interact with Vertex AI Experiments\nby using the side panel in Colab Enterprise.\n\nTo access Google Cloud services and APIs by running code in\nyour Colab Enterprise notebook, you can use the\ncredentials associated with your Google Account. To learn more, see\n[Access Google Cloud services and APIs](/colab/docs/run-code-adc).\n\nThe side panel is an additional way to interact with\nVertex AI Experiments without leaving the Colab Enterprise\ninterface.\n\nThe side panel appears to the right of an open notebook.\n\nBefore you begin\n----------------\n\n- Sign in to your Google Cloud account. If you're new to Google Cloud, [create an account](https://console.cloud.google.com/freetrial) to evaluate how our products perform in real-world scenarios. New customers also get $300 in free credits to run, test, and deploy workloads.\n- In the Google Cloud console, on the project selector page,\n select or create a Google Cloud project.\n\n | **Note**: If you don't plan to keep the resources that you create in this procedure, create a project instead of selecting an existing project. After you finish these steps, you can delete the project, removing all resources associated with the project.\n\n [Go to project selector](https://console.cloud.google.com/projectselector2/home/dashboard)\n-\n [Verify that billing is enabled for your Google Cloud project](/billing/docs/how-to/verify-billing-enabled#confirm_billing_is_enabled_on_a_project).\n\n-\n\n\n Enable the Vertex AI, Dataform, and Compute Engine APIs.\n\n\n [Enable the APIs](https://console.cloud.google.com/flows/enableapi?apiid=aiplatform.googleapis.com, dataform.googleapis.com, compute.googleapis.com&redirect=https://console.cloud.google.com)\n\n- In the Google Cloud console, on the project selector page,\n select or create a Google Cloud project.\n\n | **Note**: If you don't plan to keep the resources that you create in this procedure, create a project instead of selecting an existing project. After you finish these steps, you can delete the project, removing all resources associated with the project.\n\n [Go to project selector](https://console.cloud.google.com/projectselector2/home/dashboard)\n-\n [Verify that billing is enabled for your Google Cloud project](/billing/docs/how-to/verify-billing-enabled#confirm_billing_is_enabled_on_a_project).\n\n-\n\n\n Enable the Vertex AI, Dataform, and Compute Engine APIs.\n\n\n [Enable the APIs](https://console.cloud.google.com/flows/enableapi?apiid=aiplatform.googleapis.com, dataform.googleapis.com, compute.googleapis.com&redirect=https://console.cloud.google.com)\n\n### Required roles\n\n\nTo get the permissions that\nyou need to use the side panel in a Colab Enterprise notebook,\n\nask your administrator to grant you the\nfollowing IAM roles on the project:\n\n- [Colab Enterprise User](/iam/docs/roles-permissions/aiplatform#aiplatform.colabEnterpriseUser) (`roles/aiplatform.colabEnterpriseUser`)\n- [Vertex AI User](/iam/docs/roles-permissions/aiplatform#aiplatform.user) (`roles/aiplatform.user`)\n\n\nFor more information about granting roles, see [Manage access to projects, folders, and organizations](/iam/docs/granting-changing-revoking-access).\n\n\nYou might also be able to get\nthe required permissions through [custom\nroles](/iam/docs/creating-custom-roles) or other [predefined\nroles](/iam/docs/roles-overview#predefined).\n| One or more of the required roles includes the `dataform.repositories.list` permission. Users who are granted the `dataform.repositories.list` permission or the [Code Creator\n| (`roles/dataform.codeCreator`)](/iam/docs/understanding-roles#dataform.codeCreator) role in a project can list the names of code assets in that project by using the Dataform API or the Dataform command-line interface (CLI). Non-administrators using BigQuery Studio can only see code assets that they created or that were shared with them.\n\nVertex AI Experiments\n---------------------\n\nVertex AI Experiments helps you track and analyze different\nmodel architectures, hyperparameters, and training environments by\nletting you track the steps, inputs, and outputs of an experiment run.\nTo learn more, see [Introduction to\nVertex AI Experiments](/vertex-ai/docs/experiments/intro-vertex-ai-experiments).\n\nCreate and view an experiment\n-----------------------------\n\nYou can create and view the results of an experiment by using the\nside panel in Colab Enterprise.\n\n1. In the Google Cloud console, go to\n the Colab Enterprise **My notebooks** page.\n\n [Go to My notebooks](https://console.cloud.google.com/vertex-ai/colab/notebooks)\n2. In the **Region** menu, select the region that contains your notebook.\n\n3. Click the notebook that you want to open. If you haven't created a notebook yet,\n [create a notebook](/colab/docs/create-console-quickstart#create).\n\n4.\n To the right of your notebook, in the side panel, click the\n **Experiments** button.\n\n The side panel expands the **Experiments** tab.\n5. Click the **Insert sample code** button.\n\n\n Colab Enterprise adds code cells to your notebook for\n interacting with an experiment.\n6.\n In your notebook, find the code cell that stores parameter values.\n You'll use these parameters to interact with\n Vertex AI Experiments.\n\n7.\n Update the values for the following parameters:\n\n - \u003cvar translate=\"no\"\u003ePROJECT_ID\u003c/var\u003e: The ID of the project that your notebook is in.\n - \u003cvar translate=\"no\"\u003eREGION\u003c/var\u003e: The region that your notebook is in.\n - \u003cvar translate=\"no\"\u003eBUCKET_URI\u003c/var\u003e: A Cloud Storage bucket URI, in the format `gs://`\u003cvar translate=\"no\"\u003eBUCKET_NAME\u003c/var\u003e. This can be an existing bucket, or you can create it when you run the code. This bucket must be in the same project and region as your Colab Enterprise notebook.\n - \u003cvar translate=\"no\"\u003eEXPERIMENT_NAME\u003c/var\u003e: The name of your experiment. If your experiment doesn't exist, Vertex AI Experiments creates one.\n8.\n If you need to create your Cloud Storage bucket, find and\n uncomment the following line of code:\n\n ```\n # ! gcloud storage buckets create {BUCKET_URI} --location={REGION} --project={PROJECT_ID}\n ```\n9. Run the code cells that the side panel added to your notebook.\n\n10.\n After the last code cell runs, click the\n **View\n experiment** button that appears.\n\n11.\n In the side panel, click the **Runs** tab or\n **Details** tab to see information about your experiment.\n To learn more, see\n [Create and\n manage experiment runs](/vertex-ai/docs/experiments/create-manage-exp-run).\n\n | The side panel shows information about your experiment runs. You can create, manage, and delete runs by using [Vertex AI Experiments\n | in the Google Cloud console](https://console.cloud.google.com/vertex-ai/experiments) or through the Vertex AI API.\n\nWhat's next\n-----------\n\n- Learn more about\n [Vertex AI Experiments](/vertex-ai/docs/experiments/intro-vertex-ai-experiments).\n\n- To find a notebook that can help you get your project started quickly,\n see the [notebook gallery](https://console.cloud.google.com/vertex-ai/colab/notebook-gallery)."]]