Using a notebook
Jupyter notebooks provide an interactive coding and learning environment. You can view explanatory content, modify and run code, and view the results. This page describes how to find and use a Jupyter notebook on AI Hub.
Finding and using a notebook on AI Hub
To find a notebook on AI Hub:
- Open your web browser and go to AI Hub.
- Browse or search for assets, then click Notebook under Category to filter the list of assets to display only Jupyter notebooks.
- Once you find the notebook you are interested in, click the notebook's name. AI Hub displays a description of the notebook and information on how to use it. For more information on how to find assets, read the guide to finding assets on AI Hub.
One or more options for using this notebook are listed under Use this asset. For detailed instructions on using this notebook, use the links in the list below to jump to the instructions for using this notebook.
Click Open in GCP to deploy a notebook to a Vertex AI Workbench user-managed notebooks instance. Vertex AI Workbench provides hosted JupyterLab environments that come optimized for machine learning (ML).
Click Download to download a copy of the notebook to your computer. You can experiment with the notebook locally or you can upload it to a hosted Jupyter notebook environment.
Click Open in Colab to open the notebook in Colaboratory, a hosted environment based on Jupyter notebooks.
Deploying a notebook to Vertex AI Workbench user-managed notebooks
Vertex AI Workbench provides hosted JupyterLab environments that come optimized for machine learning (ML). To learn more about user-managed notebooks, read the introduction to user-managed notebooks.
Before you deploy a notebook, follow the steps in Before you begin to set up your Google Cloud project and enable the Notebooks API. You need to follow these steps only once.
To deploy a notebook to a user-managed notebooks instance:
- Under Use this asset, click Open in GCP. A new tab opens and Google Cloud console is displayed.
To deploy a notebook, you must either select an existing user-managed notebooks instance or create a new one.
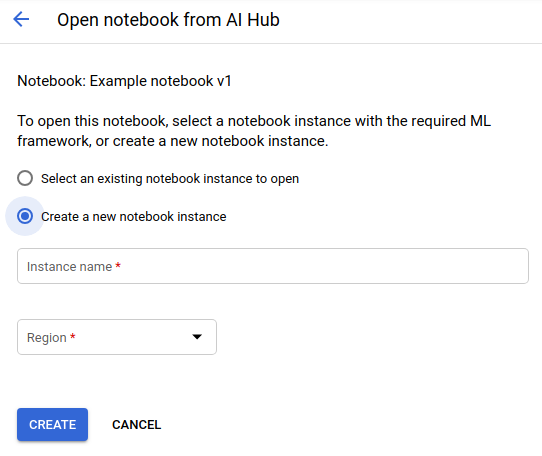
If you do you not have a user-managed notebooks instance, you will be prompted to create one. If your project already has a user-managed notebooks instance, you can deploy the notebook to a new instance by clicking Create a new notebook instance.
Supply the following information to create a new notebook instance:
- Instance name: Provide a name for your user-managed notebooks instance.
- Region: Select a region for the new instance. Select the region that is geographically closest to you for best network performance.
- Zone: Select a zone within the region that you selected.
- ML framework: Select the ML framework to use for your new user-managed notebooks instance.
- Machine type: Select the number of CPUs and amount of RAM for your new instance.
- GPU type: (Optional.) Select the GPU type and Number of GPUs for your new instance. For information about the different GPUS, see GPUs on Compute Engine.
- Select the option to Install NVIDIA GPU driver automatically on first startup: (this is a legal requirement). You can modify the GPU type and number of GPUs for your instance after it is created. For more information, learn how to manage hardware accelerators for a notebook.
- Boot disk type: Select the boot disk type for your new instance.
- Boot disk size in GB: Specify the boot disk size in GB.
Click Create to create your user-managed notebooks instance.
JupyterLab opens in a new tab with the notebook you found on AI Hub.
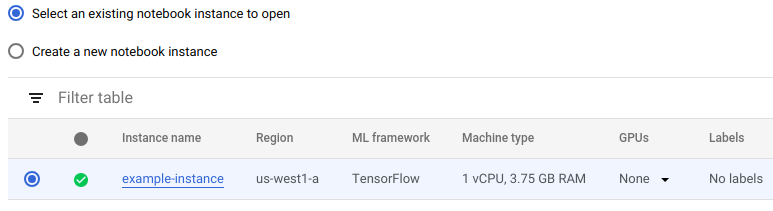
To deploy this notebook to an existing user-managed notebooks instance.
Select the user-managed notebooks instance you would like to deploy this notebook to and then click Continue.
JupyterLab opens in a new tab with the notebook you found on AI Hub.
Download a Jupyter notebook
Download a notebook from AI Hub to experiment with it locally or to upload the notebook to a hosted environment.
To download a Jupyter notebook from AI Hub:
- Click Download under Use this asset. The notebook downloads to your computer.
- You can now open the notebook in Jupyter on your computer or upload it to a hosting environment such as Vertex AI Workbench user-managed notebooks or Colab.
Open a Colab notebook
Colaboratory is a free hosted Jupyter notebook environment that you can use to experiment and learn.
To open a notebook in Colaboratory:
- Click Open in Colab under Use this asset. The notebook opens in a new browser tab.
- Follow the instructions in the Colab notebook. If you need help with using the notebook interface, click Help in the Colab menu.
What's next
- Learn how to upload a notebook on AI Hub.
- Understand important concepts and terms by reading the introduction to AI Hub.