作業内容
このチュートリアルでは、エクスポートされたカスタム TensorFlow Lite モデルを AutoML Vision Edge からダウンロードします。それから、モデルを使用して画像内の複数のオブジェクトを(境界ボックスとともに)検出する既製の iOS アプリを実行し、オブジェクト カテゴリのカスタムラベルを作成します。

目標
この入門用のエンドツーエンドのチュートリアルでは、コードを使用して次のことを行います。
- TF Lite インタープリタを使用して、iOS アプリで AutoML Vision Object Detection Edge モデルを実行します。
始める前に
Git リポジトリのクローンを作成する
コマンドラインの次のコマンドを使用して、以下の Git リポジトリのクローンを作成します。
git clone https://github.com/tensorflow/examples.git
リポジトリ(examples/lite/examples/object_detection/ios/)のローカル クローンの ios ディレクトリに移動します。以下のすべてのコードサンプルを ios ディレクトリで実行します。
cd examples/lite/examples/object_detection/ios
前提条件
- Git がインストールされている必要があります。
- サポートされている iOS のバージョン: iOS 12.0 以降。
iOS アプリを設定する
ワークスペース ファイルを生成して開く
オリジナルの iOS アプリの設定を開始するには、まず必要なソフトウェアを使用して、ワークスペース ファイルを生成する必要があります。
まだ
iosフォルダに移動していない場合は、移動します。cd examples/lite/examples/object_detection/ios
ポッドをインストールして、ワークスペース ファイルを生成します。
pod install
このポッドを以前インストールしたことがある場合は、次のコマンドを使用します。
pod update
ワークスペース ファイルを生成したら、Xcode でプロジェクトを開けるようになります。コマンドラインでプロジェクトを開くには、
iosディレクトリから次のコマンドを実行します。open ./ObjectDetection.xcworkspace
固有の ID を作成してアプリをビルドする
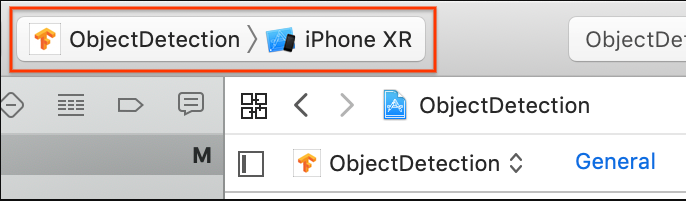
Xcode で ObjectDetection.xcworkspace を開くには、まずバンドル識別子(バンドル ID)を一意の値に変更します。
左側のプロジェクト ナビゲータ上部にある
ObjectDetectionプロジェクト アイテムを選択します。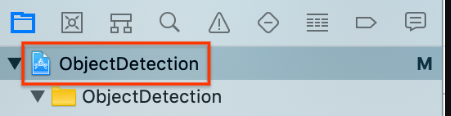
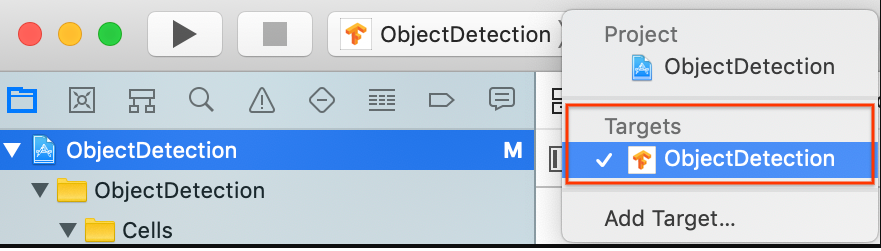
[Targets] > [ObjectDetection] が選択されていることを確認します。
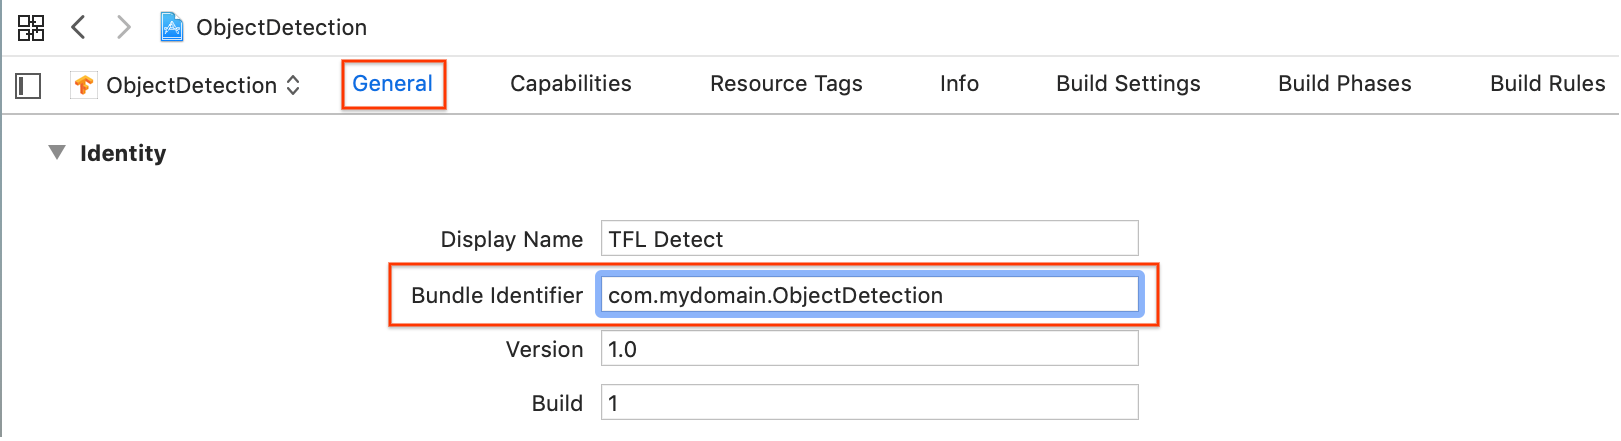
[General] > [Identity] セクションで、[Bundle Identifier] フィールドを一意の値に変更します。望ましいスタイルは逆ドメイン名表記です。
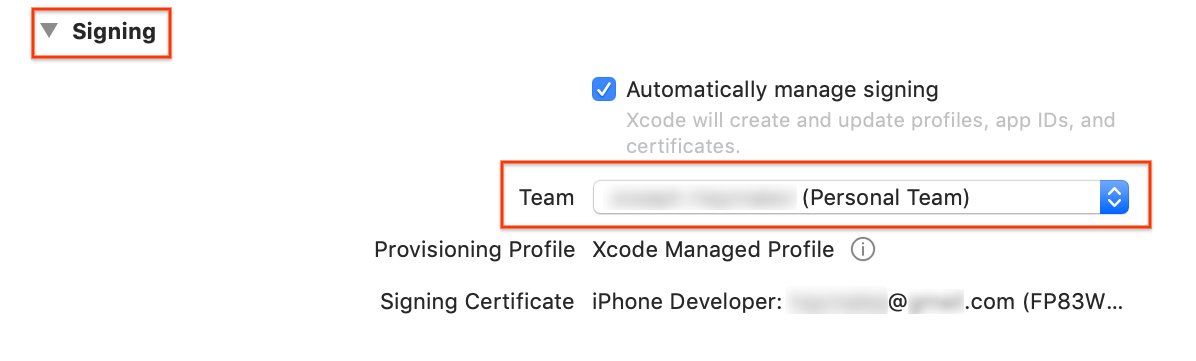
[Identity] の下部の [General] > [Signing] セクションで、プルダウン メニューからチームを指定します。この値は、デベロッパー ID で指定します。
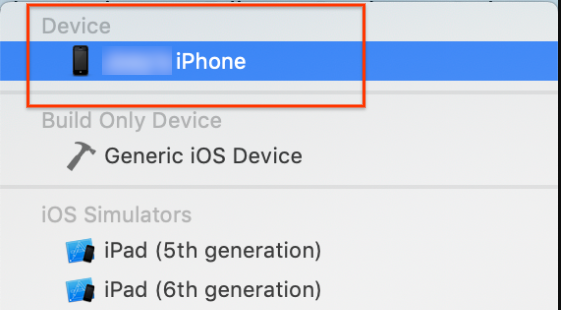
iOS デバイスをパソコンに接続します。デバイスが検出されたら、デバイスの一覧から選択します。
すべての構成変更を指定したら、command+B キーを使用して Xcode でアプリをビルドします。
オリジナル アプリの実行
サンプルアプリは、デバイスの背面カメラで撮影されるフレーム内のオブジェクト(境界ボックスとラベル)を続けて検出するカメラアプリです。アプリは、COCO データセットでトレーニングされた量子化 MobileNet SSD モデルを使用します。
ここでは、iOS デバイスでデモをビルドおよび実行する方法について、段階的に説明します。
モデルファイルは、ビルドおよび実行時に Xcode のスクリプトでダウンロードされます。TF Lite モデルをプロジェクトにわざわざダウンロードする手順は必要ありません。
カスタマイズしたモデルを挿入する前に、トレーニングされたモデルのベース「mobilenet」を使用するアプリのベースライン バージョンをテストします。
Simulator でアプリを起動するには、Xcode ウィンドウの左上隅にある再生ボタン
 を選択します。
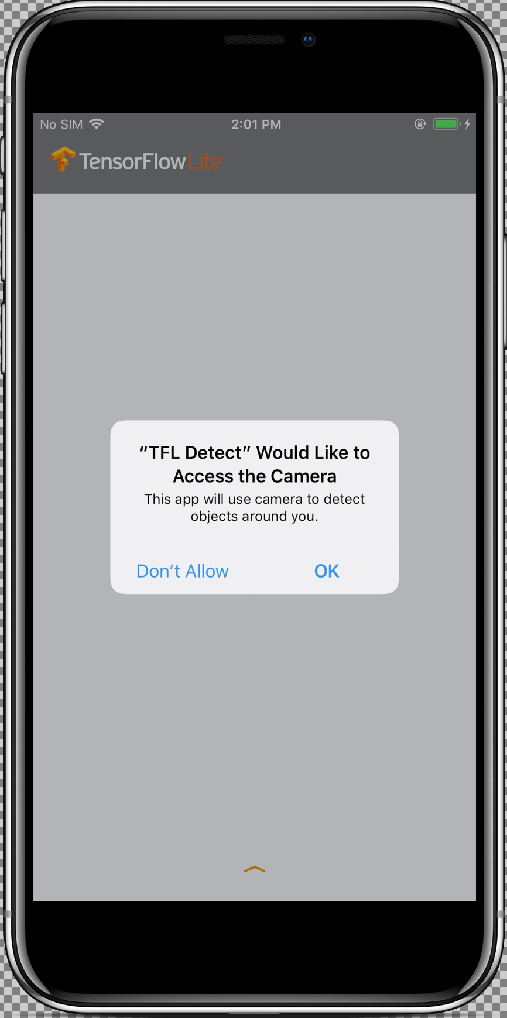
[Allow] ボタンを選択してアプリにカメラへのアクセスを許可すると、アプリはライブ検出とアノテーションを開始します。オブジェクトが検出され、各カメラフレーム内で境界ボックスとラベルでマークされます。
デバイスを周囲のさまざまなものに向けて動かし、アプリが画像を正しく検出していることを確認します。
カスタマイズしたアプリを実行する
カスタム オブジェクトの画像カテゴリで、再トレーニングされたモデルを使用するようにアプリを変更します。
モデルファイルをプロジェクトに追加する
デモ プロジェクトは、ios/objectDetection/model ディレクトリの 2 つのファイルを検索するように構成されています。
detect.tflitelabelmap.txt
これら 2 つのファイルをカスタム バージョンに置き換えるには、次のコマンドを実行します。
cp tf_files/optimized_graph.lite ios/objectDetection/model/detect.tflite
cp tf_files/retrained_labels.txt ios/objectDetection/model/labelmap.txt
アプリを実行する
iOS デバイスでアプリを再起動するには、Xcode ウィンドウの左上隅にある再生ボタン ![]() を選択します。
を選択します。
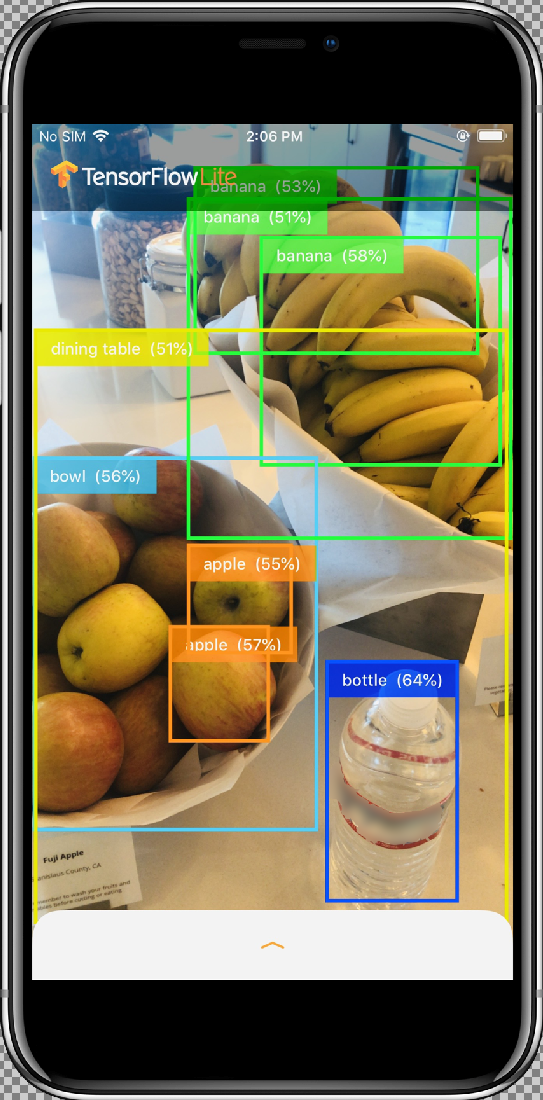
変更をテストするには、デバイスのカメラをさまざまなオブジェクトに向けて動かして、ライブ予測を表示します。
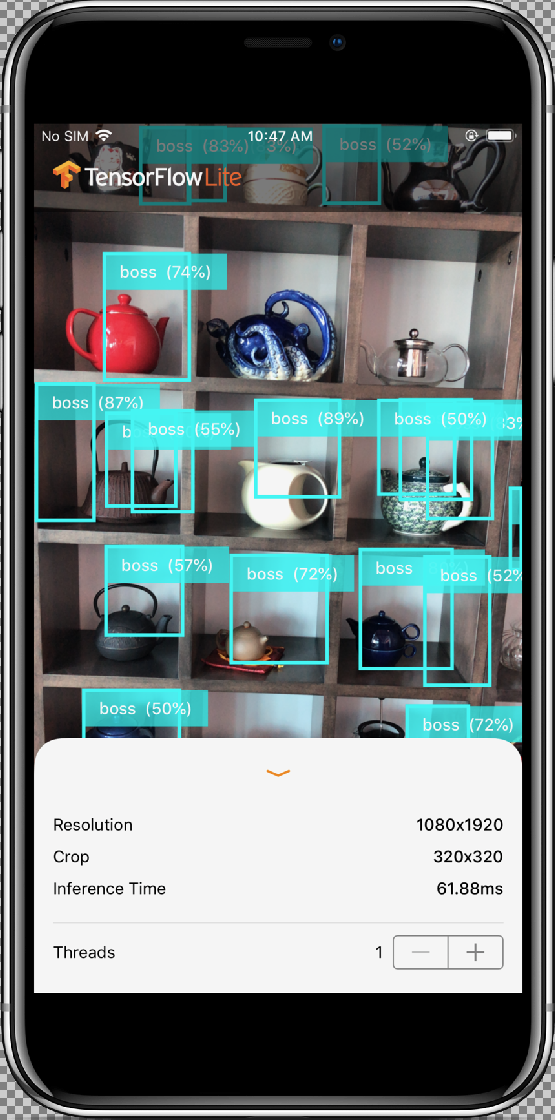
結果は次のようになります。
仕組み
アプリを実行したら、TensorFlow Lite 固有のコードを確認します。
TensorFlowLite ポッド
このアプリはコンパイル済み TFLite Cocoapod を使用しています。Podfile にはプロジェクトの cocoapod が含まれています。
# Uncomment the next line to define a global platform for your project
platform :ios, '12.0'

target 'ObjectDetection' do
  # Comment the next line if you're not using Swift and don't want to use dynamic frameworks
  use_frameworks!

  # Pods for ObjectDetection
  pod 'TensorFlowLiteSwift'

end
TF Lite に連結されたコードは、すべて、ModelDataHandler.swift ファイルに含まれます。このクラスは、すべてのデータ前処理を行い、Interpreter を呼び出して指定されたフレームでの推論を実行します。次に、取得した推論をフォーマットしてから、成功した推論の上位 N 件の結果を返します。
コードの確認
まず注目すべきブロックは(必要なインポートをしたあと)、プロパティの宣言です。tfLite モデル inputShape パラメータ(batchSize、inputChannels、inputWidth、inputHeight)は tflite_metadata.json にあります。このファイルは、tflite モデルのエクスポート時に作成されます。詳しくは、Edge モデルのエクスポートの入門トピックをご覧ください。
tflite_metadata.json の例は次のコードのようになります。
{
    "inferenceType": "QUANTIZED_UINT8",
    "inputShape": [
        1,   // This represents batch size
        512,  // This represents image width
        512,  // This represents image Height
        3  //This represents inputChannels
    ],
    "inputTensor": "normalized_input_image_tensor",
    "maxDetections": 20,  // This represents max number of boxes.
    "outputTensorRepresentation": [
        "bounding_boxes",
        "class_labels",
        "class_confidences",
        "num_of_boxes"
    ],
    "outputTensors": [
        "TFLite_Detection_PostProcess",
        "TFLite_Detection_PostProcess:1",
        "TFLite_Detection_PostProcess:2",
        "TFLite_Detection_PostProcess:3"
    ]
}
...
モデル パラメータ
モデルの tflite_metadata.json ファイルに合わせて、以下の値を置き換えます。
let batchSize = 1 //Number of images to get prediction, the model takes 1 image at a time
let inputChannels = 3 //The pixels of the image input represented in RGB values
let inputWidth = 300 //Width of the image
let inputHeight = 300 //Height of the image
...
init
init メソッドは、Model パスと InterpreterOptions で Interpreter を作成し、モデルの入力にメモリを割り当てます。
init?(modelFileInfo: FileInfo, labelsFileInfo: FileInfo, threadCount: Int = 1) {
    let modelFilename = modelFileInfo.name

    // Construct the path to the model file.
    guard let modelPath = Bundle.main.path(forResource: modelFilename,ofType: modelFileInfo.extension)

    // Specify the options for the `Interpreter`.
   var options = InterpreterOptions()
    options.threadCount = threadCount
    do {
      // Create the `Interpreter`.
      interpreter = try Interpreter(modelPath: modelPath, options: options)
      // Allocate memory for the model's input  `Tensor`s.
      try interpreter.allocateTensors()
    }

    super.init()

    // Load the classes listed in the labels file.
    loadLabels(fileInfo: labelsFileInfo)
  }
…
runModel
runModel メソッドは、以下を行います。
- モデルをトレーニングしたアスペクト比に合わせて入力画像をスケーリングします。
- 画像バッファから alpha コンポーネントを削除して、RGB データを取得します。
- RGB データを入力 Tensor にコピーします。
Interpreterを呼び出して推論を実行します。- インタープリタからの出力を取得します。
- 出力をフォーマットします。
func runModel(onFrame pixelBuffer: CVPixelBuffer) -> Result? {
中央の正方形が最も大きくなるように画像を切り抜き、モデルのサイズに縮小します。
let scaledSize = CGSize(width: inputWidth, height: inputHeight)
guard let scaledPixelBuffer = pixelBuffer.resized(to: scaledSize) else
{
    return nil
}
...

do {
  let inputTensor = try interpreter.input(at: 0)
画像バッファから alpha コンポーネントを削除して、RGB データを取得します。
guard let rgbData = rgbDataFromBuffer(
  scaledPixelBuffer,
  byteCount: batchSize * inputWidth * inputHeight * inputChannels,
  isModelQuantized: inputTensor.dataType == .uInt8
) else {
  print("Failed to convert the image buffer to RGB data.")
  return nil
}
RGB データを入力 Tensor にコピーします。
try interpreter.copy(rgbData, toInputAt: 0)
Interpreter を呼び出して推論を実行します。
    let startDate = Date()
    try interpreter.invoke()
    interval = Date().timeIntervalSince(startDate) * 1000
    outputBoundingBox = try interpreter.output(at: 0)
    outputClasses = try interpreter.output(at: 1)
    outputScores = try interpreter.output(at: 2)
    outputCount = try interpreter.output(at: 3)
  }
結果をフォーマットします。
    let resultArray = formatResults(
      boundingBox: [Float](unsafeData: outputBoundingBox.data) ?? [],
      outputClasses: [Float](unsafeData: outputClasses.data) ?? [],
      outputScores: [Float](unsafeData: outputScores.data) ?? [],
      outputCount: Int(([Float](unsafeData: outputCount.data) ?? [0])[0]),
      width: CGFloat(imageWidth),
      height: CGFloat(imageHeight)
    )
...
}
すべての結果を [confidence score] < [threshold] でフィルタし、上位 N 件の結果を降順に並べ替えて返します。
  func formatResults(boundingBox: [Float], outputClasses: [Float],
  outputScores: [Float], outputCount: Int, width: CGFloat, height: CGFloat)
  -> [Inference]{
    var resultsArray: [Inference] = []
    for i in 0...outputCount - 1 {

      let score = outputScores[i]
結果を [confidence] < [threshold] でフィルタします。
      guard score >= threshold else {
        continue
      }
ラベルリストから検出されたクラスの出力クラス名を取得します。
      let outputClassIndex = Int(outputClasses[i])
      let outputClass = labels[outputClassIndex + 1]

      var rect: CGRect = CGRect.zero
検出された境界ボックスを CGRect に変換します。
      rect.origin.y = CGFloat(boundingBox[4*i])
      rect.origin.x = CGFloat(boundingBox[4*i+1])
      rect.size.height = CGFloat(boundingBox[4*i+2]) - rect.origin.y
      rect.size.width = CGFloat(boundingBox[4*i+3]) - rect.origin.x
検出されたコーナーはモデルのサイズに使用します。実際の画像サイズに対して rect をスケールします。
let newRect = rect.applying(CGAffineTransform(scaleX: width, y: height))
クラスに割り当てられた色を取得します。
let colorToAssign = colorForClass(withIndex: outputClassIndex + 1)
      let inference = Inference(confidence: score,
                                className: outputClass,
                                rect: newRect,
                                displayColor: colorToAssign)
      resultsArray.append(inference)
    }

    // Sort results in descending order of confidence.
    resultsArray.sort { (first, second) -> Bool in
      return first.confidence  > second.confidence
    }

    return resultsArray
  }
CameraFeedManager
CameraFeedManager.swift はカメラ関連のすべての機能を管理します。
AVCaptureSession を初期化して構成します。
private func configureSession() {session.beginConfiguration()
次に、
AVCaptureDeviceInputの追加を試みて、セッション向けのデバイス入力としてbuiltInWideAngleCameraを追加します。addVideoDeviceInput()
続いて
AVCaptureVideoDataOutputの追加を試みます。addVideoDataOutput()
session.commitConfiguration() self.cameraConfiguration = .success }セッションを開始します。
セッションを停止します。
エラー処理
- NSNotification.Name.AVCaptureSessionRuntimeError:
AVCaptureSessionインスタンスの実行中に予期しないエラーが発生した場合に送信されます。userInfo 辞書には、鍵NSErrorのAVCaptureSessionErrorKeyオブジェクトが含まれます。 - NSNotification.Name.AVCaptureSessionWasInterrupted: 割り込み(例: 通話、アラームなど)が発生したときに送信されます。必要に応じて、
AVCaptureSessionインスタンスは割り込みへの自動的なレスポンスの実行を停止します。userInfo には、割り込みの理由を表すAVCaptureSessionInterruptionReasonKeyが含まれます。 - NSNotification.Name.AVCaptureSessionInterruptionEnded:
AVCaptureSession割り込みを中止したときに送信されます。セッション インスタンスは、通話などの割り込みが終了すると再開できます。
InferenceViewController.swift クラスは、以下の画面を担当しています。ここではハイライト表示された部分を中心に取り上げます。
- Resolution: 現在のフレーム(動画セッションの画像)の解像度を表示します。
- Crop: 現在のフレームの切り抜きサイズを表示します。
- InferenceTime: モデルがオブジェクトを検出するまでの時間を表示します。
- Threads: 実行中のスレッドの数を表示します。ステッパーの
+または-サインをタップすると、この数を増減できます。TensorFlow Lite インタープリタで使用されている現在のスレッド数。
ViewController.swift クラスは、カメラ関連の機能と ModelDataHandler を管理する CameraFeedManager のインスタンスを保持します。ModelDataHandler は Model(トレーニングされたモデル)を担当し、動画セッションの画像フレームの出力を取得します。
private lazy var cameraFeedManager = CameraFeedManager(previewView: previewView)

private var modelDataHandler: ModelDataHandler? =
    ModelDataHandler(modelFileInfo: MobileNetSSD.modelInfo, labelsFileInfo: MobileNetSSD.labelsInfo)
次のように呼び出すと、カメラ セッションが開始されます。
cameraFeedManager.checkCameraConfigurationAndStartSession()
スレッド カウントを変更すると、このクラスは didChangeThreadCount 関数の新しいスレッド数でモデルを再び初期化します。
CameraFeedManager クラスは CVPixelBuffer として ImageFrame を ViewController に送信します。これは予測のためにモデルに送信されます。
このメソッドは、TensorFlow を通じてライブカメラ pixelBuffer を実行して、結果を取得します。
@objc
func runModel(onPixelBuffer pixelBuffer: CVPixelBuffer) {
TensorFlow を通じてライブカメラ pixelBuffer を実行して、結果を取得します。
result = self.modelDataHandler?.runModel(onFrame: pixelBuffer)
...
let displayResult = result

let width = CVPixelBufferGetWidth(pixelBuffer)
    let height = CVPixelBufferGetHeight(pixelBuffer)

    DispatchQueue.main.async {
InferenceViewController に結果を引き渡して、表示します。
self.inferenceViewController?.resolution = CGSize(width: width, height: height)

self.inferenceViewController?.inferenceTime = inferenceTime
境界ボックスを描画し、クラス名と信頼スコアを表示します。
self.drawAfterPerformingCalculations(onInferences: displayResult.inferences, withImageSize: CGSize(width: CGFloat(width), height: CGFloat(height)))
    }
  }
次のステップ
Edge モデルを使用した iOS オブジェクトの検出とアノテーションのアプリのチュートリアルは、これで完了です。オブジェクト検出アプリに変更を加えてサンプル アノテーションを取得する前に、トレーニングした Edge Tensorflow Lite モデルを使用して、オブジェクト検出アプリをテストしました。次に、TensorFlow Lite 固有のコードを調べて基本的な機能を理解しました。
次のリソースは、TensorFlow モデルと AutoML Vision Edge の使い方を説明しています。
- TFLite の詳細については、公式ドキュメントとコード リポジトリを参照してください。
- 音声ホットワード検出ツールやスマート リプライのデバイス バージョンなど、他の TFLite 対応モデルをお試しください。
- TensorFlow の詳細については、TensorFlow のスタートガイドのドキュメントをご覧ください。