Melacak objek dalam video
Setelah membuat (melatih) model, Anda dapat meminta prediksi untuk satu atau beberapa video menggunakan metode batchPredict. Anda memberikan file CSV yang berisi daftar video ke metode batchPredict.
Metode batchPredict menganotasi video dengan mendeteksi dan melacak objek yang diprediksi model Anda.
Masa pakai maksimum untuk model adalah dua tahun. Setelah dua tahun, Anda harus membuat dan melatih model baru untuk terus memberikan anotasi ke video Anda.
Contoh Prediksi
Untuk meminta batch prediksi dari AutoML Video Object Tracking, buat file CSV yang mencantumkan jalur Cloud Storage ke video yang ingin Anda anotasi. Anda juga dapat menentukan waktu mulai dan berakhir untuk memberi tahu AutoML Video Object Tracking agar hanya menganotasi segmen video tertentu. Waktu mulai harus nol atau lebih besar dan harus sebelum waktu berakhir. Waktu berakhir harus lebih besar dari waktu mulai dan kurang dari atau sama dengan durasi video.
Contoh berikut menunjukkan cara menganotasi seluruh video dengan
menentukan waktu mulai dan berakhir sebagai 0,inf.
gs://my-videos-vcm/cow_video.mp4,0,inf
gs://my-videos-vcm/bird_video.mp4,10.00000,15.50000
Anda juga harus menentukan jalur file output tempat AutoML Video Object Tracking harus menulis hasil prediksi dari model Anda. Jalur ini harus berupa bucket dan objek Cloud Storage yang izin tulisnya Anda miliki.
Setiap video dapat berdurasi hingga 3 jam dengan ukuran file maksimum 50 GB. AutoML Video Object Tracking dapat menghasilkan prediksi untuk sekitar 100 jam video dalam waktu pemrosesan 12 jam.
UI Web
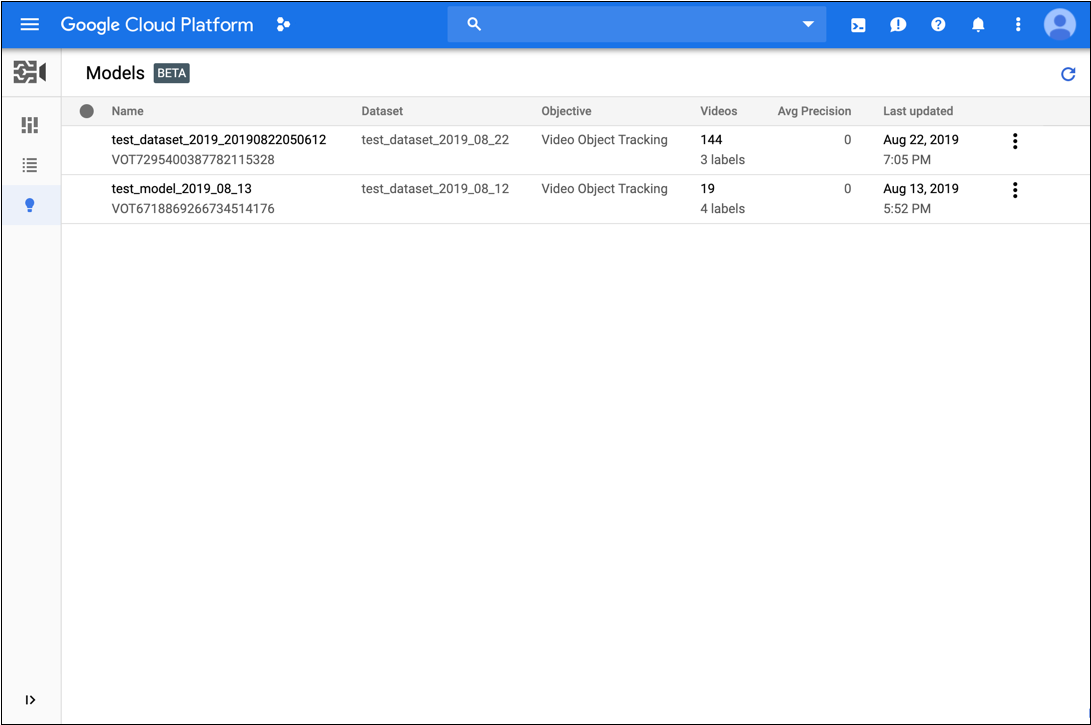
- Buka AutoML Video Object Tracking UI.
- Klik model yang ingin Anda gunakan dari daftar yang ditampilkan.
- Di tab Test & Use untuk model, lakukan tindakan berikut:
- Di bagian Test your model, pilih file CSV yang akan digunakan untuk prediksi. File CSV harus menyediakan daftar video yang ingin Anda anotasi.
Juga di bagian Test your model, pilih direktori dalam bucket Cloud Storage untuk menerima hasil anotasi.
Sebaiknya buat folder 'results' tertentu di bucket Cloud Storage Anda untuk menyimpan hasil anotasi.
- Klik Dapatkan Prediksi.
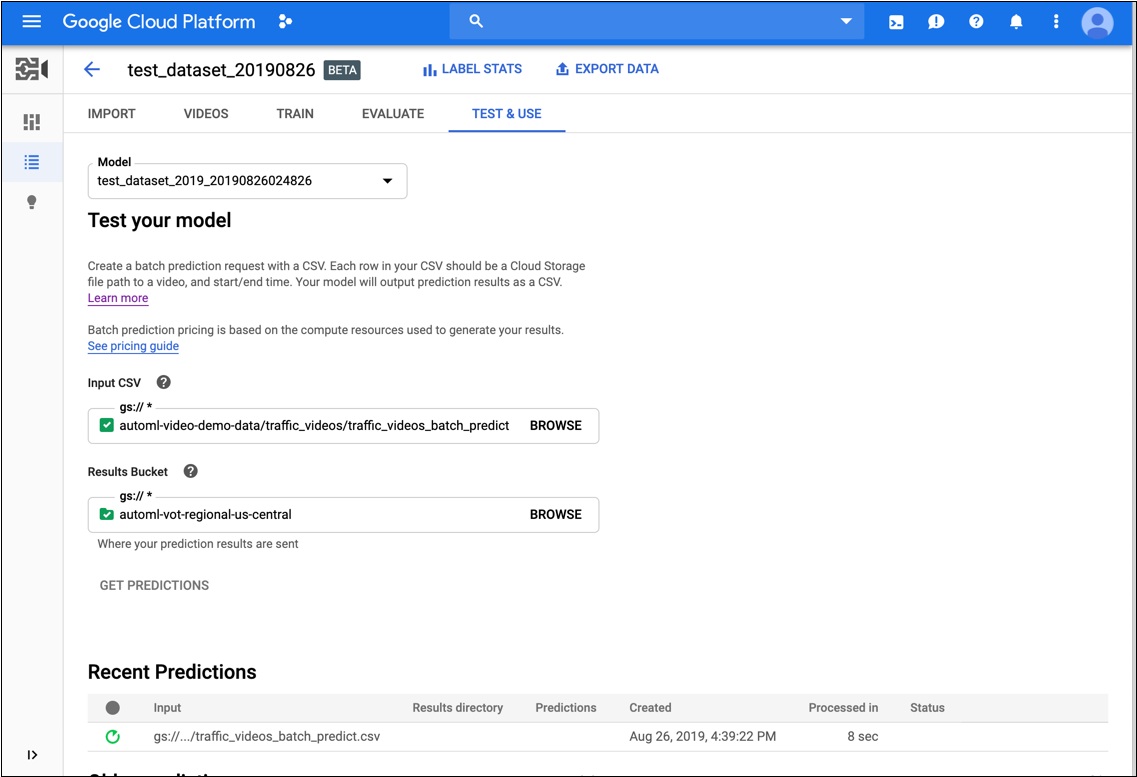
Proses untuk mendapatkan prediksi dapat memakan waktu, tergantung pada jumlah video yang ingin dianotasi.
Setelah proses selesai, hasilnya akan muncul di halaman untuk model di bagian Recent Predictions. Untuk melihat hasilnya, lakukan langkah berikut:
- Di bagian Recent Predictions pada kolom Predictions, klik View untuk prediksi yang ingin Anda lihat.
- Di bagian Video, pilih nama video yang ingin Anda lihat hasilnya.
REST
Sebelum menggunakan salah satu data permintaan, lakukan penggantian berikut:
- model-id: ganti dengan ID model Anda. ID adalah elemen terakhir dari nama model Anda. Misalnya, jika nama model Anda adalah
projects/project-number/locations/location-id/models/VOT6312181905852727296, maka ID model Anda adalahVOT6312181905852727296. - request-id: menetapkan nilai digital apa pun ke kolom ini.
- bucket-name: ganti dengan nama bucket Cloud Storage Anda. Contoh:
my-project-vcm. - input-file: ganti dengan nama file CSV Anda yang mengidentifikasi video yang akan dianotasi.
- output-storage-path: ganti dengan jalur ke bucket Cloud Storage tempat output prediksi akan disimpan.
AutoML Video Object Tracking membuat subfolder untuk hasil di jalur ini yang diberi nama menggunakan format berikut:
prediction-model_name-timestamp. Sub-folder akan berisi file prediksi untuk setiap video dalam permintaan batch. Anda harus memiliki izin tulis ke jalur ini. - Catatan:
- project-number: nomor project Anda
- location-id: region Cloud tempat anotasi
seharusnya dilakukan. Region cloud yang didukung adalah:
us-east1,us-west1,europe-west1,asia-east1. Jika tidak ada wilayah yang ditentukan, wilayah akan ditentukan berdasarkan lokasi file video.
Metode HTTP dan URL:
POST https://automl.googleapis.com/v1beta1/projects/project-number/locations/location-id/models/model-id:batchPredict
Isi JSON permintaan:
{
  "request_id": "request-id",
  "inputConfig": {
    "gcsSource": {
      "inputUris": ["gs://bucket-name/input-file.csv"]
    }
  },
  "outputConfig": {
    "gcsDestination": {
      "outputUriPrefix": "gs://output-storage-path"
    }
  },
  "params": {
    "score_threshold": "0.0"
  }
}
Untuk mengirim permintaan Anda, pilih salah satu opsi berikut:
curl
Simpan isi permintaan dalam file bernama request.json,
dan jalankan perintah berikut:
curl -X POST \
     -H "Authorization: Bearer $(gcloud auth print-access-token)" \
     -H "x-goog-user-project: project-number" \
     -H "Content-Type: application/json; charset=utf-8" \
     -d @request.json \
     "https://automl.googleapis.com/v1beta1/projects/project-number/locations/location-id/models/model-id:batchPredict"
PowerShell
Simpan isi permintaan dalam file bernama request.json,
dan jalankan perintah berikut:
$cred = gcloud auth print-access-token
$headers = @{ "Authorization" = "Bearer $cred"; "x-goog-user-project" = "project-number" }

Invoke-WebRequest `
    -Method POST `
    -Headers $headers `
    -ContentType: "application/json; charset=utf-8" `
    -InFile request.json `
    -Uri "https://automl.googleapis.com/v1beta1/projects/project-number/locations/location-id/models/model-id:batchPredict" | Select-Object -Expand Content
VOT1741767155885539328.
Java
Untuk mengautentikasi ke AutoML Video Object Tracking, siapkan Kredensial Default Aplikasi. Untuk mengetahui informasi selengkapnya, baca Menyiapkan autentikasi untuk lingkungan pengembangan lokal.
Node.js
Untuk mengautentikasi ke AutoML Video Object Tracking, siapkan Kredensial Default Aplikasi. Untuk mengetahui informasi selengkapnya, baca Menyiapkan autentikasi untuk lingkungan pengembangan lokal.
Python
Untuk mengautentikasi ke AutoML Video Object Tracking, siapkan Kredensial Default Aplikasi. Untuk mengetahui informasi selengkapnya, baca Menyiapkan autentikasi untuk lingkungan pengembangan lokal.
Mendapatkan status operasi prediksi
Anda dapat membuat kueri status operasi prediksi batch menggunakan
perintah curl atau PowerShell berikut.
REST
Sebelum menggunakan salah satu data permintaan, lakukan penggantian berikut:
- project-number: jumlah project Anda
- location-id: region Cloud tempat anotasi seharusnya dilakukan. Region cloud yang didukung adalah:
us-east1,us-west1,europe-west1,asia-east1. Jika tidak ada wilayah yang ditentukan, wilayah akan ditentukan berdasarkan lokasi file video. - operation-id: ID operasi yang berjalan lama yang dibuat
untuk permintaan dan diberikan dalam respons saat Anda memulai
operasi, misalnya
VOT12345....
Metode HTTP dan URL:
GET https://automl.googleapis.com/v1beta1/projects/project-number/locations/location-id/operations/operation-id
Untuk mengirim permintaan Anda, pilih salah satu opsi berikut:
curl
Jalankan perintah berikut:
curl -X GET \
     -H "Authorization: Bearer $(gcloud auth print-access-token)" \
     -H "x-goog-user-project: project-number" \
     "https://automl.googleapis.com/v1beta1/projects/project-number/locations/location-id/operations/operation-id"
PowerShell
Jalankan perintah berikut:
$cred = gcloud auth print-access-token
$headers = @{ "Authorization" = "Bearer $cred"; "x-goog-user-project" = "project-number" }

Invoke-WebRequest `
    -Method GET `
    -Headers $headers `
    -Uri "https://automl.googleapis.com/v1beta1/projects/project-number/locations/location-id/operations/operation-id" | Select-Object -Expand Content
projects/project-number/locations/location-id/operations/operation-id
Setelah tugas prediksi batch selesai, output prediksi disimpan di bucket Cloud Storage yang Anda tentukan dalam perintah. Ada file JSON untuk setiap segmen video. File JSON memiliki format yang mirip dengan my-video-01.avi.json, dengan ekstensi file .json yang ditambahkan ke nama file asli.
{
  "inputUris": ["automl-video-demo-data/sample_video.avi"],
  "object_annotations": [ {
    "annotation_spec": {
      "display_name": "Cat",
      "description": "Cat"
    },
    "confidence": 0.43253016
    "frames": [ {
      "frame": {
        "time_offset": {
          "seconds": 4,
          "nanos": 960000000
        },
        "normalized_bounding_box": {
          "x_min": 0.1,
          "y_min": 0.1,
          "x_max": 0.8,
          "y_max": 0.8
        }
      }
    }, {
      "frame": {
        "time_offset": {
          "seconds": 5,
          "nanos": 960000000
        },
        "normalized_bounding_box": {
          "x_min": 0.2,
          "y_min": 0.2,
          "x_max": 0.9,
          "y_max": 0.9
        }
      }
    } ],
    "segment": {
      "start_time_offset": {
          "seconds": 4,
          "nanos": 960000000
      },
      "end_time_offset": {
          "seconds": 5,
          "nanos": 960000000
      }
    }
  } ],
  "error": {
    "details": [ ]
  }
}