Using the API, without any code, you can create and train a Custom Speech-to-Text model to improve recognition accuracy from an existing Speech-to-Text model. This fully managed service automatically provisions compute resources, executes the training application code, and ensures deletion of compute resources after the training job. You get a fully fine-tuned transcription model useful for any downstream application.
Similar to machine-learning models, training a Custom Speech-to-Text model is typically iterative and involves selecting a base model as a starting point, fine-tuning it with your text and audio datasets, then testing the recognition quality of the model. If the results are not what you expected, you retrain a new model with a different mixture of data, test again, or use it directly for transcription in your domain.
Before you begin
Ensure you have signed up for a Google Cloud account, created a Google Cloud project, and enabled the Speech-to-Text API: Go to Speech in the Google Cloud console, and navigate to the Speech-to-Text API. Operate in the Custom Models section of the navigation bar on the left.
Create a custom model
Start by creating a custom Speech-to-Text model and defining its parameters, like base model and transcription language:
- Click Create to create a custom model.
- Enter a Model name, which will be used for the display and be referenced in your API requests and Google Cloud Speech console.
- Enter a Description for the model.
- Select a Base model that is suited best for your use case.
- Select the transcription Language of the model.
- Select the Region in which training should take place.
- Click Continue.

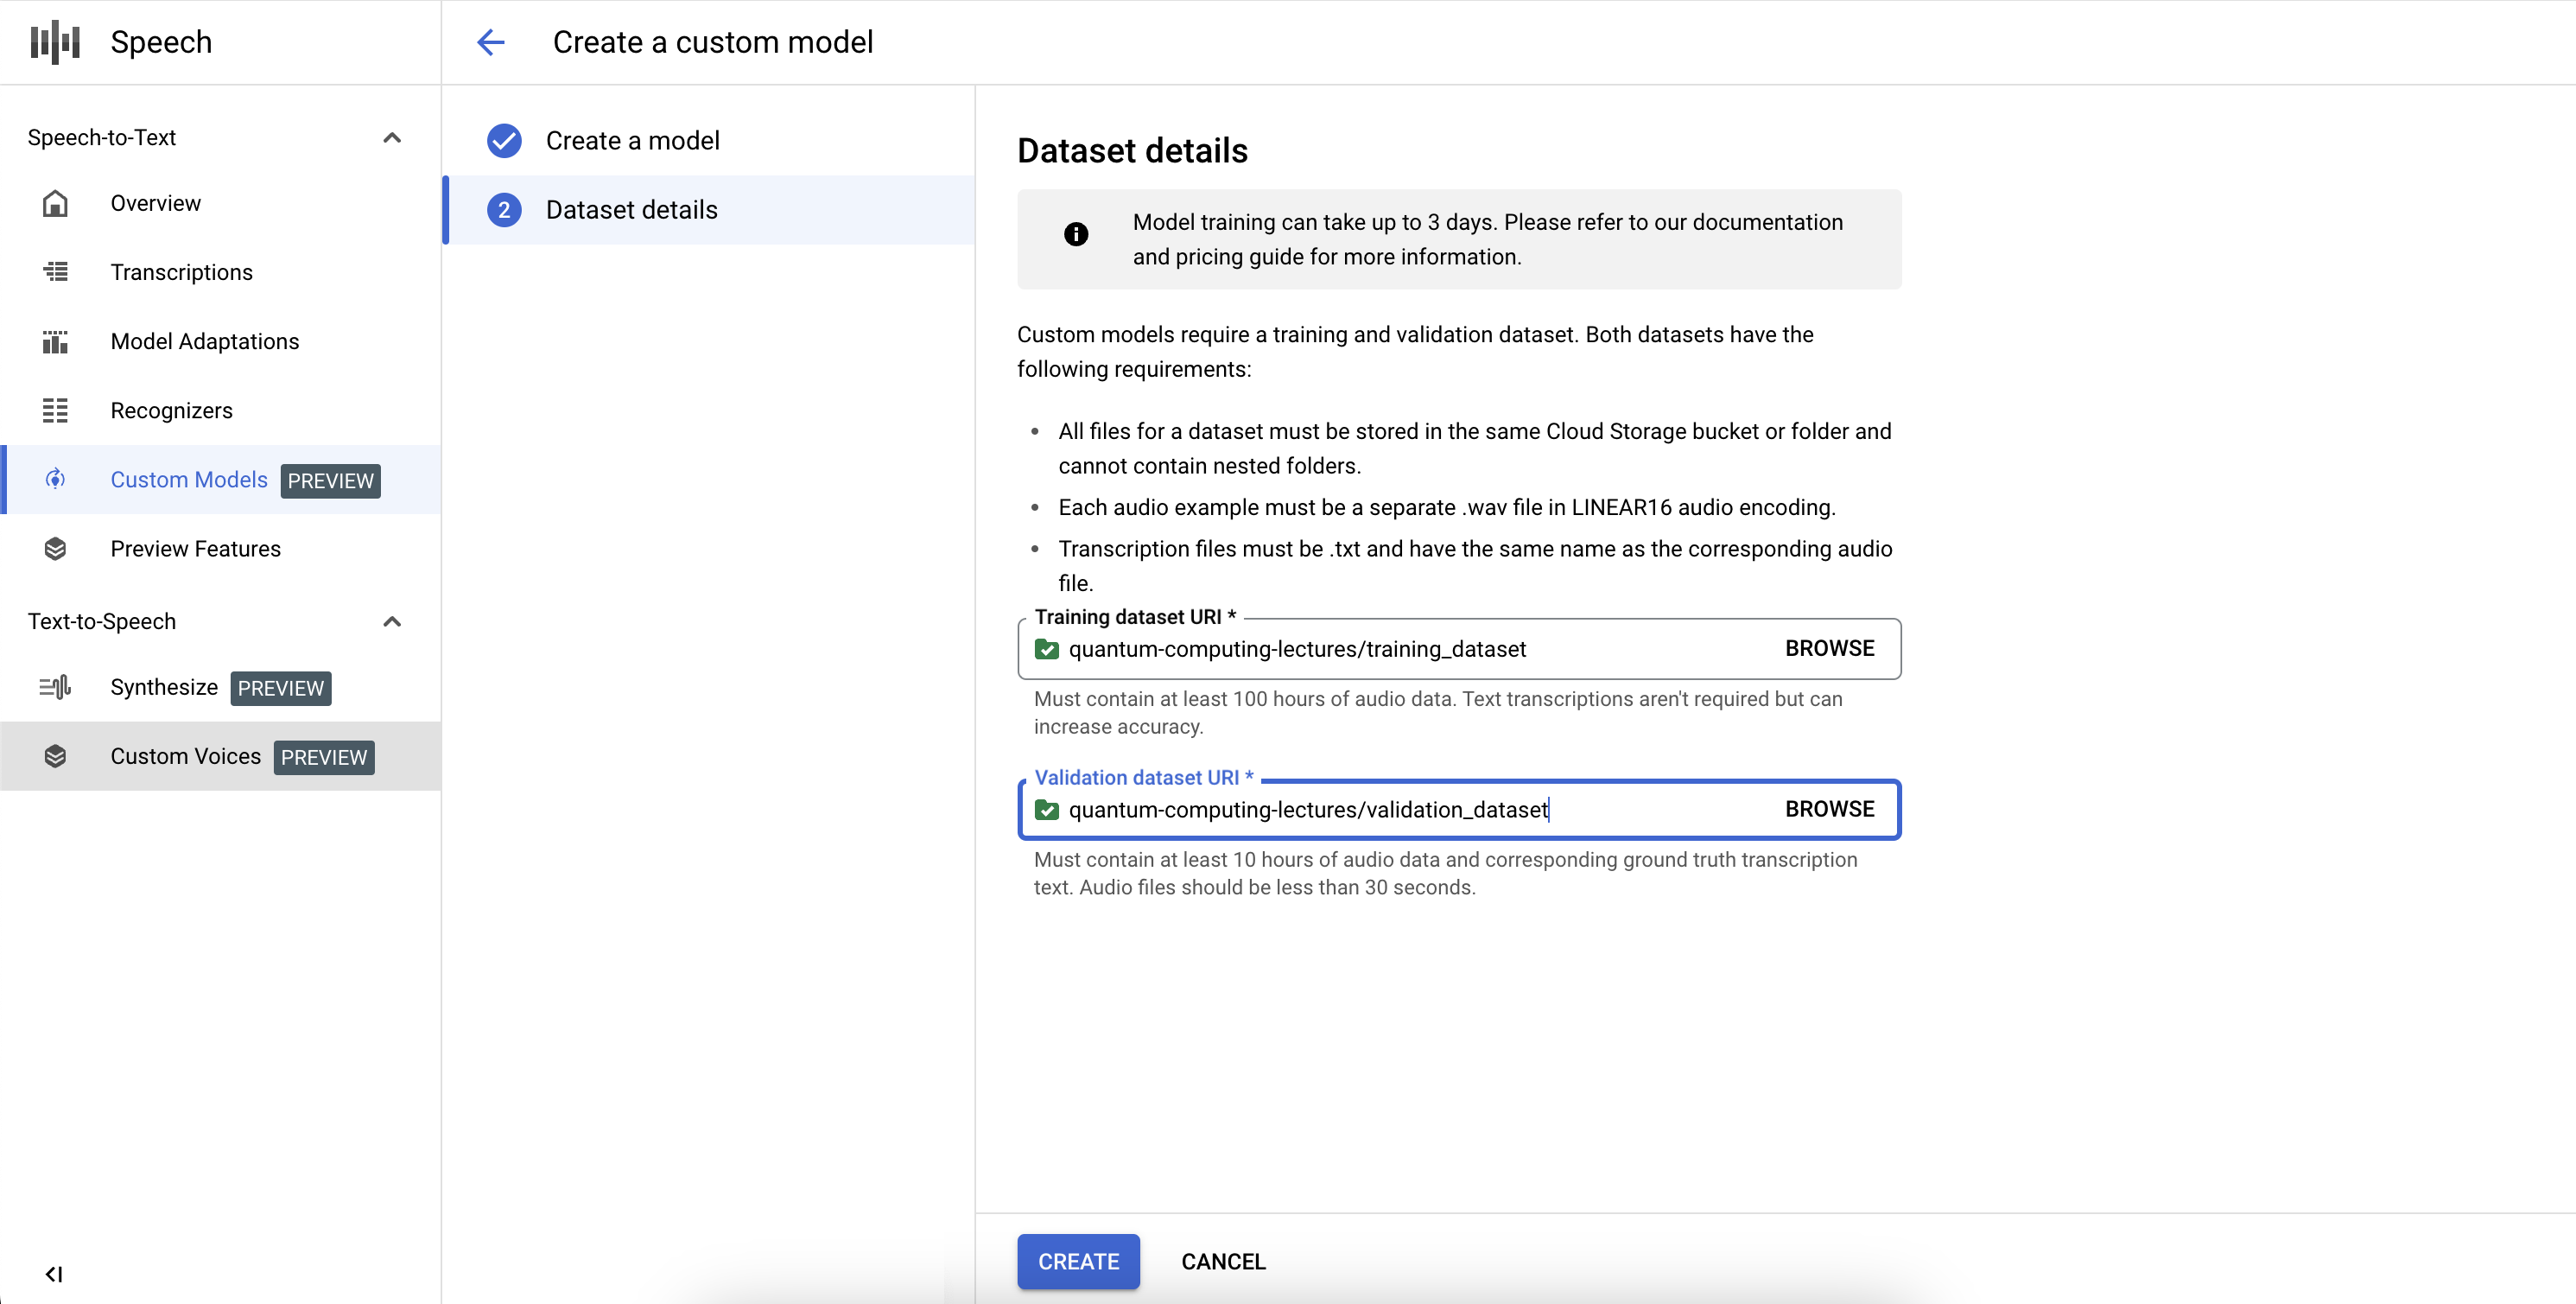
To complete the definition of the Custom Speech-to-Text model job and start the training, you will need to define the training and validation datasets.
- Select a training dataset, by providing a valid Cloud Storage directory URI. Ensure that only audio and text files are present and that the total duration of audio follows the training dataset requirements.
- Select a validation dataset, by providing a valid Cloud Storage directory URI. Ensure that only audio and text files are present and that the total duration of audio follows the validation dataset requirements.
- Click Create to initiate the training process.
If not enough audio hours are indexed or the files don't follow the guidelines, the training job will fail.
Training jobs can be queued behind other jobs in our system, and training a model can take anywhere from a couple of hours to a few days depending on the dataset size. After the model training, its state will be flagged as Active.
Delete a custom model
Before you start, make sure that there is no traffic routed to your Custom Speech-to-Text model through any endpoint, because deleting it will stop it from serving any requests.
- Navigate to the Models tab of the Custom Models section.
- Click to expand options and then click Delete. In a few moments the Custom Speech-to-Text model will be deleted, along with all of its endpoints, and will no longer serve any traffic.
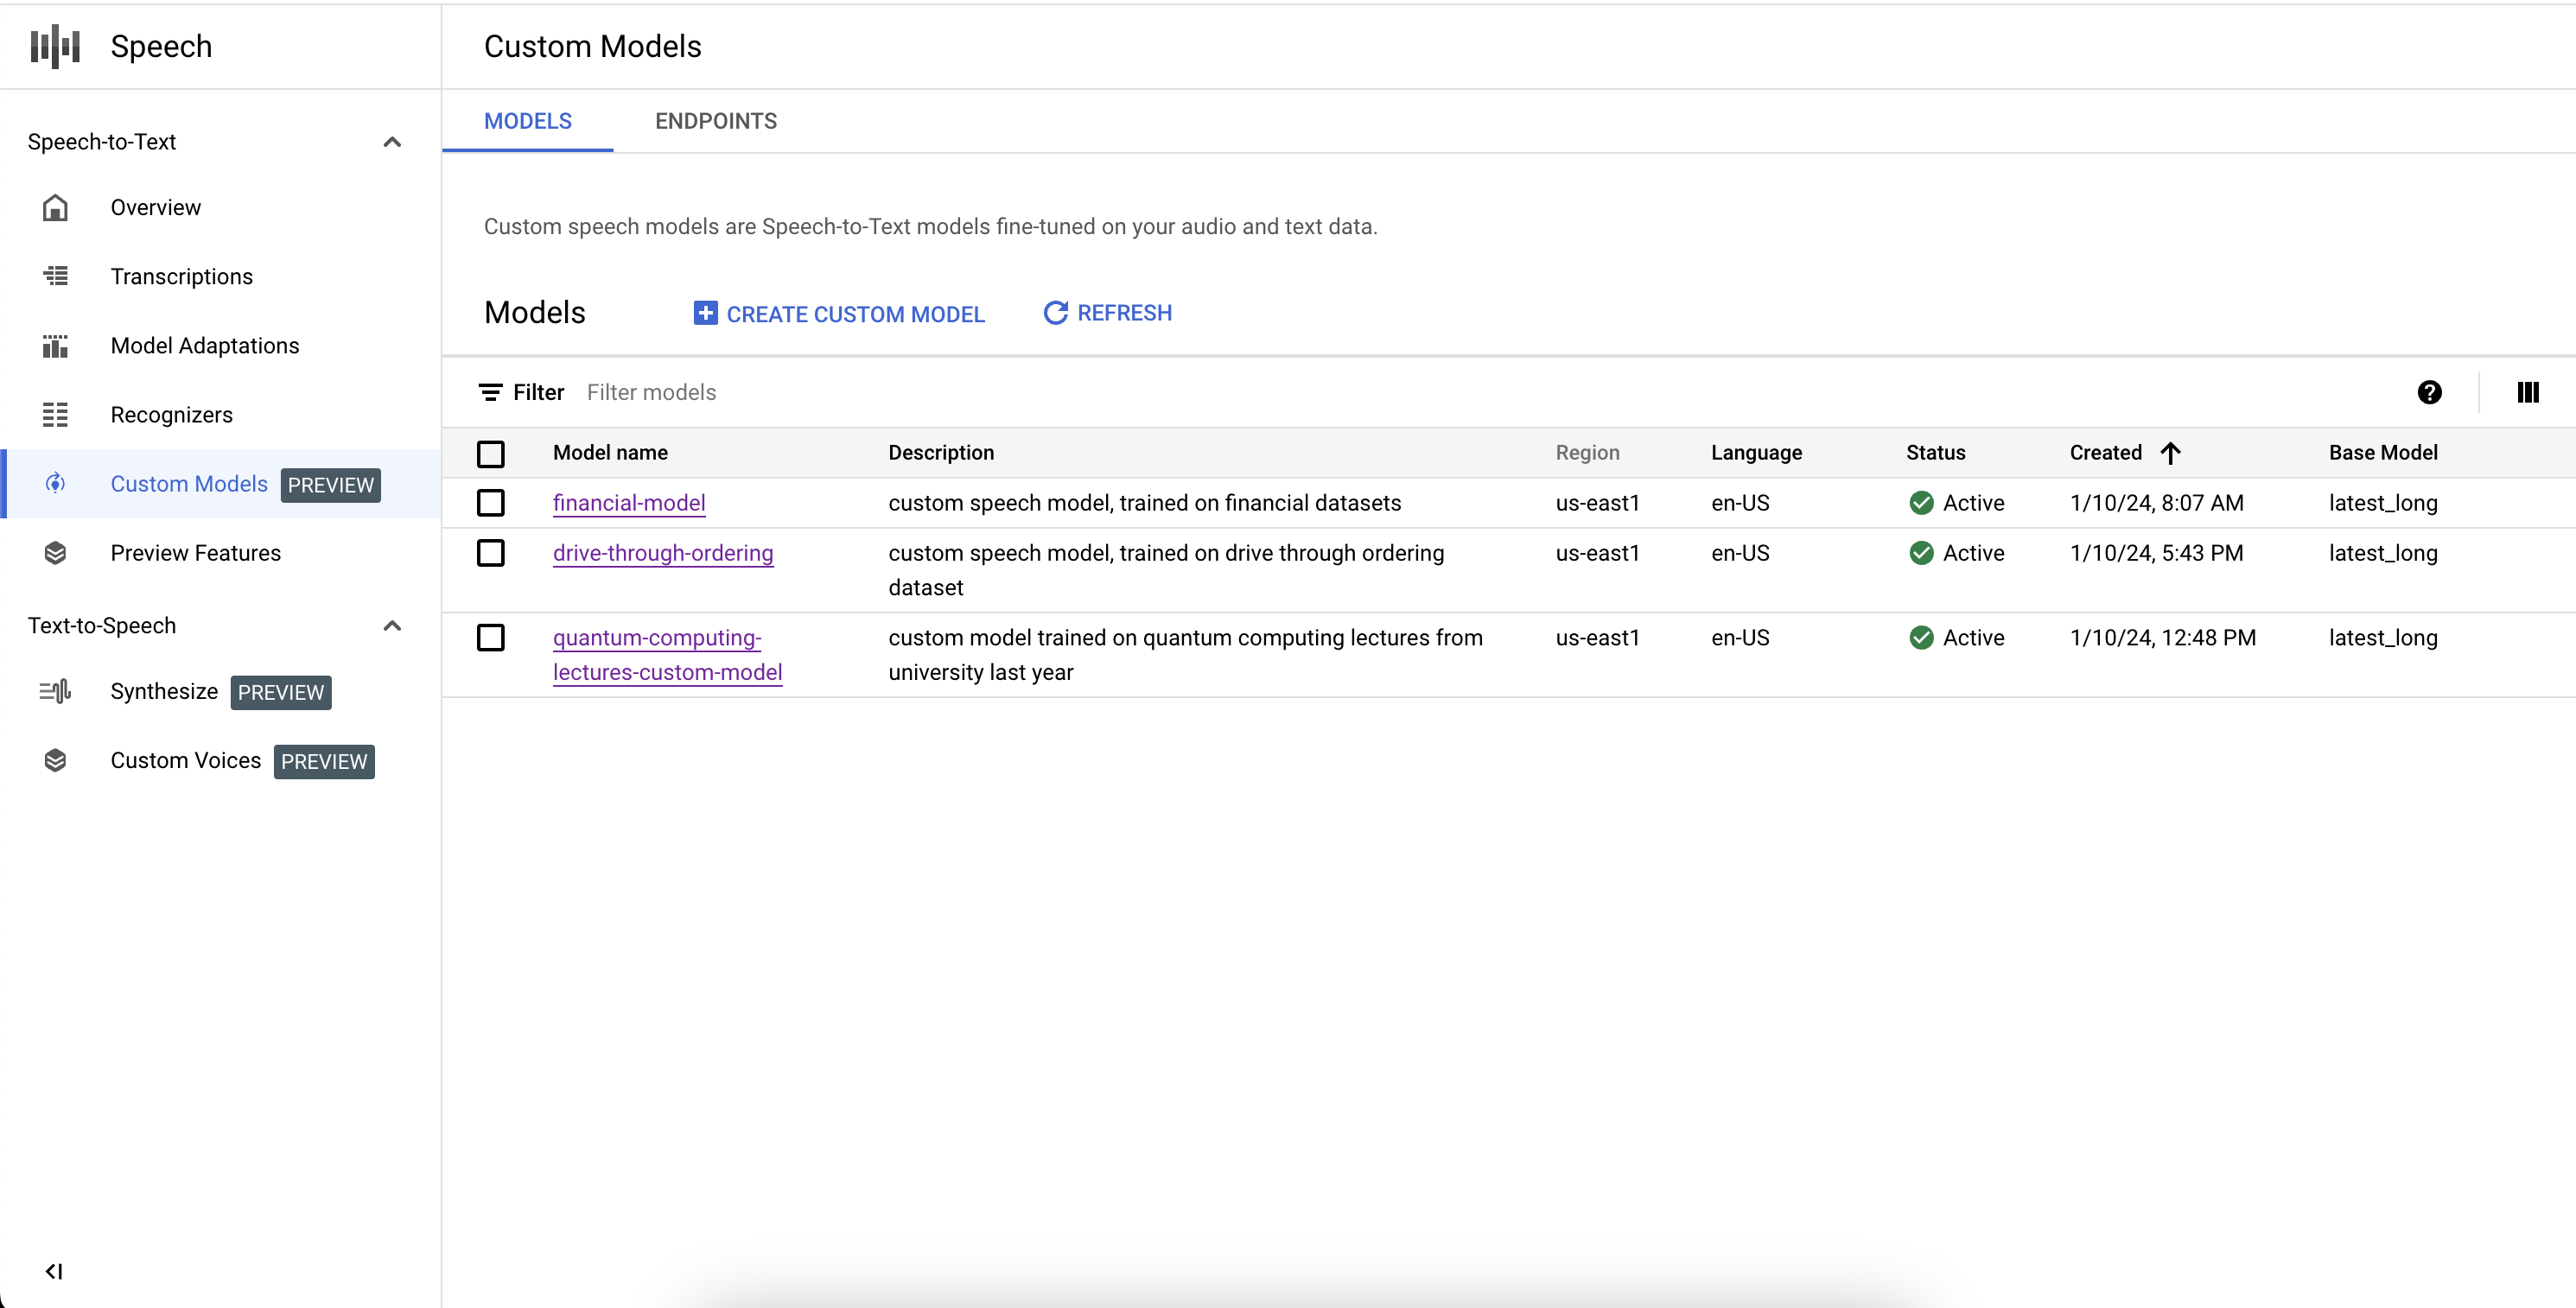
List your custom models
By selecting the Models in the Custom Models section, you can also list all of your Custom Speech-to-Text models, including the ones that are training, active, and deleting.
What's next
Follow the resources to take advantage of custom speech models in your application: