A labeled dataset of documents is required to train, up-train, or evaluate a processor version.
This page describes how to create a dataset, import documents, and define a schema. To label the imported documents, see Label documents.
This page assumes you have already created a processor that supports training, up-training, or evaluation. If your processor is supported, you see the Train tab in the Google Cloud console.
Dataset storage options
You can choose between two options to save your dataset:
- Google-managed
- Custom location Cloud Storage
Unless you have special requirements (for example to keep documents in a set of CMEK-enabled folders) we recommend the simpler Google-managed storage option. Once created the dataset storage option cannot be changed for the processor.
The folder or subfolder for a custom Cloud Storage location must start empty and be treated as strictly read-only. Any manual changes to its contents might make the dataset unusable, risking its loss. The Google-managed storage option does not have this risk.
Follow these steps to provision your storage location.
Google-managed storage (recommended)
Display advanced options while creating a new processor.
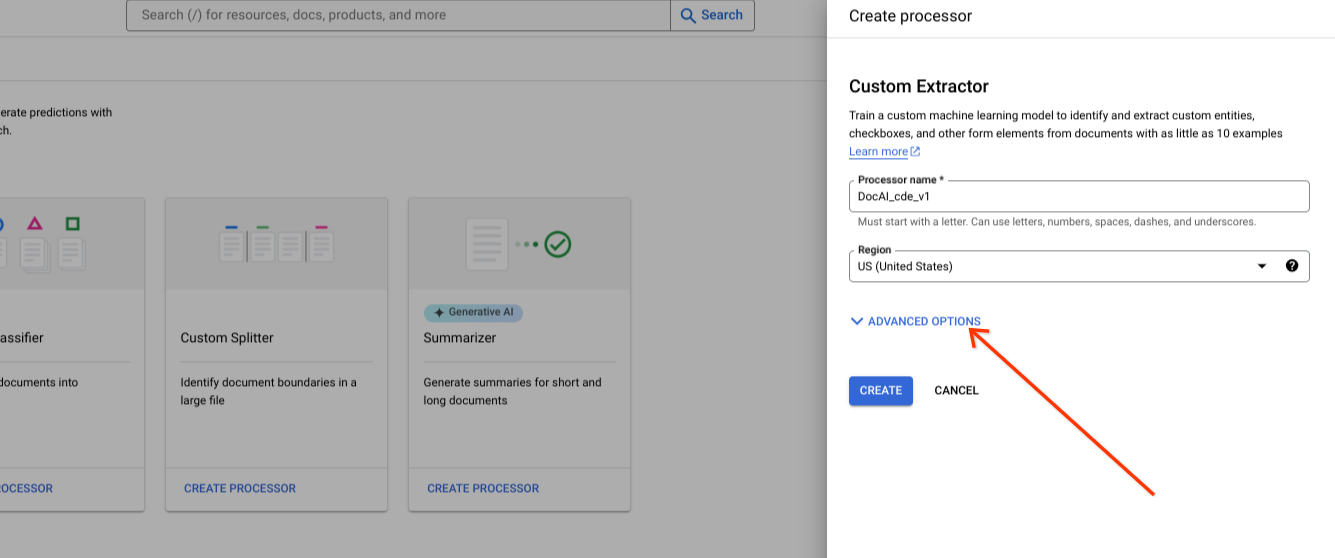
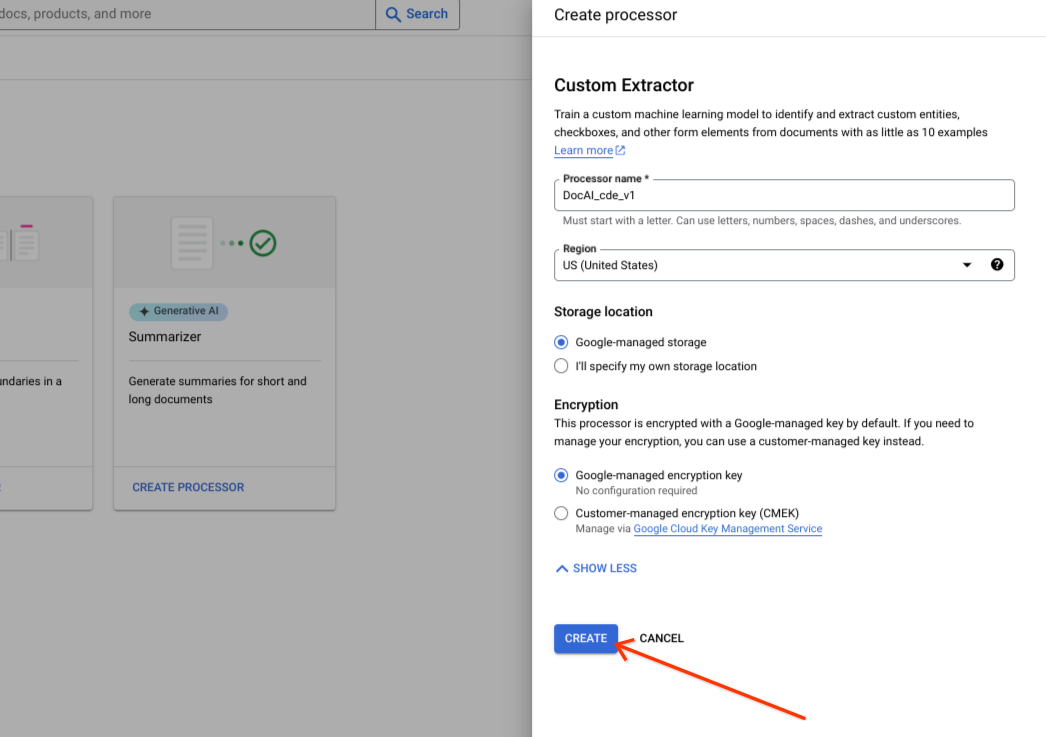
Keep the default radio group option to Google-managed storage.
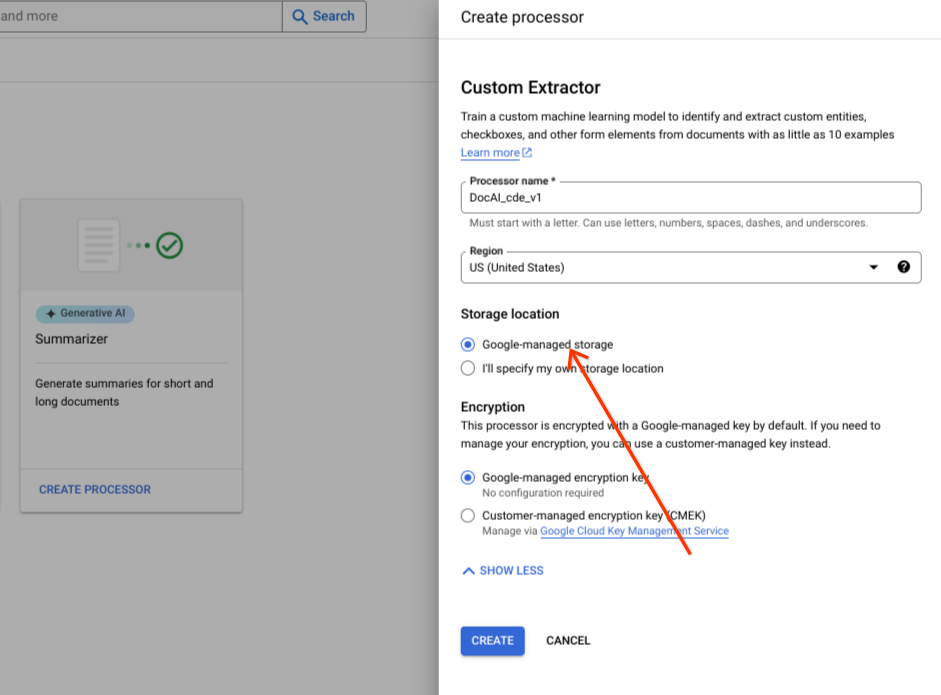
Select Create.
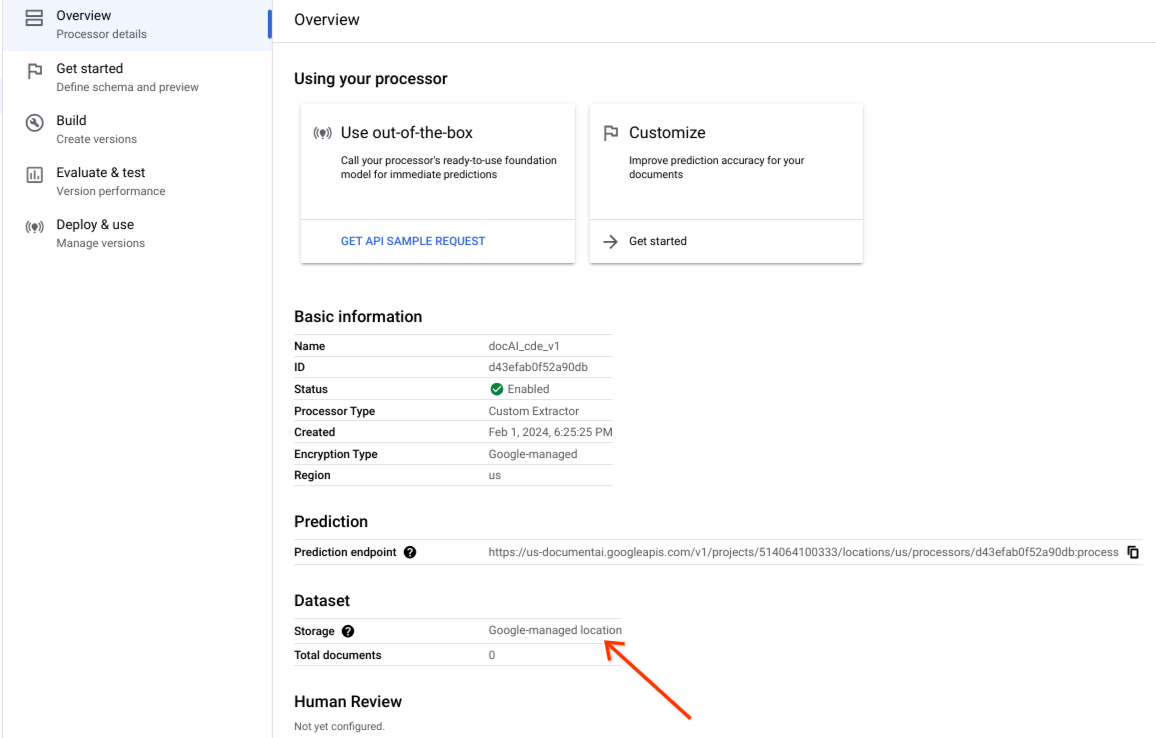
Confirm dataset is created successfully and dataset location is Google-managed location.
Custom storage option
Set the advanced options on or off.
Select I'll specify my own storage location.
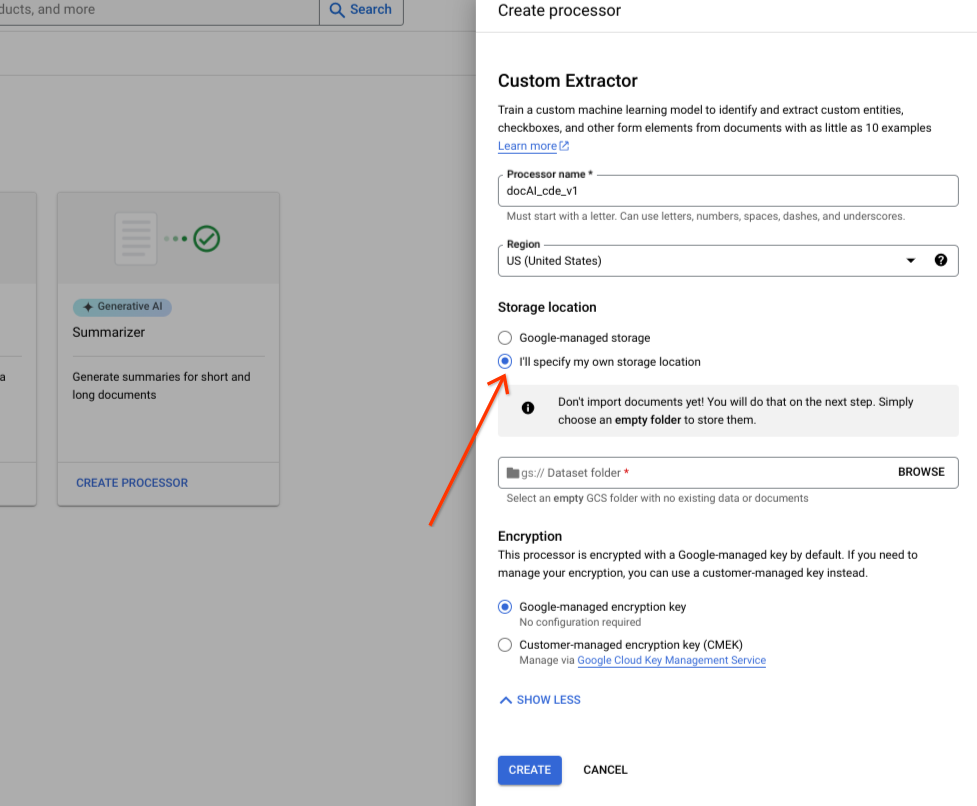
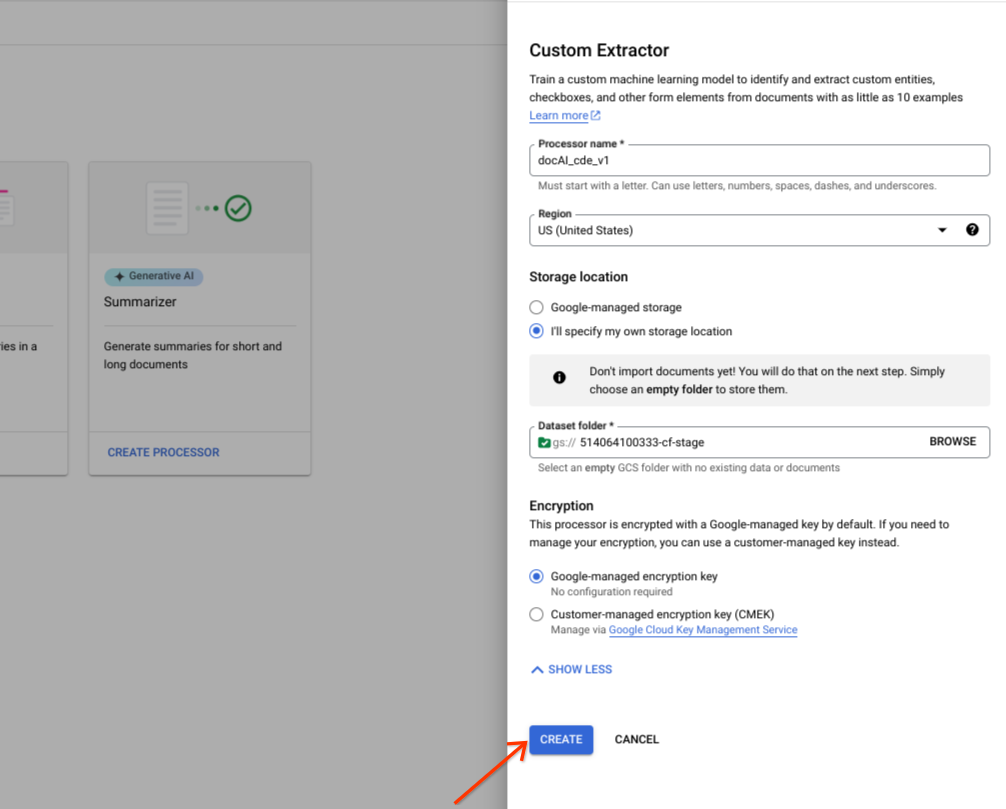
Choose a Cloud Storage folder from the input component.
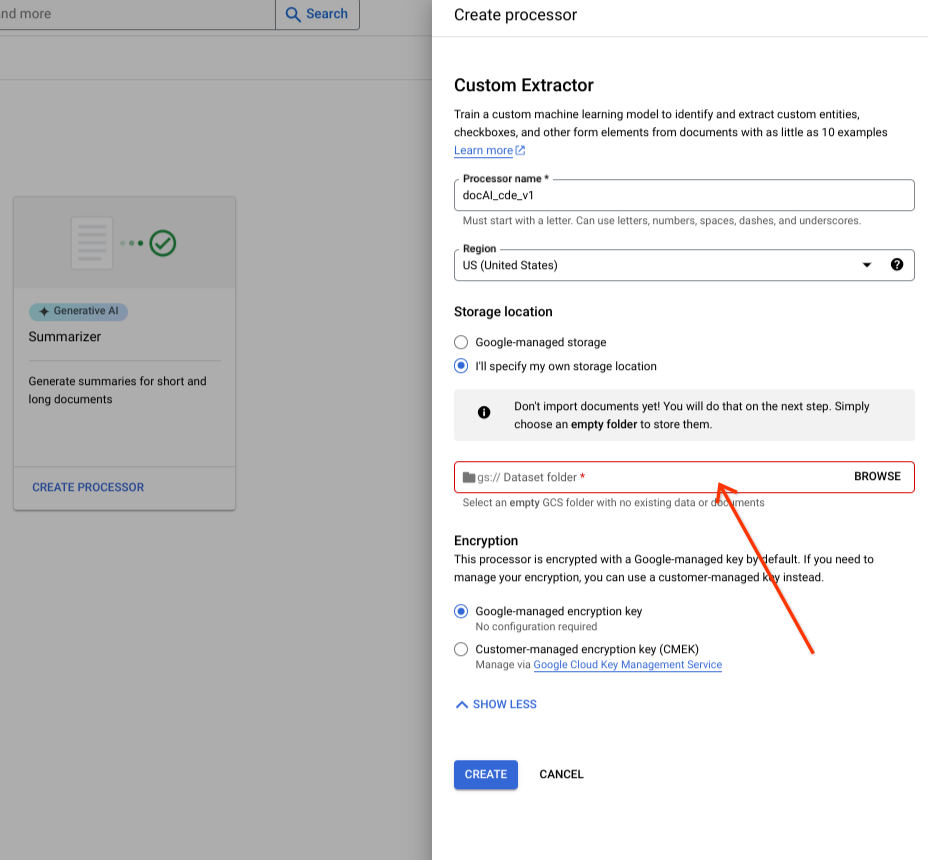
Select Create.
Dataset API operations
This sample shows you how to use the
processors.updateDataset
method to create a dataset. A dataset resource is a singleton resource in a processor,
which means that there is no create resource RPC. Instead, you can use the
updateDataset RPC to set the preferences. Document AI provides an
option to store the dataset documents in a Cloud Storage bucket you provide
or to have them automatically managed by Google.
Before using any of the request data, make the following replacements:
LOCATION: Your processor location
PROJECT_ID: Your Google Cloud project ID
PROCESSOR_ID The ID of your custom processor
GCS_URI: Your Cloud Storage URI where dataset documents are stored
Provided bucket
Follow next steps to create a dataset request with a Cloud Storage bucket you provide.
HTTP method
PATCH https://LOCATION-documentai.googleapis.com/v1beta3/projects/PROJECT_ID/locations/LOCATION/processors/PROCESSOR_ID/datasetRequest JSON:
  {
      "name":"projects/PROJECT_ID/locations/LOCATION/processors/PROCESSOR_ID/dataset"
      "gcs_managed_config" {
          "gcs_prefix" {
              "gcs_uri_prefix": "GCS_URI"
          }
      }
      "spanner_indexing_config" {}
  }
Google managed
In case you want to create the dataset which is Google managed, update the following information:
HTTP method
PATCH https://LOCATION-documentai.googleapis.com/v1beta3/projects/PROJECT_ID/locations/LOCATION/processors/PROCESSOR_ID/datasetRequest JSON:
  {
      "name":"projects/PROJECT_ID/locations/LOCATION/processors/PROCESSOR_ID/dataset"
      "unmanaged_dataset_config": {}
      "spanner_indexing_config": {}
  }
To send your request, you can use Curl:
Save the request body in a file named request.json. Execute the following command:
CURL
  curl -X PATCH \
  -H "Authorization: Bearer $(gcloud auth print-access-token)" \
  -H "Content-Type: application/json; charset=utf-8" \
  -d @request.json \
  "https://LOCATION-documentai.googleapis.com/v1beta3/projects/PROJECT_ID/locations/LOCATION/processors/PROCESSOR_ID/dataset"
You should receive a JSON response similar to the following:
  {
      "name": "projects/PROJECT_ID/locations/LOCATION/operations/OPERATION_ID"
  }
Import documents
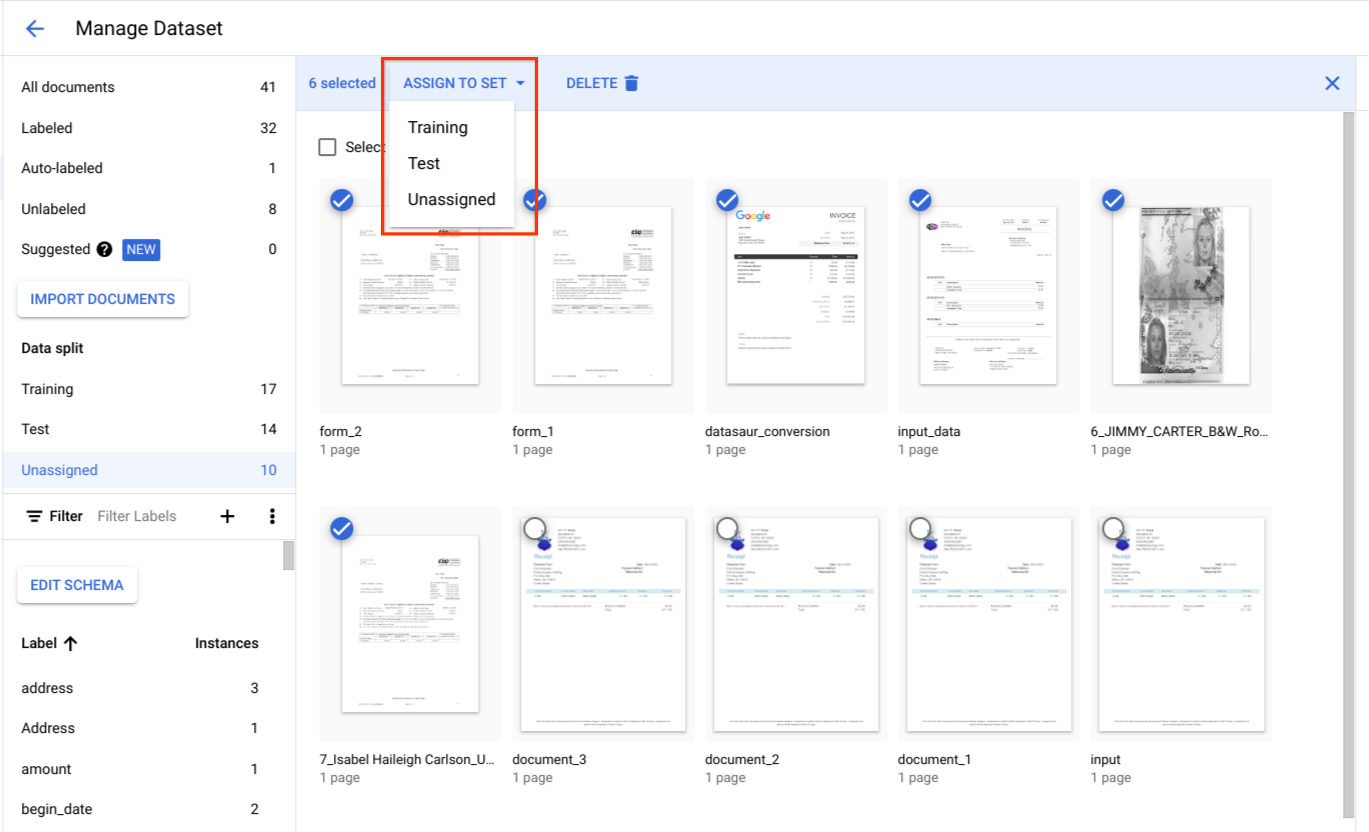
A newly created dataset is empty. To add documents, select Import Documents and select one or more Cloud Storage folders that contain the documents you want to add to your dataset.
If your Cloud Storage is in a different Google Cloud project, make sure to
grant access so that Document AI is allowed to read files from that
location. Specifically, you must grant the
Storage Object Viewer role to
Document AI's core service agent
service-{project-id}@gcp-sa-prod-dai-core.iam.gserviceaccount.com. For more
information, see
Service agents.
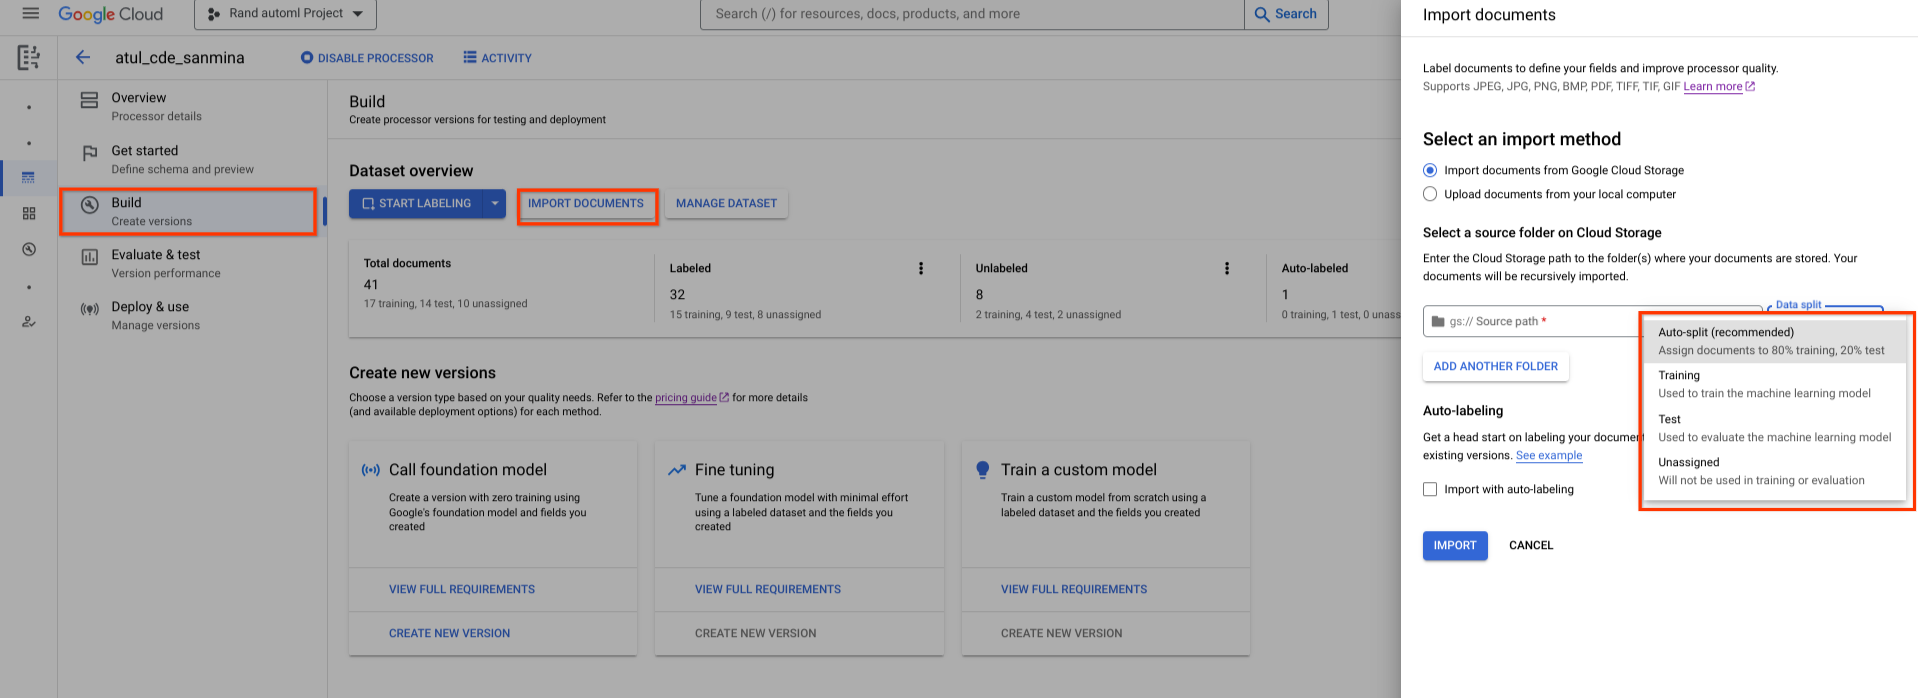
Then, choose one of the following assignment options:
- Training: Assign to training set.
- Test: Assign to test set.
- Auto-split: Randomly shuffles documents in training and test set.
- Unassigned: Is not used in training or evaluation. You can manually assign later.
You can always modify the assignments later.
When you select Import, Document AI imports all of the
supported file types as well as JSON
Document files into the
dataset. For JSON Document
files, Document AI imports the document and converts its entities
into label instances.
Document AI does not modify the import folder or read from the folder after import is complete.
Select Activity at the top of the page to open the Activity panel, which lists the files that were successfully imported as well as those that failed to import.
If you already have an existing version of your processor, you can select the Import with auto-labeling checkbox in the Import documents dialog. The documents are auto-labeled using the previous processor when they are imported. You cannot train or up-train on auto-labeled documents, or use them in the test set, without marking them as labeled. After you import auto-labeled documents, manually review and correct the auto-labeled documents. Then, select Save to save the corrections and mark the document as labeled. You can then assign the documents as appropriate. See Auto-labeling.
Import documents RPC
This sample shows you how to use the dataset.importDocuments method to import documents into the dataset.
Before using any of the request data, make the following replacements:
LOCATION: Your processor location
PROJECT_ID: Your Google Cloud project ID
PROCESSOR_ID: The ID of your custom processor
GCS_URI: Your Cloud Storage URI where dataset documents are stored
DATASET_TYPE: The dataset type to which you want to add documents. The value should be either `DATASET_SPLIT_TRAIN` or `DATASET_SPLIT_TEST`.
TRAINING_SPLIT_RATIO: The ratio of documents which you want to autoassign to the training set.
Train or test dataset
If you want to add documents to either training or test dataset:
HTTP method
POST https://LOCATION-documentai.googleapis.com/v1beta3/projects/PROJECT_ID/locations/LOCATION/processors/PROCESSOR_ID/dataset/importDocumentsRequest JSON:
  {
      "batch_documents_import_configs": {
          "dataset_split": DATASET_TYPE
          "batch_input_config": {
          "gcs_prefix": {
              "gcs_uri_prefix": GCS_URI
          }
          }
      }
  }
Train & test dataset
If you want to autosplit the documents between the training and test dataset:
HTTP method
POST https://LOCATION-documentai.googleapis.com/v1beta3/projects/PROJECT_ID/locations/LOCATION/processors/PROCESSOR_ID/dataset/importDocumentsRequest JSON:
  {
      "batch_documents_import_configs": {
          "auto_split_config": {
          "training_split_ratio": TRAINING_SPLIT_RATIO
          },
          "batch_input_config": {
          "gcs_prefix": {
              "gcs_uri_prefix": "gs://test_sbindal/pdfs-1-page/"
          }
          }
      }
  }
Save the request body in a file named request.json, and execute the following command:
CURL
  curl -X POST \
  -H "Authorization: Bearer $(gcloud auth print-access-token)" \
  -H "Content-Type: application/json; charset=utf-8" \
  -d @request.json \
  "https://LOCATION-documentai.googleapis.com/v1beta3/projects/PROJECT_ID/locations/LOCATION/processors/PROCESSOR_ID/dataset/importDocuments"
You should receive a JSON response similar to the following:
  {
      "name": "projects/PROJECT_ID/locations/LOCATION/operations/OPERATION_ID"
}Delete documents RPC
This sample shows you how to use the dataset.batchDeleteDocuments method to delete documents from the dataset.
Before using any of the request data, make the following replacements:
LOCATION: Your processor location
PROJECT_ID: Your Google Cloud project ID
PROCESSOR_ID: The ID of your custom processor
DOCUMENT_ID: The document ID blob returned by <code>ImportDocuments</code> request
Delete documents
HTTP method
POST https://LOCATION-documentai.googleapis.com/v1beta3/projects/PROJECT_ID/locations/LOCATION/processors/PROCESSOR_ID/dataset/batchDeleteDocumentsRequest JSON:
  {
  "dataset_documents": {
      "individual_document_ids": {
      "document_ids": DOCUMENT_ID
      }
      }
  }
Save the request body in a file named request.json, and execute the following command:
CURL
  curl -X POST \
  -H "Authorization: Bearer $(gcloud auth print-access-token)" \
  -H "Content-Type: application/json; charset=utf-8" \
  -d @request.json \
  "https://LOCATION-documentai.googleapis.com/v1beta3/projects/PROJECT_ID/locations/LOCATION/processors/PROCESSOR_ID/dataset/batchDeleteDocuments"
You should receive a JSON response similar to the following:
  {
      "name": "projects/PROJECT_ID/locations/LOCATION/operations/OPERATION_ID"
  }
Assign documents to training or test set
Under Data split, select documents and assign them to either the training set, test set, or unassigned.
Best practices for test set
The quality of your test set determines the quality of your evaluation.
The test set should be created at the beginning of the processor development cycle and locked in so that you can track the processor's quality over time.
We recommend at least 100 documents per document type for the test set. It is critical to ensure that the test set is representative of the types of documents that customers are using for the model being developed.
The test set should be representative of production traffic in terms of frequency. For example, if you are processing W2 forms and expect 70% to be for year 2020 and 30% to be for year 2019, then ~70% of the test set should consist of W2 2020 documents. Such a test set composition ensures appropriate importance is given to each document subtype when evaluating the processor's performance. Also, if you are extracting people's names from international forms, make sure that your test set includes forms from all targeted countries.
Best practices for the training set
Any documents that have already been included in the test set shouldn't be included in the training set.
Unlike the test set, the final training set doesn't need to be as strictly representative of the customer usage in terms of document diversity or frequency. Some labels are more difficult to train than others. Thus, you might get better performance by skewing the training set towards those labels.
In the beginning, there isn't a good way to figure out which labels are difficult. You should start with a small, randomly-sampled initial training set using the same approach described for the test set. This initial training set should contain roughly 10% of the total number of documents that you plan to annotate. Then, you can iteratively evaluate the processor quality (looking for specific error patterns) and add more training data.
Define processor schema
After you create a dataset, you can define a processor schema either before or after you import documents.
The processor's schema defines the labels, such as name and address, to
extract from your documents.
Select Edit Schema and then create, edit, enable, and disable labels as necessary.
Make sure to select Save when you are finished.
Notes on schema label management:
Once a schema label is created, the schema label's name cannot be edited.
A schema label can only be edited or deleted when there are no trained processor versions. Only data type and occurrence type can be edited.
Disabling a label also does not affect prediction. When you send a processing request, the processor version extracts all labels that were active at the time of training.
Get data schema
This sample shows you how to use the dataset.
getDatasetSchema
to get the current schema. DatasetSchema is a singleton resource, which is
automatically created when you create a dataset resource.
Before using any of the request data, make the following replacements:
LOCATION: Your processor location
PROJECT_ID: Your Google Cloud project ID
PROCESSOR_ID: The ID of your custom processor
Get data schema
HTTP method
GET https://LOCATION-documentai.googleapis.com/v1beta3/projects/PROJECT_ID/locations/LOCATION/processors/PROCESSOR_ID/dataset/datasetSchemaCURL
  curl -X POST \
  -H "Authorization: Bearer $(gcloud auth print-access-token)" \
  -H "Content-Type: application/json; charset=utf-8" \
  -d @request.json \
  "https://LOCATION-documentai.googleapis.com/v1beta3/projects/PROJECT_ID/locations/LOCATION/processors/PROCESSOR_ID/dataset/datasetSchema"
You should receive a JSON response similar to the following:
  {
      "name": "projects/PROJECT_ID/locations/LOCATION/processors/PROCESSOR_ID/dataset/datasetSchema",
      "documentSchema": {
          "entityTypes": [
          {
              "name": $SCHEMA_NAME,
              "baseTypes": [
              "document"
              ],
              "properties": [
              {
                  "name": $LABEL_NAME,
                  "valueType": $VALUE_TYPE,
                  "occurrenceType": $OCCURRENCE_TYPE,
                  "propertyMetadata": {}
              },
              ],
              "entityTypeMetadata": {}
          }
          ]
      }
  }
Update document schema
This sample shows you how to use the
dataset.updateDatasetSchema
to update the current schema. This example shows you a command to update the
dataset schema to have one label. If you want to add a new label, not delete
or update existing labels, then you can call getDatasetSchema first and make
appropriate changes in its response.
Before using any of the request data, make the following replacements:
LOCATION: Your processor location
PROJECT_ID: Your Google Cloud project ID
PROCESSOR_ID: The ID of your custom processor
LABEL_NAME: The label name which you want to add
LABEL_DESCRIPTION: Describe what the label represents
DATA_TYPE: The type of the label. You can specify this as string, number, currency, money, datetime, address, boolean.
OCCURRENCE_TYPE: Describes the number of times this label is expected. Pick an enum value.
Update schema
HTTP method
PATCH https://LOCATION-documentai.googleapis.com/v1beta3/projects/PROJECT_ID/locations/LOCATION/processors/PROCESSOR_ID/dataset/datasetSchemaRequest JSON:
  {
      "document_schema": {
          "entityTypes": [
              {
                  "name": $SCHEMA_NAME,
                  "baseTypes": [
                  "document"
                  ],
                  "properties": [
                  {
                      "name": LABEL_NAME,
                      "description": LABEL_DESCRIPTION,
                      "valueType": DATA_TYPE,
                      "occurrenceType": OCCURRENCE_TYPE,
                      "propertyMetadata": {}
                  },
                  ],
                  "entityTypeMetadata": {}
              }
          ]
      }
  }
Save the request body in a file named request.json, and execute the following command:
CURL
  curl -X POST \
  -H "Authorization: Bearer $(gcloud auth print-access-token)" \
  -H "Content-Type: application/json; charset=utf-8" \
  -d @request.json \
  "https://LOCATION-documentai.googleapis.com/v1beta3/projects/PROJECT_ID/locations/LOCATION/processors/PROCESSOR_ID/dataset/datasetSchema"
Choose label attributes
Data type
Plain text: a string value.Number: a number - integer or floating point.Money: a monetary value amount. When labeling, don't include the currency symbol.- When the entity is extracted, it is normalized to
google.type.Money.
- When the entity is extracted, it is normalized to
Currency: a currency symbol.Datetime: a date or time value.- When the entity is extracted, it is
normalized to the
ISO 8601text format.
- When the entity is extracted, it is
normalized to the
Address- a location address.- When the entity is extracted, it is normalized and enriched with EKG.
Checkbox- atrueorfalseboolean value.Signature- atrueorfalseboolean value innormalized_value.signature_valuethat indicates if a Signature is present. It supports thederivemethods.mention_text- aDetectedor an empty""boolean value inhas_signedthat indicates if a Signature is present. It supports thederivemethods.normalized_value.text- aDetectedor an empty""boolean value inhas_signedthat indicates if a Signature is present. It supports thederivemethods.normalized_value.boolean_valueisn't populated.
Method
- When the entity is
extracted, it has thetextAnchor,type,mentionText, andpageAnchorfields populated. - When the entity is
derived, the derived values may not be present in the document text. It doesn't have thetextAnchorandpageAnchor.pageRefs[].bounding_polyfields populated.
Occurrence
Choose REQUIRED if an entity is expected to always appear in documents of a
given type. Choose OPTIONAL if there is no such expectation.
Choose ONCE if an entity is expected to have one value, even if the same
value appears multiple times in the same document. Choose MULTIPLE if an
entity is expected to have multiple values.
Parent and child labels
Parent-child labels (also known as tabular entities) are used to label data in a table. The following table contains 3 rows and 4 columns.

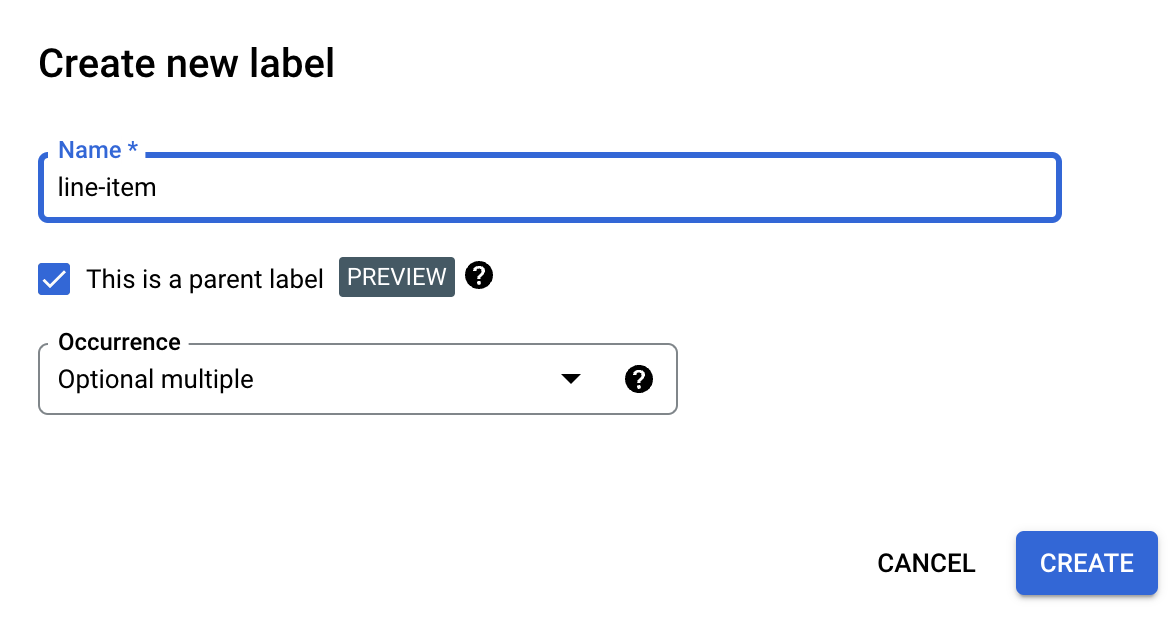
You can define such tables using parent-child labels. In this example, the parent
label line-item defines a row of the table.
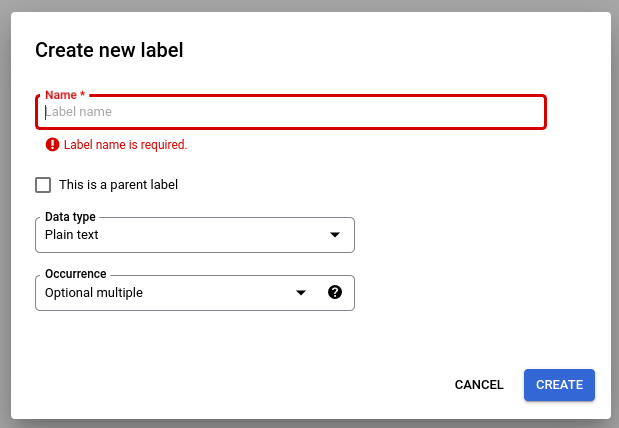
Create a parent label
On the Edit schema page, select Create Label.
Select the This is a parent label checkbox, and enter the other information. The parent label must have an occurrence of either
optional_multipleorrequire_multipleso that it can be repeated to capture all the rows in the table.Select Save.
The parent label appears on the Edit schema page, with an Add Child Label option next to it.
To create a child label
Next to the parent label on the Edit schema page, select Add Child Label.
Enter the information for the child label.
Select Save.
Repeat for each child label you want to add.
The child labels appear indented under the parent label on the Edit schema page.

Parent-child labels are a preview feature and are only supported for tables. Nesting depth is limited to 1, meaning that child entities cannot contain other child entities.
Create Schema Labels from Labeled Documents
Automatically create schema labels by importing pre-labeled Document JSON files.
While Document import is in progress, newly added
schema labels are added to the Schema Editor. Select 'Edit Schema' to verify or
change new schema labels data type and occurrence type. Once confirmed, select
schema labels and select Enable.
Sample datasets
To aid in getting started using Document AI Workbench, datasets are provided in a
public Cloud Storage bucket that includes pre-labeled and unlabeled sample
Document JSON files of multiple document types.
These can be used for up-training or custom extractors depending on the document type.
gs://cloud-samples-data/documentai/Custom/
gs://cloud-samples-data/documentai/Custom/1040/
gs://cloud-samples-data/documentai/Custom/Invoices/
gs://cloud-samples-data/documentai/Custom/Patents/
gs://cloud-samples-data/documentai/Custom/Procurement-Splitter/
gs://cloud-samples-data/documentai/Custom/W2-redacted/
gs://cloud-samples-data/documentai/Custom/W2/
gs://cloud-samples-data/documentai/Custom/W9/