Create, use, and manage a custom document classifier
Use custom classifier to classify documents. Build it from the ground up with your own documents and custom classes. Its generative AI aspect allows few-shot learning and fine-tuning. These improve accuracy with fewer samples and corrections with iterative auto-labeling.
Custom classifier covers these three general use cases.
- Pretrained model: Use the pretrained generative AI foundation model to quickly classify documents with your supplied labels.
- Fine-tuning: Improve accuracy by training the generative AI foundation model on your own data and labels.
- Train a custom model: Train a non-generative AI custom extractor using your own data and labels.
Custom classifier model versions
| Model version | Description | Release channel | ML processing in US/EU | Fine-tuning in US/EU | Release date |
|---|---|---|---|---|---|
pretrained-foundation-model-v1.4-2025-05-16 |
Release candidate powered by the Gemini 2.0 Flash LLM. Also includes advanced OCR features. | Release Candidate | Yes | US, EU (Preview) | May 16, 2025 |
pretrained-classifier-v1.5-2025-08-05 |
Release candidate powered by the Gemini 2.5 Flash LLM. Also includes advanced OCR features. | Release Candidate | Yes | US, EU (Preview) | August 5, 2025 |
Confidence scores are not supported for custom classifier models.
Create a custom classifier in the Google Cloud console
You can create custom classifiers that are specifically suited to your documents and trained and evaluated with your data. This processor identifies classes of documents from a user-defined set of classes. You can then use this trained processor on additional documents. You typically would use a custom classifier on documents that are different types, then use the identification to pass the documents to an extraction processor to extract the entities.
For the general process to create and use a processor, see the How to section.
You can make your own configuration choices that suit your workflow.
To follow step-by-step guidance for this task directly in the Google Cloud console, click Guide me:
Before you begin
- Sign in to your Google Cloud account. If you're new to Google Cloud, create an account to evaluate how our products perform in real-world scenarios. New customers also get $300 in free credits to run, test, and deploy workloads.
-
In the Google Cloud console, on the project selector page, select or create a Google Cloud project.
Roles required to select or create a project
- Select a project: Selecting a project doesn't require a specific IAM role—you can select any project that you've been granted a role on.
-
Create a project: To create a project, you need the Project Creator
(
roles/resourcemanager.projectCreator), which contains theresourcemanager.projects.createpermission. Learn how to grant roles.
-
Verify that billing is enabled for your Google Cloud project.
-
Enable the Document AI, Cloud Storage APIs.
Roles required to enable APIs
To enable APIs, you need the Service Usage Admin IAM role (
roles/serviceusage.serviceUsageAdmin), which contains theserviceusage.services.enablepermission. Learn how to grant roles. -
In the Google Cloud console, on the project selector page, select or create a Google Cloud project.
Roles required to select or create a project
- Select a project: Selecting a project doesn't require a specific IAM role—you can select any project that you've been granted a role on.
-
Create a project: To create a project, you need the Project Creator
(
roles/resourcemanager.projectCreator), which contains theresourcemanager.projects.createpermission. Learn how to grant roles.
-
Verify that billing is enabled for your Google Cloud project.
-
Enable the Document AI, Cloud Storage APIs.
Roles required to enable APIs
To enable APIs, you need the Service Usage Admin IAM role (
roles/serviceusage.serviceUsageAdmin), which contains theserviceusage.services.enablepermission. Learn how to grant roles.
Create a processor
Complete the following steps.
Go to the Workbench
For custom document classifier, select
Create processor .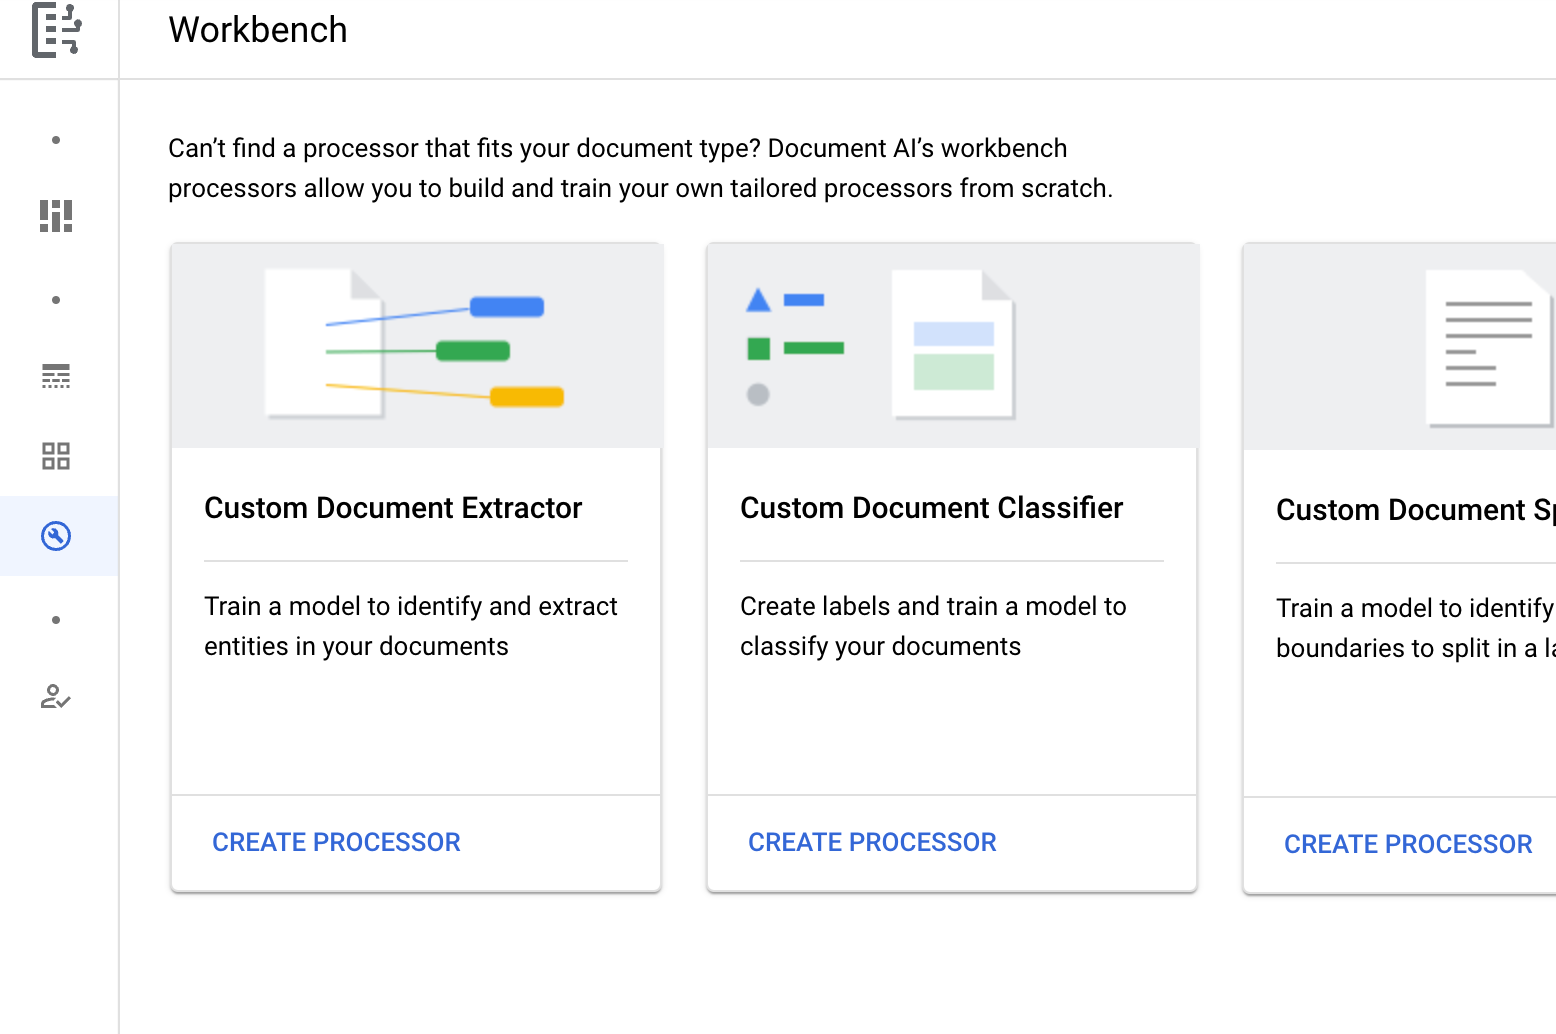
In the Create processor menu, enter a name for your processor, such as
my-custom-document-classifier.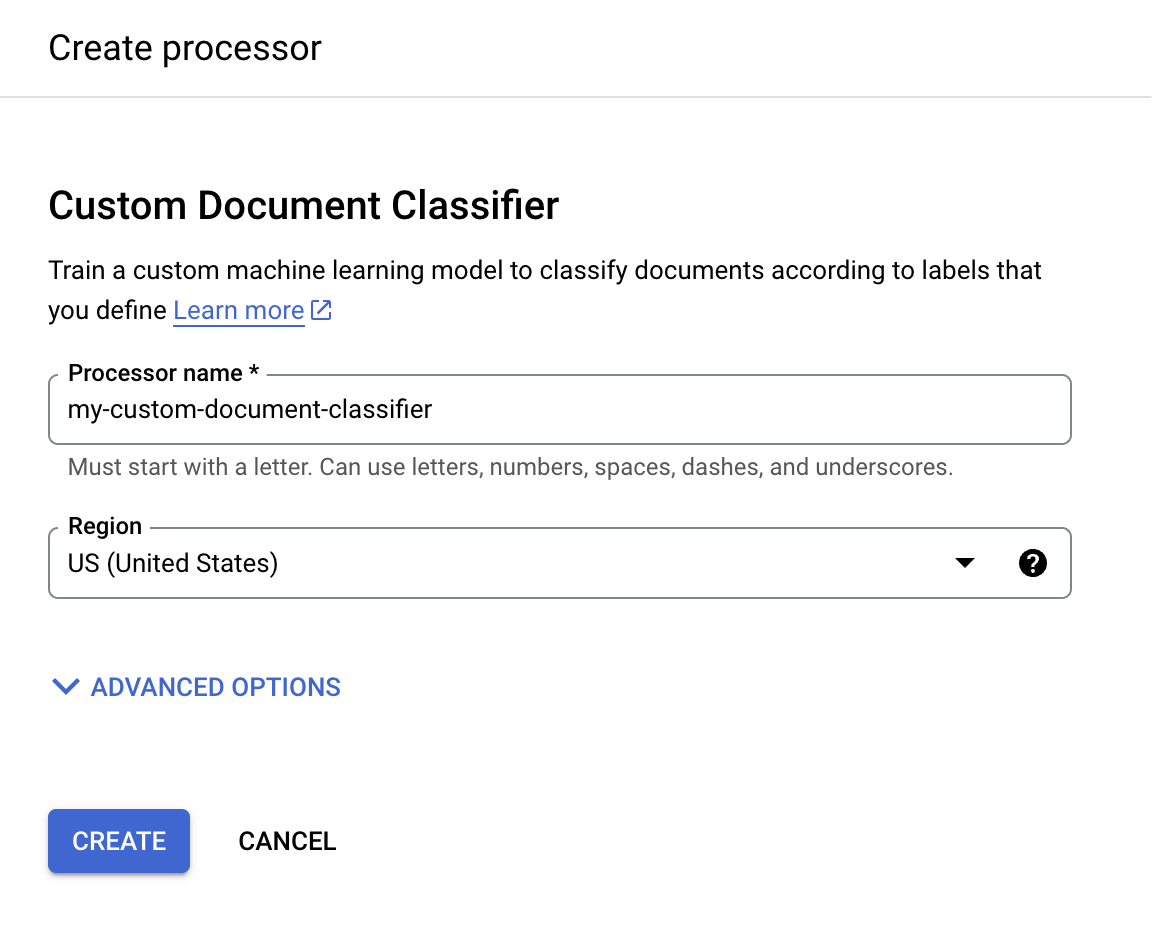
Select the region closest to you.
Select Create. The Processor Details tab appears.
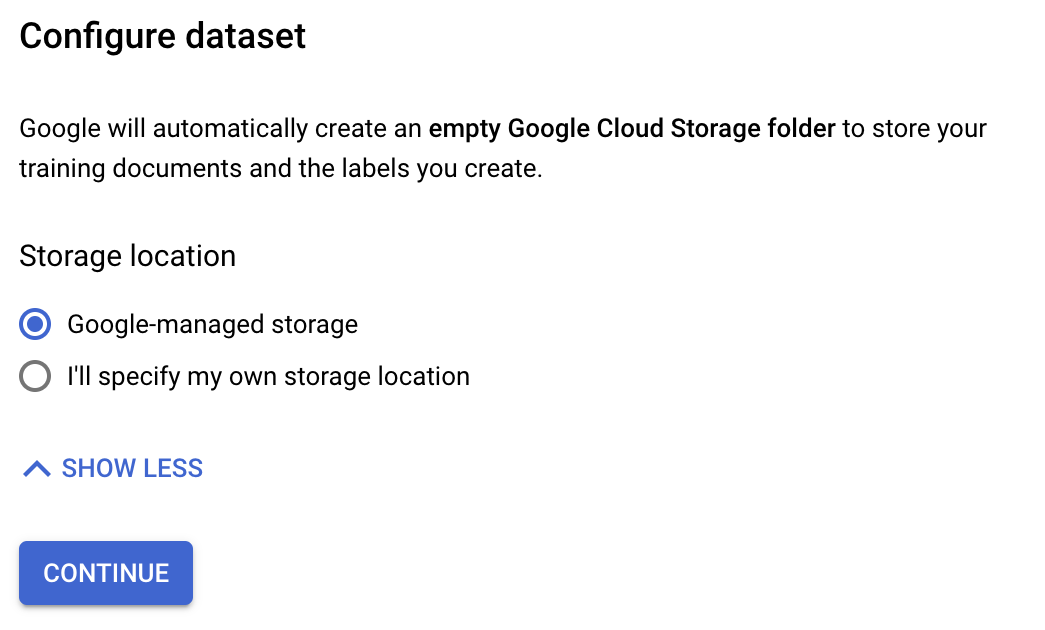
Configure dataset
To train this new processor, you must create a dataset with training and testing data to help the processor identify the documents that you want to split and classify. This dataset requires a new location. This can be an empty Cloud Storage bucket or folder, or you can allow an internally managed location.
After the Processor Details tab appears, then you can:
- Select Google-managed storage in case you want to use Cloud Storage.
- Select I'll specify my own storage location if you want to use your own storage to use Customer-Managed Encryption Keys (CMEK), and follow the procedure in Create a dataset.
Import documents into a dataset
Next, you import your documents into your dataset.
On the Build tab, select
Import documents .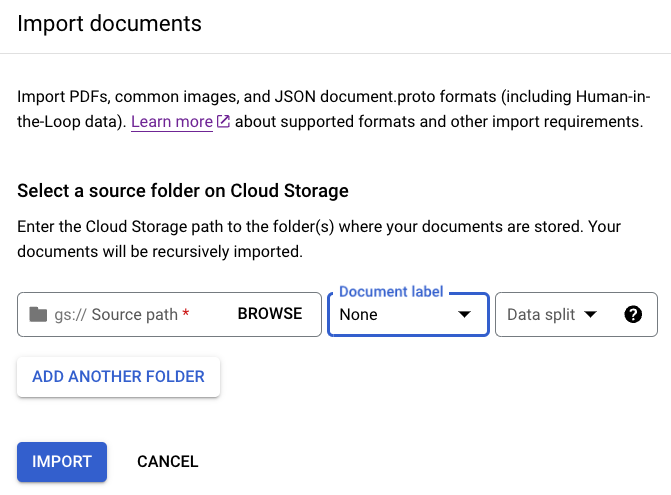
When choosing to use a storage bucket, you must enter the Source Path for the bucket. For this training example, enter this bucket name in
Source path . This links directly to one document.cloud-samples-data/documentai/Custom/Patents/PDF/computer_vision_20.pdfFor Data split, select Unassigned. The document in this folder is not assigned to either the testing or training set. Leave Import with auto-labeling unchecked.
Select Import. Document AI reads the documents from the bucket into the dataset. It does not modify the import bucket or read from the bucket after the import is complete.
Optional: To delete imported documents, in the Build tab, go to Manage dataset > select the documents > click Delete.
When you import documents, you can optionally assign the documents to the Training or Test set when imported, or wait to assign them later.
For more information about preparing your data for import, refer to the Data preparation guide.
Define processor schema
You can create the processor schema either before or after you import documents into your dataset. The schema provides labels that you use to annotate documents.
On the Build tab, select Manage Dataset > Edit Schema. The Edit schema page opens.
Select
Create label .Enter the name for the label.
Select Create. Refer to Define processor schema for detailed instructions on creating and editing a schema.
Create each of the following labels for the processor schema.
computer_visioncryptomed_techother
Select
Save when the labels are complete.
Label a document
The process of selecting text in a document and applying labels is known as annotation.
Return to the Build tab, and select
a document to open the Manage Dataset console.Among the
options , select the appropriate label for the document. If you're using the sample document provided, selectcomputer_vision.When labeled, the document should look like this:
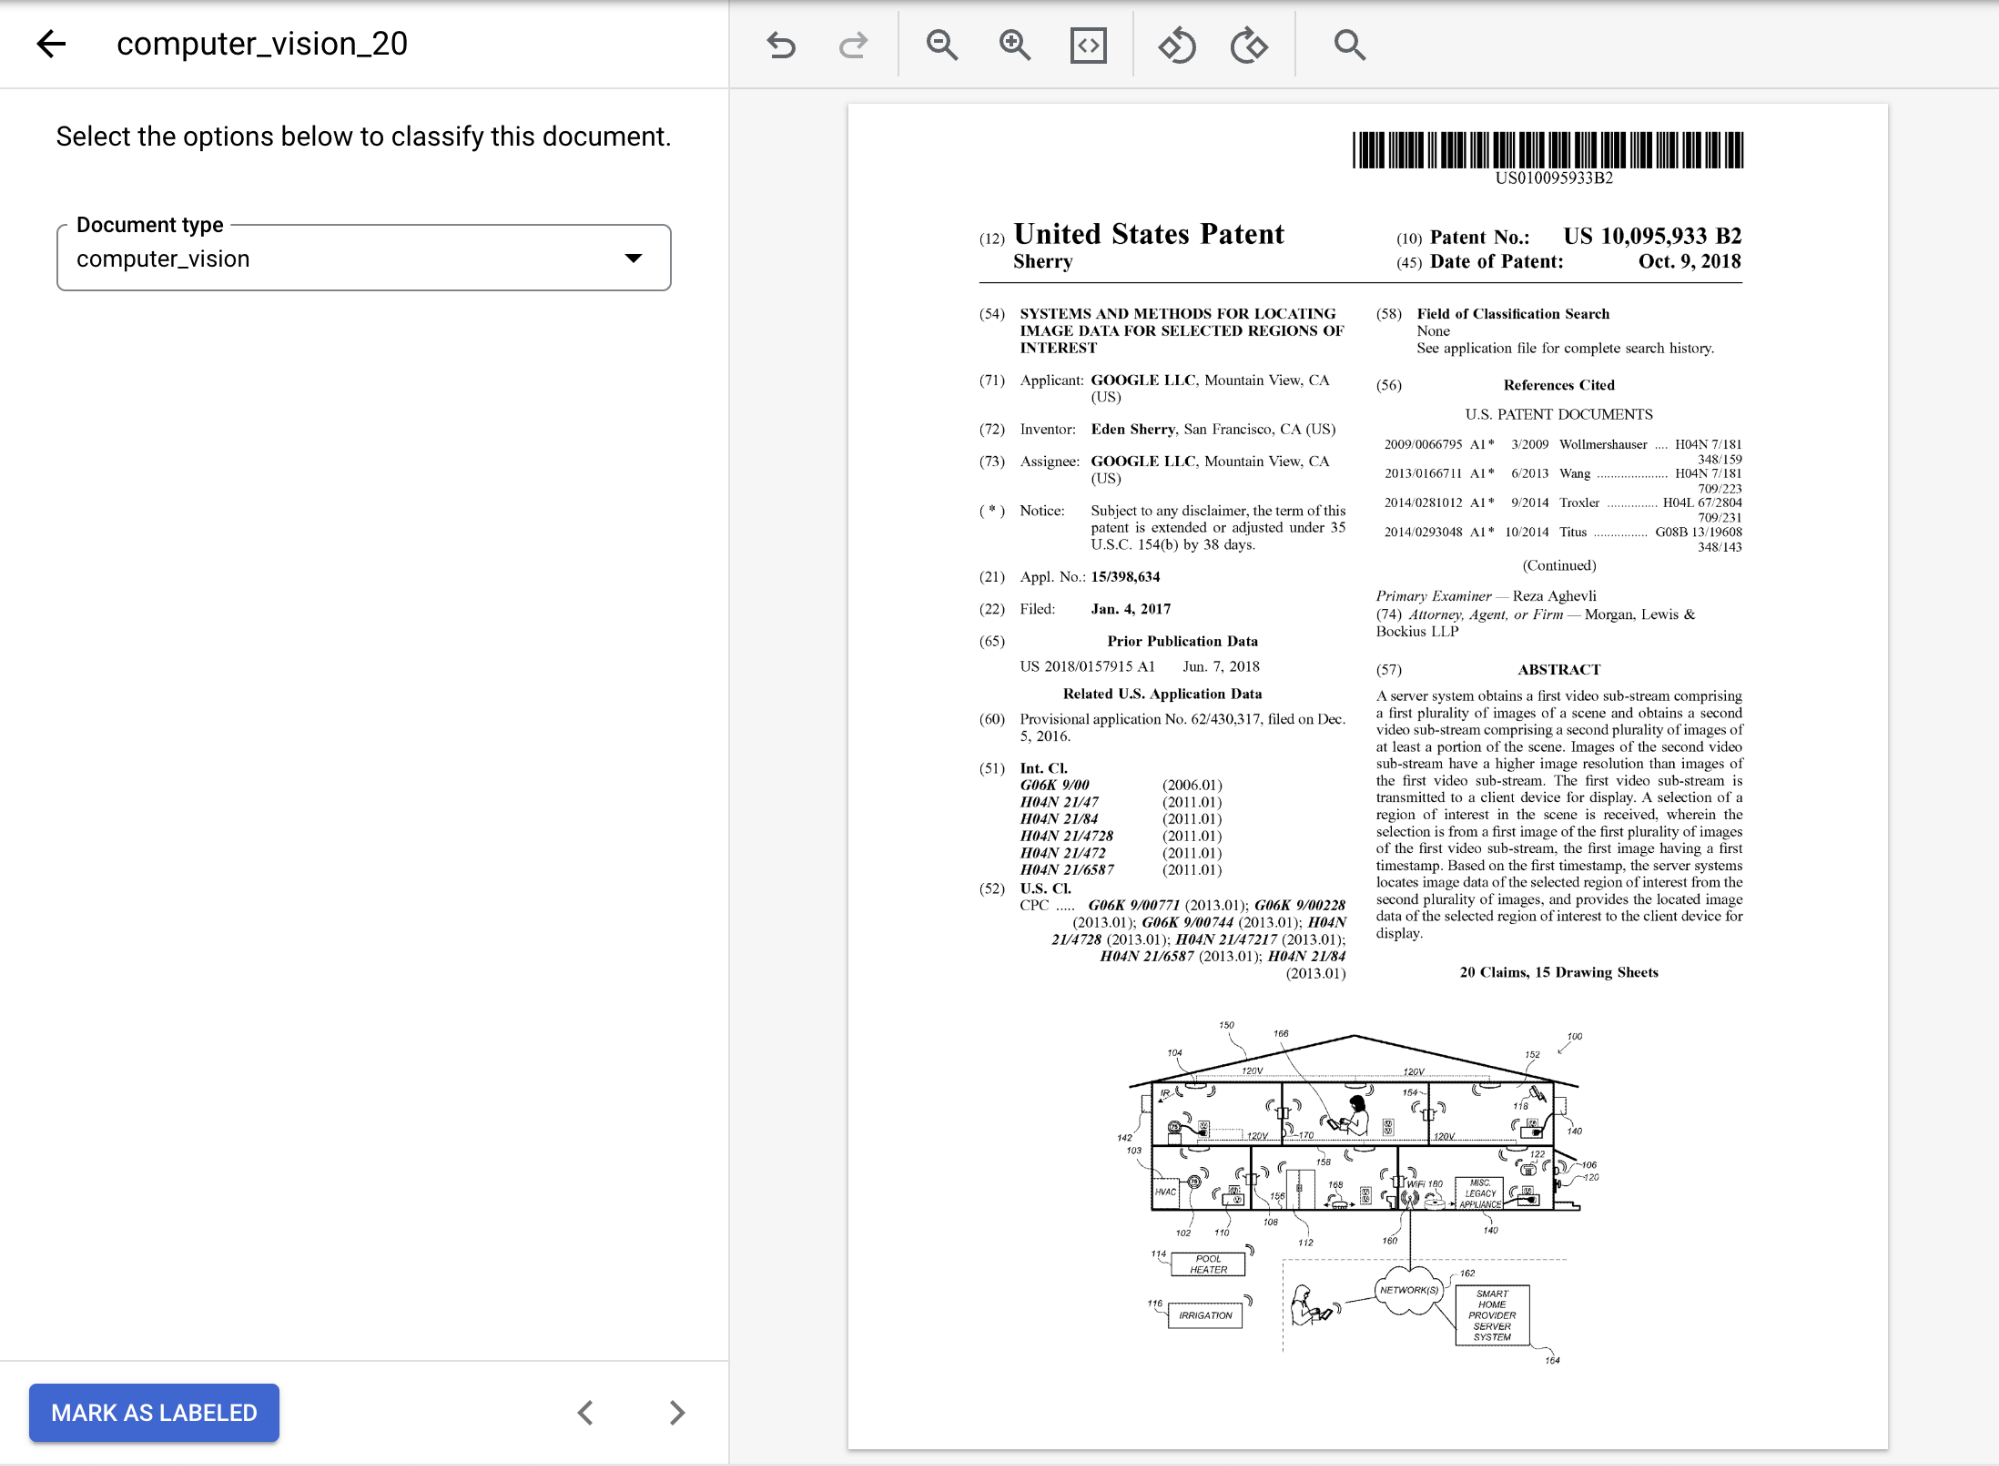
Select
Mark as Labeled when you have finished annotating the document.On the Manage Dataset tab, the Document panel shows that one document has been labeled.
Assign annotated document to the training set
Now that you have labeled this example document, you can assign it to the training set.
On the Manage Dataset tab, select the
Select All checkbox.From the
Assign to Set list, select Training.
In the Documents panel, you can find that one document has been assigned to the training set.
Import prelabeled data to the training and test sets
In this guide, you are provided with prelabeled data. If working on your own project, you have to determine how to label your data. Refer to Labeling options.
Document AI custom processors require a minimum of one document in both the training and test sets for each document type to be labeled. We recommend that you have at least 10 documents for each label for best performance. For 5 labels, you would need 50 documents to train and 50 to test. More training data typically produces higher accuracy.
Select
Import documents .Enter the following path in
Source path . This bucket contains pre-labeled documents in the Document JSON format.cloud-samples-data/documentai/Custom/Patents/JSON/Classification-InventionTypeFrom the Data split list, select Auto-split. This automatically splits the documents to have 80% in the training set and 20% in the test set. Ignore the Apply labels section.
Select Import. The import might take several minutes to complete.
When the import is finished, you'll find the documents in the Manage Dataset tab.
Batch label documents at import
Optionally, after the schema has been configured, you can label all documents that are in a particular directory at import to save time with labeling.
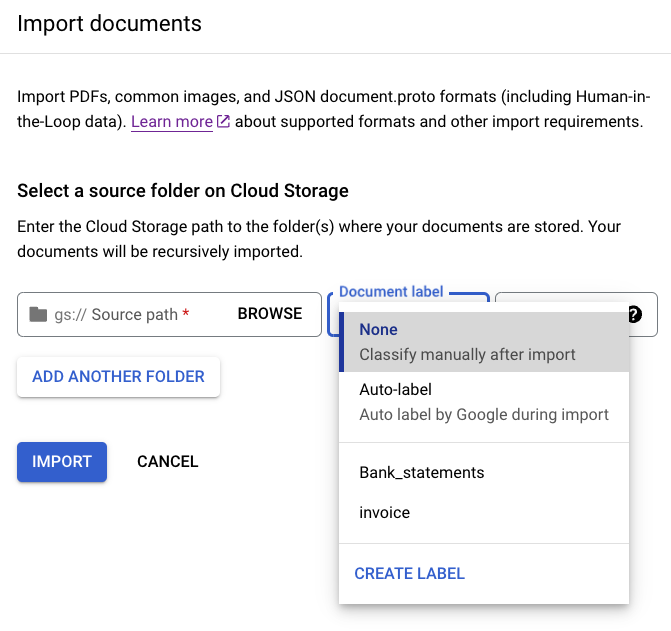
Select
Import documents .Enter the following path in
Source path . This bucket contains unlabeled documents in PDF format.cloud-samples-data/documentai/Custom/Patents/PDF-CDC-BatchLabelFrom the Data split list, select Auto-split. This automatically splits the documents to have 80% in the training set and 20% in the test set.
In the Apply labels section, select Choose label.
For these sample documents, select
other.Select Import and wait for the process to finish. You can leave this page and return later. When complete, you find the documents on the Manage Dataset tab with the label applied.
Train the processor
Now that you have imported the training and test data, you can train the processor. Because training might take several hours, make sure you have set up the processor with the appropriate data and labels before you begin training.
You can train fine-tuned and custom models with your labeled data. Fine-tuned models use generative AI. The custom models trains a unique large language Model using your labeled data. You need a minimum of two labels in the schema, with a recommended ten training documents and 10 test documents (minimum of 1).
- Select
Train New Version .
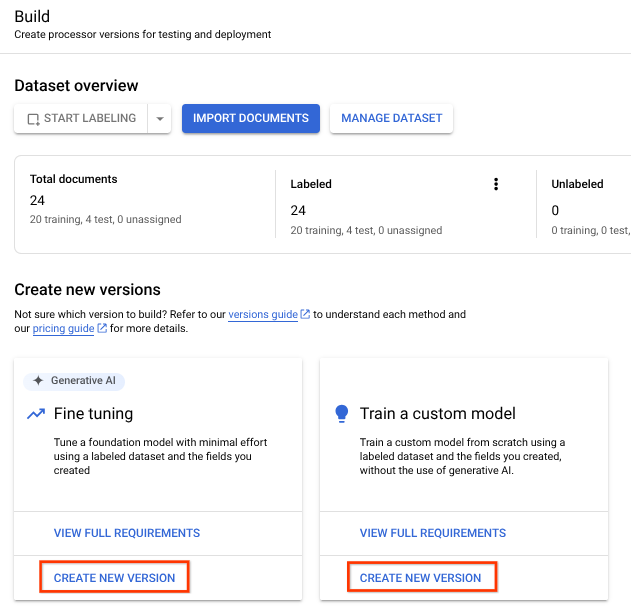
In the
Version name field, enter a name for this processor version, such asmy-cdc-version-1.Optional: Select View Label Stats to find information about the document labels that can help determine your coverage. Select Close to return to the training setup.
Select
Start training. You can check the status on the side panel.
Deploy the processor version
After training is complete, navigate to the
Manage Versions tab. You can view details about the version you just trained.Select the
beside the version you want to deploy, and select Deploy version. Select
Deploy from the dialog window.Deployment takes a few minutes to complete.
Evaluate and test the processor
After deployment is complete, navigate to the
Evaluate & Test tab.On this page, you can view evaluation metrics including the F1 score, precision and recall for the full document, and individual labels. For more information about evaluation and statistics, refer to Evaluate processor.
Download a document that has not been involved in previous training or testing so that you can use it to evaluate the processor version. If using your own data, you would use a document set aside for this purpose.
Select
Upload Test Document and select the document you just downloaded.The Custom Document Classifier analysis page opens. The output demonstrates how well the document was classified.
You can also rerun the evaluation against a different test set or processor version.
Auto-label newly imported documents
After deploying a trained processor version, you can use Auto-labeling to save time on labeling when importing new documents.
On the Manage Dataset page,
Import documents .Copy and paste the following Cloud Storage path. This directory contains five unlabeled patent PDFs. From the Data split drop-down list, select Training.
cloud-samples-data/documentai/Custom/Patents/PDF-CDC-AutoLabelIn the Apply labels section, select Auto-labeling.
Select an existing processor version to label the documents.
- For example:
2af620b2fd4d1fcf
- For example:
Select Import and wait for the process to finish. You can leave this page and return later. When complete, the documents appear in the Auto-labeled section of the Manage Dataset page.
You cannot use auto-labeled documents for training or testing without marking them as labeled. Go to the
Auto-labeled section to view the auto-labeled documents.Select the first document to enter the labeling console.
Verify the label to ensure it's correct. Adjust if it's incorrect.
Select
Mark as Labeled when finished.Repeat the label verification for each auto-labeled document, then return to the Manage Dataset page to assign the data for training.
Use the processor
You can manage your custom-trained processor versions just like any other processor version. For more information, refer to Managing processor versions.
You can also Send a processing request to your custom processor, and the response can be handled the same as other classifier processors.
Clean up
To avoid incurring charges to your Google Cloud account for the resources used on this page, follow these steps.
In the Google Cloud console navigation menu, select Document AI, then My Processors.
Select
More actions in the same row as the processor you want to delete.Select Delete processor, enter the processor name, then select Delete again to confirm.
What's next
- For more details, see Guides.
- Review the processors list.
- Separate documents into readable chunks with Layout Parser.
- Use Enterprise Document OCR to detect and extract text.