使用 Cloud Composer 啟動 Dataflow 管道

Cloud Composer 3 | Cloud Composer 2 | Cloud Composer 1

本頁面說明如何使用 DataflowTemplateOperator 從 Cloud Composer 啟動 Dataflow 管道。Cloud Storage Text 到 BigQuery 管道是一種批次管道,可讓您上傳儲存在 Cloud Storage 的文字檔案,並使用您提供的 JavaScript 使用者定義函式 (UDF) 轉換文字檔案,然後將結果輸出至 BigQuery。

使用者定義的函式、輸入檔案和 JSON 結構定義會上傳至 Cloud Storage bucket。參照這些檔案的 DAG 會啟動 Dataflow 批次管道,將使用者定義函式和 JSON 結構定義檔套用至輸入檔案。隨後,這項內容會上傳至 BigQuery 資料表

總覽

  • 開始工作流程前,請先建立下列實體:

    • 來自空白資料集的空白 BigQuery 資料表,將包含下列資訊欄:locationaverage_temperaturemonth,以及 (選用) inches_of_rainis_currentlatest_measurement

    • JSON 檔案,可將 .txt 檔案中的資料正規化為 BigQuery 資料表結構定義的正確格式。JSON 物件會包含 BigQuery Schema 陣列,其中每個物件都會包含欄名、輸入類型,以及是否為必填欄位。

    • 輸入 .txt 檔案,其中包含要批次上傳至 BigQuery 資料表的資料。

    • 以 JavaScript 編寫的使用者定義函式,可將 .txt 檔案的每一行轉換為資料表的相關變數。

    • 指向這些檔案位置的 Airflow DAG 檔案。

  • 接著,您會將 .txt 檔案、.js UDF 檔案和 .json 結構定義檔案上傳至 Cloud Storage bucket。您也會將 DAG 上傳至 Cloud Composer 環境。

  • 上傳 DAG 後,Airflow 會執行其中的工作。這項工作會啟動 Dataflow 管道,將使用者定義函式套用至 .txt 檔案,並根據 JSON 結構定義設定格式。

  • 最後,資料會上傳至您先前建立的 BigQuery 資料表。

事前準備

  • 如要撰寫使用者定義函式,您必須熟悉 JavaScript。
  • 本指南假設您已擁有 Cloud Composer 環境。如要建立環境,請參閱「建立環境」。您可以使用任何版本的 Cloud Composer 搭配本指南。
  • Enable the Cloud Composer, Dataflow, Cloud Storage, BigQuery APIs.

    Enable the APIs

  • 請確認您具備下列權限:

    • Cloud Composer 角色:建立環境 (如果沒有的話)、管理環境值區中的物件、執行 DAG,以及存取 Airflow UI。
    • Cloud Storage 角色:建立值區並管理其中的物件。
    • BigQuery 角色:建立資料集和資料表、修改資料表中的資料、修改資料表結構定義和中繼資料。
    • Dataflow 角色:查看 Dataflow 工作。
  • 請確認環境的服務帳戶有權建立 Dataflow 工作、存取 Cloud Storage 值區,以及讀取和更新 BigQuery 資料表中的資料。

建立含結構定義的空白 BigQuery 資料表

建立具有結構定義的 BigQuery 資料表。本指南稍後會使用這個結構定義。這個 BigQuery 資料表會保存批次上傳的結果。

如何建立含結構定義的空白資料表:

主控台

  1. 前往 Google Cloud 控制台的「BigQuery」頁面:

    前往「BigQuery」

  2. 在導覽面板的「Resources」(資源) 區段,展開專案。

  3. 在詳細資料面板中,按一下「建立資料集」

    按一下「建立資料集」按鈕

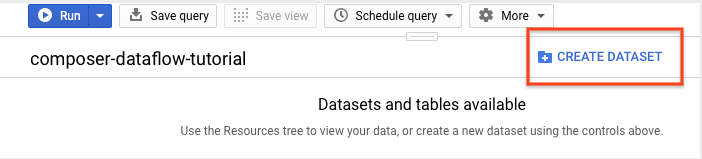
  4. 在「建立資料集」頁面的「資料集 ID」部分,為資料集命名 average_weather。其他欄位則一概保留預設值。
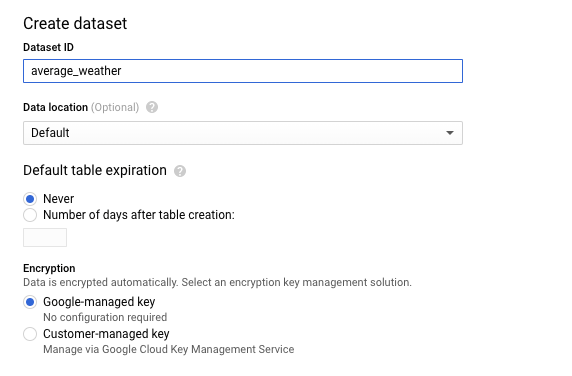
    將資料集 ID 填入名稱 average_weather

  5. 點選「建立資料集」

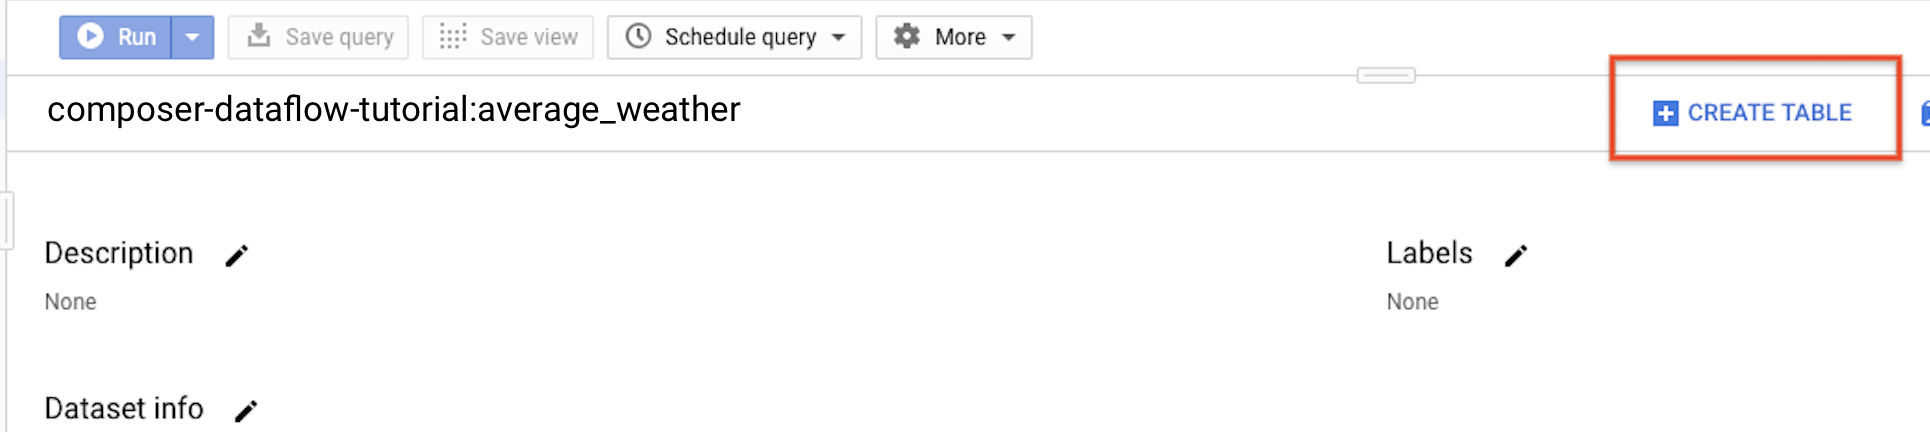
  6. 返回導覽面板,在「Resources」(資源) 區段中展開專案。然後點選 average_weather 資料集。

  7. 在詳細資料面板中,按一下「建立資料表」

    按一下「建立資料表」

  8. 在「Create table」(建立資料表) 頁面的「Source」(來源) 區段中,選取「Empty table」(空白資料表)

  9. 在「Create table」(建立資料表) 頁面的「Destination」(目的地) 區段中:

    • 在「Dataset name」(資料集名稱) 部分,選擇 average_weather 資料集。

      選取 average_weather 資料集的「資料集」選項

    • 在「Table name」(資料表名稱) 欄位中輸入名稱 average_weather

    • 確認「Table type」(資料表類型) 設為「Native table」(原生資料表)

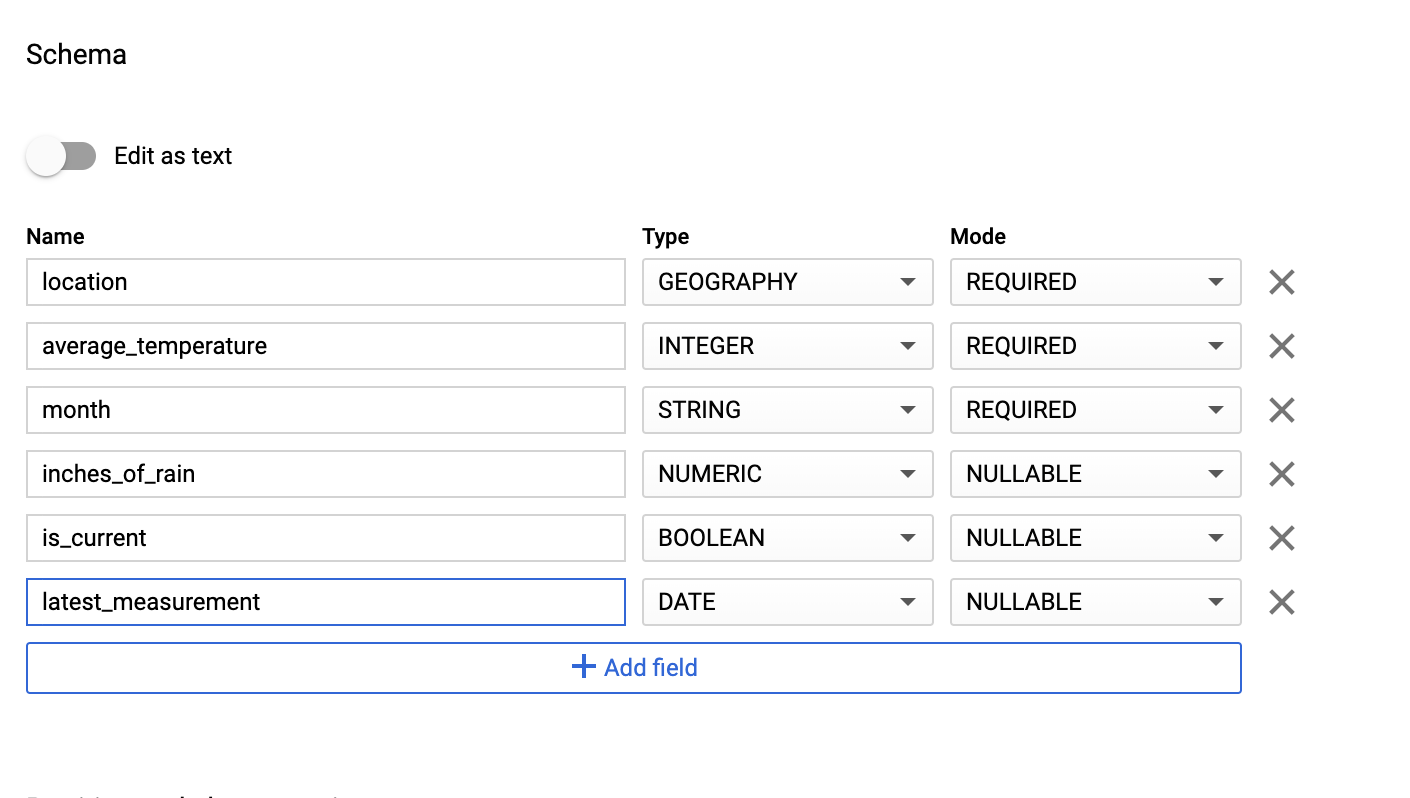
  10. 在「Schema」(結構定義) 區段中,輸入結構定義。您可以採用下列其中一種做法:

    • 啟用「以文字形式編輯」,然後以 JSON 陣列的形式輸入資料表結構定義,即可手動輸入結構定義資訊。在下列欄位中輸入資訊:

      [
          {
              "name": "location",
              "type": "GEOGRAPHY",
              "mode": "REQUIRED"
          },
          {
              "name": "average_temperature",
              "type": "INTEGER",
              "mode": "REQUIRED"
          },
          {
              "name": "month",
              "type": "STRING",
              "mode": "REQUIRED"
          },
          {
              "name": "inches_of_rain",
              "type": "NUMERIC"
          },
          {
              "name": "is_current",
              "type": "BOOLEAN"
          },
          {
              "name": "latest_measurement",
              "type": "DATE"
          }
      ]
      
    • 使用「新增欄位」手動輸入結構定義:

      按一下「新增欄位」即可輸入欄位

  11. 保留「Partition and cluster settings」(分區與叢集設定) 中的預設值:No partitioning

  12. 在「Advanced options」(進階選項) 區段的「Encryption」(加密) 項目中,請保留預設值:Google-owned and managed key

  13. 點選「建立資料表」。

bq

使用 bq mk 指令在這個資料集中建立空白資料集和資料表。

執行下列指令,建立全球平均天氣資料集:

bq --location=LOCATION mk \
    --dataset PROJECT_ID:average_weather

更改下列內容:

  • LOCATION:環境所在的區域。
  • PROJECT_ID專案 ID

執行下列指令,在這個資料集中建立含有結構定義的空白資料表:

bq mk --table \
PROJECT_ID:average_weather.average_weather \
location:GEOGRAPHY,average_temperature:INTEGER,month:STRING,inches_of_rain:NUMERIC,is_current:BOOLEAN,latest_measurement:DATE

您可以在建立資料表後,更新資料表的到期時間、說明和標籤。您也可以修改結構定義

Python

將這段程式碼儲存為 dataflowtemplateoperator_create_dataset_and_table_helper.py,並更新其中的變數,以反映您的專案和位置,然後執行下列指令:

python dataflowtemplateoperator_create_dataset_and_table_helper.py

Python

如要向 Cloud Composer 進行驗證,請設定應用程式預設憑證。 詳情請參閱「為本機開發環境設定驗證」。


# Make sure to follow the quickstart setup instructions beforehand.
# See instructions here:
# https://cloud.google.com/bigquery/docs/quickstarts/quickstart-client-libraries

# Before running the sample, be sure to install the bigquery library
# in your local environment by running pip install google.cloud.bigquery

from google.cloud import bigquery

# TODO(developer): Replace with your values
project = "your-project"  # Your GCP Project
location = "US"  # the location where you want your BigQuery data to reside. For more info on possible locations see https://cloud.google.com/bigquery/docs/locations
dataset_name = "average_weather"


def create_dataset_and_table(project, location, dataset_name):
    # Construct a BigQuery client object.
    client = bigquery.Client(project)

    dataset_id = f"{project}.{dataset_name}"

    # Construct a full Dataset object to send to the API.
    dataset = bigquery.Dataset(dataset_id)

    # Set the location to your desired location for the dataset.
    # For more information, see this link:
    # https://cloud.google.com/bigquery/docs/locations
    dataset.location = location

    # Send the dataset to the API for creation.
    # Raises google.api_core.exceptions.Conflict if the Dataset already
    # exists within the project.
    dataset = client.create_dataset(dataset)  # Make an API request.

    print(f"Created dataset {client.project}.{dataset.dataset_id}")

    # Create a table from this dataset.

    table_id = f"{client.project}.{dataset_name}.average_weather"

    schema = [
        bigquery.SchemaField("location", "GEOGRAPHY", mode="REQUIRED"),
        bigquery.SchemaField("average_temperature", "INTEGER", mode="REQUIRED"),
        bigquery.SchemaField("month", "STRING", mode="REQUIRED"),
        bigquery.SchemaField("inches_of_rain", "NUMERIC", mode="NULLABLE"),
        bigquery.SchemaField("is_current", "BOOLEAN", mode="NULLABLE"),
        bigquery.SchemaField("latest_measurement", "DATE", mode="NULLABLE"),
    ]

    table = bigquery.Table(table_id, schema=schema)
    table = client.create_table(table)  # Make an API request.
    print(f"Created table {table.project}.{table.dataset_id}.{table.table_id}")

建立 Cloud Storage 值區

建立值區,存放工作流程所需的所有檔案。您在本指南稍後建立的 DAG 會參照您上傳至這個儲存空間值區的檔案。如要建立新的儲存空間值區:

主控台

  1. 在 Google Cloud 控制台中開啟 Cloud Storage。

    前往 Cloud Storage

  2. 按一下「建立值區」,開啟值區建立表單。

    1. 輸入 bucket 資訊,並點選「繼續」來完成各個步驟:

      • 為 bucket 指定全域不重複的名稱。本指南以 bucketName 為例。

      • 選取「區域」這個位置類型,接下來,選取要儲存值區資料的[Location](位置)

      • 選取「Standard」做為資料的預設儲存空間級別。

      • 選取「統一」存取權控管機制,即可存取物件。

    2. 按一下 [完成]

gcloud

使用 gcloud storage buckets create 指令:

gcloud storage buckets create gs://bucketName/

更改下列內容:

  • bucketName:您在本指南稍早建立的值區名稱。

程式碼範例

C#

如要向 Cloud Composer 進行驗證,請設定應用程式預設憑證。 詳情請參閱「為本機開發環境設定驗證」。


using Google.Apis.Storage.v1.Data;
using Google.Cloud.Storage.V1;
using System;

public class CreateBucketSample
{
    public Bucket CreateBucket(
        string projectId = "your-project-id",
        string bucketName = "your-unique-bucket-name")
    {
        var storage = StorageClient.Create();
        var bucket = storage.CreateBucket(projectId, bucketName);
        Console.WriteLine($"Created {bucketName}.");
        return bucket;
    }
}

Go

如要向 Cloud Composer 進行驗證,請設定應用程式預設憑證。 詳情請參閱「為本機開發環境設定驗證」。

import (
	"context"
	"fmt"
	"io"
	"time"

	"cloud.google.com/go/storage"
)

// createBucket creates a new bucket in the project.
func createBucket(w io.Writer, projectID, bucketName string) error {
	// projectID := "my-project-id"
	// bucketName := "bucket-name"
	ctx := context.Background()
	client, err := storage.NewClient(ctx)
	if err != nil {
		return fmt.Errorf("storage.NewClient: %w", err)
	}
	defer client.Close()

	ctx, cancel := context.WithTimeout(ctx, time.Second*30)
	defer cancel()

	bucket := client.Bucket(bucketName)
	if err := bucket.Create(ctx, projectID, nil); err != nil {
		return fmt.Errorf("Bucket(%q).Create: %w", bucketName, err)
	}
	fmt.Fprintf(w, "Bucket %v created\n", bucketName)
	return nil
}

Java

如要向 Cloud Composer 進行驗證,請設定應用程式預設憑證。 詳情請參閱「為本機開發環境設定驗證」。

import com.google.cloud.storage.Bucket;
import com.google.cloud.storage.BucketInfo;
import com.google.cloud.storage.Storage;
import com.google.cloud.storage.StorageOptions;

public class CreateBucket {
  public static void createBucket(String projectId, String bucketName) {
    // The ID of your GCP project
    // String projectId = "your-project-id";

    // The ID to give your GCS bucket
    // String bucketName = "your-unique-bucket-name";

    Storage storage = StorageOptions.newBuilder().setProjectId(projectId).build().getService();

    Bucket bucket = storage.create(BucketInfo.newBuilder(bucketName).build());

    System.out.println("Created bucket " + bucket.getName());
  }
}

Python

如要向 Cloud Composer 進行驗證,請設定應用程式預設憑證。 詳情請參閱「為本機開發環境設定驗證」。

from google.cloud import storage


def create_bucket(bucket_name):
    """Creates a new bucket."""
    # bucket_name = "your-new-bucket-name"

    storage_client = storage.Client()

    bucket = storage_client.create_bucket(bucket_name)

    print(f"Bucket {bucket.name} created")

Ruby

如要向 Cloud Composer 進行驗證,請設定應用程式預設憑證。 詳情請參閱「為本機開發環境設定驗證」。

def create_bucket bucket_name:
  # The ID to give your GCS bucket
  # bucket_name = "your-unique-bucket-name"

  require "google/cloud/storage"

  storage = Google::Cloud::Storage.new
  bucket  = storage.create_bucket bucket_name

  puts "Created bucket: #{bucket.name}"
end

為輸出資料表建立 JSON 格式的 BigQuery 結構定義

建立 JSON 格式的 BigQuery 結構定義檔案,與您先前建立的輸出資料表相符。請注意,欄位名稱、類型和模式必須與先前在 BigQuery 資料表結構定義中定義的項目相符。這個檔案會將 .txt 檔案中的資料正規化,轉換成與 BigQuery 結構定義相容的格式。將這個檔案命名為 jsonSchema.json

{
    "BigQuery Schema": [
    {
        "name": "location",
        "type": "GEOGRAPHY",
        "mode": "REQUIRED"
    },
    {
        "name": "average_temperature",
        "type": "INTEGER",
        "mode": "REQUIRED"
    },
    {
        "name": "month",
        "type": "STRING",
        "mode": "REQUIRED"
    },
    {
        "name": "inches_of_rain",
        "type": "NUMERIC"
    },
    {
        "name": "is_current",
        "type": "BOOLEAN"
    },
    {
        "name": "latest_measurement",
        "type": "DATE"
    }]
}

建立 JavaScript 檔案來格式化資料

您將在這個檔案中定義 UDF (使用者定義函式),提供邏輯來轉換輸入檔案中的文字行。請注意,這項函式會將輸入檔案中的每一行文字視為個別引數,因此函式會針對輸入檔案中的每一行執行一次。將這個檔案命名為 transformCSVtoJSON.js


function transformCSVtoJSON(line) {
  var values = line.split(',');
  var properties = [
    'location',
    'average_temperature',
    'month',
    'inches_of_rain',
    'is_current',
    'latest_measurement',
  ];
  var weatherInCity = {};

  for (var count = 0; count < values.length; count++) {
    if (values[count] !== 'null') {
      weatherInCity[properties[count]] = values[count];
    }
  }

  return JSON.stringify(weatherInCity);
}

建立輸入檔案

這個檔案會包含您要上傳至 BigQuery 資料表的資訊。將這個檔案複製到本機,並命名為 inputFile.txt

POINT(40.7128 74.006),45,'July',null,true,2020-02-16
POINT(41.8781 87.6298),23,'October',13,false,2015-02-13
POINT(48.8566 2.3522),80,'December',null,true,null
POINT(6.5244 3.3792),15,'March',14,true,null

將檔案上傳至 bucket

將下列檔案上傳至您先前建立的 Cloud Storage bucket:

  • JSON 格式的 BigQuery 結構定義 (.json)
  • JavaScript 使用者定義函式 (transformCSVtoJSON.js)
  • 要處理的文字輸入檔案 (.txt)

主控台

  1. 在 Google Cloud 控制台,前往「Cloud Storage bucket」頁面。

    前往「Buckets」(值區) 頁面

  2. 在 bucket 清單中,按一下你的 bucket。

  3. 在值區的「物件」分頁中,從下列兩個方式擇一操作:

    • 將需要的檔案從桌面或檔案管理員拖曳到 Google Cloud 主控台的主要窗格。

    • 按一下「上傳檔案」按鈕,在出現的對話方塊中選取要上傳的檔案,然後按一下「開啟」

gcloud

執行 gcloud storage cp 指令:

gcloud storage cp OBJECT_LOCATION gs://bucketName

更改下列內容:

  • bucketName:您在本指南中稍早建立的 bucket 名稱。
  • OBJECT_LOCATION:物件的本機路徑。例如:Desktop/transformCSVtoJSON.js

程式碼範例

Python

如要向 Cloud Composer 進行驗證,請設定應用程式預設憑證。 詳情請參閱「為本機開發環境設定驗證」。

from google.cloud import storage


def upload_blob(bucket_name, source_file_name, destination_blob_name):
    """Uploads a file to the bucket."""
    # The ID of your GCS bucket
    # bucket_name = "your-bucket-name"
    # The path to your file to upload
    # source_file_name = "local/path/to/file"
    # The ID of your GCS object
    # destination_blob_name = "storage-object-name"

    storage_client = storage.Client()
    bucket = storage_client.bucket(bucket_name)
    blob = bucket.blob(destination_blob_name)

    # Optional: set a generation-match precondition to avoid potential race conditions
    # and data corruptions. The request to upload is aborted if the object's
    # generation number does not match your precondition. For a destination
    # object that does not yet exist, set the if_generation_match precondition to 0.
    # If the destination object already exists in your bucket, set instead a
    # generation-match precondition using its generation number.
    generation_match_precondition = 0

    blob.upload_from_filename(source_file_name, if_generation_match=generation_match_precondition)

    print(
        f"File {source_file_name} uploaded to {destination_blob_name}."
    )

Ruby

如要向 Cloud Composer 進行驗證,請設定應用程式預設憑證。 詳情請參閱「為本機開發環境設定驗證」。

def upload_file bucket_name:, local_file_path:, file_name: nil
  # The ID of your GCS bucket
  # bucket_name = "your-unique-bucket-name"

  # The path to your file to upload
  # local_file_path = "/local/path/to/file.txt"

  # The ID of your GCS object
  # file_name = "your-file-name"

  require "google/cloud/storage"

  storage = Google::Cloud::Storage.new
  bucket  = storage.bucket bucket_name, skip_lookup: true

  file = bucket.create_file local_file_path, file_name

  puts "Uploaded #{local_file_path} as #{file.name} in bucket #{bucket_name}"
end

設定 DataflowTemplateOperator

執行 DAG 前,請設定下列 Airflow 變數

Airflow 變數
project_id 專案 ID。範例:example-project
gce_zone 必須建立 Dataflow 叢集的 Compute Engine 區域。例如:us-central1-a。如要進一步瞭解有效區域,請參閱地區和區域
bucket_path 您稍早建立的 Cloud Storage bucket 位置。範例:gs://example-bucket.

現在,您將參照先前建立的檔案,建立啟動 Dataflow 工作流程的 DAG。複製這個 DAG,並以 composer-dataflow-dag.py 儲存至本機。

Airflow 2


"""Example Airflow DAG that creates a Cloud Dataflow workflow which takes a
text file and adds the rows to a BigQuery table.

This DAG relies on four Airflow variables
https://airflow.apache.org/docs/apache-airflow/stable/concepts/variables.html
* project_id - Google Cloud Project ID to use for the Cloud Dataflow cluster.
* gce_zone - Google Compute Engine zone where Cloud Dataflow cluster should be
  created.
For more info on zones where Dataflow is available see:
https://cloud.google.com/dataflow/docs/resources/locations
* bucket_path - Google Cloud Storage bucket where you've stored the User Defined
Function (.js), the input file (.txt), and the JSON schema (.json).
"""

import datetime

from airflow import models
from airflow.providers.google.cloud.operators.dataflow import (
    DataflowTemplatedJobStartOperator,
)
from airflow.utils.dates import days_ago

bucket_path = "{{var.value.bucket_path}}"
project_id = "{{var.value.project_id}}"
gce_zone = "{{var.value.gce_zone}}"


default_args = {
    # Tell airflow to start one day ago, so that it runs as soon as you upload it
    "start_date": days_ago(1),
    "dataflow_default_options": {
        "project": project_id,
        # Set to your zone
        "zone": gce_zone,
        # This is a subfolder for storing temporary files, like the staged pipeline job.
        "tempLocation": bucket_path + "/tmp/",
    },
}

# Define a DAG (directed acyclic graph) of tasks.
# Any task you create within the context manager is automatically added to the
# DAG object.
with models.DAG(
    # The id you will see in the DAG airflow page
    "composer_dataflow_dag",
    default_args=default_args,
    # The interval with which to schedule the DAG
    schedule_interval=datetime.timedelta(days=1),  # Override to match your needs
) as dag:
    start_template_job = DataflowTemplatedJobStartOperator(
        # The task id of your job
        task_id="dataflow_operator_transform_csv_to_bq",
        # The name of the template that you're using.
        # Below is a list of all the templates you can use.
        # For versions in non-production environments, use the subfolder 'latest'
        # https://cloud.google.com/dataflow/docs/guides/templates/provided-batch#gcstexttobigquery
        template="gs://dataflow-templates/latest/GCS_Text_to_BigQuery",
        # Use the link above to specify the correct parameters for your template.
        parameters={
            "javascriptTextTransformFunctionName": "transformCSVtoJSON",
            "JSONPath": bucket_path + "/jsonSchema.json",
            "javascriptTextTransformGcsPath": bucket_path + "/transformCSVtoJSON.js",
            "inputFilePattern": bucket_path + "/inputFile.txt",
            "outputTable": project_id + ":average_weather.average_weather",
            "bigQueryLoadingTemporaryDirectory": bucket_path + "/tmp/",
        },
    )

Airflow 1


"""Example Airflow DAG that creates a Cloud Dataflow workflow which takes a
text file and adds the rows to a BigQuery table.

This DAG relies on four Airflow variables
https://airflow.apache.org/docs/apache-airflow/stable/concepts/variables.html
* project_id - Google Cloud Project ID to use for the Cloud Dataflow cluster.
* gce_zone - Google Compute Engine zone where Cloud Dataflow cluster should be
  created.
  created.
Learn more about the difference between the two here:
https://cloud.google.com/compute/docs/regions-zones
* bucket_path - Google Cloud Storage bucket where you've stored the User Defined
Function (.js), the input file (.txt), and the JSON schema (.json).
"""

import datetime

from airflow import models
from airflow.contrib.operators.dataflow_operator import DataflowTemplateOperator
from airflow.utils.dates import days_ago

bucket_path = "{{var.value.bucket_path}}"
project_id = "{{var.value.project_id}}"
gce_zone = "{{var.value.gce_zone}}"


default_args = {
    # Tell airflow to start one day ago, so that it runs as soon as you upload it
    "start_date": days_ago(1),
    "dataflow_default_options": {
        "project": project_id,
        # Set to your zone
        "zone": gce_zone,
        # This is a subfolder for storing temporary files, like the staged pipeline job.
        "tempLocation": bucket_path + "/tmp/",
    },
}

# Define a DAG (directed acyclic graph) of tasks.
# Any task you create within the context manager is automatically added to the
# DAG object.
with models.DAG(
    # The id you will see in the DAG airflow page
    "composer_dataflow_dag",
    default_args=default_args,
    # The interval with which to schedule the DAG
    schedule_interval=datetime.timedelta(days=1),  # Override to match your needs
) as dag:
    start_template_job = DataflowTemplateOperator(
        # The task id of your job
        task_id="dataflow_operator_transform_csv_to_bq",
        # The name of the template that you're using.
        # Below is a list of all the templates you can use.
        # For versions in non-production environments, use the subfolder 'latest'
        # https://cloud.google.com/dataflow/docs/guides/templates/provided-batch#gcstexttobigquery
        template="gs://dataflow-templates/latest/GCS_Text_to_BigQuery",
        # Use the link above to specify the correct parameters for your template.
        parameters={
            "javascriptTextTransformFunctionName": "transformCSVtoJSON",
            "JSONPath": bucket_path + "/jsonSchema.json",
            "javascriptTextTransformGcsPath": bucket_path + "/transformCSVtoJSON.js",
            "inputFilePattern": bucket_path + "/inputFile.txt",
            "outputTable": project_id + ":average_weather.average_weather",
            "bigQueryLoadingTemporaryDirectory": bucket_path + "/tmp/",
        },
    )

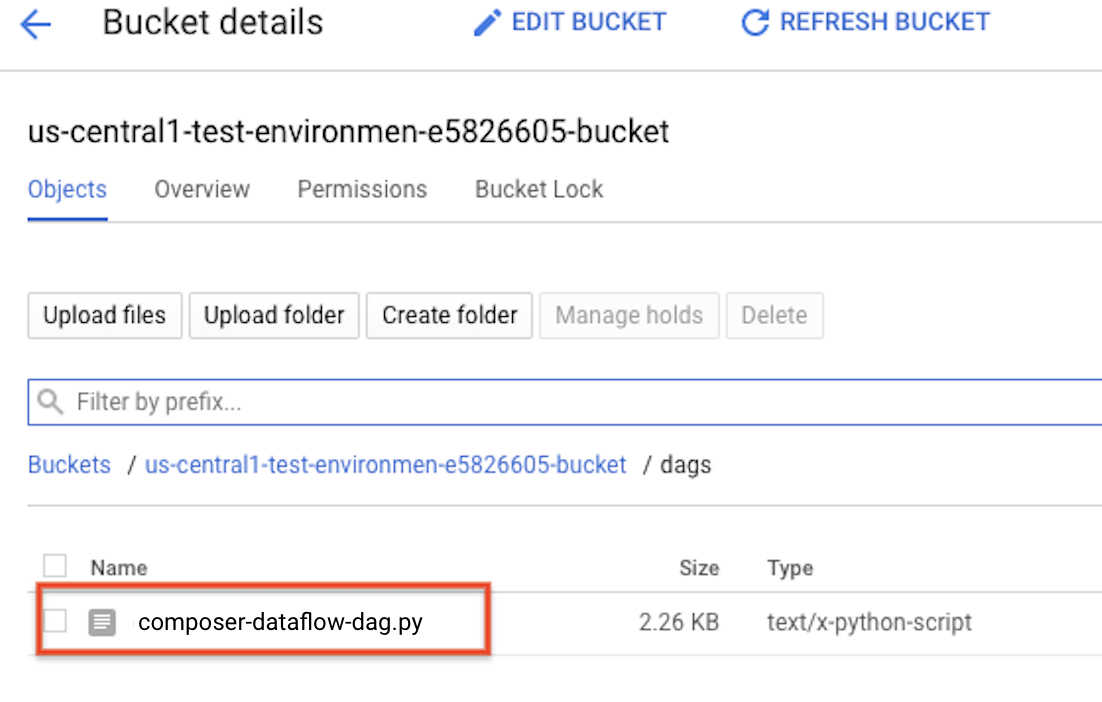
將 DAG 上傳至 Cloud Storage

上傳 DAG 至環境 bucket 中的 /dags 資料夾。上傳成功後,您可以在 Cloud Composer 環境頁面點選「DAGs Folder」連結,查看上傳的 DAG。

環境中的 DAG 資料夾會保留 DAG

查看工作狀態

  1. 前往 Airflow 網頁介面
  2. 在 DAG 頁面中,按一下 DAG 名稱 (例如 composerDataflowDAG)。
  3. 在 DAG 詳細資料頁面中,按一下「Graph View」
  4. 查看狀態:

    • Failed:工作周圍有紅框。 你也可以將指標懸停在工作上,然後尋找「狀態:失敗」

    • Success:工作周圍有綠框。 您也可以將指標懸停在工作上,檢查是否顯示「State: Success」

幾分鐘後,您可以在 Dataflow 和 BigQuery 中查看結果。
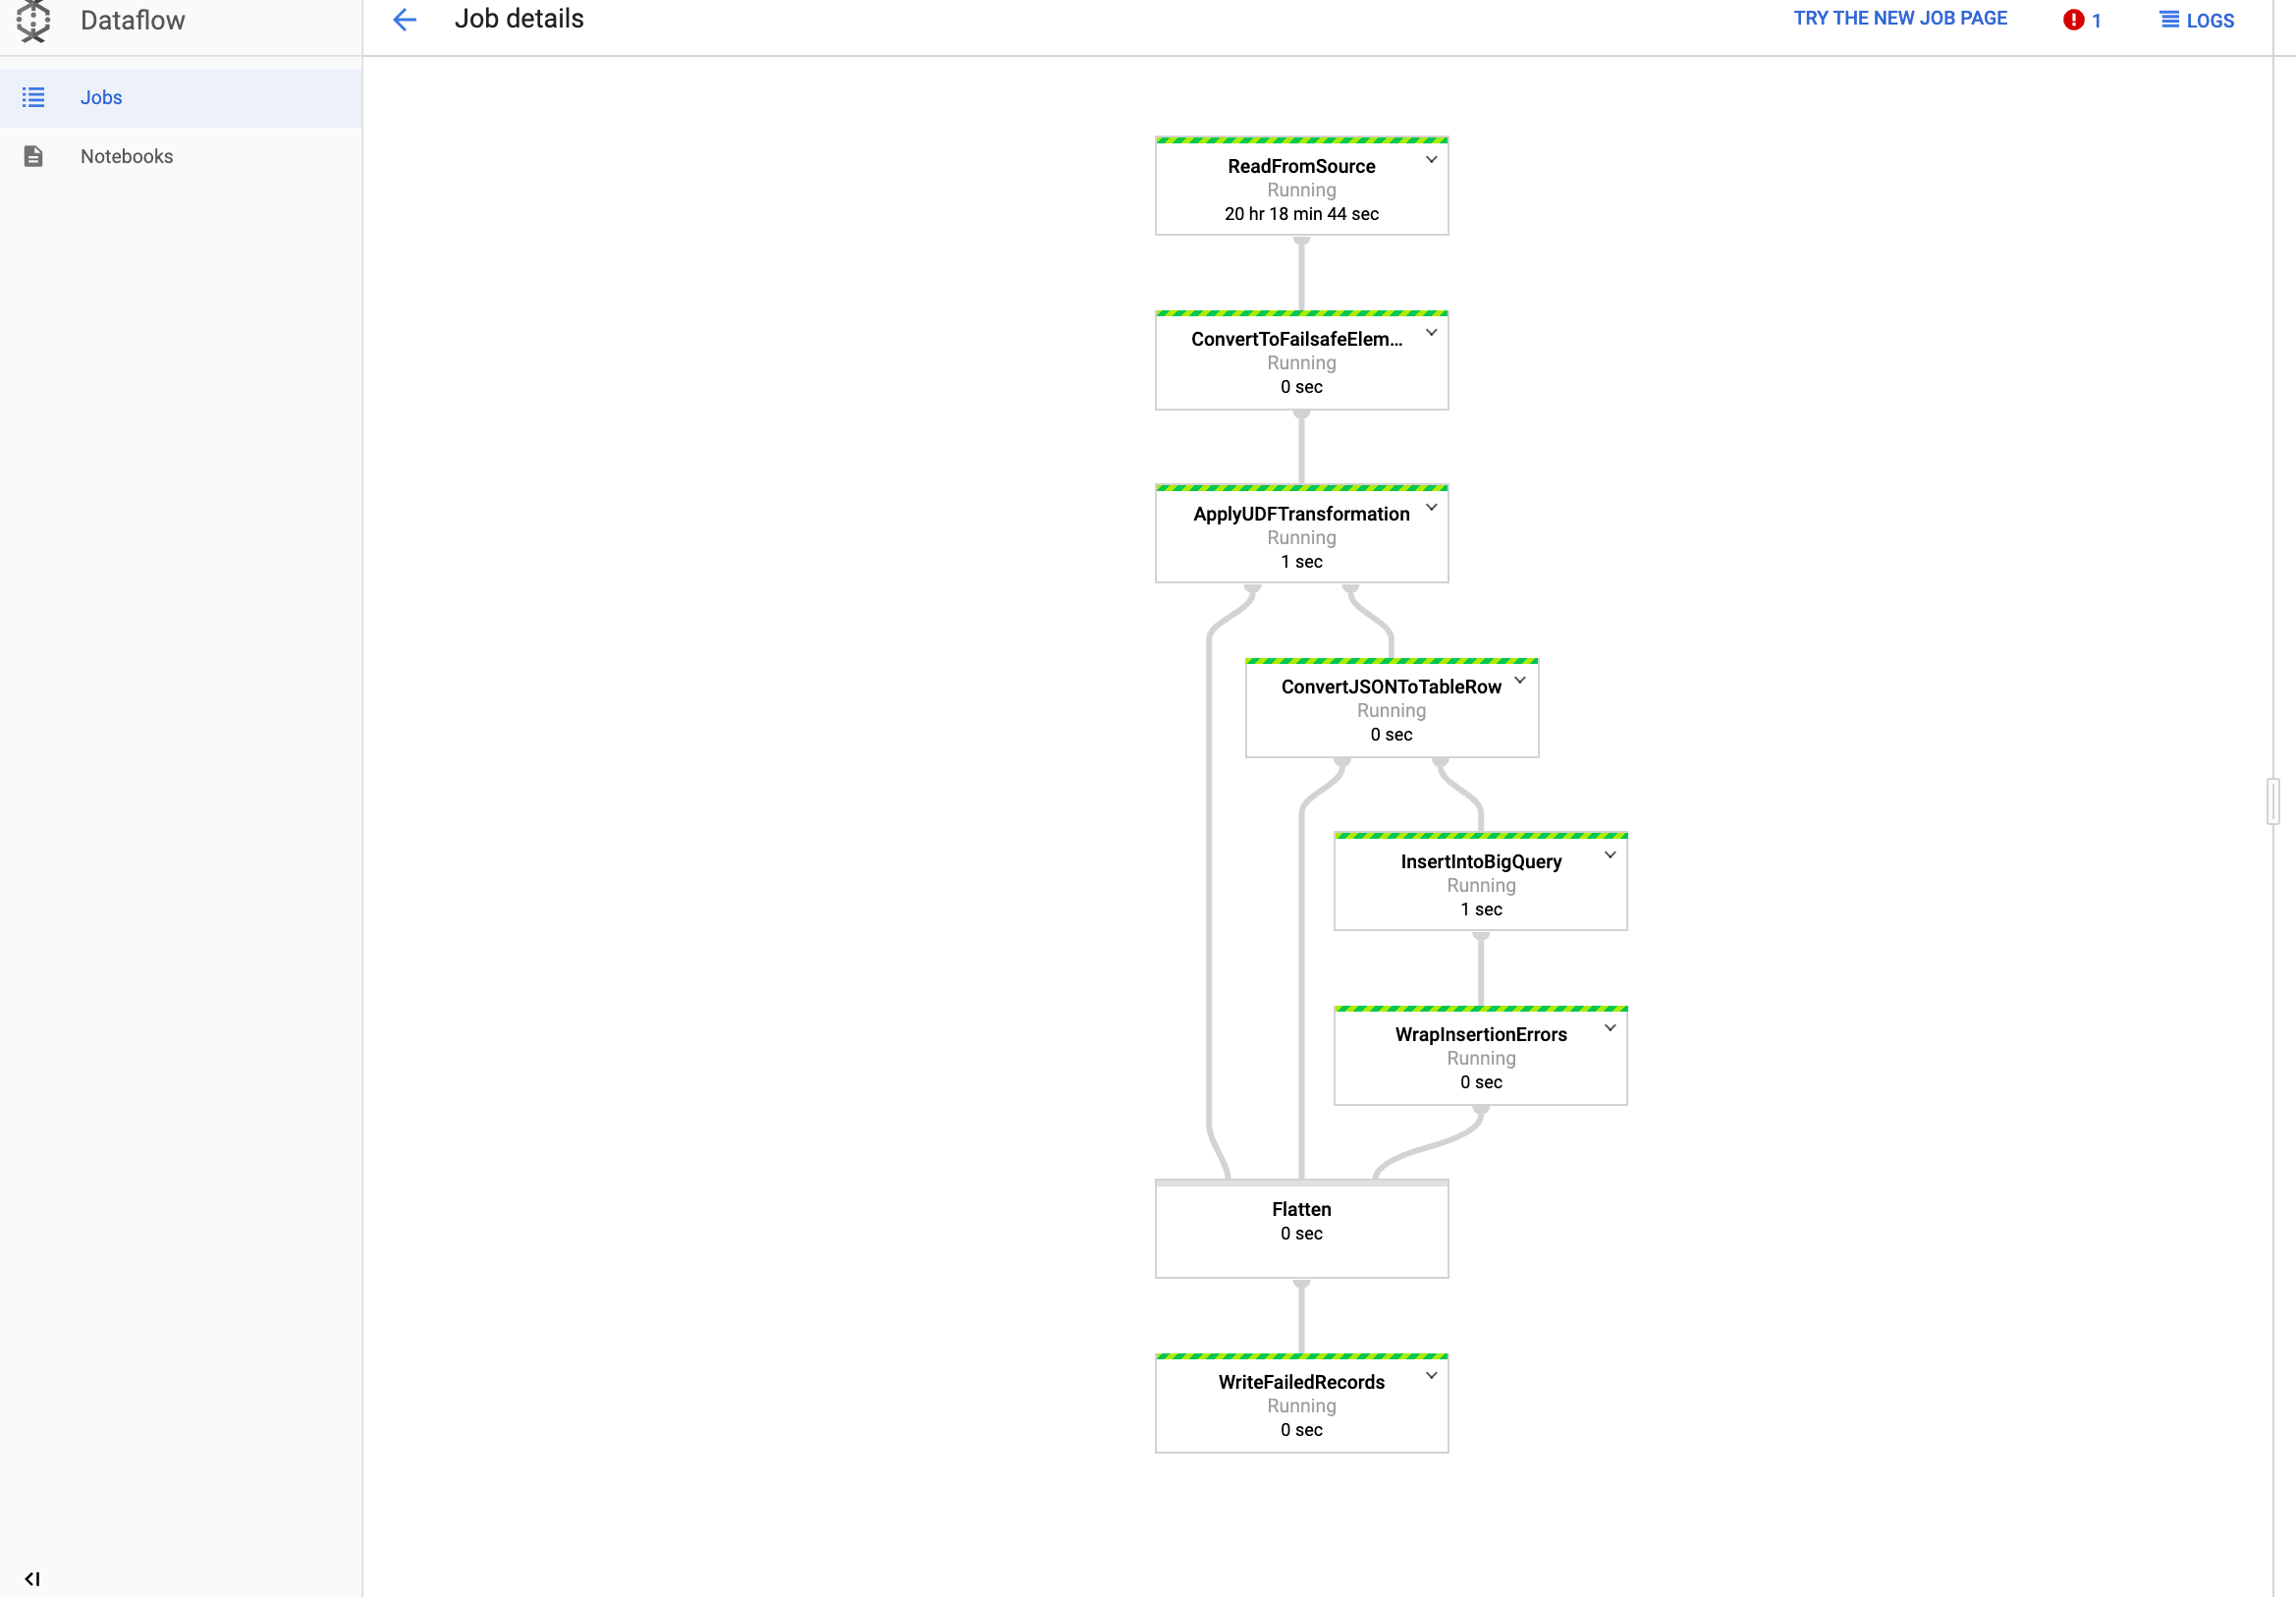
在 Dataflow 中查看工作

  1. 前往 Google Cloud 控制台的「Dataflow」頁面。

    前往 Dataflow

  2. 您的工作名稱為 dataflow_operator_transform_csv_to_bq,名稱結尾會以連字號加上專屬 ID,如下所示:

    資料流工作具有專屬 ID

  3. 按一下名稱即可查看工作詳細資料

    查看所有工作詳細資料

在 BigQuery 中查看結果

  1. 前往 Google Cloud 控制台的「BigQuery」頁面。

    前往「BigQuery」

  2. 您可以使用標準 SQL 提交查詢。使用下列查詢,查看新增至資料表的資料列:

    SELECT * FROM projectId.average_weather.average_weather
    

後續步驟