This tutorial shows you how to connect a BigQuery table or
view for reading and writing data from a Databricks notebook. The steps are
described using the
Google Cloud console and
Databricks Workspaces.
You can also perform these steps using the gcloud and databricks
command-line tools, although that guidance is outside the scope of this
tutorial.
Databricks on Google Cloud is a Databricks environment hosted on Google Cloud, running on Google Kubernetes Engine (GKE) and providing built-in integration with BigQuery and other Google Cloud technologies. If you are new to Databricks, watch the Introduction to Databricks Unified Data Platform video for an overview of the Databricks lakehouse platform.
Objectives
- Configure Google Cloud to connect with Databricks.
- Deploy Databricks on Google Cloud.
- Query BigQuery from Databricks.
Costs
This tutorial uses billable components of Google Cloud console, including BigQuery and GKE. BigQuery pricing and GKE pricing apply. For information about costs associated with a Databricks account running on Google Cloud, see the Set up your account and create a workspace section in the Databricks documentation.
Before you begin
Before you connect Databricks to BigQuery, complete the following steps:
- Enable the BigQuery Storage API.
- Create a service account for Databricks.
- Create a Cloud Storage bucket for temporary storage.
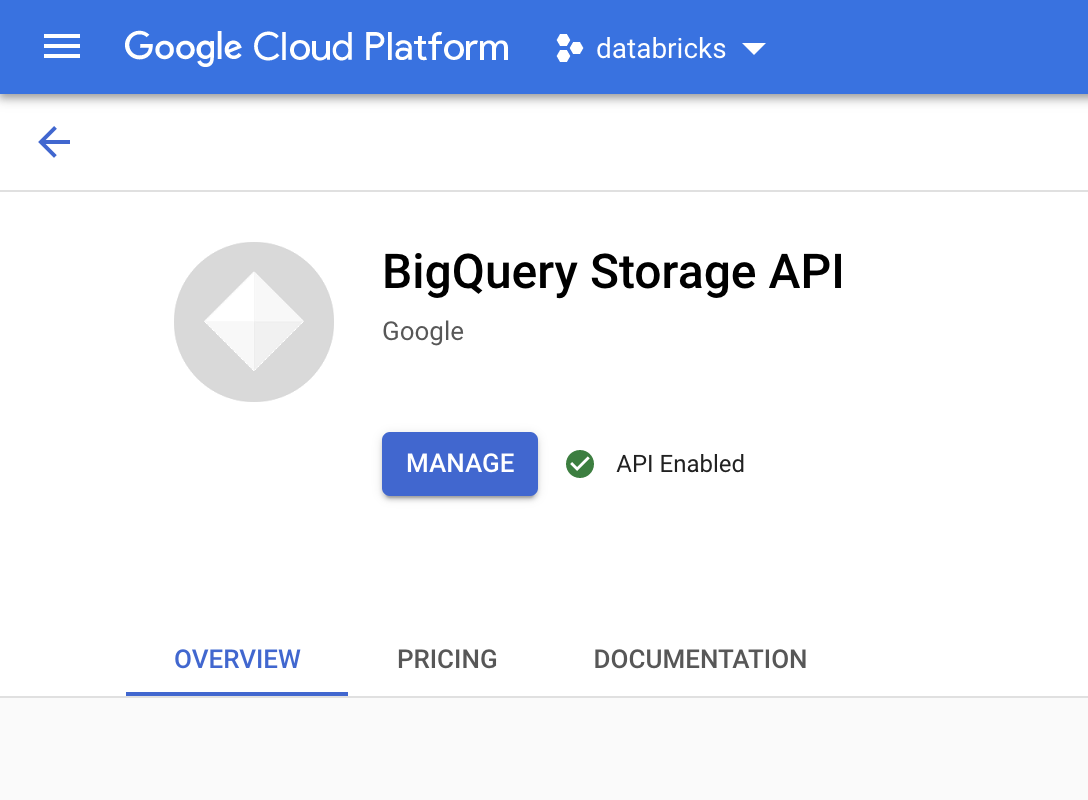
Enable the BigQuery Storage API
The BigQuery Storage API is enabled by default for any new projects where BigQuery is used. For existing projects that don't have the API enabled, follow these instructions:
In the Google Cloud console, go to the BigQuery Storage API page.
Confirm that the BigQuery Storage API is enabled.
Create a service account for Databricks
Next, create an Identity and Access Management (IAM) service account to allow a Databricks cluster to execute queries against BigQuery. We recommend that you give this service account the least privileges needed to perform its tasks. See BigQuery Roles and Permissions.
In the Google Cloud console, go to the Service Accounts page.
Click Create service account, name the service account
databricks-bigquery, enter a brief description such asDatabricks tutorial service account, and then click Create and continue.Under Grant this service account access to project, specify the roles for the service account. To give the service account permission to read data with the Databricks workspace and the BigQuery table in the same project, specifically without referencing a materialized view, grant the following roles:
- BigQuery Read Session User
- BigQuery Data Viewer
To give permission to write data, grant the following roles:
- BigQuery Job User
- BigQuery Data Editor
Record the email address of your new service account for reference in future steps.
Click Done.
Create a Cloud Storage bucket
To write to BigQuery, the Databricks cluster needs access to a Cloud Storage bucket to buffer the written data.
In the Google Cloud console, go to the Cloud Storage Browser.
Click Create bucket to open the Create a bucket dialog.
Specify a name for the bucket used to write data to BigQuery. The bucket name must be a globally unique name. If you specify a bucket name that already exists, then Cloud Storage responds with an error message. If this occurs, specify a different name for your bucket.
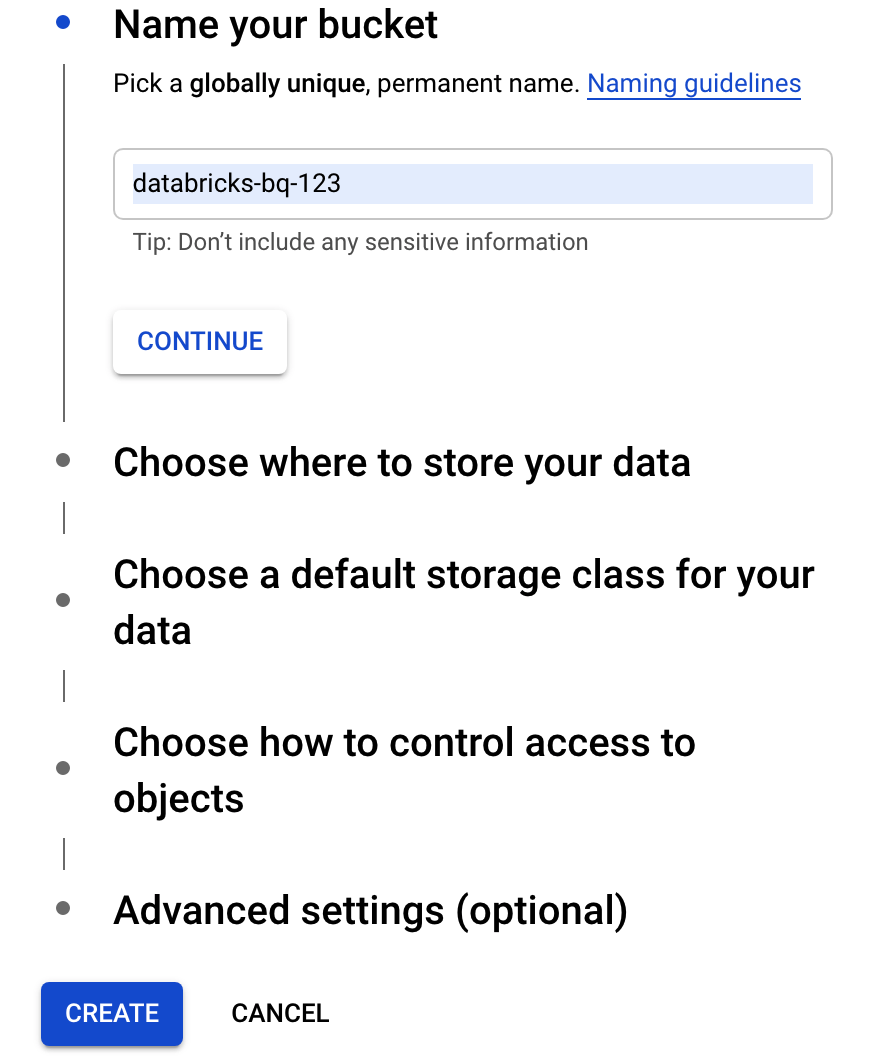
For this tutorial, use the default settings for the storage location, storage class, access control, and advanced settings.
Click Create to create your Cloud Storage bucket.
Click Permissions, click Add, and then specify the email address of the service account you created for Databricks access on the Service Accounts page.
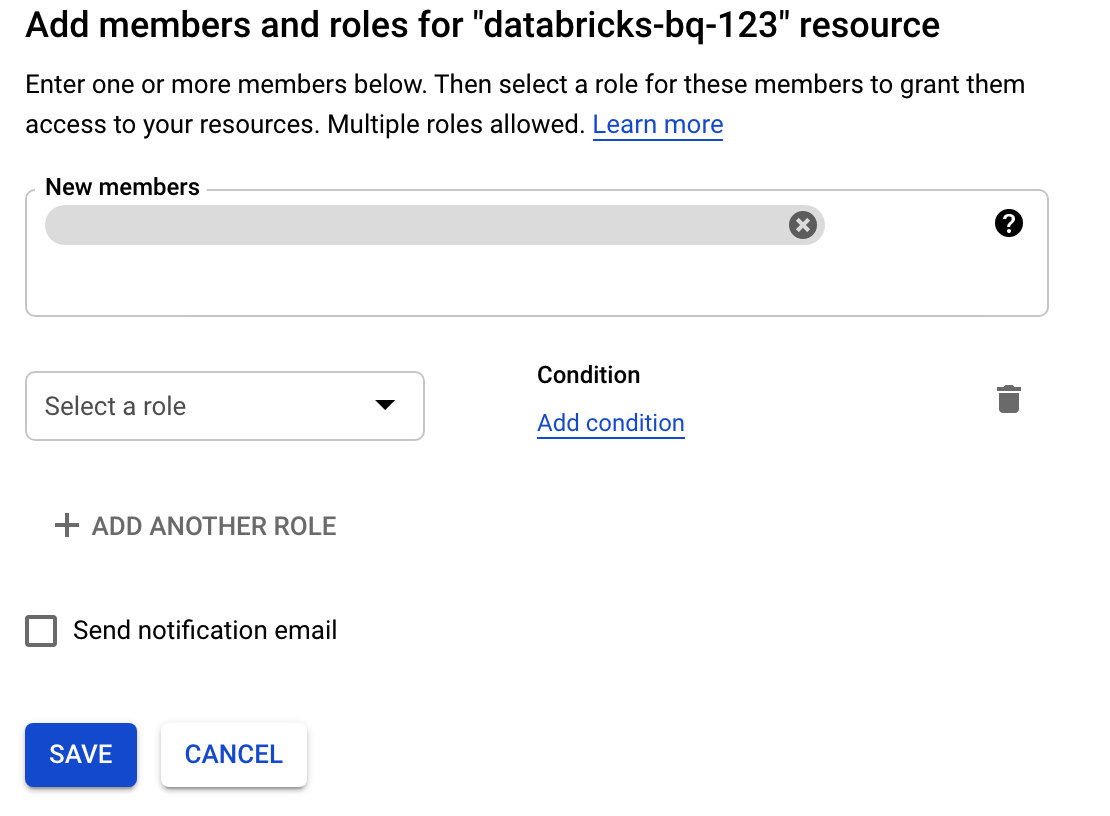
Click Select a role and add the Storage admin role.
Click Save.
Deploy Databricks on Google Cloud
Complete the following steps to prepare to deploy Databricks on Google Cloud.
- To set up your Databricks account, follow the instructions in the Databricks documentation, Set up your Databricks on Google Cloud account.
- After you register, learn more about how to Manage your Databricks account.
Create a Databricks workspace, cluster, and notebook
The following steps describe how to create a Databricks workspace, a cluster, and a Python notebook to write code to access BigQuery.
Confirm the Databrick prerequisites.
Create your first workspace. On the Databricks account console, click Create Workspace.
Specify
gcp-bqfor the Workspace name and select your Region.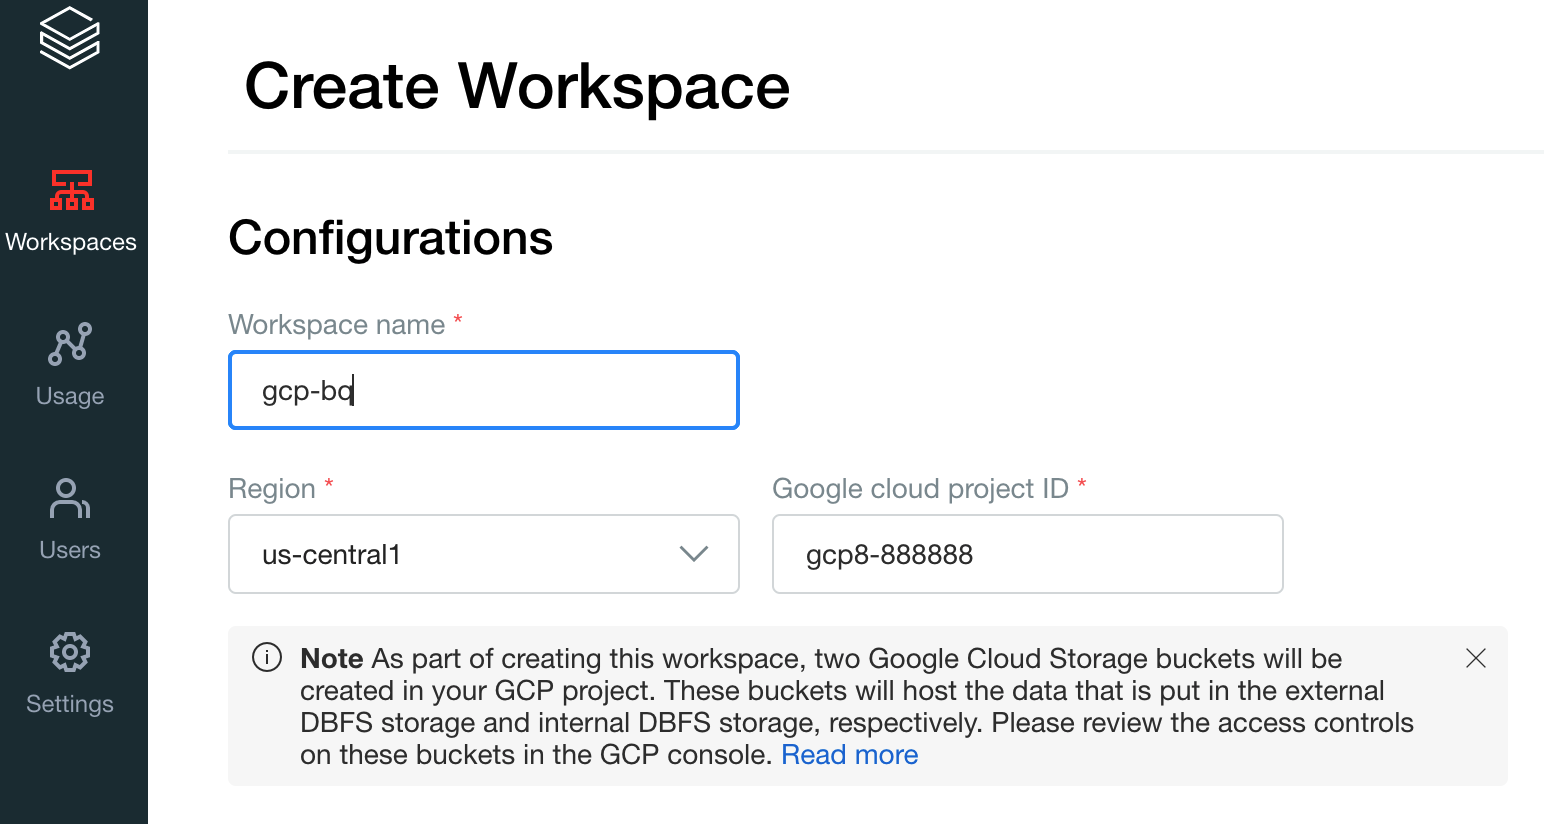
To determine your Google Cloud project ID, visit the Google Cloud console, and then copy the value to the Google Cloud project ID field.
Click Save to create your Databricks workspace.
To create a Databricks cluster with Databricks runtime 7.6 or later, in the left menu bar select Clusters, and then click Create Cluster at the top.
Specify the name of your cluster and its size, then click Advanced Options and specify the email addresss of your Google Cloud service account.
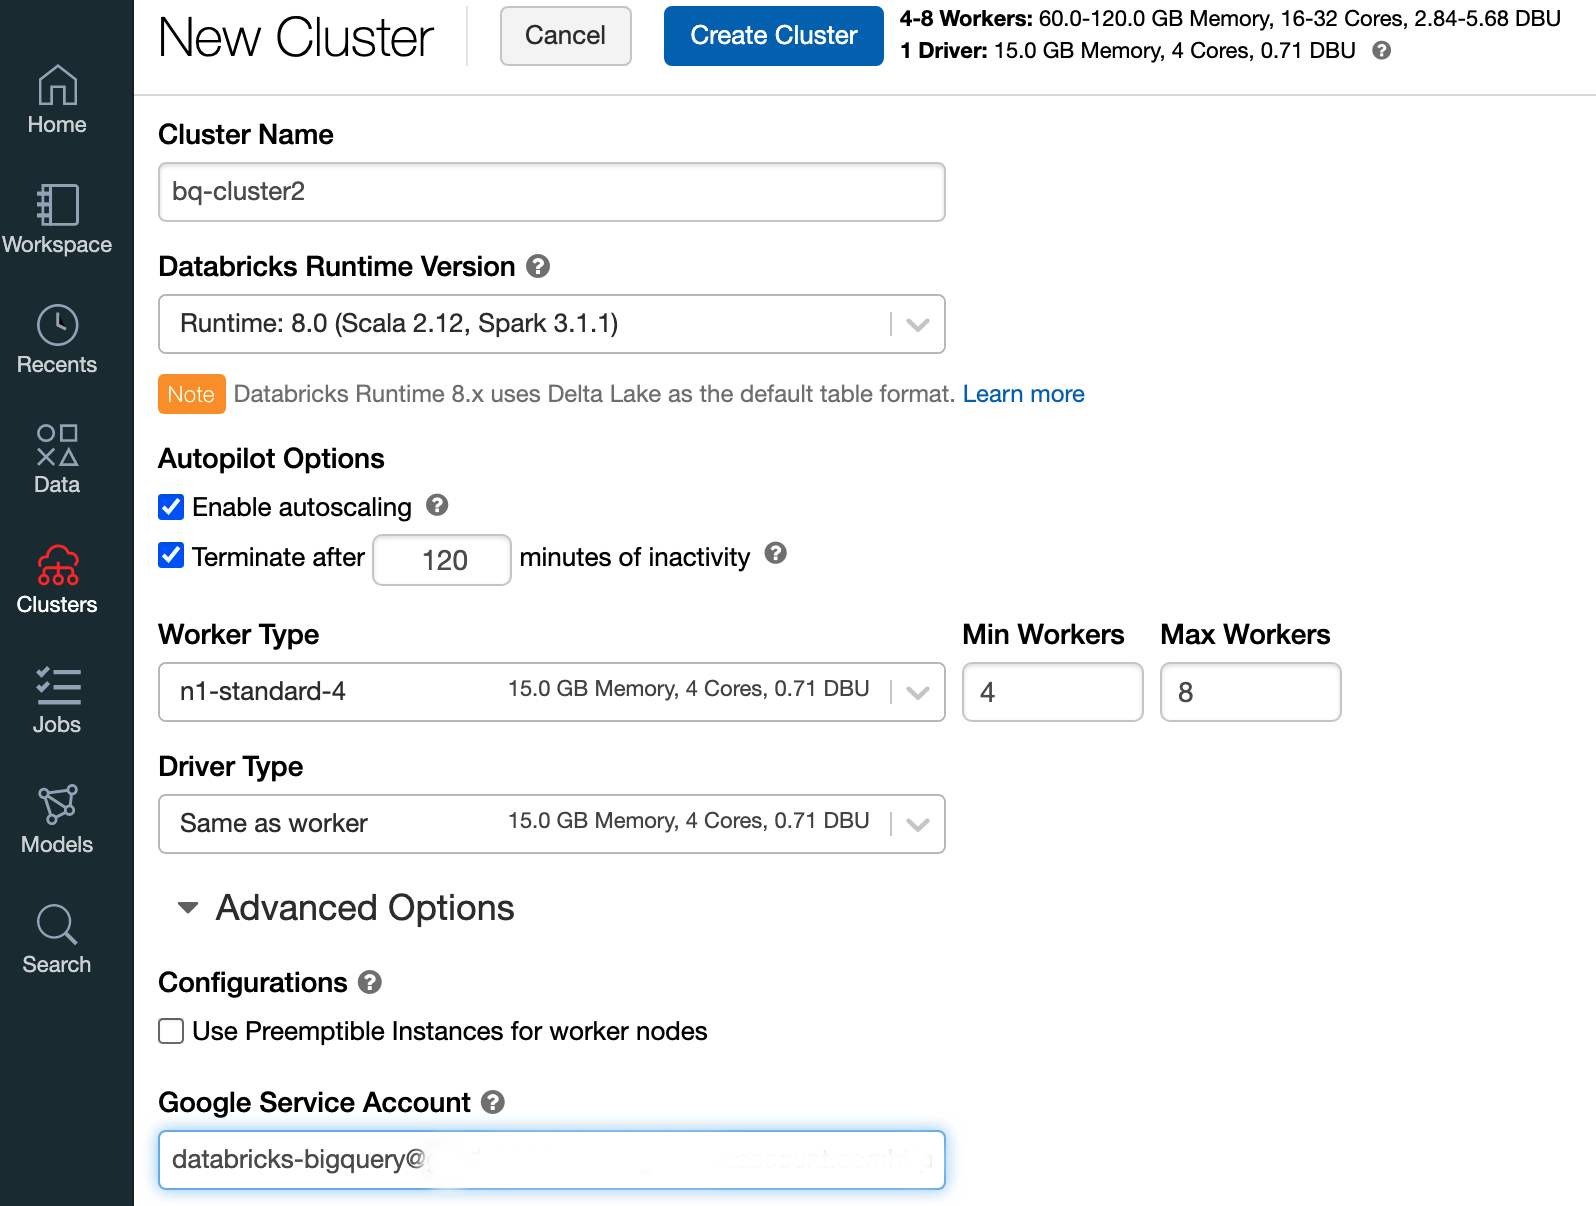
Click Create Cluster.
To create a Python notebook for Databricks, follow instructions in Create a notebook.
Querying BigQuery from Databricks
With the configuration above, you can securely connect Databricks to BigQuery. Databricks uses a fork of the open source Google Spark Adapter to access BigQuery.
Databricks reduces data transfer and accelerates queries by automatically
pushing down certain query predicates, for example filtering on nested columns
to BigQuery. In addition, the added capability to first run a SQL
query on BigQuery with the query() API reduces the transfer size
of the resulting data set.
The following steps describe how to access a dataset in BigQuery and write your own data to BigQuery.
Access a public dataset on BigQuery
BigQuery provides a list of available public datasets. To query the BigQuery Shakespeare dataset that is part of the public datasets, follow these steps:
To read the BigQuery table, use the following code snippet in your Databricks notebook.
table = "bigquery-public-data.samples.shakespeare"
df = spark.read.format("bigquery").option("table",table).load()
df.createOrReplaceTempView("shakespeare")
Execute the code by pressing
Shift+Return.You can now query your BigQuery table through the Spark DataFrame (
df). For example, use the following to show the first three rows of the dataframe:df.show(3)To query another table, update the
tablevariable.A key feature of Databricks notebooks is that you can mix the cells of different languages such as Scala, Python, and SQL in a single notebook.
The following SQL query allows you to visualize the word count in Shakespeare after running the previous cell that creates the temporary view.
%sql
SELECT word, SUM(word_count) AS word_count FROM words GROUP BY word ORDER BY word_count DESC LIMIT 12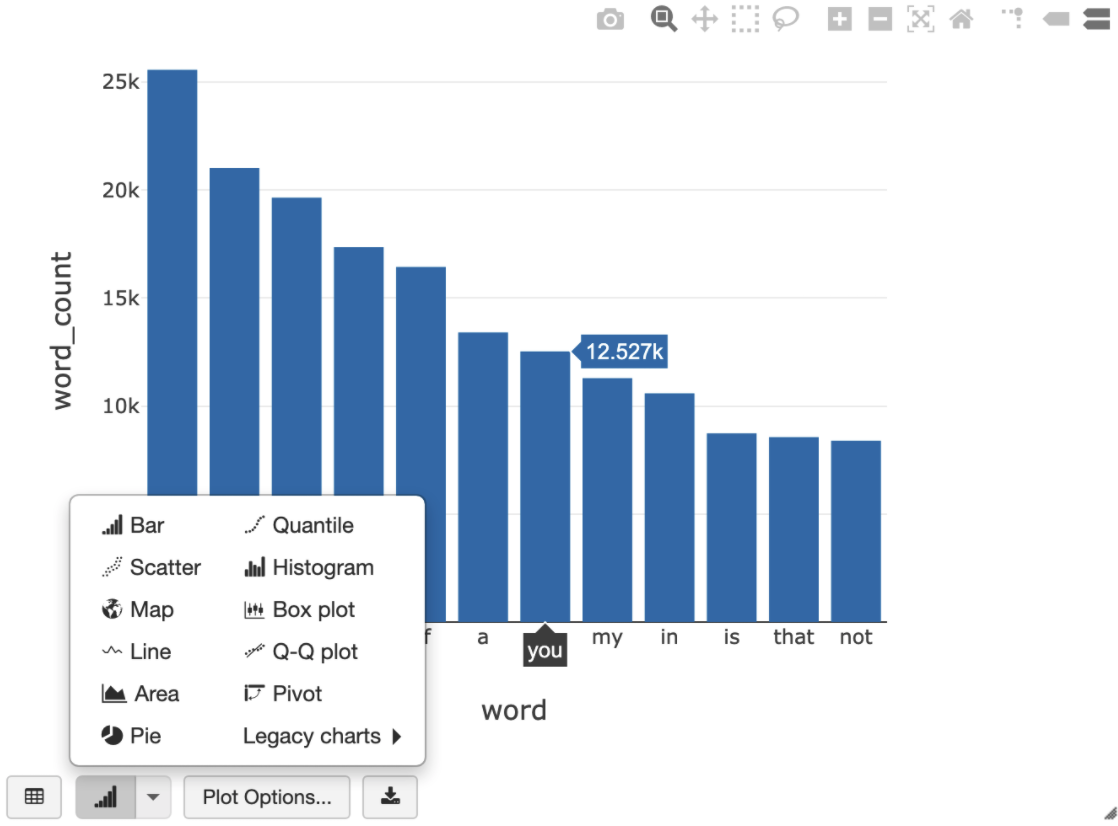
The cell above runs a Spark SQL query against the dataframe in your Databricks cluster, not in BigQuery. The benefit of this approach is that data analysis occurs on a Spark level, no further BigQuery API calls are issued, and you incur no additional BigQuery costs.
As an alternative, you can delegate the execution of a SQL query to BigQuery with the
query()API and optimize for reducing the transfer size of the resulting data frame. Unlike in the example above—where the processing was done in Spark—if you use this approach, pricing and query optimizations apply for executing the query on BigQuery.The example below uses Scala, the
query()API, and the public Shakespeare dataset in BigQuery to calculate the five most common words in Shakespeare's works. Before you run the code, you must first create an empty dataset in BigQuery calledmdatasetthat the code can reference. For more information, see Writing data to BigQuery.%scala // public dataset val table = "bigquery-public-data.samples.shakespeare" // existing dataset where the Google Cloud user has table creation permission val tempLocation = "mdataset" // query string val q = s"""SELECT word, SUM(word_count) AS word_count FROM ${table} GROUP BY word ORDER BY word_count DESC LIMIT 10 """ // read the result of a GoogleSQL query into a DataFrame val df2 = spark.read.format("bigquery") .option("query", q) .option("materializationDataset", tempLocation) .load() // show the top 5 common words in Shakespeare df2.show(5)For more code examples, see the Databricks BigQuery sample notebook.
Writing data to BigQuery
BigQuery tables exist in datasets. Before you can write data to a BigQuery table, you must create a new dataset in BigQuery. To create a dataset for a Databricks Python notebook, follow these steps:
Go to the BigQuery page in the Google Cloud console.
Expand the Actions option, click Create dataset, and then name it
together.In the Databricks Python notebook, create a simple Spark dataframe from a Python list with three string entries using the following code snippet:
from pyspark.sql.types import StringType
mylist = ["Google", "Databricks", "better together"]

df = spark.createDataFrame(mylist, StringType())
Add another cell to your notebook that writes the Spark dataframe from the previous step to the BigQuery table
myTablein the datasettogether. The table is either created or overwritten. Use the bucket name that you specified earlier.bucket = YOUR_BUCKET_NAME table = "together.myTable" df.write .format("bigquery") .option("temporaryGcsBucket", bucket) .option("table", table) .mode("overwrite").save()To verify that you have successfully written the data, query and display your BigQuery table through the Spark DataFrame (
df):display(spark.read.format("bigquery").option("table", table).load)
Clean up
To avoid incurring charges to your Google Cloud account for the resources used in this tutorial, either delete the project that contains the resources, or keep the project and delete the individual resources.
Before removing Databricks, always backup your data and notebooks. To clean up and completely remove Databricks, cancel your Databricks subscription in the Google Cloud console and remove any related resources you created from the Google Cloud console.
If you delete a Databricks workspace, the two Cloud Storage buckets with the
names databricks-WORKSPACE_ID and
databricks-WORKSPACE_ID-system that were
created by Databricks
might not be deleted if the Cloud Storage buckets are not empty. After
workspace deletion, you can delete those objects manually in the
Google Cloud console for your project.
What's next
This section provides a list of additional documents and tutorials:
- Learn about Databricks free trial details.
- Learn about Databricks on Google Cloud.
- Learn about Databricks BigQuery.
- Read the BigQuery support for Databricks blog announcement.
- Learn about BigQuery Sample notebooks.
- Learn about Terraform provider for Databricks on Google Cloud.
- Read the Databricks blog, including more information about data science topics and data sets.