查看 Application Integration 支持的连接器。
向公共 API 发出 REST 调用
使用“调用 REST 端点”任务,调用 https://mocktarget.apigee.net/json,并将响应保存在 JSON 变量中。
代码示例
示例集成流程
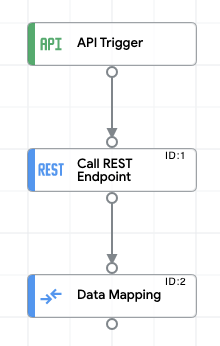
下图显示了此集成代码示例的集成编辑器示例布局。
上传并运行示例集成
如需上传并运行示例集成,请执行以下步骤:
- 将集成示例保存为系统中的 .json 文件。
- 在 Google Cloud 控制台中,前往 Application Integration 页面。
- 点击左侧导航菜单中的集成,打开集成页面。
- 选择现有集成,或通过点击创建集成来创建新的集成。
要创建新的集成,请执行以下操作:
- 在创建 Integrations对话框中输入名称和说明。
- 选择集成的区域。
- 为集成选择服务账号。您可以随时在集成工具栏的 集成摘要窗格中更改或更新集成的服务账号详细信息。
- 点击创建。
这将在集成编辑器中打开集成。
- 在集成编辑器中,点击 上传/下载菜单,然后选择上传集成。
- 在文件浏览器对话框中,选择您在第 1 步中保存的文件,然后点击打开。
系统会使用上传的文件创建新版本的集成。
- 在集成编辑器中,点击测试。
- 点击测试集成。此操作会运行集成,并在测试集成窗格中显示执行结果。