이미지 속성 감지

이미지 속성은 이미지의 주요 색상과 같은 일반적인 속성을 감지하는 기능입니다.
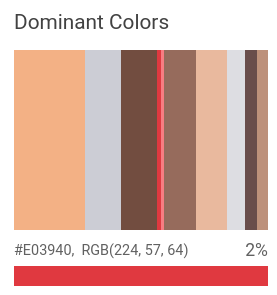
발리 이미지
이미지 크레딧: 제레미 비숍, Unsplash

주요 색상 감지됨:

발리 이미지에서 주요 색상 감지

이미지 속성 감지 요청

Google Cloud 프로젝트 및 인증 설정

로컬 이미지의 이미지 속성 감지

Vision API를 사용하여 로컬 이미지 파일에서 기능 감지를 수행할 수 있습니다.

REST 요청의 경우 이미지 파일의 콘텐츠를 요청 본문에 base64로 인코딩된 문자열로 보냅니다.

gcloud 및 클라이언트 라이브러리 요청의 경우 요청에 로컬 이미지 경로를 지정합니다.

ColorInfo 필드는 RGB 값(예: sRGB, Adobe RGB, DCI-P3, BT.2020 등)을 해석하는 데 사용해야 하는 절대 색상 공간에 대한 정보를 제공하지 않습니다. 기본적으로 애플리케이션은 sRGB 색상 공간을 가정해야 합니다.

REST

요청 데이터를 사용하기 전에 다음을 바꿉니다.

  • BASE64_ENCODED_IMAGE: 바이너리 이미지 데이터의 base64 표현(ASCII 문자열)입니다. 이 문자열은 다음 문자열과 유사하게 표시됩니다.
    • /9j/4QAYRXhpZgAA...9tAVx/zDQDlGxn//2Q==
    자세한 내용은 base64 인코딩 주제를 참조하세요.
  • RESULTS_INT: (선택사항) 반환할 결과의 정수 값입니다. "maxResults" 필드와 해당 값을 생략하면 API에서 기본값 10개를 반환합니다. 이 필드는 TEXT_DETECTION, DOCUMENT_TEXT_DETECTION, CROP_HINTS 기능 유형에는 적용되지 않습니다.
  • PROJECT_ID: Google Cloud 프로젝트 ID입니다.

HTTP 메서드 및 URL:

POST https://vision.googleapis.com/v1/images:annotate

JSON 요청 본문:

{
  "requests": [
    {
      "image": {
        "content": "BASE64_ENCODED_IMAGE"
      },
      "features": [
        {
          "maxResults": RESULTS_INT,
          "type": "IMAGE_PROPERTIES"
        },
      ]
    }
  ]
}

요청을 보내려면 다음 옵션 중 하나를 선택합니다.

curl

요청 본문을 request.json 파일에 저장하고 다음 명령어를 실행합니다.

curl -X POST \
-H "Authorization: Bearer $(gcloud auth print-access-token)" \
-H "x-goog-user-project: PROJECT_ID" \
-H "Content-Type: application/json; charset=utf-8" \
-d @request.json \
"https://vision.googleapis.com/v1/images:annotate"

PowerShell

요청 본문을 request.json 파일에 저장하고 다음 명령어를 실행합니다.

$cred = gcloud auth print-access-token
$headers = @{ "Authorization" = "Bearer $cred"; "x-goog-user-project" = "PROJECT_ID" }

Invoke-WebRequest `
-Method POST `
-Headers $headers `
-ContentType: "application/json; charset=utf-8" `
-InFile request.json `
-Uri "https://vision.googleapis.com/v1/images:annotate" | Select-Object -Expand Content

요청이 성공하면 서버가 200 OK HTTP 상태 코드와 응답을 JSON 형식으로 반환합니다.

응답:

Go

이 샘플을 사용해 보기 전에 Vision 빠른 시작: 클라이언트 라이브러리 사용Go 설정 안내를 따르세요. 자세한 내용은 Vision Go API 참조 문서를 참조하세요.

Vision에 인증하려면 애플리케이션 기본 사용자 인증 정보를 설정합니다. 자세한 내용은 로컬 개발 환경의 인증 설정을 참조하세요.


// detectProperties gets image properties from the Vision API for an image at the given file path.
func detectProperties(w io.Writer, file string) error {
	ctx := context.Background()

	client, err := vision.NewImageAnnotatorClient(ctx)
	if err != nil {
		return err
	}

	f, err := os.Open(file)
	if err != nil {
		return err
	}
	defer f.Close()

	image, err := vision.NewImageFromReader(f)
	if err != nil {
		return err
	}
	props, err := client.DetectImageProperties(ctx, image, nil)
	if err != nil {
		return err
	}

	fmt.Fprintln(w, "Dominant colors:")
	for _, quantized := range props.DominantColors.Colors {
		color := quantized.Color
		r := int(color.Red) & 0xff
		g := int(color.Green) & 0xff
		b := int(color.Blue) & 0xff
		fmt.Fprintf(w, "%2.1f%% - #%02x%02x%02x\n", quantized.PixelFraction*100, r, g, b)
	}

	return nil
}

Java

이 샘플을 시도하기 전에 Vision API 빠른 시작: 클라이언트 라이브러리 사용의 자바 설정 안내를 따르세요. 자세한 내용은 Vision API 자바 참조 문서를 참조하세요.


import com.google.cloud.vision.v1.AnnotateImageRequest;
import com.google.cloud.vision.v1.AnnotateImageResponse;
import com.google.cloud.vision.v1.BatchAnnotateImagesResponse;
import com.google.cloud.vision.v1.ColorInfo;
import com.google.cloud.vision.v1.DominantColorsAnnotation;
import com.google.cloud.vision.v1.Feature;
import com.google.cloud.vision.v1.Image;
import com.google.cloud.vision.v1.ImageAnnotatorClient;
import com.google.protobuf.ByteString;
import java.io.FileInputStream;
import java.io.IOException;
import java.util.ArrayList;
import java.util.List;

public class DetectProperties {
  public static void detectProperties() throws IOException {
    // TODO(developer): Replace these variables before running the sample.
    String filePath = "path/to/your/image/file.jpg";
    detectProperties(filePath);
  }

  // Detects image properties such as color frequency from the specified local image.
  public static void detectProperties(String filePath) throws IOException {
    List<AnnotateImageRequest> requests = new ArrayList<>();

    ByteString imgBytes = ByteString.readFrom(new FileInputStream(filePath));

    Image img = Image.newBuilder().setContent(imgBytes).build();
    Feature feat = Feature.newBuilder().setType(Feature.Type.IMAGE_PROPERTIES).build();
    AnnotateImageRequest request =
        AnnotateImageRequest.newBuilder().addFeatures(feat).setImage(img).build();
    requests.add(request);

    // Initialize client that will be used to send requests. This client only needs to be created
    // once, and can be reused for multiple requests. After completing all of your requests, call
    // the "close" method on the client to safely clean up any remaining background resources.
    try (ImageAnnotatorClient client = ImageAnnotatorClient.create()) {
      BatchAnnotateImagesResponse response = client.batchAnnotateImages(requests);
      List<AnnotateImageResponse> responses = response.getResponsesList();

      for (AnnotateImageResponse res : responses) {
        if (res.hasError()) {
          System.out.format("Error: %s%n", res.getError().getMessage());
          return;
        }

        // For full list of available annotations, see http://g.co/cloud/vision/docs
        DominantColorsAnnotation colors = res.getImagePropertiesAnnotation().getDominantColors();
        for (ColorInfo color : colors.getColorsList()) {
          System.out.format(
              "fraction: %f%nr: %f, g: %f, b: %f%n",
              color.getPixelFraction(),
              color.getColor().getRed(),
              color.getColor().getGreen(),
              color.getColor().getBlue());
        }
      }
    }
  }
}

Node.js

이 샘플을 사용해 보기 전에 Vision 빠른 시작: 클라이언트 라이브러리 사용Node.js 설정 안내를 따르세요. 자세한 내용은 Vision Node.js API 참조 문서를 참조하세요.

Vision에 인증하려면 애플리케이션 기본 사용자 인증 정보를 설정합니다. 자세한 내용은 로컬 개발 환경의 인증 설정을 참조하세요.

const vision = require('@google-cloud/vision');

// Creates a client
const client = new vision.ImageAnnotatorClient();

/**
 * TODO(developer): Uncomment the following line before running the sample.
 */
// const fileName = 'Local image file, e.g. /path/to/image.png';

// Performs property detection on the local file
const [result] = await client.imageProperties(fileName);
const colors = result.imagePropertiesAnnotation.dominantColors.colors;
colors.forEach(color => console.log(color));

Python

이 샘플을 사용해 보기 전에 Vision 빠른 시작: 클라이언트 라이브러리 사용Python 설정 안내를 따르세요. 자세한 내용은 Vision Python API 참조 문서를 참조하세요.

Vision에 인증하려면 애플리케이션 기본 사용자 인증 정보를 설정합니다. 자세한 내용은 로컬 개발 환경의 인증 설정을 참조하세요.

def detect_properties(path):
    """Detects image properties in the file."""
    from google.cloud import vision

    client = vision.ImageAnnotatorClient()

    with open(path, "rb") as image_file:
        content = image_file.read()

    image = vision.Image(content=content)

    response = client.image_properties(image=image)
    props = response.image_properties_annotation
    print("Properties:")

    for color in props.dominant_colors.colors:
        print(f"fraction: {color.pixel_fraction}")
        print(f"\tr: {color.color.red}")
        print(f"\tg: {color.color.green}")
        print(f"\tb: {color.color.blue}")
        print(f"\ta: {color.color.alpha}")

    if response.error.message:
        raise Exception(
            "{}\nFor more info on error messages, check: "
            "https://cloud.google.com/apis/design/errors".format(response.error.message)
        )

추가 언어

C#: 클라이언트 라이브러리 페이지의 C# 설정 안내를 따른 다음 .NET용 Vision 참조 문서를 참조하세요.

PHP: 클라이언트 라이브러리 페이지의 PHP 설정 안내를 따른 다음 PHP용 Vision 참조 문서를 참조하세요.

Ruby: 클라이언트 라이브러리 페이지의 Ruby 설정 안내를 따른 다음 Ruby용 Vision 참조 문서를 참조하세요.

원격 이미지의 이미지 속성 감지

Vision API를 사용하여 Cloud Storage 또는 웹에 있는 원격 이미지 파일에서 기능 감지를 수행할 수 있습니다. 원격 파일 요청을 보내려면 요청 본문에 파일의 웹 URL 또는 Cloud Storage URI를 지정합니다.

ColorInfo 필드는 RGB 값(예: sRGB, Adobe RGB, DCI-P3, BT.2020 등)을 해석하는 데 사용해야 하는 절대 색상 공간에 대한 정보를 제공하지 않습니다. 기본적으로 애플리케이션은 sRGB 색상 공간을 가정해야 합니다.

REST

요청 데이터를 사용하기 전에 다음을 바꿉니다.

  • CLOUD_STORAGE_IMAGE_URI: Cloud Storage 버킷에 있는 유효한 이미지 파일의 경로입니다. 적어도 파일에 대한 읽기 권한이 있어야 합니다. 예를 들면 다음과 같습니다.
    • gs://cloud-samples-data/vision/image_properties/bali.jpeg
  • RESULTS_INT: (선택사항) 반환할 결과의 정수 값입니다. "maxResults" 필드와 해당 값을 생략하면 API에서 기본값 10개를 반환합니다. 이 필드는 TEXT_DETECTION, DOCUMENT_TEXT_DETECTION, CROP_HINTS 기능 유형에는 적용되지 않습니다.
  • PROJECT_ID: Google Cloud 프로젝트 ID입니다.

HTTP 메서드 및 URL:

POST https://vision.googleapis.com/v1/images:annotate

JSON 요청 본문:

{
  "requests": [
    {
      "image": {
        "source": {
          "gcsImageUri": "CLOUD_STORAGE_IMAGE_URI"
        }
      },
      "features": [
        {
          "maxResults": RESULTS_INT,
          "type": "IMAGE_PROPERTIES"
        },
      ]
    }
  ]
}

요청을 보내려면 다음 옵션 중 하나를 선택합니다.

curl

요청 본문을 request.json 파일에 저장하고 다음 명령어를 실행합니다.

curl -X POST \
-H "Authorization: Bearer $(gcloud auth print-access-token)" \
-H "x-goog-user-project: PROJECT_ID" \
-H "Content-Type: application/json; charset=utf-8" \
-d @request.json \
"https://vision.googleapis.com/v1/images:annotate"

PowerShell

요청 본문을 request.json 파일에 저장하고 다음 명령어를 실행합니다.

$cred = gcloud auth print-access-token
$headers = @{ "Authorization" = "Bearer $cred"; "x-goog-user-project" = "PROJECT_ID" }

Invoke-WebRequest `
-Method POST `
-Headers $headers `
-ContentType: "application/json; charset=utf-8" `
-InFile request.json `
-Uri "https://vision.googleapis.com/v1/images:annotate" | Select-Object -Expand Content

요청이 성공하면 서버가 200 OK HTTP 상태 코드와 응답을 JSON 형식으로 반환합니다.

응답:

Go

이 샘플을 사용해 보기 전에 Vision 빠른 시작: 클라이언트 라이브러리 사용Go 설정 안내를 따르세요. 자세한 내용은 Vision Go API 참조 문서를 참조하세요.

Vision에 인증하려면 애플리케이션 기본 사용자 인증 정보를 설정합니다. 자세한 내용은 로컬 개발 환경의 인증 설정을 참조하세요.


// detectProperties gets image properties from the Vision API for an image at the given file path.
func detectPropertiesURI(w io.Writer, file string) error {
	ctx := context.Background()

	client, err := vision.NewImageAnnotatorClient(ctx)
	if err != nil {
		return err
	}

	image := vision.NewImageFromURI(file)
	props, err := client.DetectImageProperties(ctx, image, nil)
	if err != nil {
		return err
	}

	fmt.Fprintln(w, "Dominant colors:")
	for _, quantized := range props.DominantColors.Colors {
		color := quantized.Color
		r := int(color.Red) & 0xff
		g := int(color.Green) & 0xff
		b := int(color.Blue) & 0xff
		fmt.Fprintf(w, "%2.1f%% - #%02x%02x%02x\n", quantized.PixelFraction*100, r, g, b)
	}

	return nil
}

Java

이 샘플을 사용해 보기 전에 Vision 빠른 시작: 클라이언트 라이브러리 사용Java 설정 안내를 따르세요. 자세한 내용은 Vision Java API 참조 문서를 참조하세요.

Vision에 인증하려면 애플리케이션 기본 사용자 인증 정보를 설정합니다. 자세한 내용은 로컬 개발 환경의 인증 설정을 참조하세요.


import com.google.cloud.vision.v1.AnnotateImageRequest;
import com.google.cloud.vision.v1.AnnotateImageResponse;
import com.google.cloud.vision.v1.BatchAnnotateImagesResponse;
import com.google.cloud.vision.v1.ColorInfo;
import com.google.cloud.vision.v1.DominantColorsAnnotation;
import com.google.cloud.vision.v1.Feature;
import com.google.cloud.vision.v1.Image;
import com.google.cloud.vision.v1.ImageAnnotatorClient;
import com.google.cloud.vision.v1.ImageSource;
import java.io.IOException;
import java.util.ArrayList;
import java.util.List;

public class DetectPropertiesGcs {

  public static void detectPropertiesGcs() throws IOException {
    // TODO(developer): Replace these variables before running the sample.
    String filePath = "gs://your-gcs-bucket/path/to/image/file.jpg";
    detectPropertiesGcs(filePath);
  }

  // Detects image properties such as color frequency from the specified remote image on Google
  // Cloud Storage.
  public static void detectPropertiesGcs(String gcsPath) throws IOException {
    List<AnnotateImageRequest> requests = new ArrayList<>();

    ImageSource imgSource = ImageSource.newBuilder().setGcsImageUri(gcsPath).build();
    Image img = Image.newBuilder().setSource(imgSource).build();
    Feature feat = Feature.newBuilder().setType(Feature.Type.IMAGE_PROPERTIES).build();
    AnnotateImageRequest request =
        AnnotateImageRequest.newBuilder().addFeatures(feat).setImage(img).build();
    requests.add(request);

    // Initialize client that will be used to send requests. This client only needs to be created
    // once, and can be reused for multiple requests. After completing all of your requests, call
    // the "close" method on the client to safely clean up any remaining background resources.
    try (ImageAnnotatorClient client = ImageAnnotatorClient.create()) {
      BatchAnnotateImagesResponse response = client.batchAnnotateImages(requests);
      List<AnnotateImageResponse> responses = response.getResponsesList();

      for (AnnotateImageResponse res : responses) {
        if (res.hasError()) {
          System.out.format("Error: %s%n", res.getError().getMessage());
          return;
        }

        // For full list of available annotations, see http://g.co/cloud/vision/docs
        DominantColorsAnnotation colors = res.getImagePropertiesAnnotation().getDominantColors();
        for (ColorInfo color : colors.getColorsList()) {
          System.out.format(
              "fraction: %f%nr: %f, g: %f, b: %f%n",
              color.getPixelFraction(),
              color.getColor().getRed(),
              color.getColor().getGreen(),
              color.getColor().getBlue());
        }
      }
    }
  }
}

Node.js

이 샘플을 사용해 보기 전에 Vision 빠른 시작: 클라이언트 라이브러리 사용Node.js 설정 안내를 따르세요. 자세한 내용은 Vision Node.js API 참조 문서를 참조하세요.

Vision에 인증하려면 애플리케이션 기본 사용자 인증 정보를 설정합니다. 자세한 내용은 로컬 개발 환경의 인증 설정을 참조하세요.

// Imports the Google Cloud client libraries
const vision = require('@google-cloud/vision');

// Creates a client
const client = new vision.ImageAnnotatorClient();

/**
 * TODO(developer): Uncomment the following lines before running the sample.
 */
// const bucketName = 'Bucket where the file resides, e.g. my-bucket';
// const fileName = 'Path to file within bucket, e.g. path/to/image.png';

// Performs property detection on the gcs file
const [result] = await client.imageProperties(
  `gs://${bucketName}/${fileName}`
);
const colors = result.imagePropertiesAnnotation.dominantColors.colors;
colors.forEach(color => console.log(color));

Python

이 샘플을 사용해 보기 전에 Vision 빠른 시작: 클라이언트 라이브러리 사용Python 설정 안내를 따르세요. 자세한 내용은 Vision Python API 참조 문서를 참조하세요.

Vision에 인증하려면 애플리케이션 기본 사용자 인증 정보를 설정합니다. 자세한 내용은 로컬 개발 환경의 인증 설정을 참조하세요.

def detect_properties_uri(uri):
    """Detects image properties in the file located in Google Cloud Storage or
    on the Web."""
    from google.cloud import vision

    client = vision.ImageAnnotatorClient()
    image = vision.Image()
    image.source.image_uri = uri

    response = client.image_properties(image=image)
    props = response.image_properties_annotation
    print("Properties:")

    for color in props.dominant_colors.colors:
        print(f"frac: {color.pixel_fraction}")
        print(f"\tr: {color.color.red}")
        print(f"\tg: {color.color.green}")
        print(f"\tb: {color.color.blue}")
        print(f"\ta: {color.color.alpha}")

    if response.error.message:
        raise Exception(
            "{}\nFor more info on error messages, check: "
            "https://cloud.google.com/apis/design/errors".format(response.error.message)
        )

gcloud

이미지 속성 감지를 수행하려면 다음 예시와 같이 gcloud ml vision detect-image-properties 명령어를 사용합니다.

gcloud ml vision detect-image-properties gs://cloud-samples-data/vision/image_properties/bali.jpeg

추가 언어

C#: 클라이언트 라이브러리 페이지의 C# 설정 안내를 따른 다음 .NET용 Vision 참조 문서를 참조하세요.

PHP: 클라이언트 라이브러리 페이지의 PHP 설정 안내를 따른 다음 PHP용 Vision 참조 문서를 참조하세요.

Ruby: 클라이언트 라이브러리 페이지의 Ruby 설정 안내를 따른 다음 Ruby용 Vision 참조 문서를 참조하세요.

사용해 보기

아래의 이미지 속성 감지를 사용해 봅니다. 이미 지정된 이미지(gs://cloud-samples-data/vision/image_properties/bali.jpeg)를 사용하거나 자체 이미지를 대신 지정할 수도 있습니다. 실행을 선택하여 요청을 보냅니다.

발리 이미지
이미지 크레딧: 제레미 비숍, Unsplash

요청 본문:

{
  "requests": [
    {
      "features": [
        {
          "maxResults": 10,
          "type": "IMAGE_PROPERTIES"
        }
      ],
      "image": {
        "source": {
          "imageUri": "gs://cloud-samples-data/vision/image_properties/bali.jpeg"
        }
      }
    }
  ]
}