Gestione dei set di dati

Un progetto può avere più set di dati, ognuno dei quali viene utilizzato per addestrare un modello separato. Puoi ottenere un elenco dei set di dati disponibili, ottenere un set di dati specifico, esportare un set di dati e può eliminare un set di dati di cui non hai più bisogno.

Elenco dei set di dati

Questa sezione descrive come recuperare un elenco dei set di dati disponibili per un progetto.

UI web

Per visualizzare un elenco dei set di dati disponibili utilizzando Vision Dashboard, fai clic sul link Set di dati nella parte superiore di nel menu di navigazione a sinistra.

Pagina di elenco di set di dati

Per visualizzare i set di dati di un altro progetto, seleziona quest'ultimo da all'elenco nel menu a discesa in alto a destra della barra del titolo.

REST

Prima di utilizzare i dati della richiesta, effettua le seguenti sostituzioni:

  • project-id: l'ID del tuo progetto Google Cloud.

Metodo HTTP e URL:

GET https://automl.googleapis.com/v1/projects/PROJECT_ID/locations/us-central1/datasets

Per inviare la richiesta, scegli una delle seguenti opzioni:

curl

Esegui questo comando:

curl -X GET \
-H "Authorization: Bearer $(gcloud auth print-access-token)" \
-H "x-goog-user-project: project-id" \
"https://automl.googleapis.com/v1/projects/PROJECT_ID/locations/us-central1/datasets"

PowerShell

Esegui questo comando:

$cred = gcloud auth print-access-token
$headers = @{ "Authorization" = "Bearer $cred"; "x-goog-user-project" = "project-id" }

Invoke-WebRequest `
-Method GET `
-Headers $headers `
-Uri "https://automl.googleapis.com/v1/projects/PROJECT_ID/locations/us-central1/datasets" | Select-Object -Expand Content

Dovresti ricevere una risposta JSON simile alla seguente:

{
  "datasets": [
    {
      "name": "projects/PROJECT_ID/locations/us-central1/datasets/DATASET_ID",
      "displayName": "my_new_dataset",
      "createTime": "2019-10-29T17:31:12.010290Z",
      "etag": "AB3BwFpNUaguCwKeQWtUKLBPQhZr7omCCUBz77pACPIINFpyFe7vbGhp9oZLEEGhIeM=",
      "exampleCount": 3667,
      "imageClassificationDatasetMetadata": {
        "classificationType": "MULTICLASS"
      }
    },
    {
      "name": "projects/PROJECT_ID/locations/us-central1/datasets/DATASET_ID",
      "displayName": "new_dataset",
      "createTime": "2019-10-02T00:44:57.821275Z",
      "etag": "AB3BwFpU_ueMZtTD_8dt-9r8BWqunqMC76YbAbmQYQsQEbtQTxs6U3rPpgAMDCXhYPGq",
      "imageClassificationDatasetMetadata": {
        "classificationType": "MULTICLASS"
      }
    }
  ]
}

Go

Prima di provare questo esempio, segui le istruzioni di configurazione per questa lingua nella Librerie client.

import (
	"context"
	"fmt"
	"io"

	automl "cloud.google.com/go/automl/apiv1"
	"cloud.google.com/go/automl/apiv1/automlpb"
	"google.golang.org/api/iterator"
)

// listDatasets lists existing datasets.
func listDatasets(w io.Writer, projectID string, location string) error {
	// projectID := "my-project-id"
	// location := "us-central1"

	ctx := context.Background()
	client, err := automl.NewClient(ctx)
	if err != nil {
		return fmt.Errorf("NewClient: %w", err)
	}
	defer client.Close()

	req := &automlpb.ListDatasetsRequest{
		Parent: fmt.Sprintf("projects/%s/locations/%s", projectID, location),
	}

	it := client.ListDatasets(ctx, req)

	// Iterate over all results
	for {
		dataset, err := it.Next()
		if err == iterator.Done {
			break
		}
		if err != nil {
			return fmt.Errorf("ListGlossaries.Next: %w", err)
		}

		fmt.Fprintf(w, "Dataset name: %v\n", dataset.GetName())
		fmt.Fprintf(w, "Dataset display name: %v\n", dataset.GetDisplayName())
		fmt.Fprintf(w, "Dataset create time:\n")
		fmt.Fprintf(w, "\tseconds: %v\n", dataset.GetCreateTime().GetSeconds())
		fmt.Fprintf(w, "\tnanos: %v\n", dataset.GetCreateTime().GetNanos())

		// Vision classification
		if metadata := dataset.GetImageClassificationDatasetMetadata(); metadata != nil {
			fmt.Fprintf(w, "Image classification dataset metadata: %v\n", metadata)
		}

	}

	return nil
}

Java

Prima di provare questo esempio, segui le istruzioni di configurazione per questa lingua nella Librerie client.

import com.google.cloud.automl.v1.AutoMlClient;
import com.google.cloud.automl.v1.Dataset;
import com.google.cloud.automl.v1.ListDatasetsRequest;
import com.google.cloud.automl.v1.LocationName;
import java.io.IOException;

class ListDatasets {

  static void listDatasets() throws IOException {
    // TODO(developer): Replace these variables before running the sample.
    String projectId = "YOUR_PROJECT_ID";
    listDatasets(projectId);
  }

  // List the datasets
  static void listDatasets(String projectId) throws IOException {
    // Initialize client that will be used to send requests. This client only needs to be created
    // once, and can be reused for multiple requests. After completing all of your requests, call
    // the "close" method on the client to safely clean up any remaining background resources.
    try (AutoMlClient client = AutoMlClient.create()) {
      // A resource that represents Google Cloud Platform location.
      LocationName projectLocation = LocationName.of(projectId, "us-central1");
      ListDatasetsRequest request =
          ListDatasetsRequest.newBuilder().setParent(projectLocation.toString()).build();

      // List all the datasets available in the region by applying filter.
      System.out.println("List of datasets:");
      for (Dataset dataset : client.listDatasets(request).iterateAll()) {
        // Display the dataset information
        System.out.format("\nDataset name: %s\n", dataset.getName());
        // To get the dataset id, you have to parse it out of the `name` field. As dataset Ids are
        // required for other methods.
        // Name Form: `projects/{project_id}/locations/{location_id}/datasets/{dataset_id}`
        String[] names = dataset.getName().split("/");
        String retrievedDatasetId = names[names.length - 1];
        System.out.format("Dataset id: %s\n", retrievedDatasetId);
        System.out.format("Dataset display name: %s\n", dataset.getDisplayName());
        System.out.println("Dataset create time:");
        System.out.format("\tseconds: %s\n", dataset.getCreateTime().getSeconds());
        System.out.format("\tnanos: %s\n", dataset.getCreateTime().getNanos());
        System.out.format(
            "Image classification dataset metadata: %s\n",
            dataset.getImageClassificationDatasetMetadata());
      }
    }
  }
}

Node.js

Prima di provare questo esempio, segui le istruzioni di configurazione per questa lingua nella Librerie client.

/**
 * TODO(developer): Uncomment these variables before running the sample.
 */
// const projectId = 'YOUR_PROJECT_ID';
// const location = 'us-central1';

// Imports the Google Cloud AutoML library
const {AutoMlClient} = require('@google-cloud/automl').v1;

// Instantiates a client
const client = new AutoMlClient();

async function listDatasets() {
  // Construct request
  const request = {
    parent: client.locationPath(projectId, location),
    filter: 'translation_dataset_metadata:*',
  };

  const [response] = await client.listDatasets(request);

  console.log('List of datasets:');
  for (const dataset of response) {
    console.log(`Dataset name: ${dataset.name}`);
    console.log(
      `Dataset id: ${
        dataset.name.split('/')[dataset.name.split('/').length - 1]
      }`
    );
    console.log(`Dataset display name: ${dataset.displayName}`);
    console.log('Dataset create time');
    console.log(`\tseconds ${dataset.createTime.seconds}`);
    console.log(`\tnanos ${dataset.createTime.nanos / 1e9}`);
    console.log(
      `Image classification dataset metadata: ${dataset.imageClassificationDatasetMetadata}`
    );
  }
}

listDatasets();

Python

Prima di provare questo esempio, segui le istruzioni di configurazione per questa lingua nella Librerie client.

from google.cloud import automl

# TODO(developer): Uncomment and set the following variables
# project_id = "YOUR_PROJECT_ID"

client = automl.AutoMlClient()
# A resource that represents Google Cloud Platform location.
project_location = f"projects/{project_id}/locations/us-central1"

# List all the datasets available in the region.
request = automl.ListDatasetsRequest(parent=project_location, filter="")
response = client.list_datasets(request=request)

print("List of datasets:")
for dataset in response:
    print(f"Dataset name: {dataset.name}")
    print("Dataset id: {}".format(dataset.name.split("/")[-1]))
    print(f"Dataset display name: {dataset.display_name}")
    print(f"Dataset create time: {dataset.create_time}")
    print(
        "Image classification dataset metadata: {}".format(
            dataset.image_classification_dataset_metadata
        )
    )

Linguaggi aggiuntivi

C#: Segui le Istruzioni per la configurazione di C# Nella pagina delle librerie client e poi visita Documentazione di riferimento di AutoML Vision per .NET.

PHP Segui le Istruzioni per la configurazione dei file PHP Nella pagina delle librerie client e poi visita Documentazione di riferimento di AutoML Vision per PHP.

Rubino: Segui le Istruzioni per la configurazione di Ruby Nella pagina delle librerie client e poi visita Documentazione di riferimento di AutoML Vision per Ruby.

Recupero di un set di dati

Puoi anche ottenere un set di dati specifico utilizzando un ID set di dati.

UI web

Per visualizzare un elenco dei set di dati disponibili utilizzando la UI di AutoML Vision, Fai clic sul link Set di dati in alto nel menu di navigazione a sinistra.

Pagina di elenco di set di dati

Per visualizzare i set di dati di un progetto diverso, selezionalo dal elenco a discesa sul lato sinistro della barra del titolo.

Accedi a un set di dati specifico selezionando il nome dall'elenco.

REST

Prima di utilizzare i dati della richiesta, effettua le seguenti sostituzioni:

  • project-id: l'ID del tuo progetto Google Cloud.
  • dataset-id: l'ID del set di dati. L'ID è l'ultimo elemento del nome del set di dati. Ad esempio:
    • nome set di dati: projects/project-id/locations/location-id/datasets/3104518874390609379
    • ID set di dati: 3104518874390609379

Metodo HTTP e URL:

GET https://automl.googleapis.com/v1/projects/PROJECT_ID/locations/us-central1/datasets/DATASET_ID

Per inviare la richiesta, scegli una delle seguenti opzioni:

curl

Esegui questo comando:

curl -X GET \
-H "Authorization: Bearer $(gcloud auth print-access-token)" \
-H "x-goog-user-project: project-id" \
"https://automl.googleapis.com/v1/projects/PROJECT_ID/locations/us-central1/datasets/DATASET_ID"

PowerShell

Esegui questo comando:

$cred = gcloud auth print-access-token
$headers = @{ "Authorization" = "Bearer $cred"; "x-goog-user-project" = "project-id" }

Invoke-WebRequest `
-Method GET `
-Headers $headers `
-Uri "https://automl.googleapis.com/v1/projects/PROJECT_ID/locations/us-central1/datasets/DATASET_ID" | Select-Object -Expand Content

Dovresti ricevere una risposta JSON simile alla seguente:

{
  "name": "projects/PROJECT_ID/locations/us-central1/datasets/DATASET_ID",
  "displayName": "DISPLAY_NAME",
  "createTime": "2019-10-29T17:31:12.010290Z",
  "etag": "AB3BwFoP09ffuRNnaWMx4UGi8uvYFctvOBjns84OercuMRIdXr0YINNiUqeW85SB3g4=",
  "exampleCount": 3667,
  "imageClassificationDatasetMetadata": {
    "classificationType": "MULTICLASS"
  }
}

Go

Prima di provare questo esempio, segui le istruzioni di configurazione per questa lingua nella Librerie client.

import (
	"context"
	"fmt"
	"io"

	automl "cloud.google.com/go/automl/apiv1"
	"cloud.google.com/go/automl/apiv1/automlpb"
)

// getDataset gets a dataset.
func getDataset(w io.Writer, projectID string, location string, datasetID string) error {
	// projectID := "my-project-id"
	// location := "us-central1"
	// datasetID := "TRL123456789..."

	ctx := context.Background()
	client, err := automl.NewClient(ctx)
	if err != nil {
		return fmt.Errorf("NewClient: %w", err)
	}
	defer client.Close()

	req := &automlpb.GetDatasetRequest{
		Name: fmt.Sprintf("projects/%s/locations/%s/datasets/%s", projectID, location, datasetID),
	}

	dataset, err := client.GetDataset(ctx, req)
	if err != nil {
		return fmt.Errorf("DeleteDataset: %w", err)
	}

	fmt.Fprintf(w, "Dataset name: %v\n", dataset.GetName())
	fmt.Fprintf(w, "Dataset display name: %v\n", dataset.GetDisplayName())
	fmt.Fprintf(w, "Dataset create time:\n")
	fmt.Fprintf(w, "\tseconds: %v\n", dataset.GetCreateTime().GetSeconds())
	fmt.Fprintf(w, "\tnanos: %v\n", dataset.GetCreateTime().GetNanos())

	// Vision classification
	if metadata := dataset.GetImageClassificationDatasetMetadata(); metadata != nil {
		fmt.Fprintf(w, "Image classification dataset metadata: %v\n", metadata)
	}

	return nil
}

Java

Prima di provare questo esempio, segui le istruzioni di configurazione per questa lingua nella Librerie client.

import com.google.cloud.automl.v1.AutoMlClient;
import com.google.cloud.automl.v1.Dataset;
import com.google.cloud.automl.v1.DatasetName;
import java.io.IOException;

class GetDataset {

  static void getDataset() throws IOException {
    // TODO(developer): Replace these variables before running the sample.
    String projectId = "YOUR_PROJECT_ID";
    String datasetId = "YOUR_DATASET_ID";
    getDataset(projectId, datasetId);
  }

  // Get a dataset
  static void getDataset(String projectId, String datasetId) throws IOException {
    // Initialize client that will be used to send requests. This client only needs to be created
    // once, and can be reused for multiple requests. After completing all of your requests, call
    // the "close" method on the client to safely clean up any remaining background resources.
    try (AutoMlClient client = AutoMlClient.create()) {
      // Get the complete path of the dataset.
      DatasetName datasetFullId = DatasetName.of(projectId, "us-central1", datasetId);
      Dataset dataset = client.getDataset(datasetFullId);

      // Display the dataset information
      System.out.format("Dataset name: %s\n", dataset.getName());
      // To get the dataset id, you have to parse it out of the `name` field. As dataset Ids are
      // required for other methods.
      // Name Form: `projects/{project_id}/locations/{location_id}/datasets/{dataset_id}`
      String[] names = dataset.getName().split("/");
      String retrievedDatasetId = names[names.length - 1];
      System.out.format("Dataset id: %s\n", retrievedDatasetId);
      System.out.format("Dataset display name: %s\n", dataset.getDisplayName());
      System.out.println("Dataset create time:");
      System.out.format("\tseconds: %s\n", dataset.getCreateTime().getSeconds());
      System.out.format("\tnanos: %s\n", dataset.getCreateTime().getNanos());
      System.out.format(
          "Image classification dataset metadata: %s\n",
          dataset.getImageClassificationDatasetMetadata());
    }
  }
}

Node.js

Prima di provare questo esempio, segui le istruzioni di configurazione per questa lingua nella Librerie client.

/**
 * TODO(developer): Uncomment these variables before running the sample.
 */
// const projectId = 'YOUR_PROJECT_ID';
// const location = 'us-central1';
// const datasetId = 'YOUR_DATASET_ID';

// Imports the Google Cloud AutoML library
const {AutoMlClient} = require('@google-cloud/automl').v1;

// Instantiates a client
const client = new AutoMlClient();

async function getDataset() {
  // Construct request
  const request = {
    name: client.datasetPath(projectId, location, datasetId),
  };

  const [response] = await client.getDataset(request);

  console.log(`Dataset name: ${response.name}`);
  console.log(
    `Dataset id: ${
      response.name.split('/')[response.name.split('/').length - 1]
    }`
  );
  console.log(`Dataset display name: ${response.displayName}`);
  console.log('Dataset create time');
  console.log(`\tseconds ${response.createTime.seconds}`);
  console.log(`\tnanos ${response.createTime.nanos / 1e9}`);
  console.log(
    `Image classification dataset metadata: ${response.imageClassificationDatasetMetadata}`
  );
}

getDataset();

Python

Prima di provare questo esempio, segui le istruzioni di configurazione per questa lingua nella Librerie client.

from google.cloud import automl

# TODO(developer): Uncomment and set the following variables
# project_id = "YOUR_PROJECT_ID"
# dataset_id = "YOUR_DATASET_ID"

client = automl.AutoMlClient()
# Get the full path of the dataset
dataset_full_id = client.dataset_path(project_id, "us-central1", dataset_id)
dataset = client.get_dataset(name=dataset_full_id)

# Display the dataset information
print(f"Dataset name: {dataset.name}")
print("Dataset id: {}".format(dataset.name.split("/")[-1]))
print(f"Dataset display name: {dataset.display_name}")
print(f"Dataset create time: {dataset.create_time}")
print(
    "Image classification dataset metadata: {}".format(
        dataset.image_classification_dataset_metadata
    )
)

Esporta un set di dati

Puoi esportare un file CSV con tutte le informazioni di un set di dati in un nel bucket Cloud Storage.

UI web

Per esportare un set di dati non vuoto, completa i seguenti passaggi:

  1. Seleziona il set di dati non vuoto dalla pagina Set di dati.

    Pagina di elenco di set di dati

    Se selezioni un set di dati non vuoto, visualizzerai Dettagli set di dati .

    Etichetta l'interfaccia utente delle immagini di addestramento

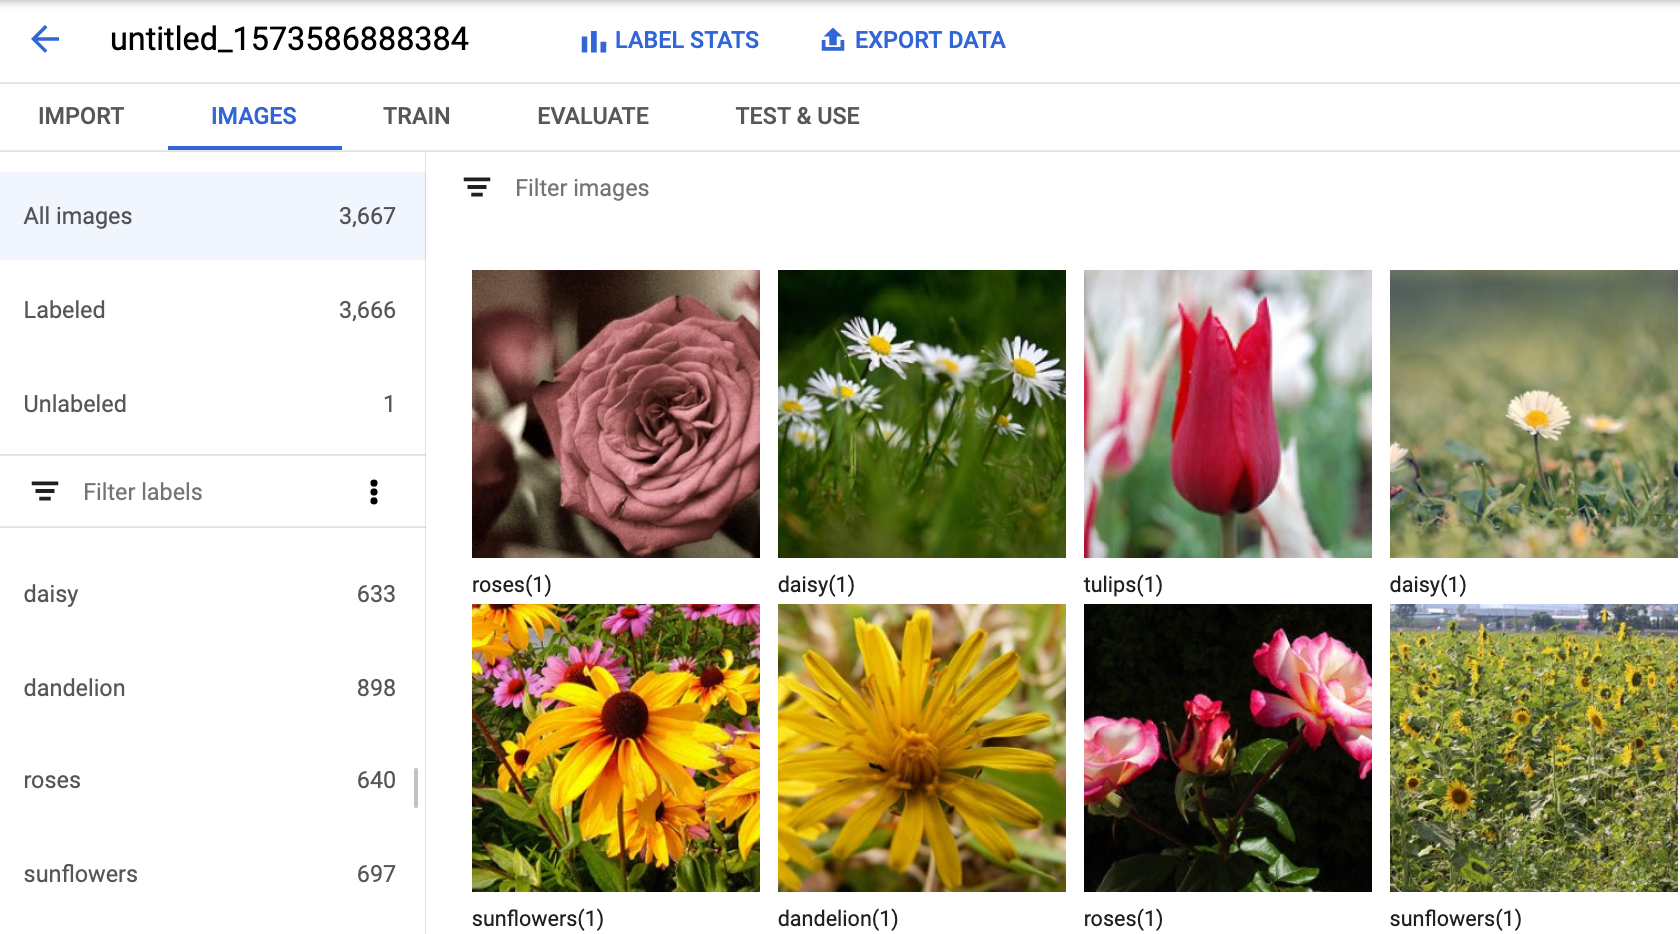
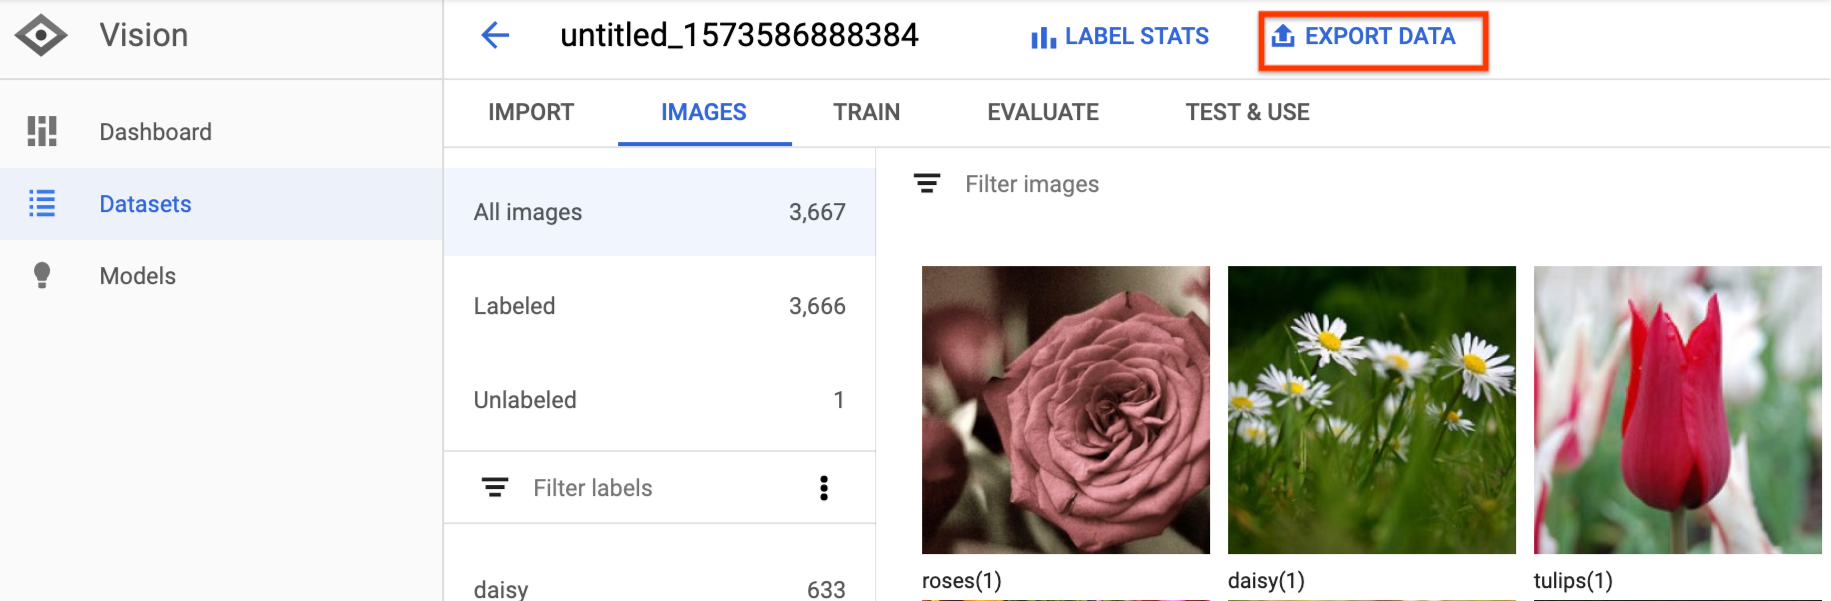
  2. Seleziona l'opzione Esporta dati nella parte superiore della pagina Dettagli del set di dati.

    pulsante esporta set di dati

    Si apre una finestra in cui scegli la località di un bucket Google Cloud Storage o crea un nuovo bucket e designarlo come posizione in cui archiviare il file CSV.

    finestra popout statistiche etichetta

  3. Seleziona Esporta CSV dopo aver selezionato un account Google Cloud nuovo o esistente. Località del bucket di archiviazione.

    pulsante esporta CSV

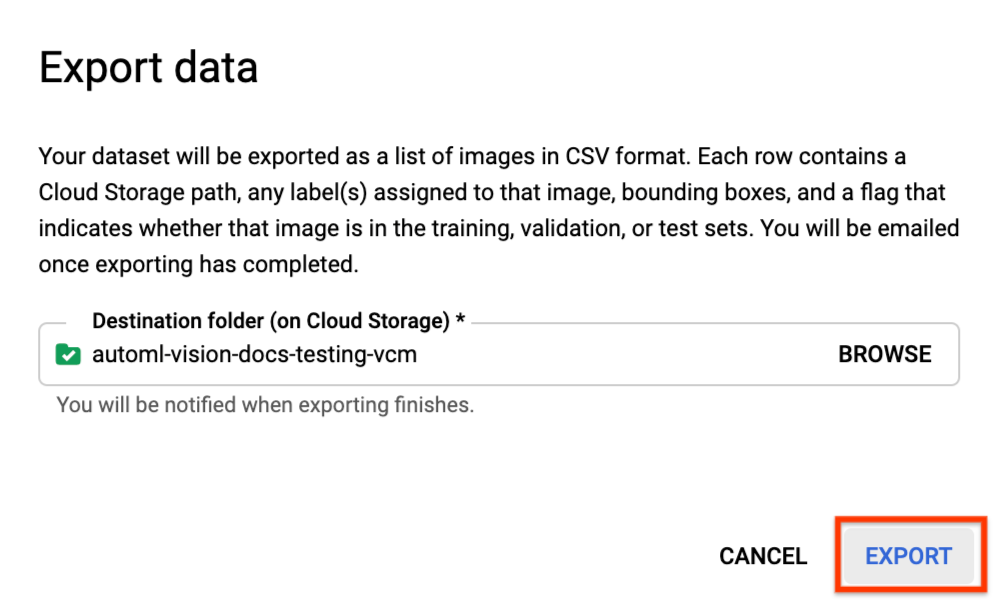
  4. Riceverai un'email al termine del processo di esportazione dei dati.

REST

Prima di utilizzare i dati della richiesta, effettua le seguenti sostituzioni:

  • project-id: l'ID del tuo progetto Google Cloud.
  • dataset-id: l'ID del set di dati. L'ID è l'ultimo elemento del nome del set di dati. Ad esempio:
    • nome set di dati: projects/project-id/locations/location-id/datasets/3104518874390609379
    • ID set di dati: 3104518874390609379
  • output-storage-bucket: uno Google Cloud Storage bucket/directory in cui salvare i file di output, espressi nel seguente formato: gs://bucket/directory/. L'utente che ha inviato la richiesta deve disporre dell'autorizzazione di scrittura per di sincronizzare la directory di una VM con un bucket.

Metodo HTTP e URL:

POST https://automl.googleapis.com/v1/projects/PROJECT_ID/locations/us-central1/datasets/DATASET_ID:exportData

Corpo JSON della richiesta:

{
  "outputConfig": {
    "gcsDestination": {
      "outputUriPrefix": "CLOUD_STORAGE_BUCKET"
    }
  }
}

Per inviare la richiesta, scegli una delle seguenti opzioni:

curl

Salva il corpo della richiesta in un file denominato request.json. ed esegui questo comando:

curl -X POST \
-H "Authorization: Bearer $(gcloud auth print-access-token)" \
-H "x-goog-user-project: project-id" \
-H "Content-Type: application/json; charset=utf-8" \
-d @request.json \
"https://automl.googleapis.com/v1/projects/PROJECT_ID/locations/us-central1/datasets/DATASET_ID:exportData"

PowerShell

Salva il corpo della richiesta in un file denominato request.json. ed esegui questo comando:

$cred = gcloud auth print-access-token
$headers = @{ "Authorization" = "Bearer $cred"; "x-goog-user-project" = "project-id" }

Invoke-WebRequest `
-Method POST `
-Headers $headers `
-ContentType: "application/json; charset=utf-8" `
-InFile request.json `
-Uri "https://automl.googleapis.com/v1/projects/PROJECT_ID/locations/us-central1/datasets/DATASET_ID:exportData" | Select-Object -Expand Content

Dovresti vedere un output simile al seguente. Puoi utilizzare l'ID operazione per ottenere lo stato dell'attività. Per un esempio, vedi Operazioni con operazioni a lunga esecuzione

{
  "name": "projects/PROJECT_ID/locations/us-central1/operations/OPERATION_ID",
  "metadata": {
    "@type": "type.googleapis.com/google.cloud.automl.v1.OperationMetadata",
    "createTime": "2019-08-12T18:52:31.637075Z",
    "updateTime": "2019-08-12T18:52:31.637075Z",
    "exportDataDetails": {
      "outputInfo": {
        "gcsOutputDirectory": "CLOUD_STORAGE_BUCKET/export_data-DATASET_NAME-TIMESTAMP_OF_EXPORT_CALL/"
      }
    }
  }
}

Java

Prima di provare questo esempio, segui le istruzioni di configurazione per questa lingua nella Librerie client.

import com.google.cloud.automl.v1.AutoMlClient;
import com.google.cloud.automl.v1.DatasetName;
import com.google.cloud.automl.v1.GcsDestination;
import com.google.cloud.automl.v1.OutputConfig;
import com.google.protobuf.Empty;
import java.io.IOException;
import java.util.concurrent.ExecutionException;

class ExportDataset {

  static void exportDataset() throws IOException, ExecutionException, InterruptedException {
    // TODO(developer): Replace these variables before running the sample.
    String projectId = "YOUR_PROJECT_ID";
    String datasetId = "YOUR_DATASET_ID";
    String gcsUri = "gs://BUCKET_ID/path_to_export/";
    exportDataset(projectId, datasetId, gcsUri);
  }

  // Export a dataset to a GCS bucket
  static void exportDataset(String projectId, String datasetId, String gcsUri)
      throws IOException, ExecutionException, InterruptedException {
    // Initialize client that will be used to send requests. This client only needs to be created
    // once, and can be reused for multiple requests. After completing all of your requests, call
    // the "close" method on the client to safely clean up any remaining background resources.
    try (AutoMlClient client = AutoMlClient.create()) {
      // Get the complete path of the dataset.
      DatasetName datasetFullId = DatasetName.of(projectId, "us-central1", datasetId);
      GcsDestination gcsDestination =
          GcsDestination.newBuilder().setOutputUriPrefix(gcsUri).build();

      // Export the dataset to the output URI.
      OutputConfig outputConfig =
          OutputConfig.newBuilder().setGcsDestination(gcsDestination).build();

      System.out.println("Processing export...");
      Empty response = client.exportDataAsync(datasetFullId, outputConfig).get();
      System.out.format("Dataset exported. %s\n", response);
    }
  }
}

Node.js

Prima di provare questo esempio, segui le istruzioni di configurazione per questa lingua nella Librerie client.

/**
 * TODO(developer): Uncomment these variables before running the sample.
 */
// const projectId = 'YOUR_PROJECT_ID';
// const location = 'us-central1';
// const datasetId = 'YOUR_DATASET_ID';
// const gcsUri = 'gs://BUCKET_ID/path_to_export/';

// Imports the Google Cloud AutoML library
const {AutoMlClient} = require('@google-cloud/automl').v1;

// Instantiates a client
const client = new AutoMlClient();

async function exportDataset() {
  // Construct request
  const request = {
    name: client.datasetPath(projectId, location, datasetId),
    outputConfig: {
      gcsDestination: {
        outputUriPrefix: gcsUri,
      },
    },
  };

  const [operation] = await client.exportData(request);
  // Wait for operation to complete.
  const [response] = await operation.promise();
  console.log(`Dataset exported: ${response}`);
}

exportDataset();

Python

Prima di provare questo esempio, segui le istruzioni di configurazione per questa lingua nella Librerie client.

from google.cloud import automl

# TODO(developer): Uncomment and set the following variables
# project_id = "YOUR_PROJECT_ID"
# dataset_id = "YOUR_DATASET_ID"
# gcs_uri = "gs://YOUR_BUCKET_ID/path/to/export/"

client = automl.AutoMlClient()

# Get the full path of the dataset
dataset_full_id = client.dataset_path(project_id, "us-central1", dataset_id)

gcs_destination = automl.GcsDestination(output_uri_prefix=gcs_uri)
output_config = automl.OutputConfig(gcs_destination=gcs_destination)

response = client.export_data(name=dataset_full_id, output_config=output_config)
print(f"Dataset exported. {response.result()}")

Formato CSV esportato

Il file CSV esportato contiene la stessa formattazione del CSV per l'importazione dei dati di addestramento:

set,path,label0[,label1,label2,...]

Il file CSV viene salvato in una cartella di esportazione creata, caratterizzata da un univoco. Di seguito sono riportate alcune righe di esempio di un file CSV esportato:

my-storage-bucket/export_data-my_dataset_name-2019-11-08T22:28:13.081Z/image_classification_1.csv:

TRAIN,gs://my-storage-bucket/export_data-my_dataset_name-2019-11-08T22:28:13.081Z/files/img874.jpg,dandelion
VALIDATION,gs://my-storage-bucket/export_data-my_dataset_name-2019-11-08T22:28:13.081Z/files/img447.jpg,roses
TRAIN,gs://my-storage-bucket/export_data-my_dataset_name-2019-11-08T22:28:13.081Z/files/img672.jpg,dandelion
VALIDATION,gs://my-storage-bucket/export_data-my_dataset_name-2019-11-08T22:28:13.081Z/files/img421.jpg,sunflowers
TRAIN,gs://my-storage-bucket/export_data-my_dataset_name-2019-11-08T22:28:13.081Z/files/img495.jpg,tulips
TEST,gs://my-storage-bucket/export_data-my_dataset_name-2019-11-08T22:28:13.081Z/files/img014.jpg,sunflowers

Eliminazione di un set di dati

Puoi eliminare un set di dati che non ti serve più nella UI o con tramite i seguenti esempi di codice.

UI web

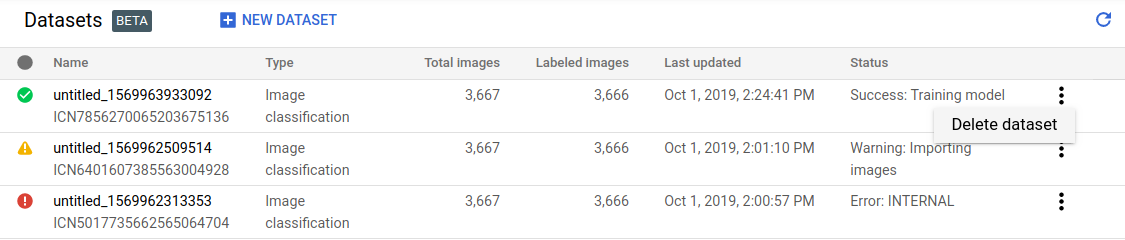
  1. In Vision Dashboard, fai clic sul link Datasets in alto nel menu di navigazione a sinistra per per visualizzare l'elenco dei set di dati disponibili.

  2. Fai clic sul menu con tre puntini all'estrema destra della riga che vuoi eliminare e Seleziona Elimina set di dati.

  3. Fai clic su Elimina nella finestra di dialogo di conferma.

    Pagina di elenco di set di dati

REST

Prima di utilizzare i dati della richiesta, effettua le seguenti sostituzioni:

  • project-id: l'ID del tuo progetto Google Cloud.
  • dataset-id: l'ID del set di dati. L'ID è l'ultimo elemento del nome del set di dati. Ad esempio:
    • nome set di dati: projects/project-id/locations/location-id/datasets/3104518874390609379
    • ID set di dati: 3104518874390609379

Metodo HTTP e URL:

DELETE https://automl.googleapis.com/v1/projects/PROJECT_ID/locations/us-central1/datasets/DATASET_ID

Per inviare la richiesta, scegli una delle seguenti opzioni:

curl

Esegui questo comando:

curl -X DELETE \
-H "Authorization: Bearer $(gcloud auth print-access-token)" \
-H "x-goog-user-project: project-id" \
"https://automl.googleapis.com/v1/projects/PROJECT_ID/locations/us-central1/datasets/DATASET_ID"

PowerShell

Esegui questo comando:

$cred = gcloud auth print-access-token
$headers = @{ "Authorization" = "Bearer $cred"; "x-goog-user-project" = "project-id" }

Invoke-WebRequest `
-Method DELETE `
-Headers $headers `
-Uri "https://automl.googleapis.com/v1/projects/PROJECT_ID/locations/us-central1/datasets/DATASET_ID" | Select-Object -Expand Content

Dovresti vedere un output simile al seguente. Puoi utilizzare l'ID operazione per ottenere lo stato dell'attività. Per un esempio, vedi Operazioni con operazioni a lunga esecuzione

{
  "name": "projects/PROJECT_ID/locations/us-central1/operations/OPERATION_ID",
  "metadata": {
    "@type": "type.googleapis.com/google.cloud.automl.v1.OperationMetadata",
    "createTime": "2019-11-08T22:37:19.822128Z",
    "updateTime": "2019-11-08T22:37:19.822128Z",
    "deleteDetails": {}
  },
  "done": true,
  "response": {
    "@type": "type.googleapis.com/google.protobuf.Empty"
  }
}

Go

Prima di provare questo esempio, segui le istruzioni di configurazione per questa lingua nella Librerie client.

import (
	"context"
	"fmt"
	"io"

	automl "cloud.google.com/go/automl/apiv1"
	"cloud.google.com/go/automl/apiv1/automlpb"
)

// deleteDataset deletes a dataset.
func deleteDataset(w io.Writer, projectID string, location string, datasetID string) error {
	// projectID := "my-project-id"
	// location := "us-central1"
	// datasetID := "TRL123456789..."

	ctx := context.Background()
	client, err := automl.NewClient(ctx)
	if err != nil {
		return fmt.Errorf("NewClient: %w", err)
	}
	defer client.Close()

	req := &automlpb.DeleteDatasetRequest{
		Name: fmt.Sprintf("projects/%s/locations/%s/datasets/%s", projectID, location, datasetID),
	}

	op, err := client.DeleteDataset(ctx, req)
	if err != nil {
		return fmt.Errorf("DeleteDataset: %w", err)
	}
	fmt.Fprintf(w, "Processing operation name: %q\n", op.Name())

	if err := op.Wait(ctx); err != nil {
		return fmt.Errorf("Wait: %w", err)
	}

	fmt.Fprintf(w, "Dataset deleted.\n")

	return nil
}

Java

Prima di provare questo esempio, segui le istruzioni di configurazione per questa lingua nella Librerie client.

import com.google.cloud.automl.v1.AutoMlClient;
import com.google.cloud.automl.v1.DatasetName;
import com.google.protobuf.Empty;
import java.io.IOException;
import java.util.concurrent.ExecutionException;

class DeleteDataset {

  static void deleteDataset() throws IOException, ExecutionException, InterruptedException {
    // TODO(developer): Replace these variables before running the sample.
    String projectId = "YOUR_PROJECT_ID";
    String datasetId = "YOUR_DATASET_ID";
    deleteDataset(projectId, datasetId);
  }

  // Delete a dataset
  static void deleteDataset(String projectId, String datasetId)
      throws IOException, ExecutionException, InterruptedException {
    // Initialize client that will be used to send requests. This client only needs to be created
    // once, and can be reused for multiple requests. After completing all of your requests, call
    // the "close" method on the client to safely clean up any remaining background resources.
    try (AutoMlClient client = AutoMlClient.create()) {
      // Get the full path of the dataset.
      DatasetName datasetFullId = DatasetName.of(projectId, "us-central1", datasetId);
      Empty response = client.deleteDatasetAsync(datasetFullId).get();
      System.out.format("Dataset deleted. %s\n", response);
    }
  }
}

Node.js

Prima di provare questo esempio, segui le istruzioni di configurazione per questa lingua nella Librerie client.

/**
 * TODO(developer): Uncomment these variables before running the sample.
 */
// const projectId = 'YOUR_PROJECT_ID';
// const location = 'us-central1';
// const datasetId = 'YOUR_DATASET_ID';

// Imports the Google Cloud AutoML library
const {AutoMlClient} = require('@google-cloud/automl').v1;

// Instantiates a client
const client = new AutoMlClient();

async function deleteDataset() {
  // Construct request
  const request = {
    name: client.datasetPath(projectId, location, datasetId),
  };

  const [operation] = await client.deleteDataset(request);

  // Wait for operation to complete.
  const [response] = await operation.promise();
  console.log(`Dataset deleted: ${response}`);
}

deleteDataset();

Python

Prima di provare questo esempio, segui le istruzioni di configurazione per questa lingua nella Librerie client.

from google.cloud import automl

# TODO(developer): Uncomment and set the following variables
# project_id = "YOUR_PROJECT_ID"
# dataset_id = "YOUR_DATASET_ID"

client = automl.AutoMlClient()
# Get the full path of the dataset
dataset_full_id = client.dataset_path(project_id, "us-central1", dataset_id)
response = client.delete_dataset(name=dataset_full_id)

print(f"Dataset deleted. {response.result()}")