Gestione dei modelli

Un modello viene addestrato utilizzando un set di dati preparato che fornisci. AutoML Video Intelligence Object Tracking utilizza gli elementi del tuo set di dati per addestrare, testare e valutare le prestazioni del modello. Quindi, devi rivedere i risultati, modificare il set di dati di addestramento in base alle esigenze e addestra un nuovo modello usando il set di dati migliorato

L'addestramento di un modello può richiedere diverse ore. L'API AutoML consente di controllare lo stato dell'addestramento.

Poiché AutoML Video Intelligence Object Tracking crea un nuovo modello ogni volta che avvii l'addestramento, il progetto può includere numerosi modelli. Puoi ottenere un dei modelli nel tuo progetto e può eliminare i modelli che non ti servono più.

La durata massima di un modello è di due anni. Devi creare e addestrare un nuovo modello per continuare a tracciare oggetti dopo questo periodo di tempo.

Utilizzo di curl o PowerShell

Per semplificare l’esecuzione degli esempi curl (o PowerShell) in questo , imposta la seguente variabile di ambiente. Sostituisci project-id con il nome del tuo progetto Google Cloud.

export PROJECT_ID="project-id"

Addestramento dei modelli

Se hai un set di dati con un solido insieme di elementi di addestramento etichettati, puoi creare e addestrare il modello.

UI web

  1. Apri l'app UI di monitoraggio degli oggetti video AutoML e vai alla pagina Set di dati.

    Pagina Set di dati nella console Google Cloud
  2. Seleziona il set di dati che vuoi utilizzare per addestrare il tuo un modello di machine learning.

    Il nome visualizzato del set di dati selezionato è riportato nel titolo e la pagina elenca i singoli elementi nel set di dati insieme alle relative etichette.

    Scheda Video con due video visualizzati
  3. Quando hai finito di rivedere il set di dati, fai clic Scheda Addestra appena sotto la barra del titolo.

    La pagina di addestramento fornisce un'analisi di base del set di dati ti consiglia se è adeguato per la formazione. Se AutoML Video Object Tracking suggerisce le modifiche. Valuta la possibilità di tornare a la pagina Video e l'aggiunta di elementi o etichette.

  4. Quando il set di dati è pronto, fai clic su Avvia addestramento. per creare un nuovo modello o addestrare modello se vuoi crearne un altro.

REST

Prima di utilizzare i dati della richiesta, effettua le seguenti sostituzioni:

  • dataset-id: il nome del set di dati di destinazione. Ad esempio, my_dataset_01 il nome visualizzato).
  • model-name: sostituisci con un nome a tua scelta per il modello.
  • Nota:
    • project-number: il numero del progetto
    • location-id: la regione Cloud in cui l'annotazione deve avvenire. Le regioni cloud supportate sono: us-east1, us-west1, europe-west1, asia-east1. Se non viene specificata alcuna regione, viene verrà determinato in base alla posizione del file video.

Metodo HTTP e URL:

POST https://automl.googleapis.com/v1beta1/projects/project-number/locations/location-id/models

Corpo JSON della richiesta:

{
  "datasetId": "dataset-id",
  "displayName": "model-name",
  "videoObjectTrackingModelMetadata": {},
}

Per inviare la richiesta, scegli una delle seguenti opzioni:

curl

Salva il corpo della richiesta in un file denominato request.json. ed esegui questo comando:

curl -X POST \
-H "Authorization: Bearer $(gcloud auth print-access-token)" \
-H "x-goog-user-project: project-number" \
-H "Content-Type: application/json; charset=utf-8" \
-d @request.json \
"https://automl.googleapis.com/v1beta1/projects/project-number/locations/location-id/models"

PowerShell

Salva il corpo della richiesta in un file denominato request.json. ed esegui questo comando:

$cred = gcloud auth print-access-token
$headers = @{ "Authorization" = "Bearer $cred"; "x-goog-user-project" = "project-number" }

Invoke-WebRequest `
-Method POST `
-Headers $headers `
-ContentType: "application/json; charset=utf-8" `
-InFile request.json `
-Uri "https://automl.googleapis.com/v1beta1/projects/project-number/locations/location-id/models" | Select-Object -Expand Content
Dovresti ricevere un ID operazione per l'operazione di addestramento del modello. La l'esempio riportato sopra mostra una risposta contenente l'operazione di addestramento del modello ID VOT1741767155885539328.

Java

Per eseguire l'autenticazione ad AutoML Video Object Tracking, configura le credenziali predefinite dell'applicazione. Per ulteriori informazioni, vedi Configura l'autenticazione per un ambiente di sviluppo locale.

import com.google.api.gax.longrunning.OperationFuture;
import com.google.cloud.automl.v1beta1.AutoMlClient;
import com.google.cloud.automl.v1beta1.LocationName;
import com.google.cloud.automl.v1beta1.Model;
import com.google.cloud.automl.v1beta1.OperationMetadata;
import com.google.cloud.automl.v1beta1.VideoObjectTrackingModelMetadata;
import java.io.IOException;
import java.util.concurrent.ExecutionException;

class VideoObjectTrackingCreateModel {

  public static void main(String[] args)
      throws IOException, ExecutionException, InterruptedException {
    // TODO(developer): Replace these variables before running the sample.
    String projectId = "YOUR_PROJECT_ID";
    String datasetId = "YOUR_DATASET_ID";
    String displayName = "YOUR_DATASET_NAME";
    createModel(projectId, datasetId, displayName);
  }

  // Create a model
  static void createModel(String projectId, String datasetId, String displayName)
      throws IOException, ExecutionException, InterruptedException {
    // Initialize client that will be used to send requests. This client only needs to be created
    // once, and can be reused for multiple requests. After completing all of your requests, call
    // the "close" method on the client to safely clean up any remaining background resources.
    try (AutoMlClient client = AutoMlClient.create()) {
      // A resource that represents Google Cloud Platform location.
      LocationName projectLocation = LocationName.of(projectId, "us-central1");
      // Set model metadata.
      VideoObjectTrackingModelMetadata metadata =
          VideoObjectTrackingModelMetadata.newBuilder().build();
      Model model =
          Model.newBuilder()
              .setDisplayName(displayName)
              .setDatasetId(datasetId)
              .setVideoObjectTrackingModelMetadata(metadata)
              .build();

      // Create a model with the model metadata in the region.
      OperationFuture<Model, OperationMetadata> future =
          client.createModelAsync(projectLocation, model);
      // OperationFuture.get() will block until the model is created, which may take several hours.
      // You can use OperationFuture.getInitialFuture to get a future representing the initial
      // response to the request, which contains information while the operation is in progress.
      System.out.format("Training operation name: %s%n", future.getInitialFuture().get().getName());
      System.out.println("Training started...");
    }
  }
}

Node.js

Per eseguire l'autenticazione ad AutoML Video Object Tracking, configura le credenziali predefinite dell'applicazione. Per ulteriori informazioni, vedi Configura l'autenticazione per un ambiente di sviluppo locale.

/**
 * TODO(developer): Uncomment these variables before running the sample.
 */
// const projectId = 'YOUR_PROJECT_ID';
// const location = 'us-central1';
// const dataset_id = 'YOUR_DATASET_ID';
// const displayName = 'YOUR_DISPLAY_NAME';

// Imports the Google Cloud AutoML library
const {AutoMlClient} = require('@google-cloud/automl').v1beta1;

// Instantiates a client
const client = new AutoMlClient();

async function createModel() {
  // Construct request
  const request = {
    parent: client.locationPath(projectId, location),
    model: {
      displayName: displayName,
      datasetId: datasetId,
      videoObjectTrackingModelMetadata: {},
    },
  };

  // Don't wait for the LRO
  const [operation] = await client.createModel(request);
  console.log(`Training started... ${operation}`);
  console.log(`Training operation name: ${operation.name}`);
}

createModel();

Python

Per eseguire l'autenticazione ad AutoML Video Object Tracking, configura le credenziali predefinite dell'applicazione. Per ulteriori informazioni, vedi Configura l'autenticazione per un ambiente di sviluppo locale.

from google.cloud import automl_v1beta1 as automl


def create_model(
    project_id="YOUR_PROJECT_ID",
    dataset_id="YOUR_DATASET_ID",
    display_name="your_models_display_name",
):
    """Create a automl video classification model."""
    client = automl.AutoMlClient()

    # A resource that represents Google Cloud Platform loacation.
    project_location = f"projects/{project_id}/locations/us-central1"
    # Leave model unset to use the default base model provided by Google
    metadata = automl.VideoObjectTrackingModelMetadata()
    model = automl.Model(
        display_name=display_name,
        dataset_id=dataset_id,
        video_object_tracking_model_metadata=metadata,
    )

    # Create a model with the model metadata in the region.
    response = client.create_model(parent=project_location, model=model)

    print(f"Training operation name: {response.operation.name}")
    print("Training started...")

Recuperare lo stato di un'operazione

Puoi controllare lo stato di un'attività di lunga durata come importare elementi in un set di dati o addestrare un modello utilizzando L'ID operazione dalla risposta all'avvio dell'attività.

REST

Prima di utilizzare i dati della richiesta, effettua le seguenti sostituzioni:

  • operation-id: l'ID dell'operazione a lunga esecuzione creata della richiesta e fornito nella risposta quando hai avviato operativa, ad esempio VOT12345....
  • Nota:
    • project-number: il numero del progetto
    • location-id: la regione Cloud in cui l'annotazione deve avvenire. Le regioni cloud supportate sono: us-east1, us-west1, europe-west1, asia-east1. Se non viene specificata alcuna regione, viene verrà determinato in base alla posizione del file video.

Metodo HTTP e URL:

GET https://automl.googleapis.com/v1beta1/projects/project-number/locations/location-id/operations/operation-id

Per inviare la richiesta, scegli una delle seguenti opzioni:

curl

Esegui questo comando:

curl -X GET \
-H "Authorization: Bearer $(gcloud auth print-access-token)" \
-H "x-goog-user-project: project-number" \
"https://automl.googleapis.com/v1beta1/projects/project-number/locations/location-id/operations/operation-id"

PowerShell

Esegui questo comando:

$cred = gcloud auth print-access-token
$headers = @{ "Authorization" = "Bearer $cred"; "x-goog-user-project" = "project-number" }

Invoke-WebRequest `
-Method GET `
-Headers $headers `
-Uri "https://automl.googleapis.com/v1beta1/projects/project-number/locations/location-id/operations/operation-id" | Select-Object -Expand Content
Il completamento dell'operazione di importazione può richiedere del tempo. Al termine dell'attività di importazione, l'operazione mostra done: true senza errori, come mostrato nell'esempio precedente.
  • operation-name: il nome dell'operazione come restituiti dall'API AutoML Video Intelligence Object Tracking. Il nome dell'operazione ha il formato projects/project-number/locations/location-id/operations/operation-id

Java

Per eseguire l'autenticazione ad AutoML Video Object Tracking, configura le credenziali predefinite dell'applicazione. Per ulteriori informazioni, vedi Configura l'autenticazione per un ambiente di sviluppo locale.

import com.google.cloud.automl.v1beta1.AutoMlClient;
import com.google.longrunning.Operation;
import java.io.IOException;

class GetOperationStatus {

  static void getOperationStatus() throws IOException {
    // TODO(developer): Replace these variables before running the sample.
    String operationFullId = "projects/[projectId]/locations/us-central1/operations/[operationId]";
    getOperationStatus(operationFullId);
  }

  // Get the status of an operation
  static void getOperationStatus(String operationFullId) throws IOException {
    // Initialize client that will be used to send requests. This client only needs to be created
    // once, and can be reused for multiple requests. After completing all of your requests, call
    // the "close" method on the client to safely clean up any remaining background resources.
    try (AutoMlClient client = AutoMlClient.create()) {
      // Get the latest state of a long-running operation.
      Operation operation = client.getOperationsClient().getOperation(operationFullId);

      // Display operation details.
      System.out.println("Operation details:");
      System.out.format("\tName: %s%n", operation.getName());
      System.out.format("\tMetadata Type Url: %s%n", operation.getMetadata().getTypeUrl());
      System.out.format("\tDone: %s%n", operation.getDone());
      if (operation.hasResponse()) {
        System.out.format("\tResponse Type Url: %s%n", operation.getResponse().getTypeUrl());
      }
      if (operation.hasError()) {
        System.out.println("\tResponse:");
        System.out.format("\t\tError code: %s%n", operation.getError().getCode());
        System.out.format("\t\tError message: %s%n", operation.getError().getMessage());
      }
    }
  }
}

Node.js

Per eseguire l'autenticazione ad AutoML Video Object Tracking, configura le credenziali predefinite dell'applicazione. Per ulteriori informazioni, vedi Configura l'autenticazione per un ambiente di sviluppo locale.

/**
 * TODO(developer): Uncomment these variables before running the sample.
 */
// const projectId = 'YOUR_PROJECT_ID';
// const location = 'us-central1';
// const operationId = 'YOUR_OPERATION_ID';

// Imports the Google Cloud AutoML library
const {AutoMlClient} = require('@google-cloud/automl').v1beta1;

// Instantiates a client
const client = new AutoMlClient();

async function getOperationStatus() {
  // Construct request
  const request = {
    name: `projects/${projectId}/locations/${location}/operations/${operationId}`,
  };

  const [response] = await client.operationsClient.getOperation(request);

  console.log(`Name: ${response.name}`);
  console.log('Operation details:');
  console.log(response);
}

getOperationStatus();

Python

Per eseguire l'autenticazione ad AutoML Video Object Tracking, configura le credenziali predefinite dell'applicazione. Per ulteriori informazioni, vedi Configura l'autenticazione per un ambiente di sviluppo locale.

from google.cloud import automl_v1beta1 as automl


def get_operation_status(
    operation_full_id="projects/YOUR_PROJECT_ID/locations/us-central1/"
    "operations/YOUR_OPERATION_ID",
):
    """Get operation status."""
    client = automl.AutoMlClient()

    # Get the latest state of a long-running operation.
    response = client._transport.operations_client.get_operation(operation_full_id)

    print(f"Name: {response.name}")
    print("Operation details:")
    print(response)

Annullamento di un'operazione

Puoi annullare un'attività di importazione, addestramento o previsione in batch utilizzando l'ID operazione.

REST

Prima di utilizzare i dati della richiesta, effettua le seguenti sostituzioni:

  • operation id: fornito nella risposta quando hai avviato l'operazione, ad esempio VOT123...
  • Nota:
    • project-id: l'ID del tuo progetto Google Cloud
    • location-id: la regione Cloud in cui l'annotazione deve avvenire. Le regioni cloud supportate sono: us-east1, us-west1, europe-west1, asia-east1. Se non viene specificata alcuna regione, viene verrà determinato in base alla posizione del file video.

Metodo HTTP e URL:

POST https://automl.googleapis.com/v1beta1/projects/project-id/locations/location-id/operations/operation-id:cancel

Per inviare la richiesta, espandi una delle seguenti opzioni:

Dovresti ricevere un codice di stato di operazione riuscita (2xx) e una risposta vuota.

Java

Per eseguire l'autenticazione ad AutoML Video Object Tracking, configura le credenziali predefinite dell'applicazione. Per ulteriori informazioni, vedi Configura l'autenticazione per un ambiente di sviluppo locale.


import com.google.cloud.automl.v1beta1.AutoMlClient;
import io.grpc.StatusRuntimeException;
import java.io.IOException;

class CancelOperation {

  static void cancelOperation() throws IOException, InterruptedException, StatusRuntimeException {
    // TODO(developer): Replace these variables before running the sample.
    String projectId = "YOUR_PROJECT_ID";
    String location = "us-central1";
    String operationId = "YOUR_OPERATION_ID";
    String operationFullId =
        String.format("projects/%s/locations/%s/operations/%s", projectId, location, operationId);
    cancelOperation(operationFullId);
  }

  static void cancelOperation(String operationFullId)
      throws IOException, InterruptedException, StatusRuntimeException {
    // Initialize client that will be used to send requests. This client only needs to be created
    // once, and can be reused for multiple requests. After completing all of your requests, call
    // the "close" method on the client to safely clean up any remaining background resources.
    try (AutoMlClient client = AutoMlClient.create()) {
      client.getOperationsClient().cancelOperation(operationFullId);
      System.out.println("Operation cancelled");
    }
  }
}

Recupero delle informazioni su un modello

Al termine dell'addestramento, potrai ottenere informazioni sul modello appena creato.

Gli esempi in questa sezione restituiscono i metadati di base relativi a un un modello di machine learning. Per ottenere dettagli su accuratezza e idoneità di un modello, consulta Valutazione dei modelli.

UI web

  1. Vai alla pagina Modelli nella UI di monitoraggio degli oggetti video AutoML.

    <img <="" alt="Pagina Modelli con un modello mostrato" class=&quot;screenshot&quot; li=&quot;&quot; src=&quot;/static/video-intelligence/automl/object-tracking/docs/images/list_models.png&quot; />
  2. Fai clic sul nome del modello che vuoi visualizzare.

REST

Prima di utilizzare i dati della richiesta, effettua le seguenti sostituzioni:

  • model-id:l'ID del modello deriva dalla risposta al momento della creazione del modello. L'ID è l'ultimo elemento del nome del modello. Ad esempio:
    • nome del modello: projects/project-number/locations/location-id/models/model-id
    • ID modello: model-id
  • dataset-id: sostituisci con l'identificatore del set di dati per il tuo set di dati (non il nome visualizzato). Ad esempio: VOT3940649673949184000
  • project-number: il numero del tuo progetto

Metodo HTTP e URL:

GET https://automl.googleapis.com/v1beta1/projects/project-id/locations/location-id/models/model-id

Corpo JSON della richiesta:

{
  "displayName": "display-name",
  "dataset_id": "dataset-id",
  "videoClassificationModelMetadata": {}
}

Per inviare la richiesta, espandi una delle seguenti opzioni:

Dovresti ricevere una risposta JSON simile alla seguente:

Java

Per eseguire l'autenticazione ad AutoML Video Object Tracking, configura le credenziali predefinite dell'applicazione. Per ulteriori informazioni, vedi Configura l'autenticazione per un ambiente di sviluppo locale.

import com.google.cloud.automl.v1beta1.AutoMlClient;
import com.google.cloud.automl.v1beta1.Model;
import com.google.cloud.automl.v1beta1.ModelName;
import io.grpc.StatusRuntimeException;
import java.io.IOException;

class GetModel {

  static void getModel() throws IOException, StatusRuntimeException {
    // TODO(developer): Replace these variables before running the sample.
    String projectId = "YOUR_PROJECT_ID";
    String modelId = "YOUR_MODEL_ID";
    getModel(projectId, modelId);
  }

  // Get a model
  static void getModel(String projectId, String modelId)
      throws IOException, StatusRuntimeException {
    // Initialize client that will be used to send requests. This client only needs to be created
    // once, and can be reused for multiple requests. After completing all of your requests, call
    // the "close" method on the client to safely clean up any remaining background resources.
    try (AutoMlClient client = AutoMlClient.create()) {
      // Get the full path of the model.
      ModelName modelFullId = ModelName.of(projectId, "us-central1", modelId);
      Model model = client.getModel(modelFullId);

      // Display the model information.
      System.out.format("Model name: %s%n", model.getName());
      // To get the model id, you have to parse it out of the `name` field. As models Ids are
      // required for other methods.
      // Name Format: `projects/{project_id}/locations/{location_id}/models/{model_id}`
      String[] names = model.getName().split("/");
      String retrievedModelId = names[names.length - 1];
      System.out.format("Model id: %s%n", retrievedModelId);
      System.out.format("Model display name: %s%n", model.getDisplayName());
      System.out.println("Model create time:");
      System.out.format("\tseconds: %s%n", model.getCreateTime().getSeconds());
      System.out.format("\tnanos: %s%n", model.getCreateTime().getNanos());
      System.out.format("Model deployment state: %s%n", model.getDeploymentState());
    }
  }
}

Node.js

Per eseguire l'autenticazione ad AutoML Video Object Tracking, configura le credenziali predefinite dell'applicazione. Per ulteriori informazioni, vedi Configura l'autenticazione per un ambiente di sviluppo locale.

/**
 * TODO(developer): Uncomment these variables before running the sample.
 */
// const projectId = 'YOUR_PROJECT_ID';
// const location = 'us-central1';
// const modelId = 'YOUR_MODEL_ID';

// Imports the Google Cloud AutoML library
const {AutoMlClient} = require('@google-cloud/automl').v1beta1;

// Instantiates a client
const client = new AutoMlClient();

async function getModel() {
  // Construct request
  const request = {
    name: client.modelPath(projectId, location, modelId),
  };

  const [response] = await client.getModel(request);

  console.log(`Model name: ${response.name}`);
  console.log(
    `Model id: ${
      response.name.split('/')[response.name.split('/').length - 1]
    }`
  );
  console.log(`Model display name: ${response.displayName}`);
  console.log('Model create time');
  console.log(`\tseconds ${response.createTime.seconds}`);
  console.log(`\tnanos ${response.createTime.nanos / 1e9}`);
  console.log(`Model deployment state: ${response.deploymentState}`);
}

getModel();

Python

Per eseguire l'autenticazione ad AutoML Video Object Tracking, configura le credenziali predefinite dell'applicazione. Per ulteriori informazioni, vedi Configura l'autenticazione per un ambiente di sviluppo locale.

from google.cloud import automl_v1beta1 as automl

# TODO(developer): Uncomment and set the following variables
# project_id = "YOUR_PROJECT_ID"
# model_id = "YOUR_MODEL_ID"

client = automl.AutoMlClient()
# Get the full path of the model.
model_full_id = client.model_path(project_id, "us-central1", model_id)
model = client.get_model(name=model_full_id)

# Retrieve deployment state.
if model.deployment_state == automl.Model.DeploymentState.DEPLOYED:
    deployment_state = "deployed"
else:
    deployment_state = "undeployed"

# Display the model information.
print(f"Model name: {model.name}")
print("Model id: {}".format(model.name.split("/")[-1]))
print(f"Model display name: {model.display_name}")
print(f"Model create time: {model.create_time}")
print(f"Model deployment state: {deployment_state}")

Elenco dei modelli

Un progetto può includere numerosi modelli. Questa sezione descrive come recuperare un dei modelli disponibili per un progetto.

UI web

Vai alla pagina Modelli nella UI di monitoraggio degli oggetti video AutoML per vedere i modelli nel tuo progetto.

Pagina Modelli con un modello nell&#39;elenco

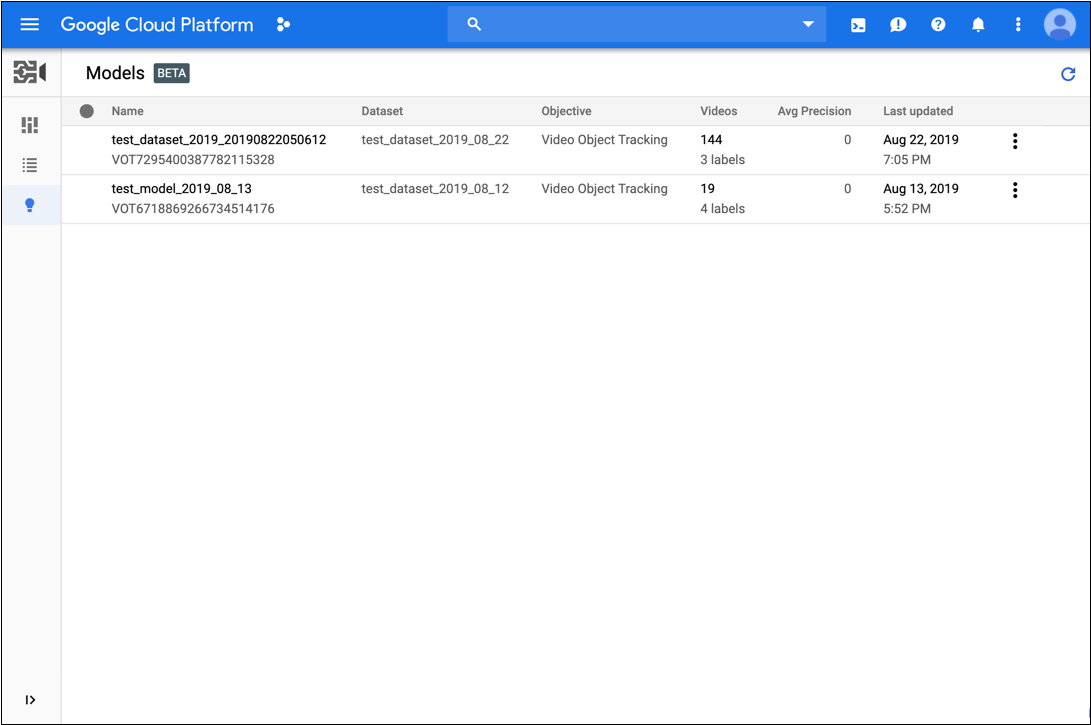
Per vedere i modelli di un altro progetto, seleziona il progetto dal nell'elenco a discesa in alto a destra della barra del titolo.

REST

Prima di utilizzare i dati della richiesta, effettua le seguenti sostituzioni:

  • project-number: il numero del tuo progetto
  • location-id: la regione Cloud in cui deve essere eseguita l'annotazione posto. Le regioni cloud supportate sono: us-east1, us-west1, europe-west1, asia-east1. Se nessuna regione è specificata, verrà determinata una regione in base alla posizione del file video.

Metodo HTTP e URL:

GET https://automl.googleapis.com/v1beta1/projects/project-number/locations/location-id/models

Per inviare la richiesta, espandi una delle seguenti opzioni:

Dovresti ricevere una risposta JSON simile alla seguente:

Java

Per eseguire l'autenticazione ad AutoML Video Object Tracking, configura le credenziali predefinite dell'applicazione. Per ulteriori informazioni, vedi Configura l'autenticazione per un ambiente di sviluppo locale.

import com.google.cloud.automl.v1beta1.AutoMlClient;
import com.google.cloud.automl.v1beta1.ListModelsRequest;
import com.google.cloud.automl.v1beta1.LocationName;
import com.google.cloud.automl.v1beta1.Model;
import java.io.IOException;

class ListModels {

  static void listModels() throws IOException {
    // TODO(developer): Replace these variables before running the sample.
    String projectId = "YOUR_PROJECT_ID";
    listModels(projectId);
  }

  // List the models available in the specified location
  static void listModels(String projectId) throws IOException {
    // Initialize client that will be used to send requests. This client only needs to be created
    // once, and can be reused for multiple requests. After completing all of your requests, call
    // the "close" method on the client to safely clean up any remaining background resources.
    try (AutoMlClient client = AutoMlClient.create()) {
      // A resource that represents Google Cloud Platform location.
      LocationName projectLocation = LocationName.of(projectId, "us-central1");

      // Create list models request.
      ListModelsRequest listModelsRequest =
          ListModelsRequest.newBuilder()
              .setParent(projectLocation.toString())
              .setFilter("")
              .build();

      // List all the models available in the region by applying filter.
      System.out.println("List of models:");
      for (Model model : client.listModels(listModelsRequest).iterateAll()) {
        // Display the model information.
        System.out.format("Model name: %s%n", model.getName());
        // To get the model id, you have to parse it out of the `name` field. As models Ids are
        // required for other methods.
        // Name Format: `projects/{project_id}/locations/{location_id}/models/{model_id}`
        String[] names = model.getName().split("/");
        String retrievedModelId = names[names.length - 1];
        System.out.format("Model id: %s%n", retrievedModelId);
        System.out.format("Model display name: %s%n", model.getDisplayName());
        System.out.println("Model create time:");
        System.out.format("\tseconds: %s%n", model.getCreateTime().getSeconds());
        System.out.format("\tnanos: %s%n", model.getCreateTime().getNanos());
        System.out.format("Model deployment state: %s%n", model.getDeploymentState());
      }
    }
  }
}

Node.js

Per eseguire l'autenticazione ad AutoML Video Object Tracking, configura le credenziali predefinite dell'applicazione. Per ulteriori informazioni, vedi Configura l'autenticazione per un ambiente di sviluppo locale.

/**
 * TODO(developer): Uncomment these variables before running the sample.
 */
// const projectId = 'YOUR_PROJECT_ID';
// const location = 'us-central1';

// Imports the Google Cloud AutoML library
const {AutoMlClient} = require('@google-cloud/automl').v1beta1;

// Instantiates a client
const client = new AutoMlClient();

async function listModels() {
  // Construct request
  const request = {
    parent: client.locationPath(projectId, location),
    filter: 'translation_model_metadata:*',
  };

  const [response] = await client.listModels(request);

  console.log('List of models:');
  for (const model of response) {
    console.log(`Model name: ${model.name}`);
    console.log(`
      Model id: ${model.name.split('/')[model.name.split('/').length - 1]}`);
    console.log(`Model display name: ${model.displayName}`);
    console.log('Model create time');
    console.log(`\tseconds ${model.createTime.seconds}`);
    console.log(`\tnanos ${model.createTime.nanos / 1e9}`);
    console.log(`Model deployment state: ${model.deploymentState}`);
  }
}

listModels();

Python

Per eseguire l'autenticazione ad AutoML Video Object Tracking, configura le credenziali predefinite dell'applicazione. Per ulteriori informazioni, vedi Configura l'autenticazione per un ambiente di sviluppo locale.

from google.cloud import automl_v1beta1 as automl

# TODO(developer): Uncomment and set the following variables
# project_id = "YOUR_PROJECT_ID"

client = automl.AutoMlClient()
# A resource that represents Google Cloud Platform location.
project_location = f"projects/{project_id}/locations/us-central1"
request = automl.ListModelsRequest(parent=project_location, filter="")
response = client.list_models(request=request)

print("List of models:")
for model in response:
    # Display the model information.
    if model.deployment_state == automl.Model.DeploymentState.DEPLOYED:
        deployment_state = "deployed"
    else:
        deployment_state = "undeployed"

    print(f"Model name: {model.name}")
    print("Model id: {}".format(model.name.split("/")[-1]))
    print(f"Model display name: {model.display_name}")
    print(f"Model create time: {model.create_time}")
    print(f"Model deployment state: {deployment_state}")

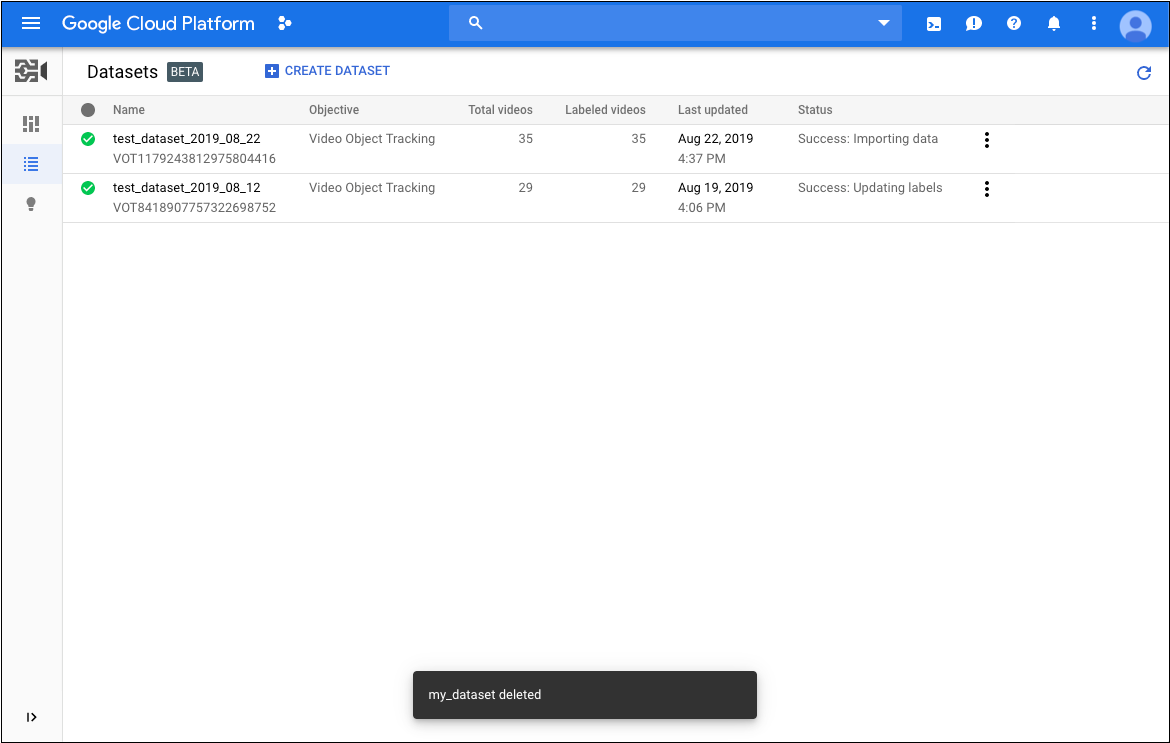
Eliminazione di un modello

L'esempio seguente elimina un modello.

UI web

  1. Vai alla pagina Modelli nella UI di monitoraggio degli oggetti video AutoML.

    Pagina Modelli con un modello mostrato
  2. Fai clic sul menu con tre puntini all'estrema destra della riga che vuoi Elimina e seleziona Elimina.
  3. Fai clic su Conferma nella finestra di dialogo di conferma.

REST

Prima di utilizzare i dati della richiesta, effettua le seguenti sostituzioni:

  • project-number: il numero del tuo progetto
  • location-id: la regione Cloud in cui deve essere eseguita l'annotazione posto. Le regioni cloud supportate sono: us-east1, us-west1, europe-west1, asia-east1. Se nessuna regione è specificata, verrà determinata una regione in base alla posizione del file video.
  • model-id: sostituisci con l'identificatore del modello.

Metodo HTTP e URL:

DELETE https://automl.googleapis.com/v1beta1/projects/project-number/locations/location-id/models/model-id

Per inviare la richiesta, espandi una delle seguenti opzioni:

Dovresti ricevere un codice di stato di operazione riuscita (2xx) e una risposta vuota.

Java

Per eseguire l'autenticazione ad AutoML Video Object Tracking, configura le credenziali predefinite dell'applicazione. Per ulteriori informazioni, vedi Configura l'autenticazione per un ambiente di sviluppo locale.

import com.google.cloud.automl.v1beta1.AutoMlClient;
import com.google.cloud.automl.v1beta1.ModelName;
import com.google.protobuf.Empty;
import java.io.IOException;
import java.util.concurrent.ExecutionException;

class DeleteModel {

  public static void main(String[] args)
      throws IOException, ExecutionException, InterruptedException {
    // TODO(developer): Replace these variables before running the sample.
    String projectId = "YOUR_PROJECT_ID";
    String modelId = "YOUR_MODEL_ID";
    deleteModel(projectId, modelId);
  }

  // Delete a model
  static void deleteModel(String projectId, String modelId)
      throws IOException, ExecutionException, InterruptedException {
    // Initialize client that will be used to send requests. This client only needs to be created
    // once, and can be reused for multiple requests. After completing all of your requests, call
    // the "close" method on the client to safely clean up any remaining background resources.
    try (AutoMlClient client = AutoMlClient.create()) {
      // Get the full path of the model.
      ModelName modelFullId = ModelName.of(projectId, "us-central1", modelId);

      // Delete a model.
      Empty response = client.deleteModelAsync(modelFullId).get();

      System.out.println("Model deletion started...");
      System.out.println(String.format("Model deleted. %s", response));
    }
  }
}

Node.js

Per eseguire l'autenticazione ad AutoML Video Object Tracking, configura le credenziali predefinite dell'applicazione. Per ulteriori informazioni, vedi Configura l'autenticazione per un ambiente di sviluppo locale.

/**
 * TODO(developer): Uncomment these variables before running the sample.
 */
// const projectId = 'YOUR_PROJECT_ID';
// const location = 'us-central1';
// const modelId = 'YOUR_MODEL_ID';

// Imports the Google Cloud AutoML library
const {AutoMlClient} = require('@google-cloud/automl').v1beta1;

// Instantiates a client
const client = new AutoMlClient();

async function deleteModel() {
  // Construct request
  const request = {
    name: client.modelPath(projectId, location, modelId),
  };

  const [response] = await client.deleteModel(request);
  console.log(`Model deleted: ${response}`);
}

deleteModel();

Python

Per eseguire l'autenticazione ad AutoML Video Object Tracking, configura le credenziali predefinite dell'applicazione. Per ulteriori informazioni, vedi Configura l'autenticazione per un ambiente di sviluppo locale.

from google.cloud import automl_v1beta1 as automl

# TODO(developer): Uncomment and set the following variables
# project_id = "YOUR_PROJECT_ID"
# model_id = "YOUR_MODEL_ID"

client = automl.AutoMlClient()
# Get the full path of the model.
model_full_id = client.model_path(project_id, "us-central1", model_id)
response = client.delete_model(name=model_full_id)

print(f"Model deleted. {response.result()}")