Chirp adalah model speech-to-text generasi berikutnya dari Google. Merepresentasikan puncak dari penelitian selama bertahun-tahun, versi pertama Chirp kini tersedia untuk Speech-to-Text. Kami bermaksud meningkatkan dan memperluas Chirp ke lebih banyak bahasa dan domain. Untuk mengetahui detailnya, lihat makalah kami, Google USM.
Kami melatih model Chirp dengan arsitektur yang berbeda dari model ucapan kami saat ini. Satu model menyatukan data dari beberapa bahasa. Namun, pengguna tetap menentukan model akan mengenali ucapan dalam bahasa yang dipilih. Chirp tidak mendukung beberapa fitur Google Speech yang dimiliki model lain. Lihat Dukungan dan batasan fitur untuk mengetahui daftar lengkapnya.
ID model
Chirp tersedia di Speech-to-Text API v2. Anda dapat menggunakannya seperti model lainnya.
ID model untuk Chirp adalah: chirp.
Anda dapat menentukan model ini dalam permintaan pengenalan sinkron atau batch.
Metode API yang tersedia
Chirp memproses ucapan dalam potongan yang jauh lebih besar daripada model lain. Artinya, fitur ini mungkin tidak cocok untuk penggunaan real-time yang sesungguhnya. Chirp tersedia melalui metode API berikut:
v2Speech.Recognize(cocok untuk audio singkat < 1 menit)v2Speech.BatchRecognize(cocok untuk audio berdurasi panjang 1 menit hingga 8 jam)
Chirp tidak tersedia pada metode API berikut:
v2Speech.StreamingRecognizev1Speech.StreamingRecognizev1Speech.Recognizev1Speech.LongRunningRecognizev1p1beta1Speech.StreamingRecognizev1p1beta1Speech.Recognizev1p1beta1Speech.LongRunningRecognize
Region
Chirp tersedia di region berikut:
us-central1europe-west4asia-southeast1
Lihat halaman harga untuk mengetahui detail selengkapnya.
Languages
Anda dapat melihat bahasa yang didukung di daftar bahasa lengkap.
Dukungan dan batasan fitur
Chirp tidak mendukung beberapa fitur STT API:
- Skor keyakinan: API menampilkan nilai, tetapi bukan sepenuhnya skor keyakinan.
- Adaptasi ucapan: Tidak ada fitur adaptasi yang didukung.
- Diarisasi: Diarisasi otomatis tidak didukung.
- Normalisasi paksa: Tidak didukung.
- Keyakinan tingkat kata: Tidak didukung.
- Deteksi bahasa: Tidak didukung.
Chirp mendukung fitur berikut:
- Tanda baca otomatis: Tanda baca diprediksi oleh model. Fitur ini dapat dinonaktifkan.
- Word timings: Opsional, ditampilkan.
- Transkripsi audio yang tidak bergantung pada bahasa: Model secara otomatis menyimpulkan bahasa lisan dalam file audio Anda dan menambahkannya ke hasil.
Sebelum memulai
- Sign in to your Google Cloud account. If you're new to Google Cloud, create an account to evaluate how our products perform in real-world scenarios. New customers also get $300 in free credits to run, test, and deploy workloads.
-
In the Google Cloud console, on the project selector page, select or create a Google Cloud project.
Roles required to select or create a project
- Select a project: Selecting a project doesn't require a specific IAM role—you can select any project that you've been granted a role on.
-
Create a project: To create a project, you need the Project Creator
(
roles/resourcemanager.projectCreator), which contains theresourcemanager.projects.createpermission. Learn how to grant roles.
-
Verify that billing is enabled for your Google Cloud project.
-
Enable the Speech-to-Text APIs.
Roles required to enable APIs
To enable APIs, you need the Service Usage Admin IAM role (
roles/serviceusage.serviceUsageAdmin), which contains theserviceusage.services.enablepermission. Learn how to grant roles. -
Make sure that you have the following role or roles on the project: Cloud Speech Administrator
Check for the roles
-
In the Google Cloud console, go to the IAM page.
Go to IAM - Select the project.
-
In the Principal column, find all rows that identify you or a group that you're included in. To learn which groups you're included in, contact your administrator.
- For all rows that specify or include you, check the Role column to see whether the list of roles includes the required roles.
Grant the roles
-
In the Google Cloud console, go to the IAM page.
Buka IAM - Pilih project.
- Klik Grant access.
-
Di kolom New principals, masukkan ID pengguna Anda. Biasanya berupa alamat email untuk Akun Google.
- Di daftar Select a role, pilih peran.
- Untuk memberikan peran tambahan, klik Tambahkan peran lain, lalu tambahkan setiap peran tambahan.
- Klik Simpan.
Install the Google Cloud CLI.
Jika Anda menggunakan penyedia identitas (IdP) eksternal, Anda harus login ke gcloud CLI dengan identitas gabungan Anda terlebih dahulu.
Untuk melakukan inisialisasi gcloud CLI, jalankan perintah berikut:
gcloud init -
-
If you're using a local shell, then create local authentication credentials for your user account:
gcloud auth application-default login
You don't need to do this if you're using Cloud Shell.
If an authentication error is returned, and you are using an external identity provider (IdP), confirm that you have signed in to the gcloud CLI with your federated identity.
- Pastikan Anda telah mendaftar ke akun Google Cloud dan membuat project.
- Buka Speech di konsol Google Cloud .
- Aktifkan API jika belum diaktifkan.
- Buka subhalaman Transkripsi.
- Klik Transkripsi Baru
Pastikan Anda memiliki ruang kerja STT. Jika belum memilikinya, buat akun.
Buka drop-down Workspace, lalu klik New Workspace.
Dari sidebar navigasi Buat workspace baru, klik Jelajahi.
Klik untuk membuat bucket.
Masukkan nama untuk bucket Anda, lalu klik Continue.
Klik Buat.
Setelah bucket dibuat, klik Select untuk memilih bucket Anda.
Klik Create untuk menyelesaikan pembuatan ruang kerja Anda untuk Speech-to-Text.
Lakukan transkripsi pada audio Anda.
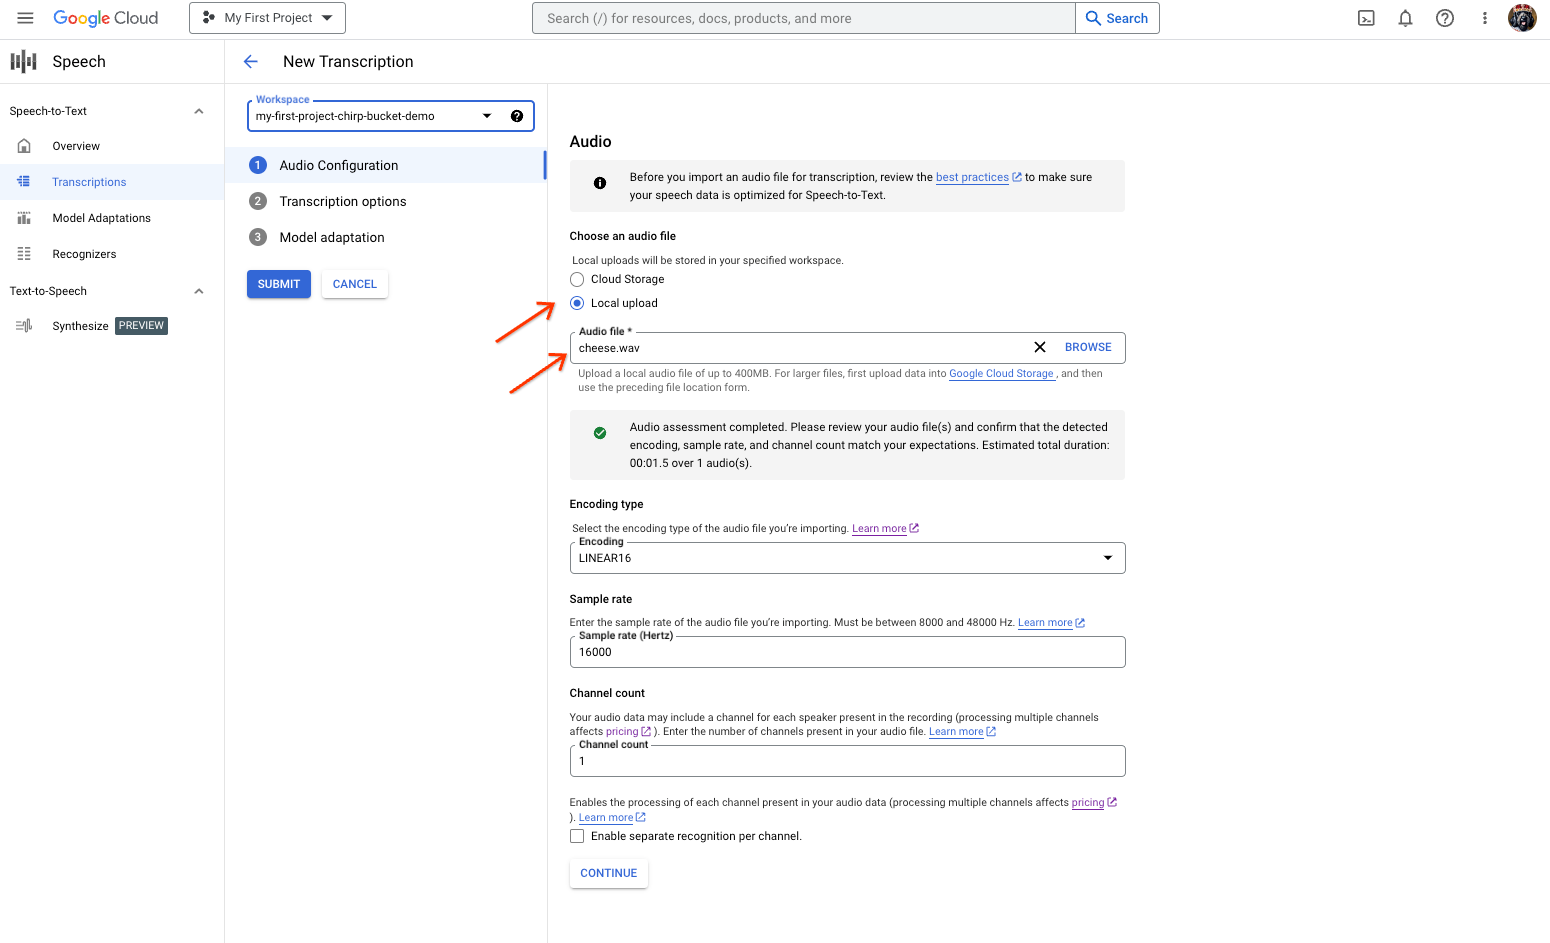
- Dari halaman Transkripsi Baru, pilih opsi untuk memilih file audio Anda:
- Upload dengan mengklik Upload lokal.
- Klik Cloud Storage untuk menentukan file Cloud Storage yang ada.
- Klik Lanjutkan.
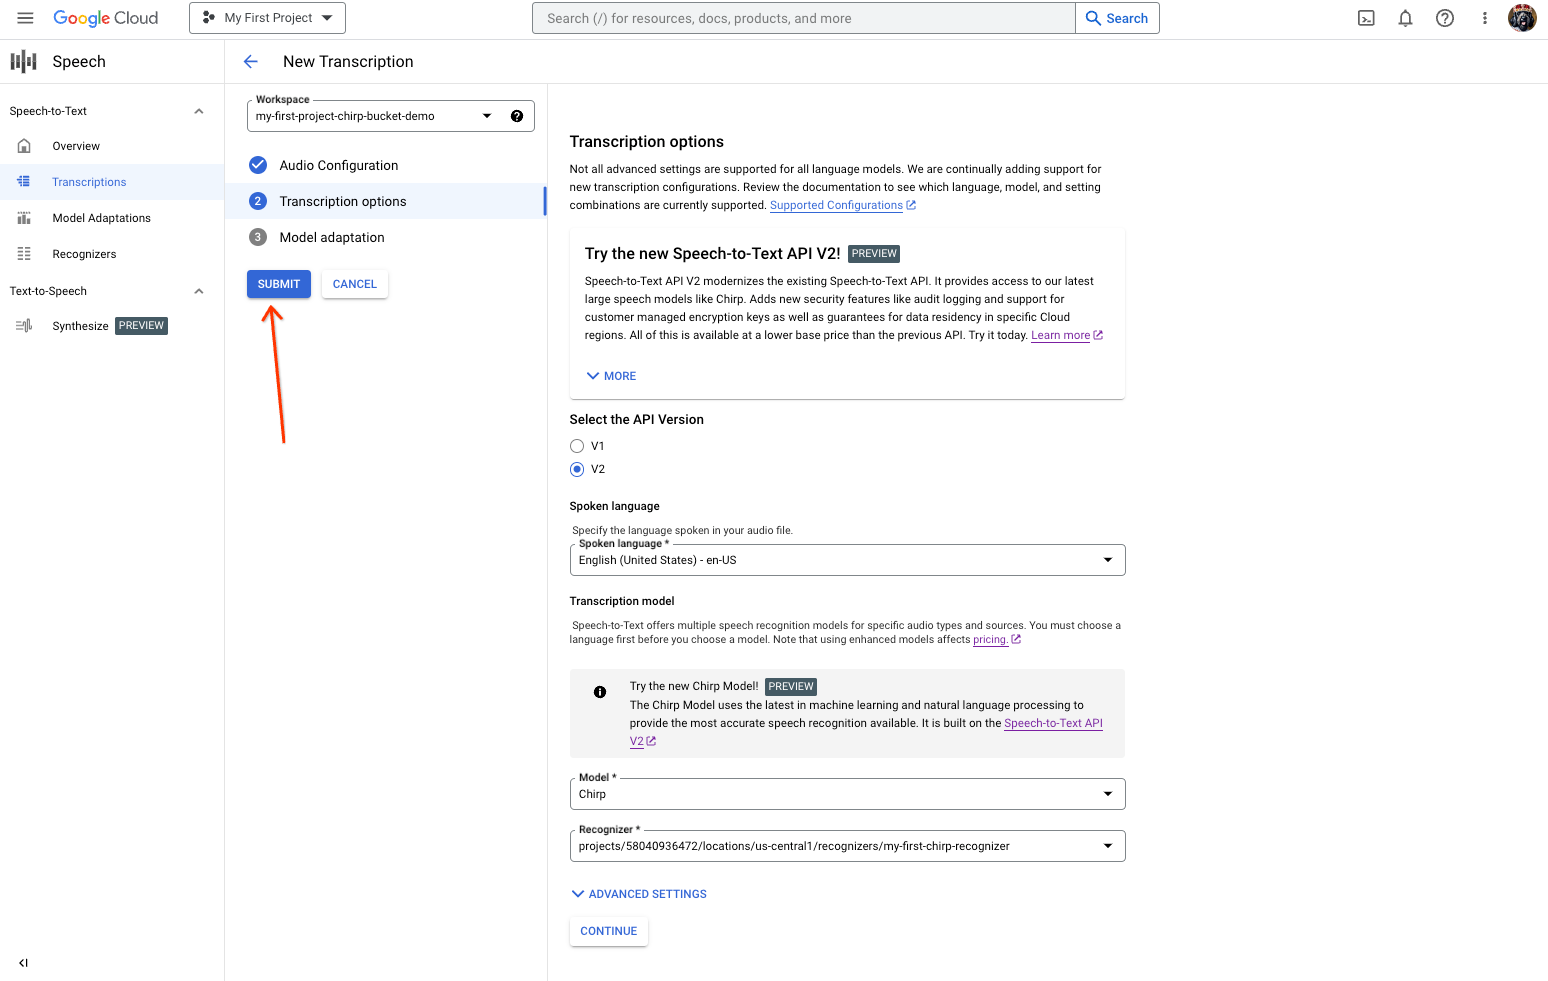
Dari bagian Opsi transkripsi, pilih Bahasa lisan yang akan Anda gunakan untuk pengenalan dengan Chirp dari pengenal yang dibuat sebelumnya.
Di drop-down Model*, pilih Chirp.
Di drop-down Region, pilih region, seperti us-central1.
Klik Lanjutkan.
Untuk menjalankan permintaan pengenalan pertama Anda menggunakan Chirp, di bagian utama, klik Kirim.
- Dari halaman Transkripsi Baru, pilih opsi untuk memilih file audio Anda:
Lihat hasil transkripsi Chirp Anda.
Dari halaman Transkripsi, klik nama transkripsi.
Di halaman Detail transkripsi, lihat hasil transkripsi Anda, dan jika perlu, putar audio di browser.
-
Optional: Revoke the authentication credentials that you created, and delete the local credential file.
gcloud auth application-default revoke
-
Optional: Revoke credentials from the gcloud CLI.
gcloud auth revoke
- In the Google Cloud console, go to the Manage resources page.
- In the project list, select the project that you want to delete, and then click Delete.
- In the dialog, type the project ID, and then click Shut down to delete the project.
- In the Google Cloud console, go to the Manage resources page.
- In the project list, select the project that you want to delete, and then click Delete.
- In the dialog, type the project ID, and then click Shut down to delete the project.
- Berlatihlah mentranskripsi file audio singkat.
- Pelajari cara mentranskripsikan audio streaming.
- Pelajari cara mentranskripsi file audio panjang.
- Untuk performa terbaik, akurasi, dan tips lainnya, lihat dokumentasi praktik terbaik.
Library klien dapat menggunakan Kredensial Default Aplikasi untuk dengan mudah melakukan autentikasi dengan Google API dan mengirim permintaan ke API tersebut. Dengan Kredensial Default Aplikasi, Anda dapat menguji aplikasi secara lokal dan men-deploy aplikasi tanpa mengubah kode yang mendasarinya. Untuk mengetahui informasi selengkapnya, lihat Melakukan autentikasi untuk menggunakan library klien.
Selain itu, pastikan Anda telah menginstal library klien.
Lakukan pengenalan ucapan sinkron dengan Chirp
Berikut adalah contoh penerapan pengenalan ucapan sinkron pada file audio lokal menggunakan Chirp:
Python
Membuat permintaan dengan transkripsi tanpa bahasa diaktifkan
Contoh kode berikut menunjukkan cara membuat permintaan dengan transkripsi agnostik bahasa diaktifkan.
Python
Mulai menggunakan Chirp di Google Cloud konsol
Pembersihan
Agar akun Google Cloud Anda tidak dikenai biaya untuk resource yang digunakan di halaman ini, ikuti langkah-langkah berikut.
Konsol
gcloud