This document shows you how to use reCAPTCHA account defender to detect and prevent account-related fraudulent activities on websites.
reCAPTCHA helps you protect critical actions, such as login and checkout. However, there are many subtle forms of account abuse that can be detected by observing a specific user's behavior on a website over a period of time. reCAPTCHA account defender helps in identifying these kinds of subtle abuse by creating a site-specific model for your website to detect a trend of suspicious behavior or a change in activity. By using the site-specific model, reCAPTCHA account defender helps you detect the following:
- Suspicious activities
- Accounts with similar behaviors
- Requests coming from devices that were marked as trusted for specific users
Based on the analysis of reCAPTCHA account defender and the site-specific model, you can take the following actions:
- Restrict or disable fraudulent accounts.
- Prevent account takeover attempts.
- Mitigate the successful account takeovers.
- Grant access only to the requests coming from legitimate user accounts.
- Reduce friction for users logging in from one of their trusted devices.
Before you begin
Configure your web pages for reCAPTCHA account defender
reCAPTCHA account defender requires a comprehensive understanding of account activities to enable effective detection. To start feeding account-related activities to reCAPTCHA account defender, and to create and improve your site-specific model, do the following:
- Enable collection of horizontal telemetry data.
- Report on critical user actions.
- Assess critical user events.
- Annotate user events to tune your site-specific model.
Enable collection of horizontal telemetry data
reCAPTCHA account defender requires a complete view of user actions, such as whether the user is logged in or leading to log in. To enable passive collection of horizontal telemetry data by reCAPTCHA account defender, load the reCAPTCHA JavaScript script with the score-based site key that you created in the background of all the web pages that are part of your user workflow.
The following example shows how to load the reCAPTCHA JavaScript script in a web page.
    <head>
    <script src="https://www.google.com/recaptcha/enterprise.js?render=KEY_ID"></script>
    ....
    </head>
Report on critical user actions
To detect suspicious activity patterns and build a better understanding of typical activity patterns on your site, reCAPTCHA account defender needs the information about critical user actions. Therefore, report critical user actions on the web pages by calling grecaptcha.enterprise.execute() on those critical user actions.
We recommend reporting all the critical user actions because it helps in
additional signal collection. For every user action that you want to report,
replace the value of the action parameter of grecaptcha.enterprise.execute()
with an action name that describes the user action.
The following table lists the action names that you can use when reporting the critical user actions.
| Action name | User initiated event or user action |
|---|---|
LOGIN |
Login to the website. |
REGISTRATION |
Registration on the website. |
SECURITY_QUESTION_CHANGE |
Request to change the security question. |
PASSWORD_RESET |
Request to reset the password. |
PHONE_NUMBER_UPDATE |
Request to update the phone number. |
EMAIL_UPDATE |
Request to update the email address. |
ACCOUNT_UPDATE |
Request to update account related information, such as contact details. |
TRIGGER_MFA |
An action that triggers an MFA challenge. |
REDEEM_CODE |
Request to redeem code. |
LIST_PAYMENT_METHODS |
Fetch the list of payment methods. |
The following example shows how to call grecaptcha.enterprise.execute() on a
phone number update:
    <script>
    function onClick(e) {
      e.preventDefault();
      grecaptcha.enterprise.ready(async () => {
        const token = await grecaptcha.enterprise.execute('KEY_ID', {action: 'PHONE_NUMBER_UPDATE'});
      });
    }
    </script>
Assess critical user events
When you call grecaptcha.enterprise.execute() on a user action, it generates a token. For the critical
user events, such as successful and failed logins, registrations, and actions of the logged-in
users, create an assessment to assess the results of the grecaptcha.enterprise.execute() call. The
assessment provides you a risk verdict, which you can use to make a decision about how to handle
potentially fraudulent activities. Some of the actions you can take are blocking suspicious
requests, challenging risky logins, and investigating accounts of interest.
reCAPTCHA account defender requires you to provide a stable account identifier to attribute user activity – such as login requests, logged-in requests, and signup requests – to a specific account. This helps reCAPTCHA account defender understand user activity patterns and build an activity model for each account to better detect anomalous and abusive traffic.
Choose a stable account identifier accountId that is not often changed by the user
and provide it to the assessment in the
projects.assessments.create method. This stable account identifier should have the
same value for all the events related to the same user. You can provide the following as the account
identifier:
User identifiers
If every account can be uniquely associated with a stable username, email address, or phone
number, you can use it as the accountId. When you provide such cross-site
identifiers (identifiers that can be reused across sites), reCAPTCHA uses this
information to improve protection for your user accounts based on cross-site models by
flagging abusive account identifiers and using knowledge of cross-site abuse patterns related
to these identifiers.
Alternatively, if you have an internal user ID uniquely associated with each account, you can
provide it as the accountId.
Hashed or encrypted
If you do not have an internal user ID uniquely associated with each account, you can turn any stable identifier into an opaque, site-specific account identifier. This identifier is still needed for reCAPTCHA account defender to understand user activity patterns and detect anomalous behaviour, but it is not shared across other sites.
Pick any stable account identifier and make it opaque before sending to reCAPTCHA by using encryption or hashing:
encryption (recommended): encrypt the account identifier using a deterministic encryption method that produces a stable ciphertext. For detailed instructions, see encrypt data deterministically. When you choose symmetric encryption over hashing, you don't need to keep a mapping between your user identifiers and the corresponding opaque user identifiers. Decrypt the opaque identifiers that are returned by reCAPTCHA to turn them into the user identifier.
hashing: we recommend hashing the account identifier using the SHA256-HMAC method with a custom salt of your choice. Because hashes are one-way only, you need to keep a mapping between the generated hashes and your user identifiers so that you can map the hashed account identifier that are returned back to the original accounts.
In addition to providing a stable account identifier for all the account-related requests, you
can provide additional account identifiers, potentially non-stable, for some specific requests.
Context-specific account identifiers provided in addition to the accountId help
reCAPTCHA account defender better understand user activity and detect account
takeover attempts to keep your user accounts safe. When you provide additional identifiers,
reCAPTCHA uses this information to improve protection for your user accounts based on
cross-site models by flagging abusive account identifiers and using knowledge of cross-site abuse
patterns related to these identifiers. For example, you can provide the following:
The username, email address, or phone number that was used as a login handle for login requests
The email address or phone number that was verified for a multi-factor authentication request
An email address or phone number (primary or secondary) that was provided by the user during an account update request
The email addresses and phone numbers that are provided by the user during a registration request
Append the chosen stable account identifier to the accountId parameter in the
projects.assessments.create method for all the account-related requests. Optionally,
provide additional account identifiers for the relevant requests by using the userIds
field in the assessment.
Before using any of the request data, make the following replacements:
- PROJECT_ID: your Google Cloud project ID
- TOKEN: token returned from the
grecaptcha.enterprise.execute()call - KEY_ID: reCAPTCHA key associated with the site
- ACCOUNT_ID: the identifier that is uniquely associated with the user account for a user account to your website
- EMAIL_ADDRESS: Optional. An email address that is associated with this request, if any
- PHONE_NUMBER: Optional. A phone number that is associated with this request, if any
- USERNAME: Optional. A username that is associated with this request, if any
HTTP method and URL:
POST https://recaptchaenterprise.googleapis.com/v1/projects/PROJECT_ID/assessments
Request JSON body:
{
  "event": {
    "token": "TOKEN",
    "siteKey": "KEY_ID",
    "userInfo": {
      "accountId": "ACCOUNT_ID",
      "userIds": [
        {
          "email": "EMAIL_ADDRESS"
        },
        {
          "phoneNumber": "PHONE_NUMBER"
        },
        {
          "username": "USERNAME"
        }
      ]
    }
  }
}
To send your request, choose one of these options:
curl
Save the request body in a file named request.json,
and execute the following command:
curl -X POST \
     -H "Authorization: Bearer $(gcloud auth print-access-token)" \
     -H "Content-Type: application/json; charset=utf-8" \
     -d @request.json \
     "https://recaptchaenterprise.googleapis.com/v1/projects/PROJECT_ID/assessments"
PowerShell
Save the request body in a file named request.json,
and execute the following command:
$cred = gcloud auth print-access-token
$headers = @{ "Authorization" = "Bearer $cred" }

Invoke-WebRequest `
    -Method POST `
    -Headers $headers `
    -ContentType: "application/json; charset=utf-8" `
    -InFile request.json `
    -Uri "https://recaptchaenterprise.googleapis.com/v1/projects/PROJECT_ID/assessments" | Select-Object -Expand Content
You should receive a JSON response similar to the following:
{
  "tokenProperties": {
    "valid": true,
    "hostname": "www.google.com",
    "action": "login",
    "createTime": "2019-03-28T12:24:17.894Z"
   },
  "riskAnalysis": {
    "score": 0.6,
  },
 "event": {
    "token": "TOKEN",
    "siteKey": "KEY",
    "userInfo": {
      "accountId": "ACCOUNT_ID"
    }
  },
  "name": "projects/PROJECT_NUMBER/assessments/b6ac310000000000",
  "accountDefenderAssessment": {
    "labels": ["SUSPICIOUS_LOGIN_ACTIVITY"]
  }
}
Code sample
Java
To authenticate to reCAPTCHA, set up Application Default Credentials. For more information, see Set up authentication for a local development environment.
Interpret the risk verdict of the critical user events
When you create an assessment with account defender enabled, account defender
returns accountDefenderAssessment as part of the assessment response.
The value of accountDefenderAssessment helps
you assess whether the user activity is legitimate or fraudulent. It also returns
an assessment ID that you need to use when annotating user events.
The following example is a sample JSON response:
{
  "tokenProperties": {
    "valid": true,
    "hostname": "www.google.com",
    "action": "login",
    "createTime": "2019-03-28T12:24:17.894Z"
   },
  "riskAnalysis": {
    "score": 0.6,
  },
 "event": {
    "token": "TOKEN",
    "siteKey": "KEY_ID",
    "expectedAction": "USER_ACTION"
  },
  "name": "projects/PROJECT_ID/assessments/b6ac310000000000X",
  "accountDefenderAssessment": {
    labels: ["SUSPICIOUS_LOGIN_ACTIVITY"]
  }
}
The accountDefenderAssessment field can have any of the following values:
| Value | Description |
|---|---|
SUSPICIOUS_LOGIN_ACTIVITY |
Indicates that the request represents a high risk of credential stuffing or account takeover. |
SUSPICIOUS_ACCOUNT_CREATION |
Indicates that the request represents a high risk of abusive account creation. |
PROFILE_MATCH |
Indicates that the attributes of the user match the attributes that have been seen earlier for this particular user. This value is an indicator that this user is on a trusted device that was used before to access your website.
|
RELATED_ACCOUNTS_NUMBER_HIGH |
Indicates that the request has a high number of related accounts. It does not necessarily imply that the account is bad but might require further investigation. |
Annotate events to tune your site-specific model
To provide more information to reCAPTCHA account defender and improve your site-specific detection model, you must annotate the events that you assessed by creating assessments.
You annotate an assessment by sending a request to the projects.assessments.annotate
method with the assessment ID. In the body of that request, you include labels
providing additional information about an event described in the assessment.
To annotate an assessment, do the following:
-
Determine the information and labels to add in the request JSON body depending on your use case.
The following table lists the labels and values that you can use to annotate events:
Label Description Request example reasonsRequired. A label to support your assessments. Provide real-time event details in the
reasonslabel in a few seconds or minutes after the event because they influence real-time detection.For the list of possible values, see reasons values.
Example: To detect account takeovers, annotate if the entered password was correct with
CORRECT_PASSWORDorINCORRECT_PASSWORDvalues. If you deployed your own MFA, you can add the following values:INITIATED_TWO_FACTOR, andPASSED_TWO_FACTORorFAILED_TWO_FACTOR.{ "reasons": ["INCORRECT_PASSWORD"] }annotationOptional. A label to indicate the legitimacy of assessments. Provide facts about login and registration events to validate or correct your risk assessments in the
annotationlabel.Possible values:
LEGITIMATEorFRAUDULENT.You can send this information at any time or as part of a batch job. However, we recommend sending this information in a few seconds or minutes after the event because they influence real-time detection.
{ "annotation": "LEGITIMATE" }accountIdOptional. A label to associate an account ID with an event.
If you created an assessment without an account ID, use this label to provide the account ID of an event whenever it is available.
  {
   "accountId": "ACCOUNT_ID"
  }
Create an annotate request with the appropriate labels.
Before using any of the request data, make the following replacements:
- ASSESSMENT_ID: Value of the
namefield returned from theprojects.assessments.createcall. - ANNOTATION: Optional. A label to indicate whether the assessment is legitimate or fraudulent.
- REASONS: Optional. Reasons that support your annotation. For the list of possible values, see reasons values.
- ACCOUNT_ID: Optional. the identifier that is uniquely associated with the user account on your website.
For more information, see labels for annotations.
HTTP method and URL:
POST https://recaptchaenterprise.googleapis.com/v1/ASSESSMENT_ID:annotate
Request JSON body:
{
  "annotation": ANNOTATION,
  "reasons": REASONS,
  "accountId": ACCOUNT_ID
}
To send your request, choose one of these options:
curl
Save the request body in a file named
request.json, and execute the following command:curl -X POST \
-H "Authorization: Bearer $(gcloud auth print-access-token)" \
-H "Content-Type: application/json; charset=utf-8" \
-d @request.json \
"https://recaptchaenterprise.googleapis.com/v1/ASSESSMENT_ID:annotate"PowerShell
Save the request body in a file named
request.json, and execute the following command:$cred = gcloud auth print-access-token
$headers = @{ "Authorization" = "Bearer $cred" }
Invoke-WebRequest `
-Method POST `
-Headers $headers `
-ContentType: "application/json; charset=utf-8" `
-InFile request.json `
-Uri "https://recaptchaenterprise.googleapis.com/v1/ASSESSMENT_ID:annotate" | Select-Object -Expand ContentYou should receive a successful status code (2xx) and an empty response.
- ASSESSMENT_ID: Value of the
Code sample
Java
To authenticate to reCAPTCHA, set up Application Default Credentials. For more information, see Set up authentication for a local development environment.
Enable reCAPTCHA account defender
After you configure your web pages for reCAPTCHA account defender, you can enable reCAPTCHA account defender.
In the Google Cloud console, go to the reCAPTCHA page.
Verify that the name of your project appears in the resource selector at the top of the page.
If you don't see the name of your project, click the resource selector, then select your project.
- Click Settings.
In the Account defender pane, click Configure.
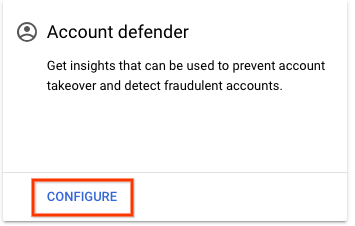
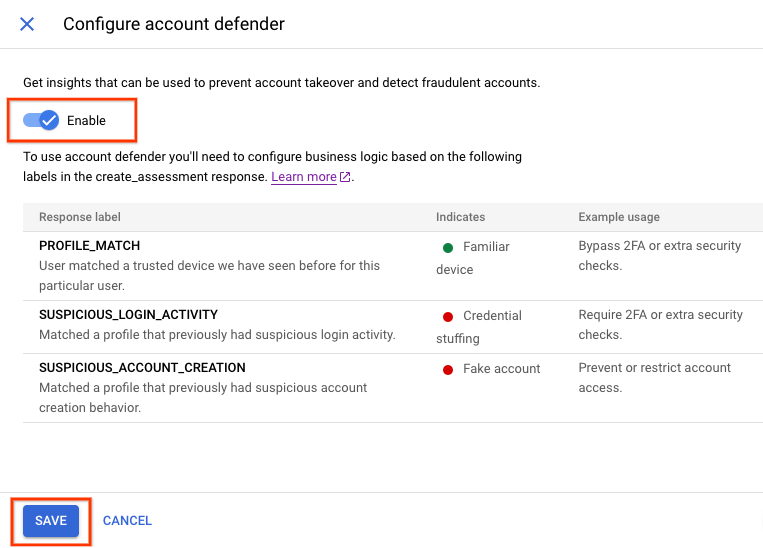
In the Configure account defender dialog, click Enable, and then click Save.
It might take a few hours for the reCAPTCHA account defender enablement to propagate to our systems. After the feature enablement is propagated to our systems, you should start receiving responses related to account defender as part of the assessments.