Using the Self-service Explores feature, you can upload a CSV file to Looker and then query and visualize the data in a Looker Explore without needing to configure a LookML model or set up Git version control.
Before you begin
To use self-service Explores, you must have a Looker instance that is running Looker 25.18 or later and that has a connection to a BigQuery database.
Your Looker admin must set up the Looker instance by completing the following steps:
- From the Looker Self-service Data Modeling admin page, enable the Data file uploads toggle.
- Also from the Self-service Data Modeling admin page, select a BigQuery connection for Looker to use for storing the self-service Explore's data. For each self-service Explore on your instance, Looker will write a LookML model and save the data to this BigQuery database.
- Ensure persistent derived tables (PDTs) are enabled on the BigQuery connection so that Looker can write to the BigQuery database: From the Looker Connections page, edit the BigQuery connection and verify that the Enable PDTs toggle is turned on under the Optional Settings tab.
- For any user who will be creating self-service Explores, grant their Looker user account with the following permissions:
explore: To access and use the Looker Explore page.uploaded_data: To upload CSV files to your instance.
Requirements for CSV files
You can create a self-service Explore from a CSV file on your computer as long as the CSV file meets the following requirements:
- The CSV file is 100 MB or smaller.
- The first row of data in the CSV file contains the column names for the file.
Uploading data to create a self-service Explore
To create a self-service Explore from a CSV file on your computer, follow these steps:
- From the Looker main navigation menu, click the Create button.
- Select Data Upload from the drop-down menu. This action opens the Data upload dialog.
- In the Data upload dialog, click the Choose data button to navigate to and select your CSV file. (Alternatively, you can drag a CSV file into the Data upload dialog.)
- Click Upload.
When you click Upload, Looker uploads your file and analyzes the file's data. For each of the fields in the CSV file, Looker automatically detects the data type and applies the appropriate format for the data type. Looker also applies a name and a label for each field.
After Looker has uploaded the file and analyzed the data, Looker creates a LookML model of the data and uploads the data to your BigQuery database. When the model is ready, Looker displays the Edit self-service Explore page.
Opening a self-service Explore
You can open a self-service Explore in two ways:
- From the Looker Explore menu, select the Explore from the Self-service Explores section.
- From the Edit self-service Explore page for the self-service Explore, click the Explore Data button.
You can use a self-service Explore much in the same way as any other Looker Explore, including performing the following tasks:
- Query your data in the Explore.
- Filter and limit your results to just the data you're interested in.
- Merge results from different Explores.
- Use table calculations to create ad hoc Explore metrics.
- Use custom fields to create ad hoc dimensions and measures.
- Create visualizations.
- Save Explore queries as Looks.
- Add Explore queries to dashboards.
- Share data with other users.
Editing a self-service Explore
After you upload a CSV file, you can edit the Explore's data fields and manage user access from the Edit self-service Explore page.
There are two ways to access the Edit self-service Explore page:
- When you first upload a CSV file, Looker will automatically display the Edit self-service Explore page for your data upload.
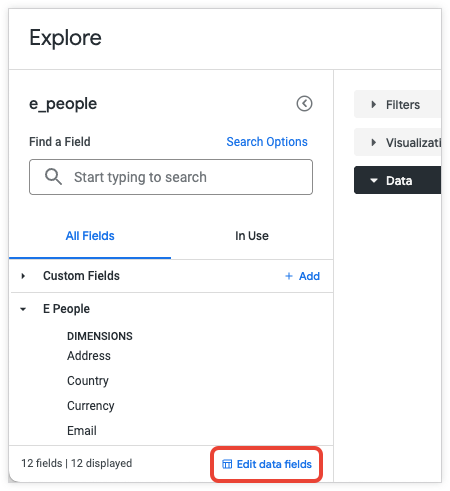
Otherwise, from the Looker Explore menu, select the Explore from the Self-service Explores section. In the Explore page, click the Edit data fields link from the bottom of the field picker panel in the Explore:
From the Edit self-service Explore page, you can do the following:
- Modify the data fields
- Add dimensions and measures
- Manage access to the self-service Explore
- Open the self-service Explore
- Remove the CSV data upload from your instance
Modify data fields
On the Edit self-service Explore page, the Data Fields tab lists the fields that Looker generated from your CSV file.
You can't delete a generated field; you can only hide it, either by selecting Hide from the field's gear menu in the Data Fields table, or by clicking the field's Edit button and selecting the Hide this field from Explores and visualizations checkbox.
To edit a field in a self-service Explore, follow these steps:
- From the Edit self-service Explore page, in the Data Fields tab, click the Edit button in a field's row of the Data Fields table.
- In the Edit dialog, you can do the following for a field:
- Edit the format, name, or label.
- Add a description for the field.
- Hide the field from the Explore and visualizations.
Add dimensions and measures
You can build your own dimensions and measures for your self-service Explore. They are defined based on existing fields in the Explore or from Looker expressions, and they remain available to all users of your self-service Explore.
To add a dimension or measure to your self-service Explore, follow these steps:
- 1. From the Edit self-service Explore page, in the Data Fields tab, click the Add Dimension or Add Measure button.
- In the Create Dimension or Create Measure dialog, use the Expression box to enter a Looker expression that calculates the value for your dimension or measure, using any Looker functions and operators. The Creating Looker expressions documentation page describes how the Looker expression editor suggests field names and displays syntax help for any functions that you use.
- If a formatting option other than the default is needed, select one in the Format drop-down.
- Specify a name in the Name field.
- Specify a label in the Label field. The label appears in the field picker and in the data table of the Explore.
- Optionally, select + Add Description to add a description that will give other users more context or information about the custom dimension. The description appears in the tool tip for the field in the field picker and in the data table of the Explore.
- Select Save.
On the Edit self-service Explore page, your created fields appear under the generated fields in the Data Fields table.
Managing access to the self-service Explore
You can share your self-service Explore with other Looker users and user groups by following these steps:
- From the Edit self-service Explore page, click the User Access tab and then click the Share access button. (You can also click the three-dot menu at the top of the Edit self-service Explore page and select Share access.)
- In the Share access dialog, click the User or group field and either select from the drop-down menu or begin typing a username or a group name to filter the menu.
- In the Access permission field, leave the value as View.
- Optionally, click the Add button to provide access to another user or group.
- Click Share.
On the Edit self-service Explore page, the User Access tab will show the new user or group to which you provided access.
If you want to remove a user or group's access to your self-service Explore, you can click the Delete user button in the user or group's row of the User Access table.
Removing a self-service Explore
You can delete your own data upload and its associated self-service Explore by performing the following steps:
- From the Looker main Explore menu, select the Explore from the Self-service Explores section.
Click the Edit data fields link from the bottom of the field picker panel in the Explore.
On the Edit self-service Explore page, click the three-dot menu.
Select Remove CSV upload.
Click Delete in the confirmation dialog.
In addition, a Looker admin can delete any user's data upload from the Self-service Data Modeling admin page by doing the following:
- From the Looker Admin menu, select Self-service Data Modeling.
- In the Data uploads table on the Self-service Data Modeling page, find the data upload and click the Delete button in its table row.
- Click Delete in the confirmation dialog.
Admin settings - Self-service Data Modeling
Looker admins can select the Self-service Data Modeling option from the Looker Admin menu to configure the Self-service Explore feature and view data uploads on the instance.
The Self-service Data Modeling page has the following configuration options:
- Data file uploads toggle: Enable or disable data file uploads on the instance.
- Default BigQuery connection pull-down menu: Select one of the BigQuery connections on the Looker instance to be used for storing the self-service Explore's data. For each self-service Explore on your instance, Looker will write a LookML model and save the data to this BigQuery database.
The Self-service Data Modeling page also displays the Data uploads table, which shows information about the data files that have been uploaded on the instance, including the following:
- The name of the data file.
- The owner of the file.
- The uploaded date.
- A Delete button that allows Looker admins to delete the file upload and its associated self-service Explore.