在直播中插入插入畫面

本頁說明如何建立宣傳內容,並插入直播。 插入畫面是一種內容,可隨時取代主要直播內容 (例如,輸入串流發生技術問題,或要隱藏輸入串流中的敏感內容時)。

設定 Google Cloud 專案和驗證

如果您尚未建立Google Cloud 專案和憑證,請參閱「事前準備」一節。

將影片上傳至 Cloud Storage bucket

  1. 前往 Google Cloud 控制台的 Cloud Storage 瀏覽器頁面。
    前往 Cloud Storage 瀏覽器頁面
  2. 按一下值區名稱即可開啟。
  3. 按一下「上傳檔案」
  4. 從本機電腦選取要上傳的影片檔案。你可以使用 60 秒的範例影片

影片現在已儲存到 Cloud Storage 值區。

建立資產

資產是可搭配 Live Stream API 使用的影片圖片。素材資源用於建立插播片尾頻道活動。 您應在預計使用資產製作節目表很久之前就建立資產,因為 API 需要時間處理資產。如果資產在 Slate 事件執行時間後兩秒內仍未準備就緒,系統會顯示黑畫面,直到資產準備就緒為止。

如要建立資產,請使用 projects.locations.assets.create 方法。以下範例會建立影片資產。

REST

使用任何要求資料之前,請先替換以下項目:

  • PROJECT_NUMBER:您的 Google Cloud 專案編號,位於「IAM Settings」(IAM 設定) 頁面的「Project number」(專案編號) 欄位
  • LOCATION:建立資產的位置;請使用支援的區域之一。
    顯示地區
    • us-central1
    • us-east1
    • us-east4
    • us-west1
    • us-west2
    • northamerica-northeast1
    • southamerica-east1
    • asia-east1
    • asia-east2
    • asia-south1
    • asia-northeast1
    • asia-southeast1
    • australia-southeast1
    • europe-north1
    • europe-west1
    • europe-west2
    • europe-west3
    • europe-west4
  • ASSET_ID:要建立的新資產使用者定義 ID。這個值必須介於 1 至 63 個字元之間,開頭和結尾須為 [a-z0-9],且字元之間可包含破折號 (-)。例如:my-asset
  • ASSET_URI:要使用的 Cloud Storage 值區中影片的 URI,例如 gs://my-bucket/my-video.mp4 (請參閱支援的媒體格式)

如要傳送要求,請展開以下其中一個選項:

您應該會收到如下的 JSON 回應:

{
  "name": "projects/PROJECT_NUMBER/locations/LOCATION/operations/OPERATION_ID",
  "metadata": {
    "@type": "type.googleapis.com/google.cloud.video.livestream.v1.OperationMetadata",
    "createTime": CREATE_TIME,
    "target": "projects/PROJECT_NUMBER/locations/LOCATION/assets/ASSET_ID",
    "verb": "create",
    "requestedCancellation": false,
    "apiVersion": "v1"
  },
  "done": false
}
這項指令會建立長期執行的作業 (LRO),您可以使用這項作業追蹤要求進度。詳情請參閱管理長時間執行的作業

C#

如要瞭解如何安裝及使用 Live Stream API 的用戶端程式庫,請參閱這篇文章。 詳情請參閱 Live Stream API C# API 參考說明文件

如要向 Live Stream API 進行驗證,請設定應用程式預設憑證。 詳情請參閱「為本機開發環境設定驗證」。


using Google.Api.Gax.ResourceNames;
using Google.Cloud.Video.LiveStream.V1;
using Google.LongRunning;
using System.Threading.Tasks;

public class CreateAssetSample
{
    public async Task<Asset> CreateAssetAsync(
         string projectId, string locationId, string assetId, string assetUri)
    {
        // Create the client.
        LivestreamServiceClient client = LivestreamServiceClient.Create();

        CreateAssetRequest request = new CreateAssetRequest
        {
            ParentAsLocationName = LocationName.FromProjectLocation(projectId, locationId),
            AssetId = assetId,
            Asset = new Asset
            {
                Video = new Asset.Types.VideoAsset
                {
                    Uri = assetUri
                }
            }
        };

        // Make the request.
        Operation<Asset, OperationMetadata> response = await client.CreateAssetAsync(request);

        // Poll until the returned long-running operation is complete.
        Operation<Asset, OperationMetadata> completedResponse = await response.PollUntilCompletedAsync();

        // Retrieve the operation result.
        return completedResponse.Result;
    }
}

Go

如要瞭解如何安裝及使用 Live Stream API 的用戶端程式庫,請參閱這篇文章。 詳情請參閱 Live Stream API Go API 參考說明文件

如要向 Live Stream API 進行驗證,請設定應用程式預設憑證。 詳情請參閱「為本機開發環境設定驗證」。

import (
	"context"
	"fmt"
	"io"

	livestream "cloud.google.com/go/video/livestream/apiv1"
	"cloud.google.com/go/video/livestream/apiv1/livestreampb"
)

// createAsset creates an asset. This asset references a video file
// in Cloud Storage.
func createAsset(w io.Writer, projectID, location, assetID, assetURI string) error {
	// projectID := "my-project-id"
	// location := "us-central1"
	// assetID := "my-asset"
	// assetURI := "gs://my-bucket/my-video.mp4"
	ctx := context.Background()
	client, err := livestream.NewClient(ctx)
	if err != nil {
		return fmt.Errorf("NewClient: %w", err)
	}
	defer client.Close()

	req := &livestreampb.CreateAssetRequest{
		Parent:  fmt.Sprintf("projects/%s/locations/%s", projectID, location),
		AssetId: assetID,
		Asset: &livestreampb.Asset{
			Resource: &livestreampb.Asset_Video{
				Video: &livestreampb.Asset_VideoAsset{
					Uri: assetURI,
				},
			},
		},
	}
	// Creates the asset.
	op, err := client.CreateAsset(ctx, req)
	if err != nil {
		return fmt.Errorf("CreateAsset: %w", err)
	}
	response, err := op.Wait(ctx)
	if err != nil {
		return fmt.Errorf("Wait: %w", err)
	}

	fmt.Fprintf(w, "Asset: %v", response.Name)
	return nil
}

Java

如要瞭解如何安裝及使用 Live Stream API 的用戶端程式庫,請參閱這篇文章。 詳情請參閱 Live Stream API Java API 參考說明文件

如要向 Live Stream API 進行驗證,請設定應用程式預設憑證。 詳情請參閱「為本機開發環境設定驗證」。


import com.google.cloud.video.livestream.v1.Asset;
import com.google.cloud.video.livestream.v1.Asset.VideoAsset;
import com.google.cloud.video.livestream.v1.CreateAssetRequest;
import com.google.cloud.video.livestream.v1.LivestreamServiceClient;
import com.google.cloud.video.livestream.v1.LocationName;
import java.io.IOException;
import java.util.concurrent.ExecutionException;
import java.util.concurrent.TimeUnit;
import java.util.concurrent.TimeoutException;

public class CreateAsset {

  public static void main(String[] args) throws Exception {
    // TODO(developer): Replace these variables before running the sample.
    String projectId = "my-project-id";
    String location = "us-central1";
    String assetId = "my-asset-id";
    String assetUri = "gs://my-bucket/my-video.mp4";

    createAsset(projectId, location, assetId, assetUri);
  }

  public static void createAsset(String projectId, String location, String assetId, String assetUri)
      throws InterruptedException, ExecutionException, TimeoutException, IOException {
    // Initialize client that will be used to send requests. This client only needs to be created
    // once, and can be reused for multiple requests. After completing all of your requests, call
    // the "close" method on the client to safely clean up any remaining background resources.
    LivestreamServiceClient livestreamServiceClient = LivestreamServiceClient.create();
    var createAssetRequest =
        CreateAssetRequest.newBuilder()
            .setParent(LocationName.of(projectId, location).toString())
            .setAssetId(assetId)
            .setAsset(
                Asset.newBuilder()
                    .setVideo(
                        VideoAsset.newBuilder()
                            .setUri(assetUri)
                            .build())
                    .build())
            .build();
    // First API call in a project can take up to 15 minutes.
    Asset result =
        livestreamServiceClient.createAssetAsync(createAssetRequest).get(15, TimeUnit.MINUTES);
    System.out.println("Asset: " + result.getName());
    livestreamServiceClient.close();
  }
}

Node.js

如要瞭解如何安裝及使用 Live Stream API 的用戶端程式庫,請參閱這篇文章。 詳情請參閱 Live Stream API Node.js API 參考說明文件

如要向 Live Stream API 進行驗證,請設定應用程式預設憑證。 詳情請參閱「為本機開發環境設定驗證」。

/**
 * TODO(developer): Uncomment these variables before running the sample.
 */
// projectId = 'my-project-id';
// location = 'us-central1';
// assetId = 'my-asset';
// assetUri = 'gs://my-bucket/my-video.mp4';

// Imports the Livestream library
const {LivestreamServiceClient} = require('@google-cloud/livestream').v1;

// Instantiates a client
const livestreamServiceClient = new LivestreamServiceClient();

async function createAsset() {
  // Construct request
  const request = {
    parent: livestreamServiceClient.locationPath(projectId, location),
    assetId: assetId,
    asset: {
      video: {
        uri: assetUri,
      },
    },
  };

  // Run request
  const [operation] = await livestreamServiceClient.createAsset(request);
  const response = await operation.promise();
  const [asset] = response;
  console.log(`Asset: ${asset.name}`);
}

createAsset();

PHP

如要瞭解如何安裝及使用 Live Stream API 的用戶端程式庫,請參閱這篇文章。 詳情請參閱 Live Stream API PHP API 參考說明文件

如要向 Live Stream API 進行驗證,請設定應用程式預設憑證。 詳情請參閱「為本機開發環境設定驗證」。

use Google\Cloud\Video\LiveStream\V1\Asset;
use Google\Cloud\Video\LiveStream\V1\Client\LivestreamServiceClient;
use Google\Cloud\Video\LiveStream\V1\CreateAssetRequest;

/**
 * Creates an asset. You can use an asset to create a slate.
 *
 * @param string  $callingProjectId   The project ID to run the API call under
 * @param string  $location           The location of the asset
 * @param string  $assetId            The ID of the asset to be created
 * @param string  $assetUri           The Cloud Storage URI of the asset
 */
function create_asset(
    string $callingProjectId,
    string $location,
    string $assetId,
    string $assetUri
): void {
    // Instantiate a client.
    $livestreamClient = new LivestreamServiceClient();

    $parent = $livestreamClient->locationName($callingProjectId, $location);
    $asset = (new Asset())
        ->setVideo(
            (new Asset\VideoAsset())
                ->setUri($assetUri));

    // Run the asset creation request. The response is a long-running operation ID.
    $request = (new CreateAssetRequest())
        ->setParent($parent)
        ->setAsset($asset)
        ->setAssetId($assetId);
    $operationResponse = $livestreamClient->createAsset($request);
    $operationResponse->pollUntilComplete();
    if ($operationResponse->operationSucceeded()) {
        $result = $operationResponse->getResult();
        // Print results
        printf('Asset: %s' . PHP_EOL, $result->getName());
    } else {
        $error = $operationResponse->getError();
        // handleError($error)
    }
}

Python

如要瞭解如何安裝及使用 Live Stream API 的用戶端程式庫,請參閱這篇文章。 詳情請參閱 Live Stream API Python API 參考說明文件

如要向 Live Stream API 進行驗證,請設定應用程式預設憑證。 詳情請參閱「為本機開發環境設定驗證」。


import argparse

from google.cloud.video import live_stream_v1
from google.cloud.video.live_stream_v1.services.livestream_service import (
    LivestreamServiceClient,
)


def create_asset(
    project_id: str, location: str, asset_id: str, asset_uri: str
) -> live_stream_v1.types.Asset:
    """Creates an asset.
    Args:
        project_id: The GCP project ID.
        location: The location in which to create the asset.
        asset_id: The user-defined asset ID.
        asset_uri: The asset URI (e.g., 'gs://my-bucket/my-video.mp4')."""

    client = LivestreamServiceClient()

    parent = f"projects/{project_id}/locations/{location}"

    asset = live_stream_v1.types.Asset(
        video=live_stream_v1.types.Asset.VideoAsset(
            uri=asset_uri,
        )
    )
    operation = client.create_asset(parent=parent, asset=asset, asset_id=asset_id)
    response = operation.result(600)
    print(f"Asset: {response.name}")

    return response

Ruby

如要瞭解如何安裝及使用 Live Stream API 的用戶端程式庫,請參閱這篇文章。 詳情請參閱 Live Stream API Ruby API 參考說明文件

如要向 Live Stream API 進行驗證,請設定應用程式預設憑證。 詳情請參閱「為本機開發環境設定驗證」。

require "google/cloud/video/live_stream"

##
# Create an asset
#
# @param project_id [String] Your Google Cloud project (e.g. "my-project")
# @param location [String] The location (e.g. "us-central1")
# @param asset_id [String] Your asset name (e.g. "my-asset")
# @param asset_uri [String] Your asset URI (e.g. "gs://my-bucket/my-video.mp4")
#
def create_asset project_id:, location:, asset_id:, asset_uri:
  # Create a Live Stream client.
  client = Google::Cloud::Video::LiveStream.livestream_service

  # Build the resource name of the parent.
  parent = client.location_path project: project_id, location: location

  # Set the asset fields.
  new_asset = {
    video: {
      uri: asset_uri
    }
  }

  operation = client.create_asset parent: parent, asset: new_asset, asset_id: asset_id

  # The returned object is of type Gapic::Operation. You can use this
  # object to check the status of an operation, cancel it, or wait
  # for results. Here is how to block until completion:
  operation.wait_until_done!

  # Print the asset name.
  puts "Asset: #{operation.response.name}"
end

建立輸入端點

如要建立輸入端點,請使用 projects.locations.inputs.create 方法。

REST

使用任何要求資料之前,請先替換以下項目:

  • PROJECT_NUMBER:您的 Google Cloud 專案編號,位於「IAM Settings」(IAM 設定) 頁面的「Project number」(專案編號) 欄位
  • LOCATION:建立輸入端點的位置;請使用支援的地區之一。
    顯示地區
    • us-central1
    • us-east1
    • us-east4
    • us-west1
    • us-west2
    • northamerica-northeast1
    • southamerica-east1
    • asia-east1
    • asia-east2
    • asia-south1
    • asia-northeast1
    • asia-southeast1
    • australia-southeast1
    • europe-north1
    • europe-west1
    • europe-west2
    • europe-west3
    • europe-west4
  • INPUT_ID:為要建立的新輸入端點定義的 ID (您會將輸入串流傳送至該端點)。這個值必須介於 1 至 63 個字元之間,開頭和結尾須為 [a-z0-9],且字元之間可包含破折號 (-)。例如:my-input

如要傳送要求,請展開以下其中一個選項:

您應該會收到如下的 JSON 回應:

{
  "name": "projects/PROJECT_NUMBER/locations/LOCATION/operations/OPERATION_ID",
  "metadata": {
    "@type": "type.googleapis.com/google.cloud.video.livestream.v1.OperationMetadata",
    "createTime": CREATE_TIME,
    "target": "projects/PROJECT_NUMBER/locations/LOCATION/inputs/INPUT_ID",
    "verb": "create",
    "requestedCancellation": false,
    "apiVersion": "v1"
  },
  "done": false
}
這項指令會建立長期執行的作業 (LRO),您可以使用這項作業追蹤要求進度。詳情請參閱管理長時間執行的作業

C#

如要瞭解如何安裝及使用 Live Stream API 的用戶端程式庫,請參閱這篇文章。 詳情請參閱 Live Stream API C# API 參考說明文件

如要向 Live Stream API 進行驗證,請設定應用程式預設憑證。 詳情請參閱「為本機開發環境設定驗證」。


using Google.Api.Gax.ResourceNames;
using Google.Cloud.Video.LiveStream.V1;
using Google.LongRunning;
using System.Threading.Tasks;

public class CreateInputSample
{
    public async Task<Input> CreateInputAsync(
         string projectId, string locationId, string inputId)
    {
        // Create the client.
        LivestreamServiceClient client = LivestreamServiceClient.Create();

        CreateInputRequest request = new CreateInputRequest
        {
            ParentAsLocationName = LocationName.FromProjectLocation(projectId, locationId),
            InputId = inputId,
            Input = new Input
            {
                Type = Input.Types.Type.RtmpPush
            }
        };

        // Make the request.
        Operation<Input, OperationMetadata> response = await client.CreateInputAsync(request);

        // Poll until the returned long-running operation is complete.
        Operation<Input, OperationMetadata> completedResponse = await response.PollUntilCompletedAsync();

        // Retrieve the operation result.
        return completedResponse.Result;
    }
}

Go

如要瞭解如何安裝及使用 Live Stream API 的用戶端程式庫,請參閱這篇文章。 詳情請參閱 Live Stream API Go API 參考說明文件

如要向 Live Stream API 進行驗證,請設定應用程式預設憑證。 詳情請參閱「為本機開發環境設定驗證」。

import (
	"context"
	"fmt"
	"io"

	livestream "cloud.google.com/go/video/livestream/apiv1"
	"cloud.google.com/go/video/livestream/apiv1/livestreampb"
)

// createInput creates an input endpoint. You send an input video stream to this
// endpoint.
func createInput(w io.Writer, projectID, location, inputID string) error {
	// projectID := "my-project-id"
	// location := "us-central1"
	// inputID := "my-input"
	ctx := context.Background()
	client, err := livestream.NewClient(ctx)
	if err != nil {
		return fmt.Errorf("NewClient: %w", err)
	}
	defer client.Close()

	req := &livestreampb.CreateInputRequest{
		Parent:  fmt.Sprintf("projects/%s/locations/%s", projectID, location),
		InputId: inputID,
		Input: &livestreampb.Input{
			Type: livestreampb.Input_RTMP_PUSH,
		},
	}
	// Creates the input.
	op, err := client.CreateInput(ctx, req)
	if err != nil {
		return fmt.Errorf("CreateInput: %w", err)
	}
	response, err := op.Wait(ctx)
	if err != nil {
		return fmt.Errorf("Wait: %w", err)
	}

	fmt.Fprintf(w, "Input: %v", response.Name)
	return nil
}

Java

如要瞭解如何安裝及使用 Live Stream API 的用戶端程式庫,請參閱這篇文章。 詳情請參閱 Live Stream API Java API 參考說明文件

如要向 Live Stream API 進行驗證,請設定應用程式預設憑證。 詳情請參閱「為本機開發環境設定驗證」。


import com.google.cloud.video.livestream.v1.CreateInputRequest;
import com.google.cloud.video.livestream.v1.Input;
import com.google.cloud.video.livestream.v1.LivestreamServiceClient;
import com.google.cloud.video.livestream.v1.LocationName;
import java.io.IOException;
import java.util.concurrent.ExecutionException;
import java.util.concurrent.TimeUnit;
import java.util.concurrent.TimeoutException;

public class CreateInput {

  public static void main(String[] args) throws Exception {
    // TODO(developer): Replace these variables before running the sample.
    String projectId = "my-project-id";
    String location = "us-central1";
    String inputId = "my-input-id";

    createInput(projectId, location, inputId);
  }

  public static void createInput(String projectId, String location, String inputId)
      throws InterruptedException, ExecutionException, TimeoutException, IOException {
    // Initialize client that will be used to send requests. This client only needs to be created
    // once, and can be reused for multiple requests. After completing all of your requests, call
    // the "close" method on the client to safely clean up any remaining background resources.
    LivestreamServiceClient livestreamServiceClient = LivestreamServiceClient.create();
    var createInputRequest =
        CreateInputRequest.newBuilder()
            .setParent(LocationName.of(projectId, location).toString())
            .setInputId(inputId)
            .setInput(Input.newBuilder().setType(Input.Type.RTMP_PUSH).build())
            .build();
    // First API call in a project can take up to 15 minutes.
    Input result =
        livestreamServiceClient.createInputAsync(createInputRequest).get(15, TimeUnit.MINUTES);
    System.out.println("Input: " + result.getName());
    livestreamServiceClient.close();
  }
}

Node.js

如要瞭解如何安裝及使用 Live Stream API 的用戶端程式庫,請參閱這篇文章。 詳情請參閱 Live Stream API Node.js API 參考說明文件

如要向 Live Stream API 進行驗證,請設定應用程式預設憑證。 詳情請參閱「為本機開發環境設定驗證」。

/**
 * TODO(developer): Uncomment these variables before running the sample.
 */
// projectId = 'my-project-id';
// location = 'us-central1';
// inputId = 'my-input';

// Imports the Livestream library
const {LivestreamServiceClient} = require('@google-cloud/livestream').v1;

// Instantiates a client
const livestreamServiceClient = new LivestreamServiceClient();

async function createInput() {
  // Construct request
  const request = {
    parent: livestreamServiceClient.locationPath(projectId, location),
    inputId: inputId,
    input: {
      type: 'RTMP_PUSH',
    },
  };

  // Run request
  const [operation] = await livestreamServiceClient.createInput(request);
  const response = await operation.promise();
  const [input] = response;
  console.log(`Input: ${input.name}`);
}

createInput();

PHP

如要瞭解如何安裝及使用 Live Stream API 的用戶端程式庫,請參閱這篇文章。 詳情請參閱 Live Stream API PHP API 參考說明文件

如要向 Live Stream API 進行驗證,請設定應用程式預設憑證。 詳情請參閱「為本機開發環境設定驗證」。

use Google\Cloud\Video\LiveStream\V1\Input;
use Google\Cloud\Video\LiveStream\V1\Client\LivestreamServiceClient;
use Google\Cloud\Video\LiveStream\V1\CreateInputRequest;

/**
 * Creates an input. You send an input video stream to this endpoint.
 *
 * @param string  $callingProjectId   The project ID to run the API call under
 * @param string  $location           The location of the input
 * @param string  $inputId            The ID of the input to be created
 */
function create_input(
    string $callingProjectId,
    string $location,
    string $inputId
): void {
    // Instantiate a client.
    $livestreamClient = new LivestreamServiceClient();

    $parent = $livestreamClient->locationName($callingProjectId, $location);
    $input = (new Input())
        ->setType(Input\Type::RTMP_PUSH);

    // Run the input creation request. The response is a long-running operation ID.
    $request = (new CreateInputRequest())
        ->setParent($parent)
        ->setInput($input)
        ->setInputId($inputId);
    $operationResponse = $livestreamClient->createInput($request);
    $operationResponse->pollUntilComplete();
    if ($operationResponse->operationSucceeded()) {
        $result = $operationResponse->getResult();
        // Print results
        printf('Input: %s' . PHP_EOL, $result->getName());
    } else {
        $error = $operationResponse->getError();
        // handleError($error)
    }
}

Python

如要瞭解如何安裝及使用 Live Stream API 的用戶端程式庫,請參閱這篇文章。 詳情請參閱 Live Stream API Python API 參考說明文件

如要向 Live Stream API 進行驗證,請設定應用程式預設憑證。 詳情請參閱「為本機開發環境設定驗證」。


import argparse

from google.cloud.video import live_stream_v1
from google.cloud.video.live_stream_v1.services.livestream_service import (
    LivestreamServiceClient,
)


def create_input(
    project_id: str, location: str, input_id: str
) -> live_stream_v1.types.Input:
    """Creates an input.
    Args:
        project_id: The GCP project ID.
        location: The location in which to create the input.
        input_id: The user-defined input ID."""

    client = LivestreamServiceClient()

    parent = f"projects/{project_id}/locations/{location}"

    input = live_stream_v1.types.Input(
        type_="RTMP_PUSH",
    )
    operation = client.create_input(parent=parent, input=input, input_id=input_id)
    response = operation.result(900)
    print(f"Input: {response.name}")

    return response

Ruby

如要瞭解如何安裝及使用 Live Stream API 的用戶端程式庫,請參閱這篇文章。 詳情請參閱 Live Stream API Ruby API 參考說明文件

如要向 Live Stream API 進行驗證,請設定應用程式預設憑證。 詳情請參閱「為本機開發環境設定驗證」。

require "google/cloud/video/live_stream"

##
# Create an input endpoint
#
# @param project_id [String] Your Google Cloud project (e.g. "my-project")
# @param location [String] The location (e.g. "us-central1")
# @param input_id [String] Your input name (e.g. "my-input")
#
def create_input project_id:, location:, input_id:
  # Create a Live Stream client.
  client = Google::Cloud::Video::LiveStream.livestream_service

  # Build the resource name of the parent.
  parent = client.location_path project: project_id, location: location

  # Set the input fields.
  new_input = {
    type: Google::Cloud::Video::LiveStream::V1::Input::Type::RTMP_PUSH
  }

  operation = client.create_input parent: parent, input: new_input, input_id: input_id

  # The returned object is of type Gapic::Operation. You can use this
  # object to check the status of an operation, cancel it, or wait
  # for results. Here is how to block until completion:
  operation.wait_until_done!

  # Print the input name.
  puts "Input: #{operation.response.name}"
end

取得輸入端點詳細資料

如要取得輸入端點的詳細資料,請使用 projects.locations.inputs.get 方法。

REST

使用任何要求資料之前,請先替換以下項目:

  • PROJECT_NUMBER:您的 Google Cloud 專案編號,位於「IAM Settings」(IAM 設定) 頁面的「Project number」(專案編號) 欄位
  • LOCATION:輸入端點所在位置;請使用其中一個支援的地區
    顯示地區
    • us-central1
    • us-east1
    • us-east4
    • us-west1
    • us-west2
    • northamerica-northeast1
    • southamerica-east1
    • asia-east1
    • asia-east2
    • asia-south1
    • asia-northeast1
    • asia-southeast1
    • australia-southeast1
    • europe-north1
    • europe-west1
    • europe-west2
    • europe-west3
    • europe-west4
  • INPUT_ID:使用者定義的輸入端點 ID

如要傳送要求,請展開以下其中一個選項:

您應該會收到如下的 JSON 回應:

{
  "name": "projects/PROJECT_NUMBER/locations/LOCATION/inputs/INPUT_ID",
  "createTime": CREATE_TIME,
  "updateTime": UPDATE_TIME,
  "type": "RTMP_PUSH",
  "uri":  "INPUT_STREAM_URI", # For example, "rtmp://1.2.3.4/live/b8ebdd94-c8d9-4d88-a16e-b963c43a953b",
  "tier": "HD"
}

C#

如要瞭解如何安裝及使用 Live Stream API 的用戶端程式庫,請參閱這篇文章。 詳情請參閱 Live Stream API C# API 參考說明文件

如要向 Live Stream API 進行驗證,請設定應用程式預設憑證。 詳情請參閱「為本機開發環境設定驗證」。


using Google.Cloud.Video.LiveStream.V1;

public class GetInputSample
{
    public Input GetInput(
         string projectId, string locationId, string inputId)
    {
        // Create the client.
        LivestreamServiceClient client = LivestreamServiceClient.Create();

        GetInputRequest request = new GetInputRequest
        {
            InputName = InputName.FromProjectLocationInput(projectId, locationId, inputId)
        };

        // Make the request.
        Input response = client.GetInput(request);
        return response;
    }
}

Go

如要瞭解如何安裝及使用 Live Stream API 的用戶端程式庫,請參閱這篇文章。 詳情請參閱 Live Stream API Go API 參考說明文件

如要向 Live Stream API 進行驗證,請設定應用程式預設憑證。 詳情請參閱「為本機開發環境設定驗證」。

import (
	"context"
	"fmt"
	"io"

	livestream "cloud.google.com/go/video/livestream/apiv1"
	"cloud.google.com/go/video/livestream/apiv1/livestreampb"
)

// getInput gets a previously-created input endpoint.
func getInput(w io.Writer, projectID, location, inputID string) error {
	// projectID := "my-project-id"
	// location := "us-central1"
	// inputID := "my-input-id"
	ctx := context.Background()
	client, err := livestream.NewClient(ctx)
	if err != nil {
		return fmt.Errorf("NewClient: %w", err)
	}
	defer client.Close()

	req := &livestreampb.GetInputRequest{
		Name: fmt.Sprintf("projects/%s/locations/%s/inputs/%s", projectID, location, inputID),
	}

	response, err := client.GetInput(ctx, req)
	if err != nil {
		return fmt.Errorf("GetInput: %w", err)
	}

	fmt.Fprintf(w, "Input: %v", response.Name)
	return nil
}

Java

如要瞭解如何安裝及使用 Live Stream API 的用戶端程式庫,請參閱這篇文章。 詳情請參閱 Live Stream API Java API 參考說明文件

如要向 Live Stream API 進行驗證,請設定應用程式預設憑證。 詳情請參閱「為本機開發環境設定驗證」。


import com.google.cloud.video.livestream.v1.Input;
import com.google.cloud.video.livestream.v1.InputName;
import com.google.cloud.video.livestream.v1.LivestreamServiceClient;
import java.io.IOException;

public class GetInput {

  public static void main(String[] args) throws Exception {
    // TODO(developer): Replace these variables before running the sample.
    String projectId = "my-project-id";
    String location = "us-central1";
    String inputId = "my-input-id";

    getInput(projectId, location, inputId);
  }

  public static void getInput(String projectId, String location, String inputId)
      throws IOException {
    // Initialize client that will be used to send requests. This client only needs to be created
    // once, and can be reused for multiple requests. In this example, try-with-resources is used
    // which automatically calls close() on the client to clean up resources.
    try (LivestreamServiceClient livestreamServiceClient = LivestreamServiceClient.create()) {
      InputName name = InputName.of(projectId, location, inputId);
      Input response = livestreamServiceClient.getInput(name);
      System.out.println("Input: " + response.getName());
    }
  }
}

Node.js

如要瞭解如何安裝及使用 Live Stream API 的用戶端程式庫,請參閱這篇文章。 詳情請參閱 Live Stream API Node.js API 參考說明文件

如要向 Live Stream API 進行驗證,請設定應用程式預設憑證。 詳情請參閱「為本機開發環境設定驗證」。

/**
 * TODO(developer): Uncomment these variables before running the sample.
 */
// projectId = 'my-project-id';
// location = 'us-central1';
// inputId = 'my-input';

// Imports the Livestream library
const {LivestreamServiceClient} = require('@google-cloud/livestream').v1;

// Instantiates a client
const livestreamServiceClient = new LivestreamServiceClient();

async function getInput() {
  // Construct request
  const request = {
    name: livestreamServiceClient.inputPath(projectId, location, inputId),
  };
  const [input] = await livestreamServiceClient.getInput(request);
  console.log(`Input: ${input.name}`);
}

getInput();

PHP

如要瞭解如何安裝及使用 Live Stream API 的用戶端程式庫,請參閱這篇文章。 詳情請參閱 Live Stream API PHP API 參考說明文件

如要向 Live Stream API 進行驗證,請設定應用程式預設憑證。 詳情請參閱「為本機開發環境設定驗證」。

use Google\Cloud\Video\LiveStream\V1\Client\LivestreamServiceClient;
use Google\Cloud\Video\LiveStream\V1\GetInputRequest;

/**
 * Gets an input.
 *
 * @param string  $callingProjectId   The project ID to run the API call under
 * @param string  $location           The location of the input
 * @param string  $inputId            The ID of the input
 */
function get_input(
    string $callingProjectId,
    string $location,
    string $inputId
): void {
    // Instantiate a client.
    $livestreamClient = new LivestreamServiceClient();
    $formattedName = $livestreamClient->inputName($callingProjectId, $location, $inputId);

    // Get the input.
    $request = (new GetInputRequest())
        ->setName($formattedName);
    $response = $livestreamClient->getInput($request);
    // Print results
    printf('Input: %s' . PHP_EOL, $response->getName());
}

Python

如要瞭解如何安裝及使用 Live Stream API 的用戶端程式庫,請參閱這篇文章。 詳情請參閱 Live Stream API Python API 參考說明文件

如要向 Live Stream API 進行驗證,請設定應用程式預設憑證。 詳情請參閱「為本機開發環境設定驗證」。


import argparse

from google.cloud.video import live_stream_v1
from google.cloud.video.live_stream_v1.services.livestream_service import (
    LivestreamServiceClient,
)


def get_input(
    project_id: str, location: str, input_id: str
) -> live_stream_v1.types.Input:
    """Gets an input.
    Args:
        project_id: The GCP project ID.
        location: The location of the input.
        input_id: The user-defined input ID."""

    client = LivestreamServiceClient()

    name = f"projects/{project_id}/locations/{location}/inputs/{input_id}"
    response = client.get_input(name=name)
    print(f"Input: {response.name}")

    return response

Ruby

如要瞭解如何安裝及使用 Live Stream API 的用戶端程式庫,請參閱這篇文章。 詳情請參閱 Live Stream API Ruby API 參考說明文件

如要向 Live Stream API 進行驗證,請設定應用程式預設憑證。 詳情請參閱「為本機開發環境設定驗證」。

require "google/cloud/video/live_stream"

##
# Get an input endpoint
#
# @param project_id [String] Your Google Cloud project (e.g. "my-project")
# @param location [String] The location (e.g. "us-central1")
# @param input_id [String] Your input name (e.g. "my-input")
#
def get_input project_id:, location:, input_id:
  # Create a Live Stream client.
  client = Google::Cloud::Video::LiveStream.livestream_service

  # Build the resource name of the input.
  name = client.input_path project: project_id, location: location, input: input_id

  # Get the input.
  input = client.get_input name: name

  # Print the input name.
  puts "Input: #{input.name}"
end

找到 uri 欄位,然後複製傳回的 INPUT_STREAM_URI,以便稍後在「傳送輸入串流」部分使用。

建立管道

如要建立管道,請使用 projects.locations.channels.create 方法。下列範例會建立管道,產生 HLS 直播串流。直播內容包含單一高畫質 (1280x720) 轉譯版本。

REST

使用任何要求資料之前,請先替換以下項目:

  • PROJECT_NUMBER:您的 Google Cloud 專案編號,位於「IAM Settings」(IAM 設定) 頁面的「Project number」(專案編號) 欄位
  • LOCATION:建立頻道的所在位置;請使用支援的區域之一。
    顯示地區
    • us-central1
    • us-east1
    • us-east4
    • us-west1
    • us-west2
    • northamerica-northeast1
    • southamerica-east1
    • asia-east1
    • asia-east2
    • asia-south1
    • asia-northeast1
    • asia-southeast1
    • australia-southeast1
    • europe-north1
    • europe-west1
    • europe-west2
    • europe-west3
    • europe-west4
  • CHANNEL_ID:要建立的管道使用者定義 ID;這個值必須介於 1 至 63 個字元之間,開頭和結尾須為 [a-z0-9],且字元之間可包含破折號 (-)
  • INPUT_ID:使用者定義的輸入端點 ID
  • BUCKET_NAME:您建立的 Cloud Storage bucket 名稱,用於保存即時串流資訊清單和區隔檔案

如要傳送要求,請展開以下其中一個選項:

您應該會收到如下的 JSON 回應:

{
  "name": "projects/PROJECT_NUMBER/locations/LOCATION/operations/OPERATION_ID",
  "metadata": {
    "@type": "type.googleapis.com/google.cloud.video.livestream.v1.OperationMetadata",
    "createTime": CREATE_TIME,
    "target": "projects/PROJECT_NUMBER/locations/LOCATION/channels/CHANNEL_ID",
    "verb": "create",
    "requestedCancellation": false,
    "apiVersion": "v1"
  },
  "done": false
}
這項指令會建立長期執行的作業 (LRO),您可以使用這項作業追蹤要求進度。詳情請參閱管理長時間執行的作業

C#

如要瞭解如何安裝及使用 Live Stream API 的用戶端程式庫,請參閱這篇文章。 詳情請參閱 Live Stream API C# API 參考說明文件

如要向 Live Stream API 進行驗證,請設定應用程式預設憑證。 詳情請參閱「為本機開發環境設定驗證」。


using Google.Api.Gax.ResourceNames;
using Google.Cloud.Video.LiveStream.V1;
using Google.LongRunning;
using System.Threading.Tasks;

public class CreateChannelSample
{
    public async Task<Channel> CreateChannelAsync(
         string projectId, string locationId, string channelId, string inputId, string outputUri)
    {
        // Create the client.
        LivestreamServiceClient client = LivestreamServiceClient.Create();

        InputAttachment inputAttachment = new InputAttachment
        {
            Key = "my-input",
            InputAsInputName = InputName.FromProjectLocationInput(projectId, locationId, inputId)
        };

        VideoStream videoStream = new VideoStream
        {
            H264 = new VideoStream.Types.H264CodecSettings
            {
                Profile = "high",
                BitrateBps = 3000000,
                FrameRate = 30,
                HeightPixels = 720,
                WidthPixels = 1280
            }
        };

        ElementaryStream elementaryStreamVideo = new ElementaryStream
        {
            Key = "es_video",
            VideoStream = videoStream
        };

        AudioStream audioStream = new AudioStream
        {
            Codec = "aac",
            ChannelCount = 2,
            BitrateBps = 160000
        };

        ElementaryStream elementaryStreamAudio = new ElementaryStream
        {
            Key = "es_audio",
            AudioStream = audioStream
        };

        MuxStream muxVideo = new MuxStream
        {
            Key = "mux_video",
            ElementaryStreams = { "es_video" },
            SegmentSettings = new SegmentSettings
            {
                SegmentDuration = new Google.Protobuf.WellKnownTypes.Duration
                {
                    Seconds = 2
                }
            }
        };

        MuxStream muxAudio = new MuxStream
        {
            Key = "mux_audio",
            ElementaryStreams = { "es_audio" },
            SegmentSettings = new SegmentSettings
            {
                SegmentDuration = new Google.Protobuf.WellKnownTypes.Duration
                {
                    Seconds = 2
                }
            }
        };

        CreateChannelRequest request = new CreateChannelRequest
        {
            ParentAsLocationName = LocationName.FromProjectLocation(projectId, locationId),
            ChannelId = channelId,
            Channel = new Channel
            {
                InputAttachments = { inputAttachment },
                Output = new Channel.Types.Output
                {
                    Uri = outputUri
                },
                ElementaryStreams = { elementaryStreamVideo, elementaryStreamAudio },
                MuxStreams = { muxVideo, muxAudio },
                Manifests = {
                    new Manifest {
                        FileName = "manifest.m3u8",
                        Type = Manifest.Types.ManifestType.Hls,
                        MuxStreams = { "mux_video", "mux_audio" },
                        MaxSegmentCount = 5
                    }
                }
            }
        };

        // Make the request.
        Operation<Channel, OperationMetadata> response = await client.CreateChannelAsync(request);

        // Poll until the returned long-running operation is complete.
        Operation<Channel, OperationMetadata> completedResponse = await response.PollUntilCompletedAsync();

        // Retrieve the operation result.
        return completedResponse.Result;
    }
}

Go

如要瞭解如何安裝及使用 Live Stream API 的用戶端程式庫,請參閱這篇文章。 詳情請參閱 Live Stream API Go API 參考說明文件

如要向 Live Stream API 進行驗證,請設定應用程式預設憑證。 詳情請參閱「為本機開發環境設定驗證」。

import (
	"context"
	"fmt"
	"io"

	"github.com/golang/protobuf/ptypes/duration"

	livestream "cloud.google.com/go/video/livestream/apiv1"
	"cloud.google.com/go/video/livestream/apiv1/livestreampb"
)

// createChannel creates a channel.
func createChannel(w io.Writer, projectID, location, channelID, inputID, outputURI string) error {
	// projectID := "my-project-id"
	// location := "us-central1"
	// channelID := "my-channel"
	// inputID := "my-input"
	// outputURI := "gs://my-bucket/my-output-folder/"
	ctx := context.Background()
	client, err := livestream.NewClient(ctx)
	if err != nil {
		return fmt.Errorf("NewClient: %w", err)
	}
	defer client.Close()

	req := &livestreampb.CreateChannelRequest{
		Parent:    fmt.Sprintf("projects/%s/locations/%s", projectID, location),
		ChannelId: channelID,
		Channel: &livestreampb.Channel{
			InputAttachments: []*livestreampb.InputAttachment{
				{
					Key:   "my-input",
					Input: fmt.Sprintf("projects/%s/locations/%s/inputs/%s", projectID, location, inputID),
				},
			},
			Output: &livestreampb.Channel_Output{
				Uri: outputURI,
			},
			ElementaryStreams: []*livestreampb.ElementaryStream{
				{
					Key: "es_video",
					ElementaryStream: &livestreampb.ElementaryStream_VideoStream{
						VideoStream: &livestreampb.VideoStream{
							CodecSettings: &livestreampb.VideoStream_H264{
								H264: &livestreampb.VideoStream_H264CodecSettings{
									Profile:      "high",
									BitrateBps:   3000000,
									FrameRate:    30,
									HeightPixels: 720,
									WidthPixels:  1280,
								},
							},
						},
					},
				},
				{
					Key: "es_audio",
					ElementaryStream: &livestreampb.ElementaryStream_AudioStream{
						AudioStream: &livestreampb.AudioStream{
							Codec:        "aac",
							ChannelCount: 2,
							BitrateBps:   160000,
						},
					},
				},
			},
			MuxStreams: []*livestreampb.MuxStream{
				{
					Key:               "mux_video",
					ElementaryStreams: []string{"es_video"},
					SegmentSettings: &livestreampb.SegmentSettings{
						SegmentDuration: &duration.Duration{
							Seconds: 2,
						},
					},
				},
				{
					Key:               "mux_audio",
					ElementaryStreams: []string{"es_audio"},
					SegmentSettings: &livestreampb.SegmentSettings{
						SegmentDuration: &duration.Duration{
							Seconds: 2,
						},
					},
				},
			},
			Manifests: []*livestreampb.Manifest{
				{
					FileName:        "manifest.m3u8",
					Type:            livestreampb.Manifest_HLS,
					MuxStreams:      []string{"mux_video", "mux_audio"},
					MaxSegmentCount: 5,
				},
			},
		},
	}
	// Creates the channel.
	op, err := client.CreateChannel(ctx, req)
	if err != nil {
		return fmt.Errorf("CreateChannel: %w", err)
	}
	response, err := op.Wait(ctx)
	if err != nil {
		return fmt.Errorf("Wait: %w", err)
	}

	fmt.Fprintf(w, "Channel: %v", response.Name)
	return nil
}

Java

如要瞭解如何安裝及使用 Live Stream API 的用戶端程式庫,請參閱這篇文章。 詳情請參閱 Live Stream API Java API 參考說明文件

如要向 Live Stream API 進行驗證,請設定應用程式預設憑證。 詳情請參閱「為本機開發環境設定驗證」。


import com.google.cloud.video.livestream.v1.AudioStream;
import com.google.cloud.video.livestream.v1.Channel;
import com.google.cloud.video.livestream.v1.Channel.Output;
import com.google.cloud.video.livestream.v1.CreateChannelRequest;
import com.google.cloud.video.livestream.v1.ElementaryStream;
import com.google.cloud.video.livestream.v1.InputAttachment;
import com.google.cloud.video.livestream.v1.InputName;
import com.google.cloud.video.livestream.v1.LivestreamServiceClient;
import com.google.cloud.video.livestream.v1.LocationName;
import com.google.cloud.video.livestream.v1.Manifest;
import com.google.cloud.video.livestream.v1.Manifest.ManifestType;
import com.google.cloud.video.livestream.v1.MuxStream;
import com.google.cloud.video.livestream.v1.SegmentSettings;
import com.google.cloud.video.livestream.v1.VideoStream;
import com.google.cloud.video.livestream.v1.VideoStream.H264CodecSettings;
import com.google.protobuf.Duration;
import java.io.IOException;
import java.util.concurrent.ExecutionException;
import java.util.concurrent.TimeUnit;
import java.util.concurrent.TimeoutException;

public class CreateChannel {

  public static void main(String[] args) throws Exception {
    // TODO(developer): Replace these variables before running the sample.
    String projectId = "my-project-id";
    String location = "us-central1";
    String channelId = "my-channel-id";
    String inputId = "my-input-id";
    String outputUri = "gs://my-bucket/my-output-folder/";

    createChannel(projectId, location, channelId, inputId, outputUri);
  }

  public static void createChannel(
      String projectId, String location, String channelId, String inputId, String outputUri)
      throws InterruptedException, ExecutionException, TimeoutException, IOException {
    // Initialize client that will be used to send requests. This client only needs to be created
    // once, and can be reused for multiple requests. After completing all of your requests, call
    // the "close" method on the client to safely clean up any remaining background resources.
    LivestreamServiceClient livestreamServiceClient = LivestreamServiceClient.create();
    VideoStream videoStream =
        VideoStream.newBuilder()
            .setH264(
                H264CodecSettings.newBuilder()
                    .setProfile("high")
                    .setBitrateBps(3000000)
                    .setFrameRate(30)
                    .setHeightPixels(720)
                    .setWidthPixels(1280))
            .build();

    AudioStream audioStream =
        AudioStream.newBuilder().setCodec("aac").setChannelCount(2).setBitrateBps(160000).build();

    var createChannelRequest =
        CreateChannelRequest.newBuilder()
            .setParent(LocationName.of(projectId, location).toString())
            .setChannelId(channelId)
            .setChannel(
                Channel.newBuilder()
                    .addInputAttachments(
                        0,
                        InputAttachment.newBuilder()
                            .setKey("my-input")
                            .setInput(InputName.of(projectId, location, inputId).toString())
                            .build())
                    .setOutput(Output.newBuilder().setUri(outputUri).build())
                    .addElementaryStreams(
                        ElementaryStream.newBuilder()
                            .setKey("es_video")
                            .setVideoStream(videoStream))
                    .addElementaryStreams(
                        ElementaryStream.newBuilder()
                            .setKey("es_audio")
                            .setAudioStream(audioStream))
                    .addMuxStreams(
                        MuxStream.newBuilder()
                            .setKey("mux_video")
                            .addElementaryStreams("es_video")
                            .setSegmentSettings(
                                SegmentSettings.newBuilder()
                                    .setSegmentDuration(
                                        Duration.newBuilder().setSeconds(2).build())
                                    .build())
                            .build())
                    .addMuxStreams(
                        MuxStream.newBuilder()
                            .setKey("mux_audio")
                            .addElementaryStreams("es_audio")
                            .setSegmentSettings(
                                SegmentSettings.newBuilder()
                                    .setSegmentDuration(
                                        Duration.newBuilder().setSeconds(2).build())
                                    .build())
                            .build())
                    .addManifests(
                        Manifest.newBuilder()
                            .setFileName("manifest.m3u8")
                            .setType(ManifestType.HLS)
                            .addMuxStreams("mux_video")
                            .addMuxStreams("mux_audio")
                            .setMaxSegmentCount(5)
                            .build()))
            .build();
    // First API call in a project can take up to 10 minutes.
    Channel result =
        livestreamServiceClient
            .createChannelAsync(createChannelRequest)
            .get(10, TimeUnit.MINUTES);
    System.out.println("Channel: " + result.getName());
    livestreamServiceClient.close();
  }
}

Node.js

如要瞭解如何安裝及使用 Live Stream API 的用戶端程式庫,請參閱這篇文章。 詳情請參閱 Live Stream API Node.js API 參考說明文件

如要向 Live Stream API 進行驗證,請設定應用程式預設憑證。 詳情請參閱「為本機開發環境設定驗證」。

/**
 * TODO(developer): Uncomment these variables before running the sample.
 */
// projectId = 'my-project-id';
// location = 'us-central1';
// channelId = 'my-channel';
// inputId = 'my-input';
// outputUri = 'gs://my-bucket/my-output-folder/';

// Imports the Livestream library
const {LivestreamServiceClient} = require('@google-cloud/livestream').v1;

// Instantiates a client
const livestreamServiceClient = new LivestreamServiceClient();

async function createChannel() {
  // Construct request
  const request = {
    parent: livestreamServiceClient.locationPath(projectId, location),
    channelId: channelId,
    channel: {
      inputAttachments: [
        {
          key: 'my-input',
          input: livestreamServiceClient.inputPath(
            projectId,
            location,
            inputId
          ),
        },
      ],
      output: {
        uri: outputUri,
      },
      elementaryStreams: [
        {
          key: 'es_video',
          videoStream: {
            h264: {
              profile: 'high',
              heightPixels: 720,
              widthPixels: 1280,
              bitrateBps: 3000000,
              frameRate: 30,
            },
          },
        },
        {
          key: 'es_audio',
          audioStream: {
            codec: 'aac',
            channelCount: 2,
            bitrateBps: 160000,
          },
        },
      ],
      muxStreams: [
        {
          key: 'mux_video',
          elementaryStreams: ['es_video'],
          segmentSettings: {
            seconds: 2,
          },
        },
        {
          key: 'mux_audio',
          elementaryStreams: ['es_audio'],
          segmentSettings: {
            seconds: 2,
          },
        },
      ],
      manifests: [
        {
          fileName: 'manifest.m3u8',
          type: 'HLS',
          muxStreams: ['mux_video', 'mux_audio'],
          maxSegmentCount: 5,
        },
      ],
    },
  };

  // Run request
  const [operation] = await livestreamServiceClient.createChannel(request);
  const response = await operation.promise();
  const [channel] = response;
  console.log(`Channel: ${channel.name}`);
}

createChannel();

PHP

如要瞭解如何安裝及使用 Live Stream API 的用戶端程式庫,請參閱這篇文章。 詳情請參閱 Live Stream API PHP API 參考說明文件

如要向 Live Stream API 進行驗證,請設定應用程式預設憑證。 詳情請參閱「為本機開發環境設定驗證」。

use Google\Cloud\Video\LiveStream\V1\AudioStream;
use Google\Cloud\Video\LiveStream\V1\Channel;
use Google\Cloud\Video\LiveStream\V1\ElementaryStream;
use Google\Cloud\Video\LiveStream\V1\InputAttachment;
use Google\Cloud\Video\LiveStream\V1\Client\LivestreamServiceClient;
use Google\Cloud\Video\LiveStream\V1\CreateChannelRequest;
use Google\Cloud\Video\LiveStream\V1\Manifest;
use Google\Cloud\Video\LiveStream\V1\MuxStream;
use Google\Cloud\Video\LiveStream\V1\SegmentSettings;
use Google\Cloud\Video\LiveStream\V1\VideoStream;
use Google\Protobuf\Duration;

/**
 * Creates a channel.
 *
 * @param string  $callingProjectId   The project ID to run the API call under
 * @param string  $location           The location of the channel
 * @param string  $channelId          The ID of the channel to be created
 * @param string  $inputId            The ID of the input for the channel
 * @param string  $outputUri          Uri of the channel output folder in a
 *                                    Cloud Storage bucket. (e.g.
 *                                    "gs://my-bucket/my-output-folder/")
 */
function create_channel(
    string $callingProjectId,
    string $location,
    string $channelId,
    string $inputId,
    string $outputUri
): void {
    // Instantiate a client.
    $livestreamClient = new LivestreamServiceClient();

    $parent = $livestreamClient->locationName($callingProjectId, $location);
    $channelName = $livestreamClient->channelName($callingProjectId, $location, $channelId);
    $inputName = $livestreamClient->inputName($callingProjectId, $location, $inputId);

    $channel = (new Channel())
        ->setName($channelName)
        ->setInputAttachments([
            new InputAttachment([
                'key' => 'my-input',
                'input' => $inputName
            ])
        ])
        ->setElementaryStreams([
            new ElementaryStream([
                'key' => 'es_video',
                'video_stream' => new VideoStream([
                    'h264' => new VideoStream\H264CodecSettings([
                        'profile' => 'high',
                        'width_pixels' => 1280,
                        'height_pixels' => 720,
                        'bitrate_bps' => 3000000,
                        'frame_rate' => 30
                    ])
                ]),
            ]),
            new ElementaryStream([
                'key' => 'es_audio',
                'audio_stream' => new AudioStream([
                    'codec' => 'aac',
                    'channel_count' => 2,
                    'bitrate_bps' => 160000
                ])
            ])
        ])
        ->setOutput(new Channel\Output(['uri' => $outputUri]))
        ->setMuxStreams([
            new MuxStream([
                'key' => 'mux_video',
                'elementary_streams' => ['es_video'],
                'segment_settings' => new SegmentSettings([
                    'segment_duration' => new Duration(['seconds' => 2])
                ])
            ]),
            new MuxStream([
                'key' => 'mux_audio',
                'elementary_streams' => ['es_audio'],
                'segment_settings' => new SegmentSettings([
                    'segment_duration' => new Duration(['seconds' => 2])
                ])
            ]),
        ])
        ->setManifests([
            new Manifest([
                'file_name' => 'manifest.m3u8',
                'type' => Manifest\ManifestType::HLS,
                'mux_streams' => ['mux_video', 'mux_audio'],
                'max_segment_count' => 5
            ])
        ]);

    // Run the channel creation request. The response is a long-running operation ID.
    $request = (new CreateChannelRequest())
        ->setParent($parent)
        ->setChannel($channel)
        ->setChannelId($channelId);
    $operationResponse = $livestreamClient->createChannel($request);
    $operationResponse->pollUntilComplete();
    if ($operationResponse->operationSucceeded()) {
        $result = $operationResponse->getResult();
        // Print results
        printf('Channel: %s' . PHP_EOL, $result->getName());
    } else {
        $error = $operationResponse->getError();
        // handleError($error)
    }
}

Python

如要瞭解如何安裝及使用 Live Stream API 的用戶端程式庫,請參閱這篇文章。 詳情請參閱 Live Stream API Python API 參考說明文件

如要向 Live Stream API 進行驗證,請設定應用程式預設憑證。 詳情請參閱「為本機開發環境設定驗證」。


import argparse

from google.cloud.video import live_stream_v1
from google.cloud.video.live_stream_v1.services.livestream_service import (
    LivestreamServiceClient,
)
from google.protobuf import duration_pb2 as duration


def create_channel(
    project_id: str, location: str, channel_id: str, input_id: str, output_uri: str
) -> live_stream_v1.types.Channel:
    """Creates a channel.
    Args:
        project_id: The GCP project ID.
        location: The location in which to create the channel.
        channel_id: The user-defined channel ID.
        input_id: The user-defined input ID.
        output_uri: Uri of the channel output folder in a Cloud Storage bucket."""

    client = LivestreamServiceClient()
    parent = f"projects/{project_id}/locations/{location}"
    input = f"projects/{project_id}/locations/{location}/inputs/{input_id}"
    name = f"projects/{project_id}/locations/{location}/channels/{channel_id}"

    channel = live_stream_v1.types.Channel(
        name=name,
        input_attachments=[
            live_stream_v1.types.InputAttachment(
                key="my-input",
                input=input,
            ),
        ],
        output=live_stream_v1.types.Channel.Output(
            uri=output_uri,
        ),
        elementary_streams=[
            live_stream_v1.types.ElementaryStream(
                key="es_video",
                video_stream=live_stream_v1.types.VideoStream(
                    h264=live_stream_v1.types.VideoStream.H264CodecSettings(
                        profile="high",
                        width_pixels=1280,
                        height_pixels=720,
                        bitrate_bps=3000000,
                        frame_rate=30,
                    ),
                ),
            ),
            live_stream_v1.types.ElementaryStream(
                key="es_audio",
                audio_stream=live_stream_v1.types.AudioStream(
                    codec="aac", channel_count=2, bitrate_bps=160000
                ),
            ),
        ],
        mux_streams=[
            live_stream_v1.types.MuxStream(
                key="mux_video",
                elementary_streams=["es_video"],
                segment_settings=live_stream_v1.types.SegmentSettings(
                    segment_duration=duration.Duration(
                        seconds=2,
                    ),
                ),
            ),
            live_stream_v1.types.MuxStream(
                key="mux_audio",
                elementary_streams=["es_audio"],
                segment_settings=live_stream_v1.types.SegmentSettings(
                    segment_duration=duration.Duration(
                        seconds=2,
                    ),
                ),
            ),
        ],
        manifests=[
            live_stream_v1.types.Manifest(
                file_name="manifest.m3u8",
                type_="HLS",
                mux_streams=["mux_video", "mux_audio"],
                max_segment_count=5,
            ),
        ],
    )
    operation = client.create_channel(
        parent=parent, channel=channel, channel_id=channel_id
    )
    response = operation.result(600)
    print(f"Channel: {response.name}")

    return response

Ruby

如要瞭解如何安裝及使用 Live Stream API 的用戶端程式庫,請參閱這篇文章。 詳情請參閱 Live Stream API Ruby API 參考說明文件

如要向 Live Stream API 進行驗證,請設定應用程式預設憑證。 詳情請參閱「為本機開發環境設定驗證」。

require "google/cloud/video/live_stream"

##
# Create a channel
#
# @param project_id [String] Your Google Cloud project (e.g. "my-project")
# @param location [String] The location (e.g. "us-central1")
# @param channel_id [String] Your channel name (e.g. "my-channel")
# @param input_id [String] Your input name (e.g. "my-input")
# @param output_uri [String] Uri of the channel output folder in a Cloud Storage
#     bucket. (e.g. "gs://my-bucket/my-output-folder/";)
#
def create_channel project_id:, location:, channel_id:, input_id:, output_uri:
  # Create a Live Stream client.
  client = Google::Cloud::Video::LiveStream.livestream_service

  # Build the resource name of the parent.
  parent = client.location_path project: project_id, location: location
  # Build the resource name of the input.
  input_path = client.input_path project: project_id, location: location, input: input_id

  # Set the channel fields.
  new_channel = {
    input_attachments: [
      {
        key: "my-input",
        input: input_path
      }
    ],
    output: {
      uri: output_uri
    },
    elementary_streams: [
      {
        key: "es_video",
        video_stream: {
          h264: {
            profile: "high",
            bitrate_bps: 3_000_000,
            frame_rate: 30,
            height_pixels: 720,
            width_pixels: 1280
          }
        }
      },
      {
        key: "es_audio",
        audio_stream: {
          codec: "aac",
          channel_count: 2,
          bitrate_bps: 160_000
        }
      }
    ],
    mux_streams: [
      {
        key: "mux_video",
        elementary_streams: [
          "es_video"
        ],
        segment_settings: {
          segment_duration: {
            seconds: 2
          }
        }
      },
      {
        key: "mux_audio",
        elementary_streams: [
          "es_audio"
        ],
        segment_settings: {
          segment_duration: {
            seconds: 2
          }
        }
      }
    ],
    manifests: [
      {
        file_name: "main.m3u8",
        type: Google::Cloud::Video::LiveStream::V1::Manifest::ManifestType::HLS,
        mux_streams: [
          "mux_video", "mux_audio"
        ],
        max_segment_count: 5
      }
    ]
  }

  operation = client.create_channel parent: parent, channel: new_channel, channel_id: channel_id

  # The returned object is of type Gapic::Operation. You can use this
  # object to check the status of an operation, cancel it, or wait
  # for results. Here is how to block until completion:
  operation.wait_until_done!

  # Print the channel name.
  puts "Channel: #{operation.response.name}"
end

啟動管道

如要啟動管道,請使用 projects.locations.channels.start 方法。

REST

使用任何要求資料之前,請先替換以下項目:

  • PROJECT_NUMBER:您的 Google Cloud 專案編號,位於「IAM Settings」(IAM 設定) 頁面的「Project number」(專案編號) 欄位
  • LOCATION:頻道所在位置;請使用支援的區域之一
    顯示地區
    • us-central1
    • us-east1
    • us-east4
    • us-west1
    • us-west2
    • northamerica-northeast1
    • southamerica-east1
    • asia-east1
    • asia-east2
    • asia-south1
    • asia-northeast1
    • asia-southeast1
    • australia-southeast1
    • europe-north1
    • europe-west1
    • europe-west2
    • europe-west3
    • europe-west4
  • CHANNEL_ID:使用者定義的管道 ID

如要傳送要求,請展開以下其中一個選項:

您應該會收到如下的 JSON 回應:

{
  "name": "projects/PROJECT_NUMBER/locations/LOCATION/operations/OPERATION_ID",
  "metadata": {
    "@type": "type.googleapis.com/google.cloud.video.livestream.v1.OperationMetadata",
    "createTime": CREATE_TIME,
    "target": "projects/PROJECT_NUMBER/locations/LOCATION/channels/CHANNEL_ID",
    "verb": "start",
    "requestedCancellation": false,
    "apiVersion": "v1"
  },
  "done": false
}
這項指令會建立長期執行的作業 (LRO),您可以使用這項作業追蹤要求進度。詳情請參閱管理長時間執行的作業

C#

如要瞭解如何安裝及使用 Live Stream API 的用戶端程式庫,請參閱這篇文章。 詳情請參閱 Live Stream API C# API 參考說明文件

如要向 Live Stream API 進行驗證,請設定應用程式預設憑證。 詳情請參閱「為本機開發環境設定驗證」。


using Google.Cloud.Video.LiveStream.V1;
using Google.LongRunning;
using System.Threading.Tasks;

public class StartChannelSample
{
    public async Task StartChannelAsync(
         string projectId, string locationId, string channelId)
    {
        // Create the client.
        LivestreamServiceClient client = LivestreamServiceClient.Create();

        StartChannelRequest request = new StartChannelRequest
        {
            ChannelName = ChannelName.FromProjectLocationChannel(projectId, locationId, channelId)
        };

        // Make the request.
        Operation<ChannelOperationResponse, OperationMetadata> response = await client.StartChannelAsync(request);

        // Poll until the returned long-running operation is complete.
        await response.PollUntilCompletedAsync();
    }
}

Go

如要瞭解如何安裝及使用 Live Stream API 的用戶端程式庫,請參閱這篇文章。 詳情請參閱 Live Stream API Go API 參考說明文件

如要向 Live Stream API 進行驗證,請設定應用程式預設憑證。 詳情請參閱「為本機開發環境設定驗證」。

import (
	"context"
	"fmt"
	"io"

	livestream "cloud.google.com/go/video/livestream/apiv1"
	"cloud.google.com/go/video/livestream/apiv1/livestreampb"
)

// startChannel starts a channel.
func startChannel(w io.Writer, projectID, location, channelID string) error {
	// projectID := "my-project-id"
	// location := "us-central1"
	// channelID := "my-channel-id"
	ctx := context.Background()
	client, err := livestream.NewClient(ctx)
	if err != nil {
		return fmt.Errorf("NewClient: %w", err)
	}
	defer client.Close()

	req := &livestreampb.StartChannelRequest{
		Name: fmt.Sprintf("projects/%s/locations/%s/channels/%s", projectID, location, channelID),
	}

	op, err := client.StartChannel(ctx, req)
	if err != nil {
		return fmt.Errorf("StartChannel: %w", err)
	}
	_, err = op.Wait(ctx)
	if err != nil {
		return fmt.Errorf("Wait: %w", err)
	}

	fmt.Fprintf(w, "Started channel")
	return nil
}

Java

如要瞭解如何安裝及使用 Live Stream API 的用戶端程式庫,請參閱這篇文章。 詳情請參閱 Live Stream API Java API 參考說明文件

如要向 Live Stream API 進行驗證,請設定應用程式預設憑證。 詳情請參閱「為本機開發環境設定驗證」。


import com.google.cloud.video.livestream.v1.ChannelName;
import com.google.cloud.video.livestream.v1.LivestreamServiceClient;
import java.io.IOException;
import java.util.concurrent.ExecutionException;
import java.util.concurrent.TimeUnit;
import java.util.concurrent.TimeoutException;

public class StartChannel {

  public static void main(String[] args) throws Exception {
    // TODO(developer): Replace these variables before running the sample.
    String projectId = "my-project-id";
    String location = "us-central1";
    String channelId = "my-channel-id";

    startChannel(projectId, location, channelId);
  }

  public static void startChannel(String projectId, String location, String channelId)
      throws InterruptedException, ExecutionException, TimeoutException, IOException {
    // Initialize client that will be used to send requests. This client only needs to be created
    // once, and can be reused for multiple requests. After completing all of your requests, call
    // the "close" method on the client to safely clean up any remaining background resources.
    LivestreamServiceClient livestreamServiceClient = LivestreamServiceClient.create();
    ChannelName name = ChannelName.of(projectId, location, channelId);
    // First API call in a project can take up to 15 minutes.
    livestreamServiceClient.startChannelAsync(name).get(15, TimeUnit.MINUTES);
    System.out.println("Started channel");
    livestreamServiceClient.close();
  }
}

Node.js

如要瞭解如何安裝及使用 Live Stream API 的用戶端程式庫,請參閱這篇文章。 詳情請參閱 Live Stream API Node.js API 參考說明文件

如要向 Live Stream API 進行驗證,請設定應用程式預設憑證。 詳情請參閱「為本機開發環境設定驗證」。

/**
 * TODO(developer): Uncomment these variables before running the sample.
 */
// projectId = 'my-project-id';
// location = 'us-central1';
// channelId = 'my-channel';

// Imports the Livestream library
const {LivestreamServiceClient} = require('@google-cloud/livestream').v1;

// Instantiates a client
const livestreamServiceClient = new LivestreamServiceClient();

async function startChannel() {
  // Construct request
  const request = {
    name: livestreamServiceClient.channelPath(projectId, location, channelId),
  };
  const [operation] = await livestreamServiceClient.startChannel(request);
  await operation.promise();
  console.log('Started channel');
}

startChannel();

PHP

如要瞭解如何安裝及使用 Live Stream API 的用戶端程式庫,請參閱這篇文章。 詳情請參閱 Live Stream API PHP API 參考說明文件

如要向 Live Stream API 進行驗證,請設定應用程式預設憑證。 詳情請參閱「為本機開發環境設定驗證」。

use Google\Cloud\Video\LiveStream\V1\Client\LivestreamServiceClient;
use Google\Cloud\Video\LiveStream\V1\StartChannelRequest;

/**
 * Starts a channel.
 *
 * @param string  $callingProjectId   The project ID to run the API call under
 * @param string  $location           The location of the channel
 * @param string  $channelId          The ID of the channel
 */
function start_channel(
    string $callingProjectId,
    string $location,
    string $channelId
): void {
    // Instantiate a client.
    $livestreamClient = new LivestreamServiceClient();
    $formattedName = $livestreamClient->channelName($callingProjectId, $location, $channelId);

    // Run the channel start request. The response is a long-running operation ID.
    $request = (new StartChannelRequest())
        ->setName($formattedName);
    $operationResponse = $livestreamClient->startChannel($request);
    $operationResponse->pollUntilComplete();
    if ($operationResponse->operationSucceeded()) {
        // Print results
        printf('Started channel' . PHP_EOL);
    } else {
        $error = $operationResponse->getError();
        // handleError($error)
    }
}

Python

如要瞭解如何安裝及使用 Live Stream API 的用戶端程式庫,請參閱這篇文章。 詳情請參閱 Live Stream API Python API 參考說明文件

如要向 Live Stream API 進行驗證,請設定應用程式預設憑證。 詳情請參閱「為本機開發環境設定驗證」。


import argparse

from google.cloud.video import live_stream_v1
from google.cloud.video.live_stream_v1.services.livestream_service import (
    LivestreamServiceClient,
)


def start_channel(
    project_id: str, location: str, channel_id: str
) -> live_stream_v1.types.ChannelOperationResponse:
    """Starts a channel.
    Args:
        project_id: The GCP project ID.
        location: The location of the channel.
        channel_id: The user-defined channel ID."""

    client = LivestreamServiceClient()

    name = f"projects/{project_id}/locations/{location}/channels/{channel_id}"
    operation = client.start_channel(name=name)
    response = operation.result(900)
    print("Started channel")

    return response

Ruby

如要瞭解如何安裝及使用 Live Stream API 的用戶端程式庫,請參閱這篇文章。 詳情請參閱 Live Stream API Ruby API 參考說明文件

如要向 Live Stream API 進行驗證,請設定應用程式預設憑證。 詳情請參閱「為本機開發環境設定驗證」。

require "google/cloud/video/live_stream"

##
# Starts a channel
#
# @param project_id [String] Your Google Cloud project (e.g. "my-project")
# @param location [String] The location (e.g. "us-central1")
# @param channel_id [String] Your channel name (e.g. "my-channel")
#
def start_channel project_id:, location:, channel_id:
  # Create a Live Stream client.
  client = Google::Cloud::Video::LiveStream.livestream_service

  # Build the resource name of the channel.
  name = client.channel_path project: project_id, location: location, channel: channel_id

  # Start the channel.
  operation = client.start_channel name: name

  # The returned object is of type Gapic::Operation. You can use this
  # object to check the status of an operation, cancel it, or wait
  # for results. Here is how to block until completion:
  operation.wait_until_done!

  # Print a success message.
  puts "Started channel"
end

傳送輸入串流

如果您使用 ffmpeg 傳送測試串流,請開啟新的終端機視窗。使用「取得輸入端點詳細資料」一節中的 INPUT_STREAM_URI,執行下列指令:

ffmpeg -re -f lavfi -i "testsrc=size=1280x720 [out0]; sine=frequency=500 [out1]" \
  -acodec aac -vcodec h264 -f flv INPUT_STREAM_URI

播放直播

如要在 Shaka Player 中播放產生的媒體檔案,請完成下列步驟:

  1. 將您建立的 Cloud Storage bucket 設為可公開讀取
  2. 如要在 Cloud Storage bucket 上啟用跨源資源共享 (CORS),請按照下列步驟操作:
    1. 建立包含下列內容的 JSON 檔案:
      [
        {
          "origin": ["https://shaka-player-demo.appspot.com/"],
          "responseHeader": ["Content-Type", "Range"],
          "method": ["GET", "HEAD"],
          "maxAgeSeconds": 3600
        }
      ]
    2. 執行下列指令,並將 JSON_FILE_NAME 替換為您在上一個步驟中建立的 JSON 檔案名稱:
      gcloud storage buckets update gs://BUCKET_NAME --cors-file=JSON_FILE_NAME.json
  3. 在 Cloud Storage 值區中,找出系統產生的檔案。在該檔案的「Public access」(公開存取權) 資料欄中,按一下「Copy URL」(複製網址)
  4. 前往 Shaka Player (這是一個線上即時串流播放器)。
  5. 按一下頂端導覽列中的「Custom Content」(自訂內容)
  6. 按一下「+」按鈕。
  7. 將檔案的公開網址貼到「Manifest URL」(資訊清單網址) 方塊中。

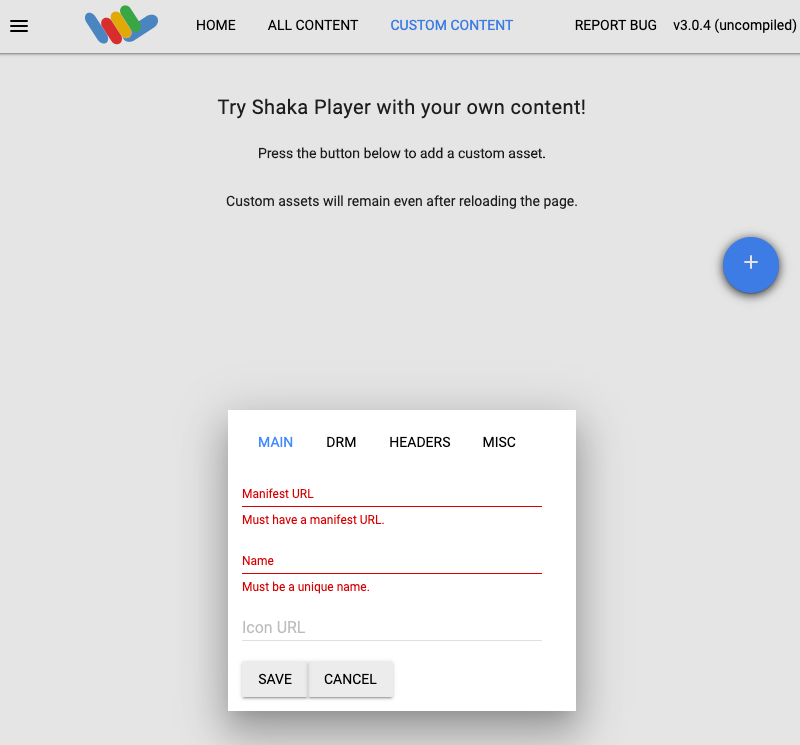
  8. 在「Name」(名稱) 方塊中輸入名稱。

  9. 按一下「Save」(儲存)

  10. 按一下「Play」(播放)

這時候應該就會看到即時串流內容以測試模式播放。

測試模式影片

建立頻道活動

如要建立頻道活動,請使用 projects.locations.channels.events.create 方法。以下範例會將宣傳片插入直播,做為頻道活動。

如果片尾素材資源尚未準備就緒 (活動執行開始後兩秒),系統會顯示黑畫面,直到片尾素材資源準備就緒為止。

REST

使用任何要求資料之前,請先替換以下項目:

  • PROJECT_NUMBER:您的 Google Cloud 專案編號,位於「IAM Settings」(IAM 設定) 頁面的「Project number」(專案編號) 欄位
  • LOCATION:頻道所在位置;請使用支援的區域之一
    顯示地區
    • us-central1
    • us-east1
    • us-east4
    • us-west1
    • us-west2
    • northamerica-northeast1
    • southamerica-east1
    • asia-east1
    • asia-east2
    • asia-south1
    • asia-northeast1
    • asia-southeast1
    • australia-southeast1
    • europe-north1
    • europe-west1
    • europe-west2
    • europe-west3
    • europe-west4
  • CHANNEL_ID:使用者定義的管道 ID
  • EVENT_ID:使用者定義的事件 ID
  • ASSET_ID:使用者定義的板岩資產 ID

如要傳送要求,請展開以下其中一個選項:

您應該會收到如下的 JSON 回應:

{
  "name": "projects/PROJECT_NUMBER/locations/LOCATION/channels/CHANNEL_ID/events/EVENT_ID",
  "createTime": CREATE_TIME,
  "updateTime": UPDATE_TIME,
  "slate": {
    "duration": "60s",
    "asset": "projects/PROJECT_NUMBER/locations/LOCATION/assets/ASSET_ID"
  },
  "executeNow": "true",
  "state": "PENDING"
}

檢查直播,確認已插入片頭。您也可以確認事件是否已將 state 設為 SUCCEEDED (請參閱「取得頻道活動詳細資料」)。

如要建立長時間的板岩,請從 slate 物件中移除 duration 欄位。如要移除長期播放的節目,請建立返回節目頻道活動