Slate in einen Livestream einfügen

Auf dieser Seite wird beschrieben, wie Sie ein Slate erstellen und in einen Livestream einfügen. Slates sind Inhalte, die den primären Livestreamcontent ersetzen können, wenn du (z. B. wenn Sie technische Probleme mit dem Eingabestream haben) oder sensible Inhalte im Eingabestream ausblenden).

Google Cloud-Projekt und Authentifizierung einrichten

Wenn Sie noch kein Google Cloud-Projekt und Anmeldedaten, siehe Hinweise

Video in den Cloud Storage-Bucket hochladen

  1. Rufen Sie in der Google Cloud Console den Cloud Storage-Browser auf.
    Zum Cloud Storage-Browser
  2. Klicken Sie auf den Namen Ihres Buckets, um ihn zu öffnen.
  3. Klicken Sie auf Dateien hochladen.
  4. Wähle eine Videodatei zum Hochladen von deinem lokalen Computer aus. Sie können Ein 60 Sekunden langes Beispielvideo

Das Video ist jetzt im Cloud Storage-Bucket gespeichert.

Asset erstellen

Assets sind Videos oder Bilder, die mit über die Live Stream API. Ein Asset wird verwendet, um ein Ereignis zum Einfügen eines Slate-Channels zu erstellen. Sie sollten ein Asset lange vor der Verwendung für ein Slate erstellen, braucht Zeit, bis die API das Asset verarbeitet hat. Wenn das Asset noch nicht zur Verfügung steht, Sekunden nach der Ausführungszeit des Slate-Ereignisses wird ein schwarzer Bildschirm angezeigt, Asset bereit.

Verwenden Sie zum Erstellen eines Assets das projects.locations.assets.create-Methode. Im folgenden Beispiel erstellt ein Video-Asset.

REST

Ersetzen Sie diese Werte in den folgenden Anfragedaten:

  • PROJECT_NUMBER: Ihr Google Cloud-Projekt Zahl; Sie finden sie im Feld Projektnummer auf der Seite IAM-Einstellungen
  • LOCATION: der Speicherort, an dem die Datei erstellt werden soll. asset; eine der unterstützten Regionen verwenden
    Standorte anzeigen
    • us-central1
    • us-east1
    • us-east4
    • us-west1
    • us-west2
    • northamerica-northeast1
    • southamerica-east1
    • asia-east1
    • asia-east2
    • asia-northeast1
    • asia-southeast1
    • australia-southeast1
    • europe-west1
    • europe-west2
    • europe-west3
    • europe-west4
  • ASSET_ID: Eine benutzerdefinierte Kennung für das neue Asset erstellt werden soll. Dieser Wert muss 1–63 Zeichen lang sein und mit [a-z0-9] beginnen und enden. kann Bindestriche (-) zwischen den Zeichen enthalten. Beispiel: my-asset
  • ASSET_URI: der URI des Videos in der Cloud Storage-Bucket, der verwendet werden soll, z. B. gs://my-bucket/my-video.mp4 (siehe unterstützte Medienformate)

Wenn Sie die Anfrage senden möchten, maximieren Sie eine der folgenden Optionen:

Sie sollten in etwa folgende JSON-Antwort erhalten:

<ph type="x-smartling-placeholder">
</ph>
{
  "name": "projects/PROJECT_NUMBER/locations/LOCATION/operations/OPERATION_ID",
  "metadata": {
    "@type": "type.googleapis.com/google.cloud.video.livestream.v1.OperationMetadata",
    "createTime": CREATE_TIME,
    "target": "projects/PROJECT_NUMBER/locations/LOCATION/assets/ASSET_ID",
    "verb": "create",
    "requestedCancellation": false,
    "apiVersion": "v1"
  },
  "done": false
}
Mit diesem Befehl wird ein Vorgang mit langer Ausführungszeit erstellt, den Sie verwenden können um den Fortschritt Ihres Antrags zu verfolgen. Weitere Informationen finden Sie unter Lang andauernde Vorgänge verwalten .

C#

Informationen zum Installieren und Verwenden der Clientbibliothek für die Live Stream API findest du unter Live Stream API-Clientbibliotheken Weitere Informationen finden Sie in der Live Stream API – C# API Referenzdokumentation.

Richten Sie Standardanmeldedaten für Anwendungen ein, um sich bei der Live Stream API zu authentifizieren. Weitere Informationen finden Sie unter Authentifizierung für eine lokale Entwicklungsumgebung einrichten.


using Google.Api.Gax.ResourceNames;
using Google.Cloud.Video.LiveStream.V1;
using Google.LongRunning;
using System.Threading.Tasks;

public class CreateAssetSample
{
    public async Task<Asset> CreateAssetAsync(
         string projectId, string locationId, string assetId, string assetUri)
    {
        // Create the client.
        LivestreamServiceClient client = LivestreamServiceClient.Create();

        CreateAssetRequest request = new CreateAssetRequest
        {
            ParentAsLocationName = LocationName.FromProjectLocation(projectId, locationId),
            AssetId = assetId,
            Asset = new Asset
            {
                Video = new Asset.Types.VideoAsset
                {
                    Uri = assetUri
                }
            }
        };

        // Make the request.
        Operation<Asset, OperationMetadata> response = await client.CreateAssetAsync(request);

        // Poll until the returned long-running operation is complete.
        Operation<Asset, OperationMetadata> completedResponse = await response.PollUntilCompletedAsync();

        // Retrieve the operation result.
        return completedResponse.Result;
    }
}

Go

Informationen zum Installieren und Verwenden der Clientbibliothek für die Live Stream API findest du unter Live Stream API-Clientbibliotheken Weitere Informationen finden Sie in der Live Stream API – Go API Referenzdokumentation.

Richten Sie Standardanmeldedaten für Anwendungen ein, um sich bei der Live Stream API zu authentifizieren. Weitere Informationen finden Sie unter Authentifizierung für eine lokale Entwicklungsumgebung einrichten.

import (
	"context"
	"fmt"
	"io"

	livestream "cloud.google.com/go/video/livestream/apiv1"
	"cloud.google.com/go/video/livestream/apiv1/livestreampb"
)

// createAsset creates an asset. This asset references a video file
// in Cloud Storage.
func createAsset(w io.Writer, projectID, location, assetID, assetURI string) error {
	// projectID := "my-project-id"
	// location := "us-central1"
	// assetID := "my-asset"
	// assetURI := "gs://my-bucket/my-video.mp4"
	ctx := context.Background()
	client, err := livestream.NewClient(ctx)
	if err != nil {
		return fmt.Errorf("NewClient: %w", err)
	}
	defer client.Close()

	req := &livestreampb.CreateAssetRequest{
		Parent:  fmt.Sprintf("projects/%s/locations/%s", projectID, location),
		AssetId: assetID,
		Asset: &livestreampb.Asset{
			Resource: &livestreampb.Asset_Video{
				Video: &livestreampb.Asset_VideoAsset{
					Uri: assetURI,
				},
			},
		},
	}
	// Creates the asset.
	op, err := client.CreateAsset(ctx, req)
	if err != nil {
		return fmt.Errorf("CreateAsset: %w", err)
	}
	response, err := op.Wait(ctx)
	if err != nil {
		return fmt.Errorf("Wait: %w", err)
	}

	fmt.Fprintf(w, "Asset: %v", response.Name)
	return nil
}

Java

Informationen zum Installieren und Verwenden der Clientbibliothek für die Live Stream API findest du unter Live Stream API-Clientbibliotheken Weitere Informationen finden Sie in der Live Stream API – Java API Referenzdokumentation.

Richten Sie Standardanmeldedaten für Anwendungen ein, um sich bei der Live Stream API zu authentifizieren. Weitere Informationen finden Sie unter Authentifizierung für eine lokale Entwicklungsumgebung einrichten.


import com.google.cloud.video.livestream.v1.Asset;
import com.google.cloud.video.livestream.v1.Asset.VideoAsset;
import com.google.cloud.video.livestream.v1.CreateAssetRequest;
import com.google.cloud.video.livestream.v1.LivestreamServiceClient;
import com.google.cloud.video.livestream.v1.LocationName;
import java.io.IOException;
import java.util.concurrent.ExecutionException;
import java.util.concurrent.TimeUnit;
import java.util.concurrent.TimeoutException;

public class CreateAsset {

  public static void main(String[] args) throws Exception {
    // TODO(developer): Replace these variables before running the sample.
    String projectId = "my-project-id";
    String location = "us-central1";
    String assetId = "my-asset-id";
    String assetUri = "gs://my-bucket/my-video.mp4";

    createAsset(projectId, location, assetId, assetUri);
  }

  public static void createAsset(String projectId, String location, String assetId, String assetUri)
      throws InterruptedException, ExecutionException, TimeoutException, IOException {
    // Initialize client that will be used to send requests. This client only needs to be created
    // once, and can be reused for multiple requests. After completing all of your requests, call
    // the "close" method on the client to safely clean up any remaining background resources.
    LivestreamServiceClient livestreamServiceClient = LivestreamServiceClient.create();
    var createAssetRequest =
        CreateAssetRequest.newBuilder()
            .setParent(LocationName.of(projectId, location).toString())
            .setAssetId(assetId)
            .setAsset(
                Asset.newBuilder()
                    .setVideo(
                        VideoAsset.newBuilder()
                            .setUri(assetUri)
                            .build())
                    .build())
            .build();
    // First API call in a project can take up to 15 minutes.
    Asset result =
        livestreamServiceClient.createAssetAsync(createAssetRequest).get(15, TimeUnit.MINUTES);
    System.out.println("Asset: " + result.getName());
    livestreamServiceClient.close();
  }
}

Node.js

Informationen zum Installieren und Verwenden der Clientbibliothek für die Live Stream API findest du unter Live Stream API-Clientbibliotheken Weitere Informationen finden Sie in der Live Stream API – Node.js API Referenzdokumentation.

Richten Sie Standardanmeldedaten für Anwendungen ein, um sich bei der Live Stream API zu authentifizieren. Weitere Informationen finden Sie unter Authentifizierung für eine lokale Entwicklungsumgebung einrichten.

/**
 * TODO(developer): Uncomment these variables before running the sample.
 */
// projectId = 'my-project-id';
// location = 'us-central1';
// assetId = 'my-asset';
// assetUri = 'gs://my-bucket/my-video.mp4';

// Imports the Livestream library
const {LivestreamServiceClient} = require('@google-cloud/livestream').v1;

// Instantiates a client
const livestreamServiceClient = new LivestreamServiceClient();

async function createAsset() {
  // Construct request
  const request = {
    parent: livestreamServiceClient.locationPath(projectId, location),
    assetId: assetId,
    asset: {
      video: {
        uri: assetUri,
      },
    },
  };

  // Run request
  const [operation] = await livestreamServiceClient.createAsset(request);
  const response = await operation.promise();
  const [asset] = response;
  console.log(`Asset: ${asset.name}`);
}

createAsset();

PHP

Informationen zum Installieren und Verwenden der Clientbibliothek für die Live Stream API findest du unter Live Stream API-Clientbibliotheken Weitere Informationen finden Sie in der Live Stream API – PHP API Referenzdokumentation.

Richten Sie Standardanmeldedaten für Anwendungen ein, um sich bei der Live Stream API zu authentifizieren. Weitere Informationen finden Sie unter Authentifizierung für eine lokale Entwicklungsumgebung einrichten.

use Google\Cloud\Video\LiveStream\V1\Asset;
use Google\Cloud\Video\LiveStream\V1\Client\LivestreamServiceClient;
use Google\Cloud\Video\LiveStream\V1\CreateAssetRequest;

/**
 * Creates an asset. You can use an asset to create a slate.
 *
 * @param string  $callingProjectId   The project ID to run the API call under
 * @param string  $location           The location of the asset
 * @param string  $assetId            The ID of the asset to be created
 * @param string  $assetUri           The Cloud Storage URI of the asset
 */
function create_asset(
    string $callingProjectId,
    string $location,
    string $assetId,
    string $assetUri
): void {
    // Instantiate a client.
    $livestreamClient = new LivestreamServiceClient();

    $parent = $livestreamClient->locationName($callingProjectId, $location);
    $asset = (new Asset())
        ->setVideo(
            (new Asset\VideoAsset())
                ->setUri($assetUri));

    // Run the asset creation request. The response is a long-running operation ID.
    $request = (new CreateAssetRequest())
        ->setParent($parent)
        ->setAsset($asset)
        ->setAssetId($assetId);
    $operationResponse = $livestreamClient->createAsset($request);
    $operationResponse->pollUntilComplete();
    if ($operationResponse->operationSucceeded()) {
        $result = $operationResponse->getResult();
        // Print results
        printf('Asset: %s' . PHP_EOL, $result->getName());
    } else {
        $error = $operationResponse->getError();
        // handleError($error)
    }
}

Python

Informationen zum Installieren und Verwenden der Clientbibliothek für die Live Stream API findest du unter Live Stream API-Clientbibliotheken Weitere Informationen finden Sie in der Live Stream API – Python API Referenzdokumentation.

Richten Sie Standardanmeldedaten für Anwendungen ein, um sich bei der Live Stream API zu authentifizieren. Weitere Informationen finden Sie unter Authentifizierung für eine lokale Entwicklungsumgebung einrichten.


import argparse

from google.cloud.video import live_stream_v1
from google.cloud.video.live_stream_v1.services.livestream_service import (
    LivestreamServiceClient,
)


def create_asset(
    project_id: str, location: str, asset_id: str, asset_uri: str
) -> live_stream_v1.types.Asset:
    """Creates an asset.
    Args:
        project_id: The GCP project ID.
        location: The location in which to create the asset.
        asset_id: The user-defined asset ID.
        asset_uri: The asset URI (e.g., 'gs://my-bucket/my-video.mp4')."""

    client = LivestreamServiceClient()

    parent = f"projects/{project_id}/locations/{location}"

    asset = live_stream_v1.types.Asset(
        video=live_stream_v1.types.Asset.VideoAsset(
            uri=asset_uri,
        )
    )
    operation = client.create_asset(parent=parent, asset=asset, asset_id=asset_id)
    response = operation.result(600)
    print(f"Asset: {response.name}")

    return response

Ruby

Informationen zum Installieren und Verwenden der Clientbibliothek für die Live Stream API findest du unter Live Stream API-Clientbibliotheken Weitere Informationen finden Sie in der Live Stream API – Ruby API Referenzdokumentation.

Richten Sie Standardanmeldedaten für Anwendungen ein, um sich bei der Live Stream API zu authentifizieren. Weitere Informationen finden Sie unter Authentifizierung für eine lokale Entwicklungsumgebung einrichten.

require "google/cloud/video/live_stream"

##
# Create an asset
#
# @param project_id [String] Your Google Cloud project (e.g. "my-project")
# @param location [String] The location (e.g. "us-central1")
# @param asset_id [String] Your asset name (e.g. "my-asset")
# @param asset_uri [String] Your asset URI (e.g. "gs://my-bucket/my-video.mp4")
#
def create_asset project_id:, location:, asset_id:, asset_uri:
  # Create a Live Stream client.
  client = Google::Cloud::Video::LiveStream.livestream_service

  # Build the resource name of the parent.
  parent = client.location_path project: project_id, location: location

  # Set the asset fields.
  new_asset = {
    video: {
      uri: asset_uri
    }
  }

  operation = client.create_asset parent: parent, asset: new_asset, asset_id: asset_id

  # The returned object is of type Gapic::Operation. You can use this
  # object to check the status of an operation, cancel it, or wait
  # for results. Here is how to block until completion:
  operation.wait_until_done!

  # Print the asset name.
  puts "Asset: #{operation.response.name}"
end

Eingabeendpunkt erstellen

Verwenden Sie zum Erstellen eines Eingabeendpunkts die Methode projects.locations.inputs.create-Methode.

REST

Ersetzen Sie diese Werte in den folgenden Anfragedaten:

  • PROJECT_NUMBER: Ihr Google Cloud-Projekt Zahl; Sie finden sie im Feld Projektnummer auf der Seite IAM-Einstellungen
  • LOCATION: der Ort, an dem die Eingabe erstellt werden soll endpoint; eine der unterstützten Regionen verwenden
    Standorte anzeigen
    • us-central1
    • us-east1
    • us-east4
    • us-west1
    • us-west2
    • northamerica-northeast1
    • southamerica-east1
    • asia-east1
    • asia-east2
    • asia-northeast1
    • asia-southeast1
    • australia-southeast1
    • europe-west1
    • europe-west2
    • europe-west3
    • europe-west4
  • INPUT_ID: eine benutzerdefinierte Kennung für die neue Eingabe Endpunkt, der erstellt werden soll (an den Sie den Eingabestream senden). Dieser Wert muss 1–63 Zeichen lang sein und mit [a-z0-9] beginnen und enden. kann Bindestriche (-) zwischen den Zeichen enthalten. Beispiel: my-input

Wenn Sie die Anfrage senden möchten, maximieren Sie eine der folgenden Optionen:

Sie sollten in etwa folgende JSON-Antwort erhalten:

<ph type="x-smartling-placeholder">
</ph>
{
  "name": "projects/PROJECT_NUMBER/locations/LOCATION/operations/OPERATION_ID",
  "metadata": {
    "@type": "type.googleapis.com/google.cloud.video.livestream.v1.OperationMetadata",
    "createTime": CREATE_TIME,
    "target": "projects/PROJECT_NUMBER/locations/LOCATION/inputs/INPUT_ID",
    "verb": "create",
    "requestedCancellation": false,
    "apiVersion": "v1"
  },
  "done": false
}
Mit diesem Befehl wird ein Vorgang mit langer Ausführungszeit erstellt, den Sie verwenden können um den Fortschritt Ihres Antrags zu verfolgen. Weitere Informationen finden Sie unter Lang andauernde Vorgänge verwalten .

C#

Informationen zum Installieren und Verwenden der Clientbibliothek für die Live Stream API findest du unter Live Stream API-Clientbibliotheken Weitere Informationen finden Sie in der Live Stream API – C# API Referenzdokumentation.

Richten Sie Standardanmeldedaten für Anwendungen ein, um sich bei der Live Stream API zu authentifizieren. Weitere Informationen finden Sie unter Authentifizierung für eine lokale Entwicklungsumgebung einrichten.


using Google.Api.Gax.ResourceNames;
using Google.Cloud.Video.LiveStream.V1;
using Google.LongRunning;
using System.Threading.Tasks;

public class CreateInputSample
{
    public async Task<Input> CreateInputAsync(
         string projectId, string locationId, string inputId)
    {
        // Create the client.
        LivestreamServiceClient client = LivestreamServiceClient.Create();

        CreateInputRequest request = new CreateInputRequest
        {
            ParentAsLocationName = LocationName.FromProjectLocation(projectId, locationId),
            InputId = inputId,
            Input = new Input
            {
                Type = Input.Types.Type.RtmpPush
            }
        };

        // Make the request.
        Operation<Input, OperationMetadata> response = await client.CreateInputAsync(request);

        // Poll until the returned long-running operation is complete.
        Operation<Input, OperationMetadata> completedResponse = await response.PollUntilCompletedAsync();

        // Retrieve the operation result.
        return completedResponse.Result;
    }
}

Go

Informationen zum Installieren und Verwenden der Clientbibliothek für die Live Stream API findest du unter Live Stream API-Clientbibliotheken Weitere Informationen finden Sie in der Live Stream API – Go API Referenzdokumentation.

Richten Sie Standardanmeldedaten für Anwendungen ein, um sich bei der Live Stream API zu authentifizieren. Weitere Informationen finden Sie unter Authentifizierung für eine lokale Entwicklungsumgebung einrichten.

import (
	"context"
	"fmt"
	"io"

	livestream "cloud.google.com/go/video/livestream/apiv1"
	"cloud.google.com/go/video/livestream/apiv1/livestreampb"
)

// createInput creates an input endpoint. You send an input video stream to this
// endpoint.
func createInput(w io.Writer, projectID, location, inputID string) error {
	// projectID := "my-project-id"
	// location := "us-central1"
	// inputID := "my-input"
	ctx := context.Background()
	client, err := livestream.NewClient(ctx)
	if err != nil {
		return fmt.Errorf("NewClient: %w", err)
	}
	defer client.Close()

	req := &livestreampb.CreateInputRequest{
		Parent:  fmt.Sprintf("projects/%s/locations/%s", projectID, location),
		InputId: inputID,
		Input: &livestreampb.Input{
			Type: livestreampb.Input_RTMP_PUSH,
		},
	}
	// Creates the input.
	op, err := client.CreateInput(ctx, req)
	if err != nil {
		return fmt.Errorf("CreateInput: %w", err)
	}
	response, err := op.Wait(ctx)
	if err != nil {
		return fmt.Errorf("Wait: %w", err)
	}

	fmt.Fprintf(w, "Input: %v", response.Name)
	return nil
}

Java

Informationen zum Installieren und Verwenden der Clientbibliothek für die Live Stream API findest du unter Live Stream API-Clientbibliotheken Weitere Informationen finden Sie in der Live Stream API – Java API Referenzdokumentation.

Richten Sie Standardanmeldedaten für Anwendungen ein, um sich bei der Live Stream API zu authentifizieren. Weitere Informationen finden Sie unter Authentifizierung für eine lokale Entwicklungsumgebung einrichten.


import com.google.cloud.video.livestream.v1.CreateInputRequest;
import com.google.cloud.video.livestream.v1.Input;
import com.google.cloud.video.livestream.v1.LivestreamServiceClient;
import com.google.cloud.video.livestream.v1.LocationName;
import java.io.IOException;
import java.util.concurrent.ExecutionException;
import java.util.concurrent.TimeUnit;
import java.util.concurrent.TimeoutException;

public class CreateInput {

  public static void main(String[] args) throws Exception {
    // TODO(developer): Replace these variables before running the sample.
    String projectId = "my-project-id";
    String location = "us-central1";
    String inputId = "my-input-id";

    createInput(projectId, location, inputId);
  }

  public static void createInput(String projectId, String location, String inputId)
      throws InterruptedException, ExecutionException, TimeoutException, IOException {
    // Initialize client that will be used to send requests. This client only needs to be created
    // once, and can be reused for multiple requests. After completing all of your requests, call
    // the "close" method on the client to safely clean up any remaining background resources.
    LivestreamServiceClient livestreamServiceClient = LivestreamServiceClient.create();
    var createInputRequest =
        CreateInputRequest.newBuilder()
            .setParent(LocationName.of(projectId, location).toString())
            .setInputId(inputId)
            .setInput(Input.newBuilder().setType(Input.Type.RTMP_PUSH).build())
            .build();
    // First API call in a project can take up to 15 minutes.
    Input result =
        livestreamServiceClient.createInputAsync(createInputRequest).get(15, TimeUnit.MINUTES);
    System.out.println("Input: " + result.getName());
    livestreamServiceClient.close();
  }
}

Node.js

Informationen zum Installieren und Verwenden der Clientbibliothek für die Live Stream API findest du unter Live Stream API-Clientbibliotheken Weitere Informationen finden Sie in der Live Stream API – Node.js API Referenzdokumentation.

Richten Sie Standardanmeldedaten für Anwendungen ein, um sich bei der Live Stream API zu authentifizieren. Weitere Informationen finden Sie unter Authentifizierung für eine lokale Entwicklungsumgebung einrichten.

/**
 * TODO(developer): Uncomment these variables before running the sample.
 */
// projectId = 'my-project-id';
// location = 'us-central1';
// inputId = 'my-input';

// Imports the Livestream library
const {LivestreamServiceClient} = require('@google-cloud/livestream').v1;

// Instantiates a client
const livestreamServiceClient = new LivestreamServiceClient();

async function createInput() {
  // Construct request
  const request = {
    parent: livestreamServiceClient.locationPath(projectId, location),
    inputId: inputId,
    input: {
      type: 'RTMP_PUSH',
    },
  };

  // Run request
  const [operation] = await livestreamServiceClient.createInput(request);
  const response = await operation.promise();
  const [input] = response;
  console.log(`Input: ${input.name}`);
}

createInput();

PHP

Informationen zum Installieren und Verwenden der Clientbibliothek für die Live Stream API findest du unter Live Stream API-Clientbibliotheken Weitere Informationen finden Sie in der Live Stream API – PHP API Referenzdokumentation.

Richten Sie Standardanmeldedaten für Anwendungen ein, um sich bei der Live Stream API zu authentifizieren. Weitere Informationen finden Sie unter Authentifizierung für eine lokale Entwicklungsumgebung einrichten.

use Google\Cloud\Video\LiveStream\V1\Input;
use Google\Cloud\Video\LiveStream\V1\Client\LivestreamServiceClient;
use Google\Cloud\Video\LiveStream\V1\CreateInputRequest;

/**
 * Creates an input. You send an input video stream to this endpoint.
 *
 * @param string  $callingProjectId   The project ID to run the API call under
 * @param string  $location           The location of the input
 * @param string  $inputId            The ID of the input to be created
 */
function create_input(
    string $callingProjectId,
    string $location,
    string $inputId
): void {
    // Instantiate a client.
    $livestreamClient = new LivestreamServiceClient();

    $parent = $livestreamClient->locationName($callingProjectId, $location);
    $input = (new Input())
        ->setType(Input\Type::RTMP_PUSH);

    // Run the input creation request. The response is a long-running operation ID.
    $request = (new CreateInputRequest())
        ->setParent($parent)
        ->setInput($input)
        ->setInputId($inputId);
    $operationResponse = $livestreamClient->createInput($request);
    $operationResponse->pollUntilComplete();
    if ($operationResponse->operationSucceeded()) {
        $result = $operationResponse->getResult();
        // Print results
        printf('Input: %s' . PHP_EOL, $result->getName());
    } else {
        $error = $operationResponse->getError();
        // handleError($error)
    }
}

Python

Informationen zum Installieren und Verwenden der Clientbibliothek für die Live Stream API findest du unter Live Stream API-Clientbibliotheken Weitere Informationen finden Sie in der Live Stream API – Python API Referenzdokumentation.

Richten Sie Standardanmeldedaten für Anwendungen ein, um sich bei der Live Stream API zu authentifizieren. Weitere Informationen finden Sie unter Authentifizierung für eine lokale Entwicklungsumgebung einrichten.


import argparse

from google.cloud.video import live_stream_v1
from google.cloud.video.live_stream_v1.services.livestream_service import (
    LivestreamServiceClient,
)


def create_input(
    project_id: str, location: str, input_id: str
) -> live_stream_v1.types.Input:
    """Creates an input.
    Args:
        project_id: The GCP project ID.
        location: The location in which to create the input.
        input_id: The user-defined input ID."""

    client = LivestreamServiceClient()

    parent = f"projects/{project_id}/locations/{location}"

    input = live_stream_v1.types.Input(
        type_="RTMP_PUSH",
    )
    operation = client.create_input(parent=parent, input=input, input_id=input_id)
    response = operation.result(900)
    print(f"Input: {response.name}")

    return response

Ruby

Informationen zum Installieren und Verwenden der Clientbibliothek für die Live Stream API findest du unter Live Stream API-Clientbibliotheken Weitere Informationen finden Sie in der Live Stream API – Ruby API Referenzdokumentation.

Richten Sie Standardanmeldedaten für Anwendungen ein, um sich bei der Live Stream API zu authentifizieren. Weitere Informationen finden Sie unter Authentifizierung für eine lokale Entwicklungsumgebung einrichten.

require "google/cloud/video/live_stream"

##
# Create an input endpoint
#
# @param project_id [String] Your Google Cloud project (e.g. "my-project")
# @param location [String] The location (e.g. "us-central1")
# @param input_id [String] Your input name (e.g. "my-input")
#
def create_input project_id:, location:, input_id:
  # Create a Live Stream client.
  client = Google::Cloud::Video::LiveStream.livestream_service

  # Build the resource name of the parent.
  parent = client.location_path project: project_id, location: location

  # Set the input fields.
  new_input = {
    type: Google::Cloud::Video::LiveStream::V1::Input::Type::RTMP_PUSH
  }

  operation = client.create_input parent: parent, input: new_input, input_id: input_id

  # The returned object is of type Gapic::Operation. You can use this
  # object to check the status of an operation, cancel it, or wait
  # for results. Here is how to block until completion:
  operation.wait_until_done!

  # Print the input name.
  puts "Input: #{operation.response.name}"
end

Details zum Eingabeendpunkt abrufen

Um die Details des Eingabeendpunkts abzurufen, verwenden Sie die Methode projects.locations.inputs.get-Methode.

REST

Ersetzen Sie diese Werte in den folgenden Anfragedaten:

  • PROJECT_NUMBER: Ihr Google Cloud-Projekt Zahl; Sie finden sie im Feld Projektnummer auf der Seite IAM-Einstellungen
  • LOCATION: der Ort, an dem sich der Eingabeendpunkt befindet gefunden; eine der unterstützten Regionen verwenden
    Standorte anzeigen
    • us-central1
    • us-east1
    • us-east4
    • us-west1
    • us-west2
    • northamerica-northeast1
    • southamerica-east1
    • asia-east1
    • asia-east2
    • asia-northeast1
    • asia-southeast1
    • australia-southeast1
    • europe-west1
    • europe-west2
    • europe-west3
    • europe-west4
  • INPUT_ID: die benutzerdefinierte Kennung für den Eingabeendpunkt

Wenn Sie die Anfrage senden möchten, maximieren Sie eine der folgenden Optionen:

Sie sollten in etwa folgende JSON-Antwort erhalten:

{
  "name": "projects/PROJECT_NUMBER/locations/LOCATION/inputs/INPUT_ID",
  "createTime": CREATE_TIME,
  "updateTime": UPDATE_TIME,
  "type": "RTMP_PUSH",
  "uri":  "INPUT_STREAM_URI", # For example, "rtmp://1.2.3.4/live/b8ebdd94-c8d9-4d88-a16e-b963c43a953b",
  "tier": "HD"
}

C#

Informationen zum Installieren und Verwenden der Clientbibliothek für die Live Stream API findest du unter Live Stream API-Clientbibliotheken Weitere Informationen finden Sie in der Live Stream API – C# API Referenzdokumentation.

Richten Sie Standardanmeldedaten für Anwendungen ein, um sich bei der Live Stream API zu authentifizieren. Weitere Informationen finden Sie unter Authentifizierung für eine lokale Entwicklungsumgebung einrichten.


using Google.Cloud.Video.LiveStream.V1;

public class GetInputSample
{
    public Input GetInput(
         string projectId, string locationId, string inputId)
    {
        // Create the client.
        LivestreamServiceClient client = LivestreamServiceClient.Create();

        GetInputRequest request = new GetInputRequest
        {
            InputName = InputName.FromProjectLocationInput(projectId, locationId, inputId)
        };

        // Make the request.
        Input response = client.GetInput(request);
        return response;
    }
}

Go

Informationen zum Installieren und Verwenden der Clientbibliothek für die Live Stream API findest du unter Live Stream API-Clientbibliotheken Weitere Informationen finden Sie in der Live Stream API – Go API Referenzdokumentation.

Richten Sie Standardanmeldedaten für Anwendungen ein, um sich bei der Live Stream API zu authentifizieren. Weitere Informationen finden Sie unter Authentifizierung für eine lokale Entwicklungsumgebung einrichten.

import (
	"context"
	"fmt"
	"io"

	livestream "cloud.google.com/go/video/livestream/apiv1"
	"cloud.google.com/go/video/livestream/apiv1/livestreampb"
)

// getInput gets a previously-created input endpoint.
func getInput(w io.Writer, projectID, location, inputID string) error {
	// projectID := "my-project-id"
	// location := "us-central1"
	// inputID := "my-input-id"
	ctx := context.Background()
	client, err := livestream.NewClient(ctx)
	if err != nil {
		return fmt.Errorf("NewClient: %w", err)
	}
	defer client.Close()

	req := &livestreampb.GetInputRequest{
		Name: fmt.Sprintf("projects/%s/locations/%s/inputs/%s", projectID, location, inputID),
	}

	response, err := client.GetInput(ctx, req)
	if err != nil {
		return fmt.Errorf("GetInput: %w", err)
	}

	fmt.Fprintf(w, "Input: %v", response.Name)
	return nil
}

Java

Informationen zum Installieren und Verwenden der Clientbibliothek für die Live Stream API findest du unter Live Stream API-Clientbibliotheken Weitere Informationen finden Sie in der Live Stream API – Java API Referenzdokumentation.

Richten Sie Standardanmeldedaten für Anwendungen ein, um sich bei der Live Stream API zu authentifizieren. Weitere Informationen finden Sie unter Authentifizierung für eine lokale Entwicklungsumgebung einrichten.


import com.google.cloud.video.livestream.v1.Input;
import com.google.cloud.video.livestream.v1.InputName;
import com.google.cloud.video.livestream.v1.LivestreamServiceClient;
import java.io.IOException;

public class GetInput {

  public static void main(String[] args) throws Exception {
    // TODO(developer): Replace these variables before running the sample.
    String projectId = "my-project-id";
    String location = "us-central1";
    String inputId = "my-input-id";

    getInput(projectId, location, inputId);
  }

  public static void getInput(String projectId, String location, String inputId)
      throws IOException {
    // Initialize client that will be used to send requests. This client only needs to be created
    // once, and can be reused for multiple requests. In this example, try-with-resources is used
    // which automatically calls close() on the client to clean up resources.
    try (LivestreamServiceClient livestreamServiceClient = LivestreamServiceClient.create()) {
      InputName name = InputName.of(projectId, location, inputId);
      Input response = livestreamServiceClient.getInput(name);
      System.out.println("Input: " + response.getName());
    }
  }
}

Node.js

Informationen zum Installieren und Verwenden der Clientbibliothek für die Live Stream API findest du unter Live Stream API-Clientbibliotheken Weitere Informationen finden Sie in der Live Stream API – Node.js API Referenzdokumentation.

Richten Sie Standardanmeldedaten für Anwendungen ein, um sich bei der Live Stream API zu authentifizieren. Weitere Informationen finden Sie unter Authentifizierung für eine lokale Entwicklungsumgebung einrichten.

/**
 * TODO(developer): Uncomment these variables before running the sample.
 */
// projectId = 'my-project-id';
// location = 'us-central1';
// inputId = 'my-input';

// Imports the Livestream library
const {LivestreamServiceClient} = require('@google-cloud/livestream').v1;

// Instantiates a client
const livestreamServiceClient = new LivestreamServiceClient();

async function getInput() {
  // Construct request
  const request = {
    name: livestreamServiceClient.inputPath(projectId, location, inputId),
  };
  const [input] = await livestreamServiceClient.getInput(request);
  console.log(`Input: ${input.name}`);
}

getInput();

PHP

Informationen zum Installieren und Verwenden der Clientbibliothek für die Live Stream API findest du unter Live Stream API-Clientbibliotheken Weitere Informationen finden Sie in der Live Stream API – PHP API Referenzdokumentation.

Richten Sie Standardanmeldedaten für Anwendungen ein, um sich bei der Live Stream API zu authentifizieren. Weitere Informationen finden Sie unter Authentifizierung für eine lokale Entwicklungsumgebung einrichten.

use Google\Cloud\Video\LiveStream\V1\Client\LivestreamServiceClient;
use Google\Cloud\Video\LiveStream\V1\GetInputRequest;

/**
 * Gets an input.
 *
 * @param string  $callingProjectId   The project ID to run the API call under
 * @param string  $location           The location of the input
 * @param string  $inputId            The ID of the input
 */
function get_input(
    string $callingProjectId,
    string $location,
    string $inputId
): void {
    // Instantiate a client.
    $livestreamClient = new LivestreamServiceClient();
    $formattedName = $livestreamClient->inputName($callingProjectId, $location, $inputId);

    // Get the input.
    $request = (new GetInputRequest())
        ->setName($formattedName);
    $response = $livestreamClient->getInput($request);
    // Print results
    printf('Input: %s' . PHP_EOL, $response->getName());
}

Python

Informationen zum Installieren und Verwenden der Clientbibliothek für die Live Stream API findest du unter Live Stream API-Clientbibliotheken Weitere Informationen finden Sie in der Live Stream API – Python API Referenzdokumentation.

Richten Sie Standardanmeldedaten für Anwendungen ein, um sich bei der Live Stream API zu authentifizieren. Weitere Informationen finden Sie unter Authentifizierung für eine lokale Entwicklungsumgebung einrichten.


import argparse

from google.cloud.video import live_stream_v1
from google.cloud.video.live_stream_v1.services.livestream_service import (
    LivestreamServiceClient,
)


def get_input(
    project_id: str, location: str, input_id: str
) -> live_stream_v1.types.Input:
    """Gets an input.
    Args:
        project_id: The GCP project ID.
        location: The location of the input.
        input_id: The user-defined input ID."""

    client = LivestreamServiceClient()

    name = f"projects/{project_id}/locations/{location}/inputs/{input_id}"
    response = client.get_input(name=name)
    print(f"Input: {response.name}")

    return response

Ruby

Informationen zum Installieren und Verwenden der Clientbibliothek für die Live Stream API findest du unter Live Stream API-Clientbibliotheken Weitere Informationen finden Sie in der Live Stream API – Ruby API Referenzdokumentation.

Richten Sie Standardanmeldedaten für Anwendungen ein, um sich bei der Live Stream API zu authentifizieren. Weitere Informationen finden Sie unter Authentifizierung für eine lokale Entwicklungsumgebung einrichten.

require "google/cloud/video/live_stream"

##
# Get an input endpoint
#
# @param project_id [String] Your Google Cloud project (e.g. "my-project")
# @param location [String] The location (e.g. "us-central1")
# @param input_id [String] Your input name (e.g. "my-input")
#
def get_input project_id:, location:, input_id:
  # Create a Live Stream client.
  client = Google::Cloud::Video::LiveStream.livestream_service

  # Build the resource name of the input.
  name = client.input_path project: project_id, location: location, input: input_id

  # Get the input.
  input = client.get_input name: name

  # Print the input name.
  puts "Input: #{input.name}"
end

Suchen Sie das Feld uri und kopieren Sie das zurückgegebene INPUT_STREAM_URI zur späteren Verwendung im Bereich Eingabestream senden ein.

Kanäle erstellen

Verwenden Sie zum Erstellen eines Channels das projects.locations.channels.create . In den folgenden Beispielen wird ein Kanal erstellt, der eine HLS-Live-Anzeige generiert . Der Livestream besteht aus einer einzelnen HD-Anzeige (1280 x 720 Pixel) Wiedergabe starten.

REST

Ersetzen Sie diese Werte in den folgenden Anfragedaten:

  • PROJECT_NUMBER: Ihr Google Cloud-Projekt Zahl; Sie finden sie im Feld Projektnummer auf der Seite IAM-Einstellungen
  • LOCATION: der Speicherort, an dem die Datei erstellt werden soll. channel; eine der unterstützten Regionen verwenden
    Standorte anzeigen
    • us-central1
    • us-east1
    • us-east4
    • us-west1
    • us-west2
    • northamerica-northeast1
    • southamerica-east1
    • asia-east1
    • asia-east2
    • asia-northeast1
    • asia-southeast1
    • australia-southeast1
    • europe-west1
    • europe-west2
    • europe-west3
    • europe-west4
  • CHANNEL_ID: eine benutzerdefinierte Kennung für den Kanal, der verwendet werden soll. erstellen; Dieser Wert muss 1–63 Zeichen lang sein, mit [a-z0-9] beginnen und enden. darf Bindestriche (-) zwischen den Zeichen enthalten
  • INPUT_ID: die benutzerdefinierte Kennung für den Eingabeendpunkt
  • BUCKET_NAME: der Name von Cloud Storage Bucket, den Sie zum Speichern des Manifests und der Segmentdateien des Livestreams erstellt haben

Wenn Sie die Anfrage senden möchten, maximieren Sie eine der folgenden Optionen:

Sie sollten in etwa folgende JSON-Antwort erhalten:

<ph type="x-smartling-placeholder">
</ph>
{
  "name": "projects/PROJECT_NUMBER/locations/LOCATION/operations/OPERATION_ID",
  "metadata": {
    "@type": "type.googleapis.com/google.cloud.video.livestream.v1.OperationMetadata",
    "createTime": CREATE_TIME,
    "target": "projects/PROJECT_NUMBER/locations/LOCATION/channels/CHANNEL_ID",
    "verb": "create",
    "requestedCancellation": false,
    "apiVersion": "v1"
  },
  "done": false
}
Mit diesem Befehl wird ein Vorgang mit langer Ausführungszeit erstellt, den Sie verwenden können um den Fortschritt Ihres Antrags zu verfolgen. Weitere Informationen finden Sie unter Lang andauernde Vorgänge verwalten .

C#

Informationen zum Installieren und Verwenden der Clientbibliothek für die Live Stream API findest du unter Live Stream API-Clientbibliotheken Weitere Informationen finden Sie in der Live Stream API – C# API Referenzdokumentation.

Richten Sie Standardanmeldedaten für Anwendungen ein, um sich bei der Live Stream API zu authentifizieren. Weitere Informationen finden Sie unter Authentifizierung für eine lokale Entwicklungsumgebung einrichten.


using Google.Api.Gax.ResourceNames;
using Google.Cloud.Video.LiveStream.V1;
using Google.LongRunning;
using System.Threading.Tasks;

public class CreateChannelSample
{
    public async Task<Channel> CreateChannelAsync(
         string projectId, string locationId, string channelId, string inputId, string outputUri)
    {
        // Create the client.
        LivestreamServiceClient client = LivestreamServiceClient.Create();

        InputAttachment inputAttachment = new InputAttachment
        {
            Key = "my-input",
            InputAsInputName = InputName.FromProjectLocationInput(projectId, locationId, inputId)
        };

        VideoStream videoStream = new VideoStream
        {
            H264 = new VideoStream.Types.H264CodecSettings
            {
                Profile = "high",
                BitrateBps = 3000000,
                FrameRate = 30,
                HeightPixels = 720,
                WidthPixels = 1280
            }
        };

        ElementaryStream elementaryStreamVideo = new ElementaryStream
        {
            Key = "es_video",
            VideoStream = videoStream
        };

        AudioStream audioStream = new AudioStream
        {
            Codec = "aac",
            ChannelCount = 2,
            BitrateBps = 160000
        };

        ElementaryStream elementaryStreamAudio = new ElementaryStream
        {
            Key = "es_audio",
            AudioStream = audioStream
        };

        MuxStream muxVideo = new MuxStream
        {
            Key = "mux_video",
            ElementaryStreams = { "es_video" },
            SegmentSettings = new SegmentSettings
            {
                SegmentDuration = new Google.Protobuf.WellKnownTypes.Duration
                {
                    Seconds = 2
                }
            }
        };

        MuxStream muxAudio = new MuxStream
        {
            Key = "mux_audio",
            ElementaryStreams = { "es_audio" },
            SegmentSettings = new SegmentSettings
            {
                SegmentDuration = new Google.Protobuf.WellKnownTypes.Duration
                {
                    Seconds = 2
                }
            }
        };

        CreateChannelRequest request = new CreateChannelRequest
        {
            ParentAsLocationName = LocationName.FromProjectLocation(projectId, locationId),
            ChannelId = channelId,
            Channel = new Channel
            {
                InputAttachments = { inputAttachment },
                Output = new Channel.Types.Output
                {
                    Uri = outputUri
                },
                ElementaryStreams = { elementaryStreamVideo, elementaryStreamAudio },
                MuxStreams = { muxVideo, muxAudio },
                Manifests = {
                    new Manifest {
                        FileName = "manifest.m3u8",
                        Type = Manifest.Types.ManifestType.Hls,
                        MuxStreams = { "mux_video", "mux_audio" },
                        MaxSegmentCount = 5
                    }
                }
            }
        };

        // Make the request.
        Operation<Channel, OperationMetadata> response = await client.CreateChannelAsync(request);

        // Poll until the returned long-running operation is complete.
        Operation<Channel, OperationMetadata> completedResponse = await response.PollUntilCompletedAsync();

        // Retrieve the operation result.
        return completedResponse.Result;
    }
}

Go

Informationen zum Installieren und Verwenden der Clientbibliothek für die Live Stream API findest du unter Live Stream API-Clientbibliotheken Weitere Informationen finden Sie in der Live Stream API – Go API Referenzdokumentation.

Richten Sie Standardanmeldedaten für Anwendungen ein, um sich bei der Live Stream API zu authentifizieren. Weitere Informationen finden Sie unter Authentifizierung für eine lokale Entwicklungsumgebung einrichten.

import (
	"context"
	"fmt"
	"io"

	"github.com/golang/protobuf/ptypes/duration"

	livestream "cloud.google.com/go/video/livestream/apiv1"
	"cloud.google.com/go/video/livestream/apiv1/livestreampb"
)

// createChannel creates a channel.
func createChannel(w io.Writer, projectID, location, channelID, inputID, outputURI string) error {
	// projectID := "my-project-id"
	// location := "us-central1"
	// channelID := "my-channel"
	// inputID := "my-input"
	// outputURI := "gs://my-bucket/my-output-folder/"
	ctx := context.Background()
	client, err := livestream.NewClient(ctx)
	if err != nil {
		return fmt.Errorf("NewClient: %w", err)
	}
	defer client.Close()

	req := &livestreampb.CreateChannelRequest{
		Parent:    fmt.Sprintf("projects/%s/locations/%s", projectID, location),
		ChannelId: channelID,
		Channel: &livestreampb.Channel{
			InputAttachments: []*livestreampb.InputAttachment{
				{
					Key:   "my-input",
					Input: fmt.Sprintf("projects/%s/locations/%s/inputs/%s", projectID, location, inputID),
				},
			},
			Output: &livestreampb.Channel_Output{
				Uri: outputURI,
			},
			ElementaryStreams: []*livestreampb.ElementaryStream{
				{
					Key: "es_video",
					ElementaryStream: &livestreampb.ElementaryStream_VideoStream{
						VideoStream: &livestreampb.VideoStream{
							CodecSettings: &livestreampb.VideoStream_H264{
								H264: &livestreampb.VideoStream_H264CodecSettings{
									Profile:      "high",
									BitrateBps:   3000000,
									FrameRate:    30,
									HeightPixels: 720,
									WidthPixels:  1280,
								},
							},
						},
					},
				},
				{
					Key: "es_audio",
					ElementaryStream: &livestreampb.ElementaryStream_AudioStream{
						AudioStream: &livestreampb.AudioStream{
							Codec:        "aac",
							ChannelCount: 2,
							BitrateBps:   160000,
						},
					},
				},
			},
			MuxStreams: []*livestreampb.MuxStream{
				{
					Key:               "mux_video",
					ElementaryStreams: []string{"es_video"},
					SegmentSettings: &livestreampb.SegmentSettings{
						SegmentDuration: &duration.Duration{
							Seconds: 2,
						},
					},
				},
				{
					Key:               "mux_audio",
					ElementaryStreams: []string{"es_audio"},
					SegmentSettings: &livestreampb.SegmentSettings{
						SegmentDuration: &duration.Duration{
							Seconds: 2,
						},
					},
				},
			},
			Manifests: []*livestreampb.Manifest{
				{
					FileName:        "manifest.m3u8",
					Type:            livestreampb.Manifest_HLS,
					MuxStreams:      []string{"mux_video", "mux_audio"},
					MaxSegmentCount: 5,
				},
			},
		},
	}
	// Creates the channel.
	op, err := client.CreateChannel(ctx, req)
	if err != nil {
		return fmt.Errorf("CreateChannel: %w", err)
	}
	response, err := op.Wait(ctx)
	if err != nil {
		return fmt.Errorf("Wait: %w", err)
	}

	fmt.Fprintf(w, "Channel: %v", response.Name)
	return nil
}

Java

Informationen zum Installieren und Verwenden der Clientbibliothek für die Live Stream API findest du unter Live Stream API-Clientbibliotheken Weitere Informationen finden Sie in der Live Stream API – Java API Referenzdokumentation.

Richten Sie Standardanmeldedaten für Anwendungen ein, um sich bei der Live Stream API zu authentifizieren. Weitere Informationen finden Sie unter Authentifizierung für eine lokale Entwicklungsumgebung einrichten.


import com.google.cloud.video.livestream.v1.AudioStream;
import com.google.cloud.video.livestream.v1.Channel;
import com.google.cloud.video.livestream.v1.Channel.Output;
import com.google.cloud.video.livestream.v1.CreateChannelRequest;
import com.google.cloud.video.livestream.v1.ElementaryStream;
import com.google.cloud.video.livestream.v1.InputAttachment;
import com.google.cloud.video.livestream.v1.InputName;
import com.google.cloud.video.livestream.v1.LivestreamServiceClient;
import com.google.cloud.video.livestream.v1.LocationName;
import com.google.cloud.video.livestream.v1.Manifest;
import com.google.cloud.video.livestream.v1.Manifest.ManifestType;
import com.google.cloud.video.livestream.v1.MuxStream;
import com.google.cloud.video.livestream.v1.SegmentSettings;
import com.google.cloud.video.livestream.v1.VideoStream;
import com.google.cloud.video.livestream.v1.VideoStream.H264CodecSettings;
import com.google.protobuf.Duration;
import java.io.IOException;
import java.util.concurrent.ExecutionException;
import java.util.concurrent.TimeUnit;
import java.util.concurrent.TimeoutException;

public class CreateChannel {

  public static void main(String[] args) throws Exception {
    // TODO(developer): Replace these variables before running the sample.
    String projectId = "my-project-id";
    String location = "us-central1";
    String channelId = "my-channel-id";
    String inputId = "my-input-id";
    String outputUri = "gs://my-bucket/my-output-folder/";

    createChannel(projectId, location, channelId, inputId, outputUri);
  }

  public static void createChannel(
      String projectId, String location, String channelId, String inputId, String outputUri)
      throws InterruptedException, ExecutionException, TimeoutException, IOException {
    // Initialize client that will be used to send requests. This client only needs to be created
    // once, and can be reused for multiple requests. After completing all of your requests, call
    // the "close" method on the client to safely clean up any remaining background resources.
    LivestreamServiceClient livestreamServiceClient = LivestreamServiceClient.create();
    VideoStream videoStream =
        VideoStream.newBuilder()
            .setH264(
                H264CodecSettings.newBuilder()
                    .setProfile("high")
                    .setBitrateBps(3000000)
                    .setFrameRate(30)
                    .setHeightPixels(720)
                    .setWidthPixels(1280))
            .build();

    AudioStream audioStream =
        AudioStream.newBuilder().setCodec("aac").setChannelCount(2).setBitrateBps(160000).build();

    var createChannelRequest =
        CreateChannelRequest.newBuilder()
            .setParent(LocationName.of(projectId, location).toString())
            .setChannelId(channelId)
            .setChannel(
                Channel.newBuilder()
                    .addInputAttachments(
                        0,
                        InputAttachment.newBuilder()
                            .setKey("my-input")
                            .setInput(InputName.of(projectId, location, inputId).toString())
                            .build())
                    .setOutput(Output.newBuilder().setUri(outputUri).build())
                    .addElementaryStreams(
                        ElementaryStream.newBuilder()
                            .setKey("es_video")
                            .setVideoStream(videoStream))
                    .addElementaryStreams(
                        ElementaryStream.newBuilder()
                            .setKey("es_audio")
                            .setAudioStream(audioStream))
                    .addMuxStreams(
                        MuxStream.newBuilder()
                            .setKey("mux_video")
                            .addElementaryStreams("es_video")
                            .setSegmentSettings(
                                SegmentSettings.newBuilder()
                                    .setSegmentDuration(
                                        Duration.newBuilder().setSeconds(2).build())
                                    .build())
                            .build())
                    .addMuxStreams(
                        MuxStream.newBuilder()
                            .setKey("mux_audio")
                            .addElementaryStreams("es_audio")
                            .setSegmentSettings(
                                SegmentSettings.newBuilder()
                                    .setSegmentDuration(
                                        Duration.newBuilder().setSeconds(2).build())
                                    .build())
                            .build())
                    .addManifests(
                        Manifest.newBuilder()
                            .setFileName("manifest.m3u8")
                            .setType(ManifestType.HLS)
                            .addMuxStreams("mux_video")
                            .addMuxStreams("mux_audio")
                            .setMaxSegmentCount(5)
                            .build()))
            .build();
    // First API call in a project can take up to 10 minutes.
    Channel result =
        livestreamServiceClient
            .createChannelAsync(createChannelRequest)
            .get(10, TimeUnit.MINUTES);
    System.out.println("Channel: " + result.getName());
    livestreamServiceClient.close();
  }
}

Node.js

Informationen zum Installieren und Verwenden der Clientbibliothek für die Live Stream API findest du unter Live Stream API-Clientbibliotheken Weitere Informationen finden Sie in der Live Stream API – Node.js API Referenzdokumentation.

Richten Sie Standardanmeldedaten für Anwendungen ein, um sich bei der Live Stream API zu authentifizieren. Weitere Informationen finden Sie unter Authentifizierung für eine lokale Entwicklungsumgebung einrichten.

/**
 * TODO(developer): Uncomment these variables before running the sample.
 */
// projectId = 'my-project-id';
// location = 'us-central1';
// channelId = 'my-channel';
// inputId = 'my-input';
// outputUri = 'gs://my-bucket/my-output-folder/';

// Imports the Livestream library
const {LivestreamServiceClient} = require('@google-cloud/livestream').v1;

// Instantiates a client
const livestreamServiceClient = new LivestreamServiceClient();

async function createChannel() {
  // Construct request
  const request = {
    parent: livestreamServiceClient.locationPath(projectId, location),
    channelId: channelId,
    channel: {
      inputAttachments: [
        {
          key: 'my-input',
          input: livestreamServiceClient.inputPath(
            projectId,
            location,
            inputId
          ),
        },
      ],
      output: {
        uri: outputUri,
      },
      elementaryStreams: [
        {
          key: 'es_video',
          videoStream: {
            h264: {
              profile: 'high',
              heightPixels: 720,
              widthPixels: 1280,
              bitrateBps: 3000000,
              frameRate: 30,
            },
          },
        },
        {
          key: 'es_audio',
          audioStream: {
            codec: 'aac',
            channelCount: 2,
            bitrateBps: 160000,
          },
        },
      ],
      muxStreams: [
        {
          key: 'mux_video',
          elementaryStreams: ['es_video'],
          segmentSettings: {
            seconds: 2,
          },
        },
        {
          key: 'mux_audio',
          elementaryStreams: ['es_audio'],
          segmentSettings: {
            seconds: 2,
          },
        },
      ],
      manifests: [
        {
          fileName: 'manifest.m3u8',
          type: 'HLS',
          muxStreams: ['mux_video', 'mux_audio'],
          maxSegmentCount: 5,
        },
      ],
    },
  };

  // Run request
  const [operation] = await livestreamServiceClient.createChannel(request);
  const response = await operation.promise();
  const [channel] = response;
  console.log(`Channel: ${channel.name}`);
}

createChannel();

PHP

Informationen zum Installieren und Verwenden der Clientbibliothek für die Live Stream API findest du unter Live Stream API-Clientbibliotheken Weitere Informationen finden Sie in der Live Stream API – PHP API Referenzdokumentation.

Richten Sie Standardanmeldedaten für Anwendungen ein, um sich bei der Live Stream API zu authentifizieren. Weitere Informationen finden Sie unter Authentifizierung für eine lokale Entwicklungsumgebung einrichten.

use Google\Cloud\Video\LiveStream\V1\AudioStream;
use Google\Cloud\Video\LiveStream\V1\Channel;
use Google\Cloud\Video\LiveStream\V1\ElementaryStream;
use Google\Cloud\Video\LiveStream\V1\InputAttachment;
use Google\Cloud\Video\LiveStream\V1\Client\LivestreamServiceClient;
use Google\Cloud\Video\LiveStream\V1\CreateChannelRequest;
use Google\Cloud\Video\LiveStream\V1\Manifest;
use Google\Cloud\Video\LiveStream\V1\MuxStream;
use Google\Cloud\Video\LiveStream\V1\SegmentSettings;
use Google\Cloud\Video\LiveStream\V1\VideoStream;
use Google\Protobuf\Duration;

/**
 * Creates a channel.
 *
 * @param string  $callingProjectId   The project ID to run the API call under
 * @param string  $location           The location of the channel
 * @param string  $channelId          The ID of the channel to be created
 * @param string  $inputId            The ID of the input for the channel
 * @param string  $outputUri          Uri of the channel output folder in a
 *                                    Cloud Storage bucket. (e.g.
 *                                    "gs://my-bucket/my-output-folder/")
 */
function create_channel(
    string $callingProjectId,
    string $location,
    string $channelId,
    string $inputId,
    string $outputUri
): void {
    // Instantiate a client.
    $livestreamClient = new LivestreamServiceClient();

    $parent = $livestreamClient->locationName($callingProjectId, $location);
    $channelName = $livestreamClient->channelName($callingProjectId, $location, $channelId);
    $inputName = $livestreamClient->inputName($callingProjectId, $location, $inputId);

    $channel = (new Channel())
        ->setName($channelName)
        ->setInputAttachments([
            new InputAttachment([
                'key' => 'my-input',
                'input' => $inputName
            ])
        ])
        ->setElementaryStreams([
            new ElementaryStream([
                'key' => 'es_video',
                'video_stream' => new VideoStream([
                    'h264' => new VideoStream\H264CodecSettings([
                        'profile' => 'high',
                        'width_pixels' => 1280,
                        'height_pixels' => 720,
                        'bitrate_bps' => 3000000,
                        'frame_rate' => 30
                    ])
                ]),
            ]),
            new ElementaryStream([
                'key' => 'es_audio',
                'audio_stream' => new AudioStream([
                    'codec' => 'aac',
                    'channel_count' => 2,
                    'bitrate_bps' => 160000
                ])
            ])
        ])
        ->setOutput(new Channel\Output(['uri' => $outputUri]))
        ->setMuxStreams([
            new MuxStream([
                'key' => 'mux_video',
                'elementary_streams' => ['es_video'],
                'segment_settings' => new SegmentSettings([
                    'segment_duration' => new Duration(['seconds' => 2])
                ])
            ]),
            new MuxStream([
                'key' => 'mux_audio',
                'elementary_streams' => ['es_audio'],
                'segment_settings' => new SegmentSettings([
                    'segment_duration' => new Duration(['seconds' => 2])
                ])
            ]),
        ])
        ->setManifests([
            new Manifest([
                'file_name' => 'manifest.m3u8',
                'type' => Manifest\ManifestType::HLS,
                'mux_streams' => ['mux_video', 'mux_audio'],
                'max_segment_count' => 5
            ])
        ]);

    // Run the channel creation request. The response is a long-running operation ID.
    $request = (new CreateChannelRequest())
        ->setParent($parent)
        ->setChannel($channel)
        ->setChannelId($channelId);
    $operationResponse = $livestreamClient->createChannel($request);
    $operationResponse->pollUntilComplete();
    if ($operationResponse->operationSucceeded()) {
        $result = $operationResponse->getResult();
        // Print results
        printf('Channel: %s' . PHP_EOL, $result->getName());
    } else {
        $error = $operationResponse->getError();
        // handleError($error)
    }
}

Python

Informationen zum Installieren und Verwenden der Clientbibliothek für die Live Stream API findest du unter Live Stream API-Clientbibliotheken Weitere Informationen finden Sie in der Live Stream API – Python API Referenzdokumentation.

Richten Sie Standardanmeldedaten für Anwendungen ein, um sich bei der Live Stream API zu authentifizieren. Weitere Informationen finden Sie unter Authentifizierung für eine lokale Entwicklungsumgebung einrichten.


import argparse

from google.cloud.video import live_stream_v1
from google.cloud.video.live_stream_v1.services.livestream_service import (
    LivestreamServiceClient,
)
from google.protobuf import duration_pb2 as duration


def create_channel(
    project_id: str, location: str, channel_id: str, input_id: str, output_uri: str
) -> live_stream_v1.types.Channel:
    """Creates a channel.
    Args:
        project_id: The GCP project ID.
        location: The location in which to create the channel.
        channel_id: The user-defined channel ID.
        input_id: The user-defined input ID.
        output_uri: Uri of the channel output folder in a Cloud Storage bucket."""

    client = LivestreamServiceClient()
    parent = f"projects/{project_id}/locations/{location}"
    input = f"projects/{project_id}/locations/{location}/inputs/{input_id}"
    name = f"projects/{project_id}/locations/{location}/channels/{channel_id}"

    channel = live_stream_v1.types.Channel(
        name=name,
        input_attachments=[
            live_stream_v1.types.InputAttachment(
                key="my-input",
                input=input,
            ),
        ],
        output=live_stream_v1.types.Channel.Output(
            uri=output_uri,
        ),
        elementary_streams=[
            live_stream_v1.types.ElementaryStream(
                key="es_video",
                video_stream=live_stream_v1.types.VideoStream(
                    h264=live_stream_v1.types.VideoStream.H264CodecSettings(
                        profile="high",
                        width_pixels=1280,
                        height_pixels=720,
                        bitrate_bps=3000000,
                        frame_rate=30,
                    ),
                ),
            ),
            live_stream_v1.types.ElementaryStream(
                key="es_audio",
                audio_stream=live_stream_v1.types.AudioStream(
                    codec="aac", channel_count=2, bitrate_bps=160000
                ),
            ),
        ],
        mux_streams=[
            live_stream_v1.types.MuxStream(
                key="mux_video",
                elementary_streams=["es_video"],
                segment_settings=live_stream_v1.types.SegmentSettings(
                    segment_duration=duration.Duration(
                        seconds=2,
                    ),
                ),
            ),
            live_stream_v1.types.MuxStream(
                key="mux_audio",
                elementary_streams=["es_audio"],
                segment_settings=live_stream_v1.types.SegmentSettings(
                    segment_duration=duration.Duration(
                        seconds=2,
                    ),
                ),
            ),
        ],
        manifests=[
            live_stream_v1.types.Manifest(
                file_name="manifest.m3u8",
                type_="HLS",
                mux_streams=["mux_video", "mux_audio"],
                max_segment_count=5,
            ),
        ],
    )
    operation = client.create_channel(
        parent=parent, channel=channel, channel_id=channel_id
    )
    response = operation.result(600)
    print(f"Channel: {response.name}")

    return response

Ruby

Informationen zum Installieren und Verwenden der Clientbibliothek für die Live Stream API findest du unter Live Stream API-Clientbibliotheken Weitere Informationen finden Sie in der Live Stream API – Ruby API Referenzdokumentation.

Richten Sie Standardanmeldedaten für Anwendungen ein, um sich bei der Live Stream API zu authentifizieren. Weitere Informationen finden Sie unter Authentifizierung für eine lokale Entwicklungsumgebung einrichten.

require "google/cloud/video/live_stream"

##
# Create a channel
#
# @param project_id [String] Your Google Cloud project (e.g. "my-project")
# @param location [String] The location (e.g. "us-central1")
# @param channel_id [String] Your channel name (e.g. "my-channel")
# @param input_id [String] Your input name (e.g. "my-input")
# @param output_uri [String] Uri of the channel output folder in a Cloud Storage
#     bucket. (e.g. "gs://my-bucket/my-output-folder/";)
#
def create_channel project_id:, location:, channel_id:, input_id:, output_uri:
  # Create a Live Stream client.
  client = Google::Cloud::Video::LiveStream.livestream_service

  # Build the resource name of the parent.
  parent = client.location_path project: project_id, location: location
  # Build the resource name of the input.
  input_path = client.input_path project: project_id, location: location, input: input_id

  # Set the channel fields.
  new_channel = {
    input_attachments: [
      {
        key: "my-input",
        input: input_path
      }
    ],
    output: {
      uri: output_uri
    },
    elementary_streams: [
      {
        key: "es_video",
        video_stream: {
          h264: {
            profile: "high",
            bitrate_bps: 3_000_000,
            frame_rate: 30,
            height_pixels: 720,
            width_pixels: 1280
          }
        }
      },
      {
        key: "es_audio",
        audio_stream: {
          codec: "aac",
          channel_count: 2,
          bitrate_bps: 160_000
        }
      }
    ],
    mux_streams: [
      {
        key: "mux_video",
        elementary_streams: [
          "es_video"
        ],
        segment_settings: {
          segment_duration: {
            seconds: 2
          }
        }
      },
      {
        key: "mux_audio",
        elementary_streams: [
          "es_audio"
        ],
        segment_settings: {
          segment_duration: {
            seconds: 2
          }
        }
      }
    ],
    manifests: [
      {
        file_name: "main.m3u8",
        type: Google::Cloud::Video::LiveStream::V1::Manifest::ManifestType::HLS,
        mux_streams: [
          "mux_video", "mux_audio"
        ],
        max_segment_count: 5
      }
    ]
  }

  operation = client.create_channel parent: parent, channel: new_channel, channel_id: channel_id

  # The returned object is of type Gapic::Operation. You can use this
  # object to check the status of an operation, cancel it, or wait
  # for results. Here is how to block until completion:
  operation.wait_until_done!

  # Print the channel name.
  puts "Channel: #{operation.response.name}"
end

Den Kanal starten

Um einen Kanal zu starten, verwende das projects.locations.channels.start-Methode.

REST

Ersetzen Sie diese Werte in den folgenden Anfragedaten:

  • PROJECT_NUMBER: Ihr Google Cloud-Projekt Zahl; Sie finden sie im Feld Projektnummer auf der Seite IAM-Einstellungen
  • LOCATION: der Ort, an dem sich dein Kanal befindet gefunden; eine der unterstützten Regionen verwenden
    Standorte anzeigen
    • us-central1
    • us-east1
    • us-east4
    • us-west1
    • us-west2
    • northamerica-northeast1
    • southamerica-east1
    • asia-east1
    • asia-east2
    • asia-northeast1
    • asia-southeast1
    • australia-southeast1
    • europe-west1
    • europe-west2
    • europe-west3
    • europe-west4
  • CHANNEL_ID: eine benutzerdefinierte Kennung für den Kanal

Wenn Sie die Anfrage senden möchten, maximieren Sie eine der folgenden Optionen:

Sie sollten in etwa folgende JSON-Antwort erhalten:

<ph type="x-smartling-placeholder">
</ph>
{
  "name": "projects/PROJECT_NUMBER/locations/LOCATION/operations/OPERATION_ID",
  "metadata": {
    "@type": "type.googleapis.com/google.cloud.video.livestream.v1.OperationMetadata",
    "createTime": CREATE_TIME,
    "target": "projects/PROJECT_NUMBER/locations/LOCATION/channels/CHANNEL_ID",
    "verb": "start",
    "requestedCancellation": false,
    "apiVersion": "v1"
  },
  "done": false
}
Mit diesem Befehl wird ein Vorgang mit langer Ausführungszeit erstellt, den Sie verwenden können um den Fortschritt Ihres Antrags zu verfolgen. Weitere Informationen finden Sie unter Lang andauernde Vorgänge verwalten .

C#

Informationen zum Installieren und Verwenden der Clientbibliothek für die Live Stream API findest du unter Live Stream API-Clientbibliotheken Weitere Informationen finden Sie in der Live Stream API – C# API Referenzdokumentation.

Richten Sie Standardanmeldedaten für Anwendungen ein, um sich bei der Live Stream API zu authentifizieren. Weitere Informationen finden Sie unter Authentifizierung für eine lokale Entwicklungsumgebung einrichten.


using Google.Cloud.Video.LiveStream.V1;
using Google.LongRunning;
using System.Threading.Tasks;

public class StartChannelSample
{
    public async Task StartChannelAsync(
         string projectId, string locationId, string channelId)
    {
        // Create the client.
        LivestreamServiceClient client = LivestreamServiceClient.Create();

        StartChannelRequest request = new StartChannelRequest
        {
            ChannelName = ChannelName.FromProjectLocationChannel(projectId, locationId, channelId)
        };

        // Make the request.
        Operation<ChannelOperationResponse, OperationMetadata> response = await client.StartChannelAsync(request);

        // Poll until the returned long-running operation is complete.
        await response.PollUntilCompletedAsync();
    }
}

Go

Informationen zum Installieren und Verwenden der Clientbibliothek für die Live Stream API findest du unter Live Stream API-Clientbibliotheken Weitere Informationen finden Sie in der Live Stream API – Go API Referenzdokumentation.

Richten Sie Standardanmeldedaten für Anwendungen ein, um sich bei der Live Stream API zu authentifizieren. Weitere Informationen finden Sie unter Authentifizierung für eine lokale Entwicklungsumgebung einrichten.

import (
	"context"
	"fmt"
	"io"

	livestream "cloud.google.com/go/video/livestream/apiv1"
	"cloud.google.com/go/video/livestream/apiv1/livestreampb"
)

// startChannel starts a channel.
func startChannel(w io.Writer, projectID, location, channelID string) error {
	// projectID := "my-project-id"
	// location := "us-central1"
	// channelID := "my-channel-id"
	ctx := context.Background()
	client, err := livestream.NewClient(ctx)
	if err != nil {
		return fmt.Errorf("NewClient: %w", err)
	}
	defer client.Close()

	req := &livestreampb.StartChannelRequest{
		Name: fmt.Sprintf("projects/%s/locations/%s/channels/%s", projectID, location, channelID),
	}

	op, err := client.StartChannel(ctx, req)
	if err != nil {
		return fmt.Errorf("StartChannel: %w", err)
	}
	_, err = op.Wait(ctx)
	if err != nil {
		return fmt.Errorf("Wait: %w", err)
	}

	fmt.Fprintf(w, "Started channel")
	return nil
}

Java

Informationen zum Installieren und Verwenden der Clientbibliothek für die Live Stream API findest du unter Live Stream API-Clientbibliotheken Weitere Informationen finden Sie in der Live Stream API – Java API Referenzdokumentation.

Richten Sie Standardanmeldedaten für Anwendungen ein, um sich bei der Live Stream API zu authentifizieren. Weitere Informationen finden Sie unter Authentifizierung für eine lokale Entwicklungsumgebung einrichten.


import com.google.cloud.video.livestream.v1.ChannelName;
import com.google.cloud.video.livestream.v1.LivestreamServiceClient;
import java.io.IOException;
import java.util.concurrent.ExecutionException;
import java.util.concurrent.TimeUnit;
import java.util.concurrent.TimeoutException;

public class StartChannel {

  public static void main(String[] args) throws Exception {
    // TODO(developer): Replace these variables before running the sample.
    String projectId = "my-project-id";
    String location = "us-central1";
    String channelId = "my-channel-id";

    startChannel(projectId, location, channelId);
  }

  public static void startChannel(String projectId, String location, String channelId)
      throws InterruptedException, ExecutionException, TimeoutException, IOException {
    // Initialize client that will be used to send requests. This client only needs to be created
    // once, and can be reused for multiple requests. After completing all of your requests, call
    // the "close" method on the client to safely clean up any remaining background resources.
    LivestreamServiceClient livestreamServiceClient = LivestreamServiceClient.create();
    ChannelName name = ChannelName.of(projectId, location, channelId);
    // First API call in a project can take up to 15 minutes.
    livestreamServiceClient.startChannelAsync(name).get(15, TimeUnit.MINUTES);
    System.out.println("Started channel");
    livestreamServiceClient.close();
  }
}

Node.js

Informationen zum Installieren und Verwenden der Clientbibliothek für die Live Stream API findest du unter Live Stream API-Clientbibliotheken Weitere Informationen finden Sie in der Live Stream API – Node.js API Referenzdokumentation.

Richten Sie Standardanmeldedaten für Anwendungen ein, um sich bei der Live Stream API zu authentifizieren. Weitere Informationen finden Sie unter Authentifizierung für eine lokale Entwicklungsumgebung einrichten.

/**
 * TODO(developer): Uncomment these variables before running the sample.
 */
// projectId = 'my-project-id';
// location = 'us-central1';
// channelId = 'my-channel';

// Imports the Livestream library
const {LivestreamServiceClient} = require('@google-cloud/livestream').v1;

// Instantiates a client
const livestreamServiceClient = new LivestreamServiceClient();

async function startChannel() {
  // Construct request
  const request = {
    name: livestreamServiceClient.channelPath(projectId, location, channelId),
  };
  const [operation] = await livestreamServiceClient.startChannel(request);
  await operation.promise();
  console.log('Started channel');
}

startChannel();

PHP

Informationen zum Installieren und Verwenden der Clientbibliothek für die Live Stream API findest du unter Live Stream API-Clientbibliotheken Weitere Informationen finden Sie in der Live Stream API – PHP API Referenzdokumentation.

Richten Sie Standardanmeldedaten für Anwendungen ein, um sich bei der Live Stream API zu authentifizieren. Weitere Informationen finden Sie unter Authentifizierung für eine lokale Entwicklungsumgebung einrichten.

use Google\Cloud\Video\LiveStream\V1\Client\LivestreamServiceClient;
use Google\Cloud\Video\LiveStream\V1\StartChannelRequest;

/**
 * Starts a channel.
 *
 * @param string  $callingProjectId   The project ID to run the API call under
 * @param string  $location           The location of the channel
 * @param string  $channelId          The ID of the channel
 */
function start_channel(
    string $callingProjectId,
    string $location,
    string $channelId
): void {
    // Instantiate a client.
    $livestreamClient = new LivestreamServiceClient();
    $formattedName = $livestreamClient->channelName($callingProjectId, $location, $channelId);

    // Run the channel start request. The response is a long-running operation ID.
    $request = (new StartChannelRequest())
        ->setName($formattedName);
    $operationResponse = $livestreamClient->startChannel($request);
    $operationResponse->pollUntilComplete();
    if ($operationResponse->operationSucceeded()) {
        // Print results
        printf('Started channel' . PHP_EOL);
    } else {
        $error = $operationResponse->getError();
        // handleError($error)
    }
}

Python

Informationen zum Installieren und Verwenden der Clientbibliothek für die Live Stream API findest du unter Live Stream API-Clientbibliotheken Weitere Informationen finden Sie in der Live Stream API – Python API Referenzdokumentation.

Richten Sie Standardanmeldedaten für Anwendungen ein, um sich bei der Live Stream API zu authentifizieren. Weitere Informationen finden Sie unter Authentifizierung für eine lokale Entwicklungsumgebung einrichten.


import argparse

from google.cloud.video import live_stream_v1
from google.cloud.video.live_stream_v1.services.livestream_service import (
    LivestreamServiceClient,
)


def start_channel(
    project_id: str, location: str, channel_id: str
) -> live_stream_v1.types.ChannelOperationResponse:
    """Starts a channel.
    Args:
        project_id: The GCP project ID.
        location: The location of the channel.
        channel_id: The user-defined channel ID."""

    client = LivestreamServiceClient()

    name = f"projects/{project_id}/locations/{location}/channels/{channel_id}"
    operation = client.start_channel(name=name)
    response = operation.result(900)
    print("Started channel")

    return response

Ruby

Informationen zum Installieren und Verwenden der Clientbibliothek für die Live Stream API findest du unter Live Stream API-Clientbibliotheken Weitere Informationen finden Sie in der Live Stream API – Ruby API Referenzdokumentation.

Richten Sie Standardanmeldedaten für Anwendungen ein, um sich bei der Live Stream API zu authentifizieren. Weitere Informationen finden Sie unter Authentifizierung für eine lokale Entwicklungsumgebung einrichten.

require "google/cloud/video/live_stream"

##
# Starts a channel
#
# @param project_id [String] Your Google Cloud project (e.g. "my-project")
# @param location [String] The location (e.g. "us-central1")
# @param channel_id [String] Your channel name (e.g. "my-channel")
#
def start_channel project_id:, location:, channel_id:
  # Create a Live Stream client.
  client = Google::Cloud::Video::LiveStream.livestream_service

  # Build the resource name of the channel.
  name = client.channel_path project: project_id, location: location, channel: channel_id

  # Start the channel.
  operation = client.start_channel name: name

  # The returned object is of type Gapic::Operation. You can use this
  # object to check the status of an operation, cancel it, or wait
  # for results. Here is how to block until completion:
  operation.wait_until_done!

  # Print a success message.
  puts "Started channel"
end

Eingabestream senden

Wenn du ffmpeg zum Senden eines Teststreams verwendest, öffne ein neues Terminalfenster. Ausführen den folgenden Befehl mit INPUT_STREAM_URI vom Bereich Details zum Eingabeendpunkt abrufen:

ffmpeg -re -f lavfi -i "testsrc=size=1280x720 [out0]; sine=frequency=500 [out1]" \
  -acodec aac -vcodec h264 -f flv INPUT_STREAM_URI

Livestream abspielen

Führen Sie die folgenden Schritte aus, um die generierte Mediadatei in Shaka Player abzuspielen:

  1. Machen Sie den von Ihnen erstellten Cloud Storage-Bucket öffentlich.
  2. So aktivieren Sie Cross-Origin Resource Sharing (CORS) für einen Cloud Storage-Bucket:
    1. Erstellen Sie eine JSON-Datei, die Folgendes enthält:
      [
        {
          "origin": ["https://shaka-player-demo.appspot.com/"],
          "responseHeader": ["Content-Type", "Range"],
          "method": ["GET", "HEAD"],
          "maxAgeSeconds": 3600
        }
      ]
    2. Führen Sie den folgenden Befehl aus, nachdem Sie JSON_FILE_NAME durch den Namen der JSON-Datei, die Sie im vorherigen Schritt erstellt haben:
      gcloud storage buckets update gs://BUCKET_NAME --cors-file=JSON_FILE_NAME.json
  3. Suchen Sie im Cloud Storage-Bucket nach dem generierten -Datei. Klicken Sie in der Spalte Öffentlicher Zugriff der Datei auf URL kopieren.
  4. Rufen Sie Shaka Player, ein Online-Livestream-Player, auf.
  5. Klicken Sie in der Navigationsleiste oben auf Benutzerdefinierte Inhalte.
  6. Klicken Sie auf die Schaltfläche +.
  7. Fügen Sie die öffentliche URL der Datei in das Feld URL manifestieren ein.

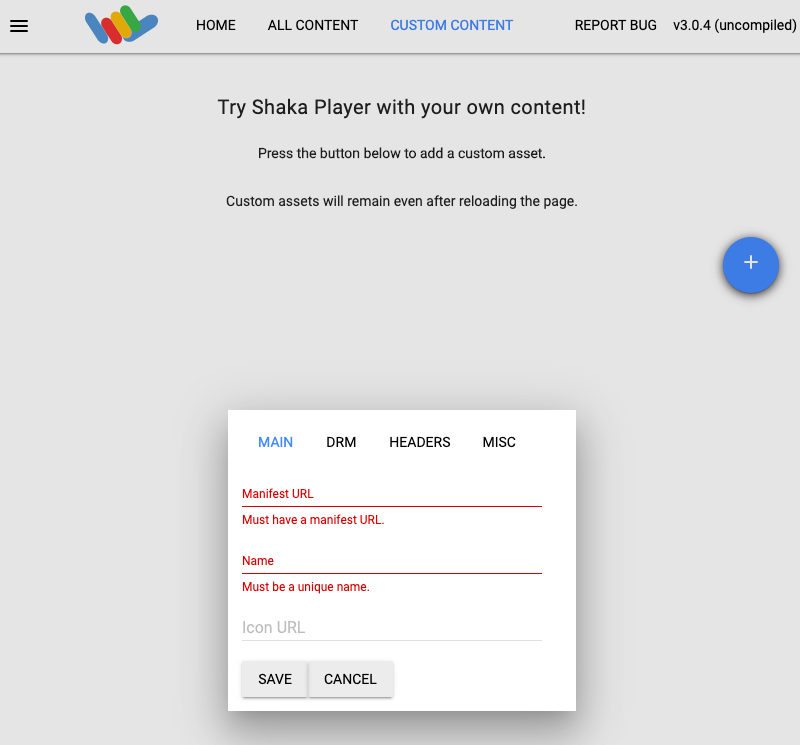
  8. Geben Sie einen Namen in das Feld Name ein.

  9. Klicken Sie auf Speichern.

  10. Klicken Sie auf Wiedergabe.

Während des Livestreams sollte ein Testmuster wiedergegeben werden.

Video zum Testen des Musters

Kanalereignis erstellen

Verwende zum Erstellen eines Kanalereignisses die projects.locations.channels.events.create-Methode. Die Im folgenden Beispiel wird das Slate als Kanalereignis in den Livestream eingefügt.

Ist das Slate-Asset noch nicht bereit (zwei Sekunden nach Beginn der Ereignisausführung), wird ein schwarzer Bildschirm angezeigt, bis das Slate-Asset fertig ist.

REST

Ersetzen Sie diese Werte in den folgenden Anfragedaten:

  • PROJECT_NUMBER: Ihr Google Cloud-Projekt Zahl; Sie finden sie im Feld Projektnummer auf der Seite IAM-Einstellungen
  • LOCATION: der Ort, an dem sich dein Kanal befindet gefunden; eine der unterstützten Regionen verwenden
    Standorte anzeigen
    • us-central1
    • us-east1
    • us-east4
    • us-west1
    • us-west2
    • northamerica-northeast1
    • southamerica-east1
    • asia-east1
    • asia-east2
    • asia-northeast1
    • asia-southeast1
    • australia-southeast1
    • europe-west1
    • europe-west2
    • europe-west3
    • europe-west4
  • CHANNEL_ID: eine benutzerdefinierte Kennung für den Kanal
  • EVENT_ID: eine benutzerdefinierte Kennung für das Ereignis
  • ASSET_ID: die benutzerdefinierte Kennung für das Slate-Asset

Wenn Sie die Anfrage senden möchten, maximieren Sie eine der folgenden Optionen:

Sie sollten in etwa folgende JSON-Antwort erhalten:

{
  "name": "projects/PROJECT_NUMBER/locations/LOCATION/channels/CHANNEL_ID/events/EVENT_ID",
  "createTime": CREATE_TIME,
  "updateTime": UPDATE_TIME,
  "slate": {
    "duration": "60s",
    "asset": "projects/PROJECT_NUMBER/locations/LOCATION/assets/ASSET_ID"
  },
  "executeNow": "true",
  "state": "PENDING"
}

Sehen Sie im Livestream nach, ob das Slate eingefügt wurde. Sie können auch prüfen, Für das Ereignis ist state auf SUCCEEDED gesetzt (siehe Details zu Kanalereignissen abrufen).

Entfernen Sie zum Erstellen eines Slates mit langer Ausführungszeit das Feld duration aus dem slate -Objekt enthält. Wenn Sie ein lang andauerndes Slate entfernen möchten, erstellen Sie ein Zurück zum Programmkanalereignis.