Custom splitter
Custom splitter is designed to be used to split composite documents (documents made up of multiple classes) into a number of single class documents by identifying each logical document. For example, a mortgage package contains multiple classes within it such as application, income verification, and photo ID. Custom splitter processors, in order to be used, are trained from the ground up using your own documents and custom classes.
Splitter description and usage
You create custom splitters that are specifically suited to your documents, and trained and evaluated with your data. This processor identifies classes of documents from a user-defined set of classes. You can then use this trained processor on production documents. You typically would use a custom splitter on files that are composed of different types of logical documents, then use the class identification of each to pass the documents to an appropriate extraction processor to extract the entities.
Because ML models are not perfect and have a certain error rate, and because errors in splitting are typically very problematic (a bad split makes two documents wrong and causes extraction errors), a best practice is to always have a human review step after the splitting prediction but before the actual file split. Based on business requirements, there are alternatives to always doing human review:
- Use confidence scores in the prediction to decide whether to bypass human review (if high enough). That confidence score threshold should be determined based on historical data about error rates at given confidence scores. This should be a business decision based on the business process tolerance for errors and requirement to bypass human review.
- In some use cases, the split documents can be routed directly to the appropriate extractor according to the predicted class. Then, if the extraction is incomplete or has low confidence scores, isolate the split documents and trigger the original composite document and split decision to then be reviewed. This has rather complex workflow requirements.
Create a custom splitter in Google Cloud console
This quickstart guide describes how to use Document AI to create and train a custom splitter that splits and classifies procurement documents. Most of the document prep is done, so that you can focus on creating a custom splitter.
A typical workflow to create and use a custom splitter is as follows:
- Create a custom splitter in Document AI.
- Create a dataset using an empty Cloud Storage bucket.
- Define and create the processor schema (classes).
- Import documents.
- Assign documents to the training and test sets.
- Annotate documents manually in Document AI or with labeling tasks.
- Train the processor.
- Evaluate the processor.
- Deploy the processor.
- Test the processor.
- Use the processor on your documents.
If you have your documents in separate folders by class, then you can skip step 6 by specifying the class at import time.
To follow step-by-step guidance for this task directly in the Google Cloud console, click Guide me:
Before you begin
- Sign in to your Google Cloud account. If you're new to Google Cloud, create an account to evaluate how our products perform in real-world scenarios. New customers also get $300 in free credits to run, test, and deploy workloads.
-
In the Google Cloud console, on the project selector page, select or create a Google Cloud project.
Roles required to select or create a project
- Select a project: Selecting a project doesn't require a specific IAM role—you can select any project that you've been granted a role on.
-
Create a project: To create a project, you need the Project Creator
(
roles/resourcemanager.projectCreator), which contains theresourcemanager.projects.createpermission. Learn how to grant roles.
-
Verify that billing is enabled for your Google Cloud project.
-
Enable the Document AI, Cloud Storage APIs.
Roles required to enable APIs
To enable APIs, you need the Service Usage Admin IAM role (
roles/serviceusage.serviceUsageAdmin), which contains theserviceusage.services.enablepermission. Learn how to grant roles. -
In the Google Cloud console, on the project selector page, select or create a Google Cloud project.
Roles required to select or create a project
- Select a project: Selecting a project doesn't require a specific IAM role—you can select any project that you've been granted a role on.
-
Create a project: To create a project, you need the Project Creator
(
roles/resourcemanager.projectCreator), which contains theresourcemanager.projects.createpermission. Learn how to grant roles.
-
Verify that billing is enabled for your Google Cloud project.
-
Enable the Document AI, Cloud Storage APIs.
Roles required to enable APIs
To enable APIs, you need the Service Usage Admin IAM role (
roles/serviceusage.serviceUsageAdmin), which contains theserviceusage.services.enablepermission. Learn how to grant roles.
Create a processor
In the Google Cloud console, in the Document AI section, go to the Workbench page.
For Custom Document Splitter, select
Create processor .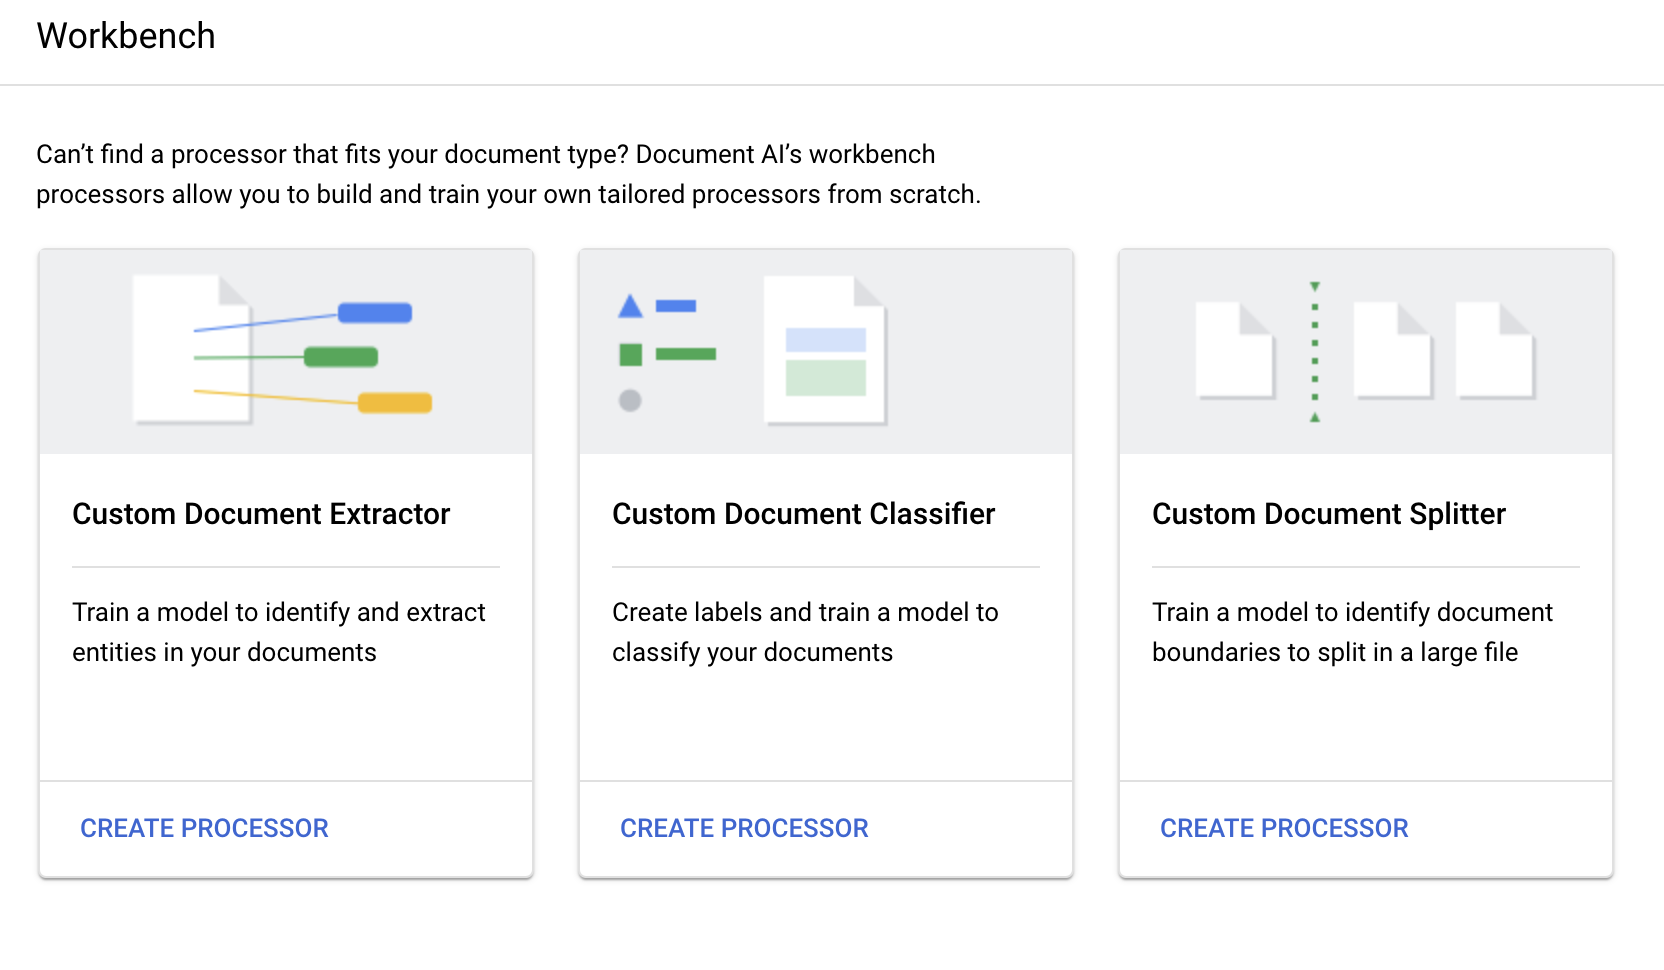
In the Create processor menu, enter a name for your processor, such as
my-custom-document-splitter.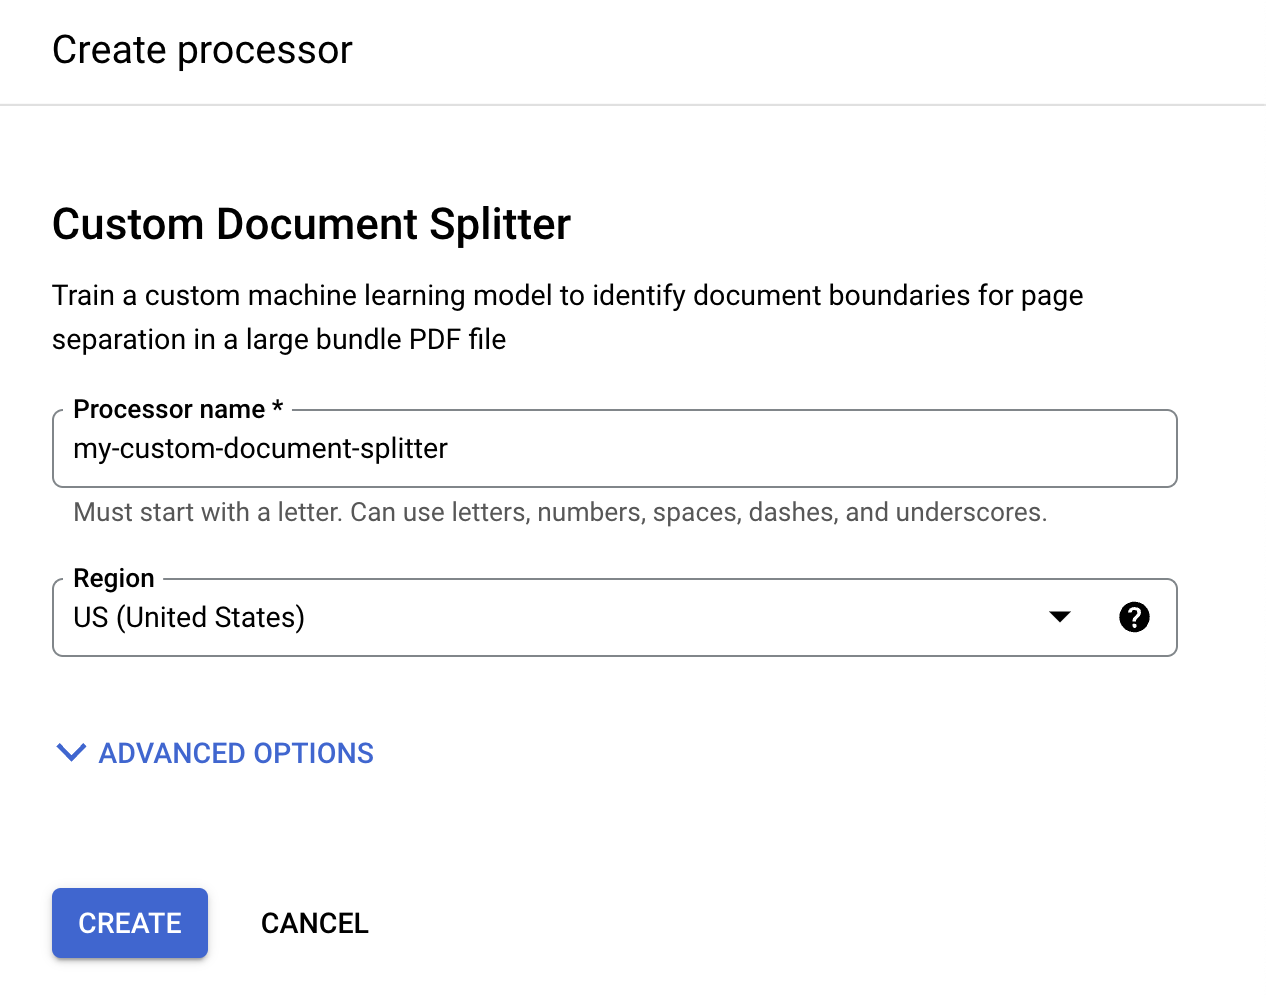
Select the region closest to you.
Select Create. The Processor Details tab appears.
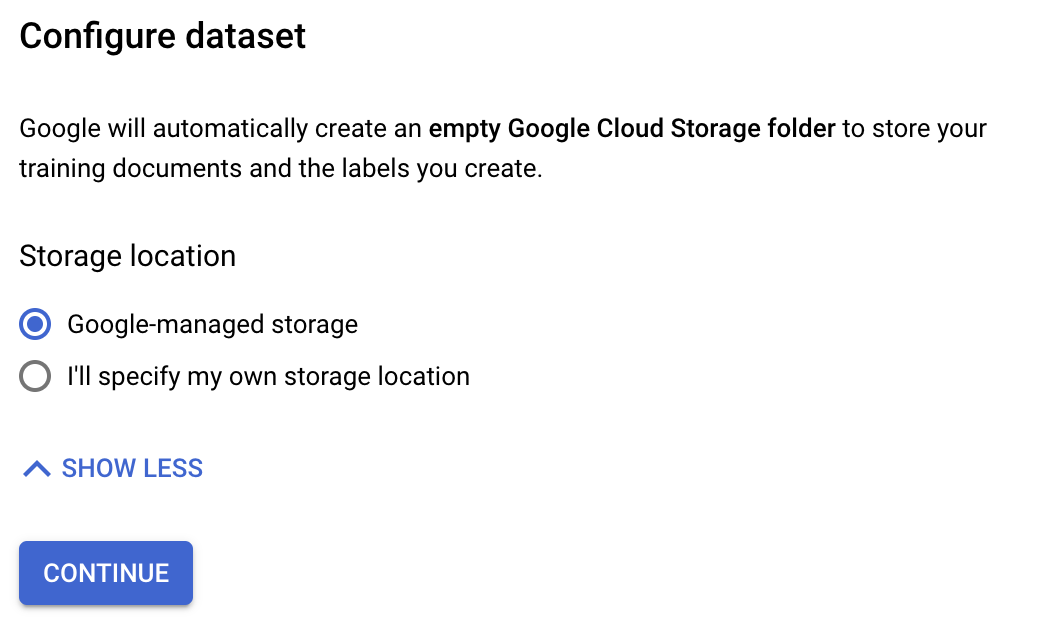
Configure dataset
In order to train this new processor, you must create a dataset with training and testing data to help the processor identify the documents that you want to split and classify.
This dataset requires a new location for it. This can be an empty Cloud Storage bucket or folder, or you can allow a Google-Managed (internal) location.
- If you want Google-managed storage, select that option.
- If you want to use your own storage in order to use Customer-Managed Encryption Keys (CMEK), select I'll specify my own storage location and follow the later procedure.
Create a Cloud Storage bucket for the dataset
Go to your processor's
Train tab.Select Set dataset location. You are prompted to select or create an empty Cloud Storage bucket or folder.
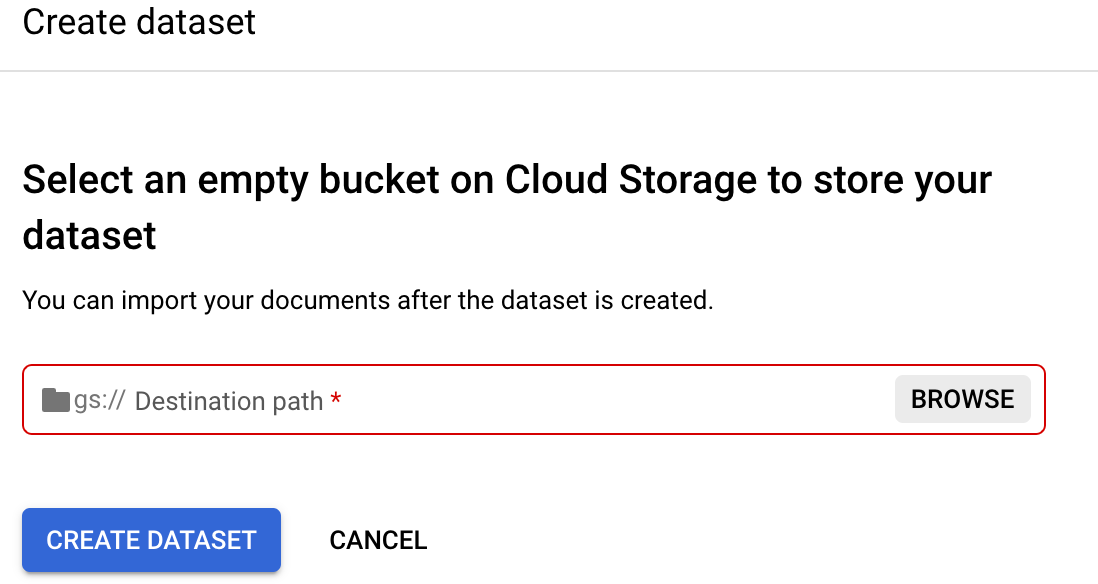
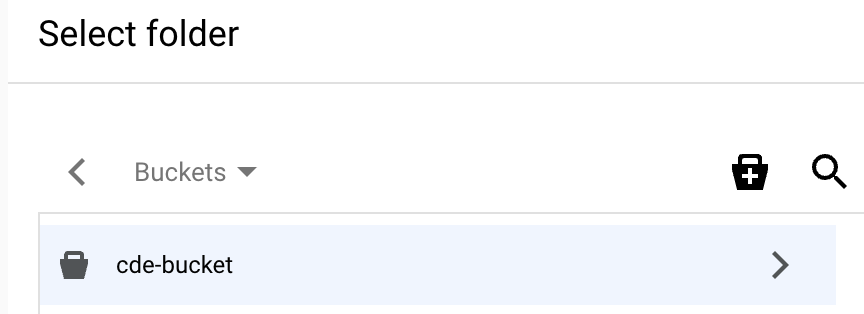
Select Browse to open Select folder.
Select the Create a new bucket icon and follow the prompts to create a new bucket. After you create the bucket, the Select folder page appears for it. For more information on creating a Cloud Storage bucket, refer to Cloud Storage buckets.
On the Select folder page for your bucket, choose the Select button at the bottom of the dialog.
Make sure the destination path is populated with the bucket name you selected. Select Create dataset. The dataset might take up to several minutes to create.
Define processor schema
You can create the processor schema either before or after you import documents into your dataset. The schema provides labels that you use to annotate documents.
On the Train tab, select
Edit Schema in the lower left. The Manage labels page opens.Select
Create label .Enter the name for the label. Select Create. Refer to Define processor schema for detailed instructions on creating and editing a schema.
Create each of the following labels for the processor schema.
bank_statementform_1040form_w2form_w9paystub
Select
Save when the labels are complete.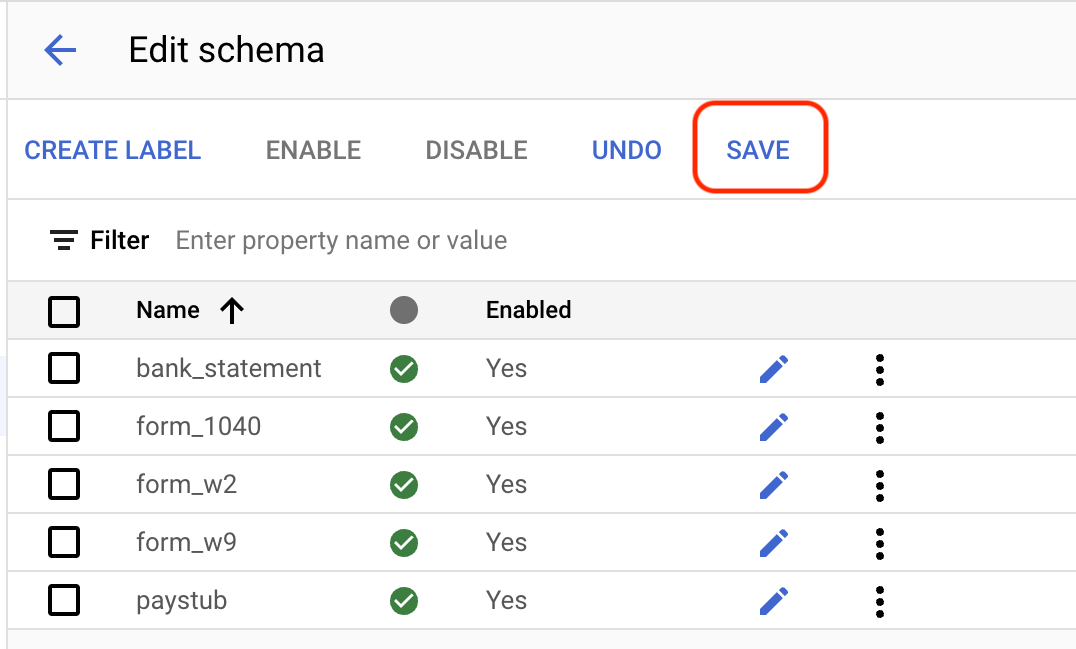
Import an unlabeled document into a dataset
The next step is to begin importing unlabeled documents into your dataset and label them. A recommended alternative is to import documents organized in folders by class, if available.
If working on your own project, you determine how to label your data. Refer to Labeling options.
Document AI custom processors require a minimum of 10 documents in the training and test sets, along with 10 instances of each label in each set. We recommend at least 50 documents in each set, with 50 instances of each label for best performance. In general, more training data produces higher accuracy.
On the Train tab, select
Import documents .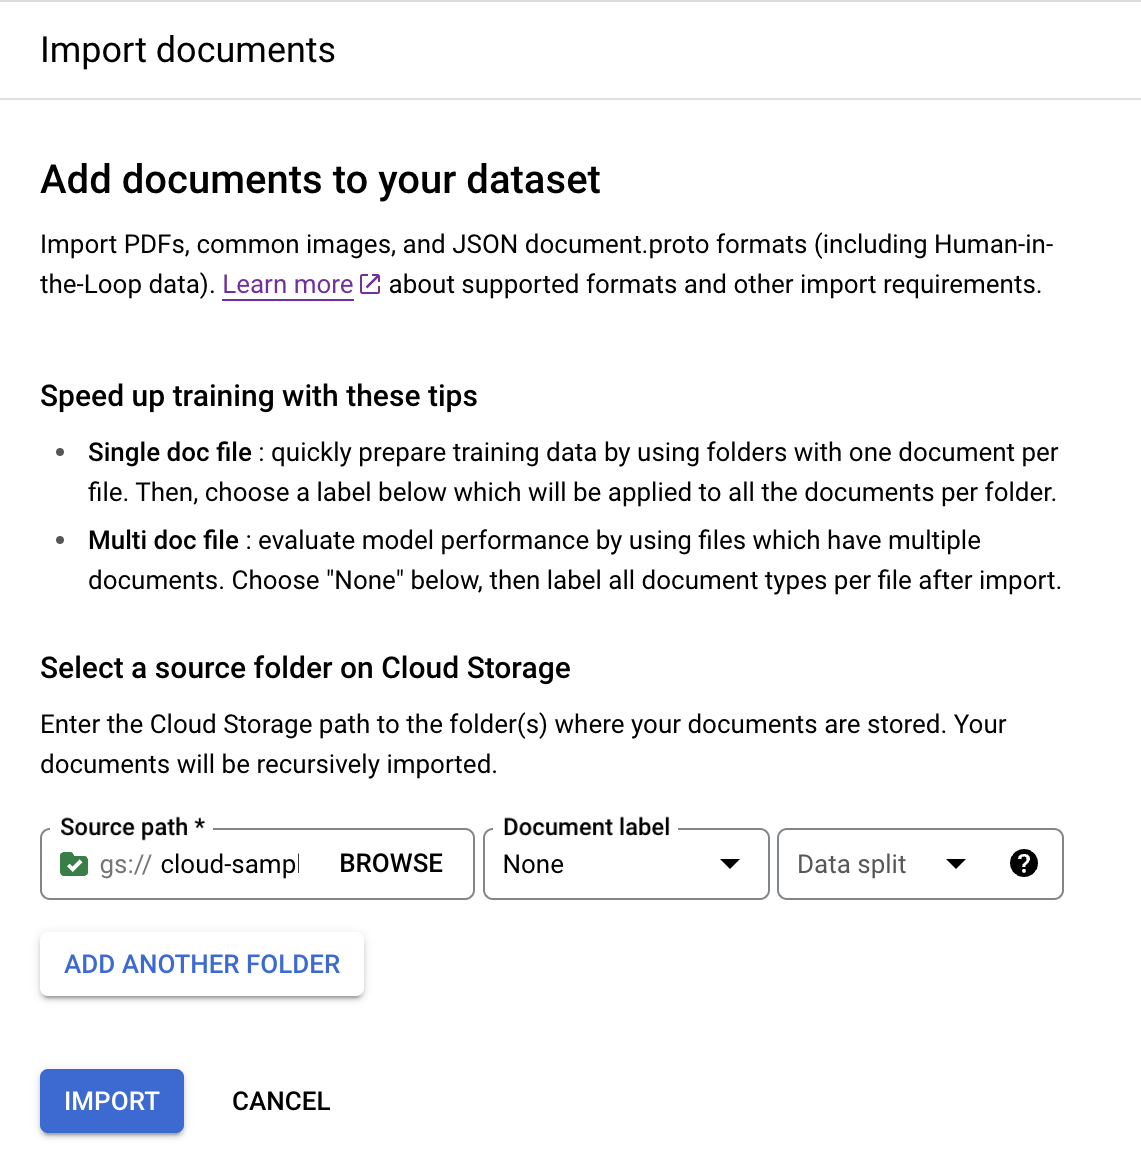
For this example, enter this path in
Source path . This contains one document PDF.cloud-samples-data/documentai/Custom/Lending-Splitter/PDF-UnlabeledSet the
Document label as None.Set the
Dataset split dropdown to Unassigned.The document in this folder is not given a label or assigned to the testing or training set by default.
Select
Import . Document AI reads the documents from the bucket into the dataset. It does not modify the import bucket or read from the bucket after the import is complete.
When you import documents, you can optionally assign the documents to the Training or Test set when imported, or wait to assign them later.
If you want to delete a document or documents that you have imported, select them on the Train tab, and select Delete.
For more information about preparing your data for import, refer to the Data preparation guide.
Optional: Batch label documents at import
You can label all documents that are in a particular directory at import to save time with labeling. If you have your training documents organized by class in folders, then you can use the Document label field to specify the class for those documents and avoid manual labeling of each document.
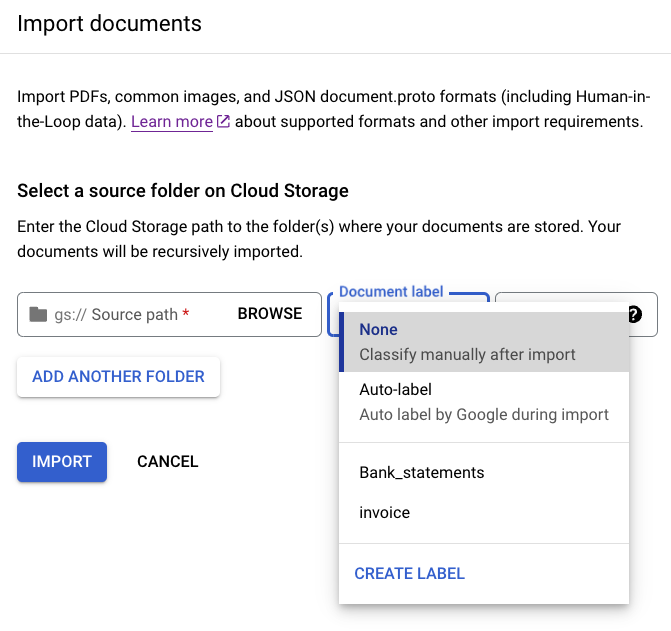
In the image Bank_statements and Invoice are available defined labels
(document classes) you can select. Or you can use CREATE LABEL and define a new
class.
- Click Import documents.
Enter the following path in Source path. This bucket contains unlabeled documents in PDF format.
cloud-samples-data/documentai/Custom/Patents/PDF-CDC-BatchLabelFrom the Data split list, select Auto-split. This automatically splits the documents to have 80% in the training set, and 20% in the test set.
In the Apply labels section, select Choose label.
For these sample documents, select other.
Click Import and wait for the documents to import. You can leave this page and return later.
Label a document
The process of applying labels to a document is known as annotation.
Return to the Train tab, and select
a document to open the Label management console.This document contains multiple page groups that need to be identified and labeled. First, you need to identify the split points. Move your mouse in between pages 1 and 2 in the image view and select on the
+ symbol .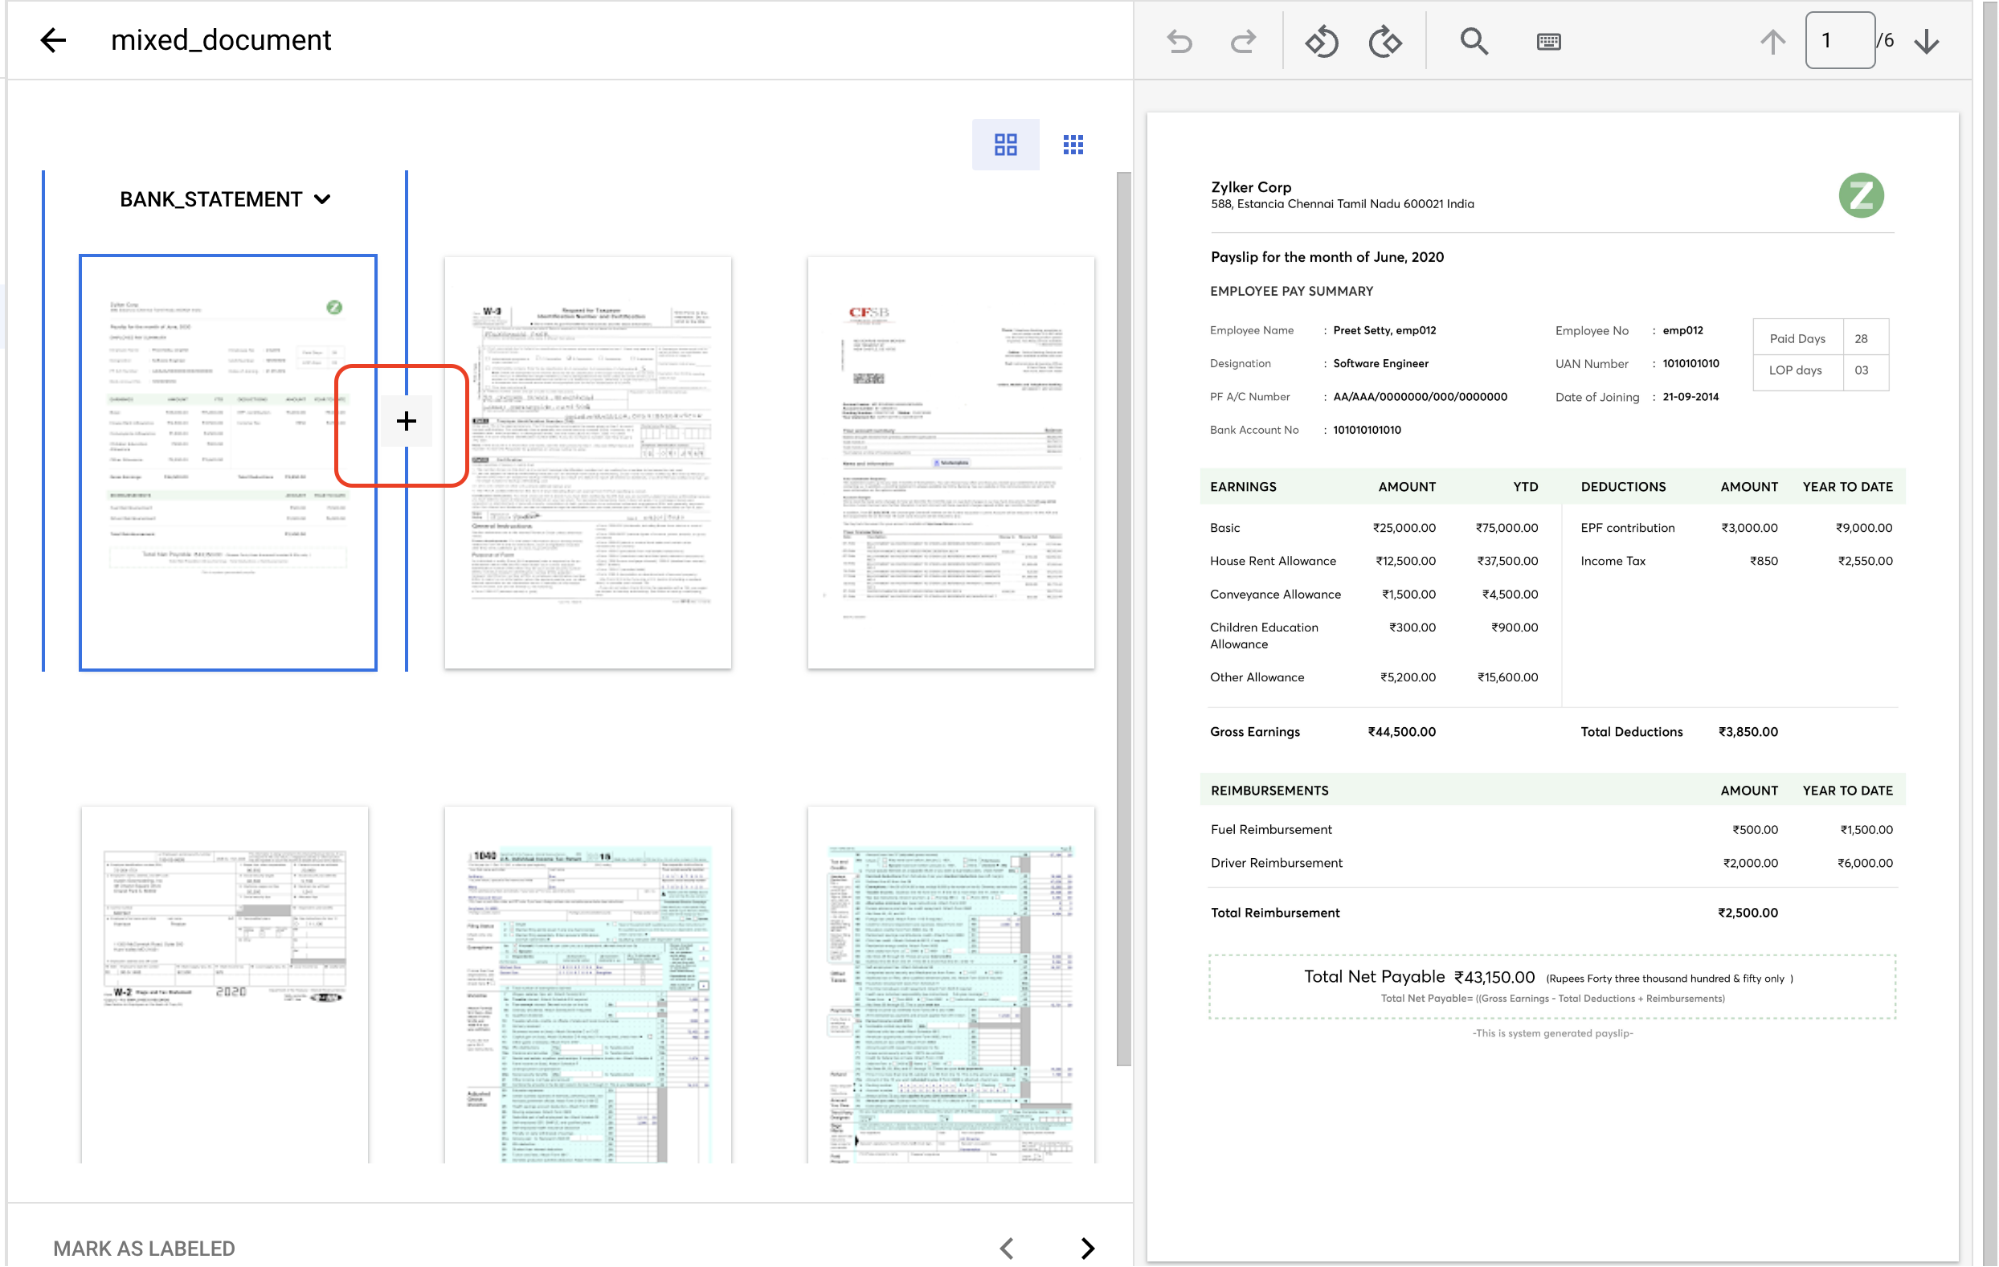
Create split points before the following page numbers: 2, 3, 4, 5.
Your console should look like this when finished.
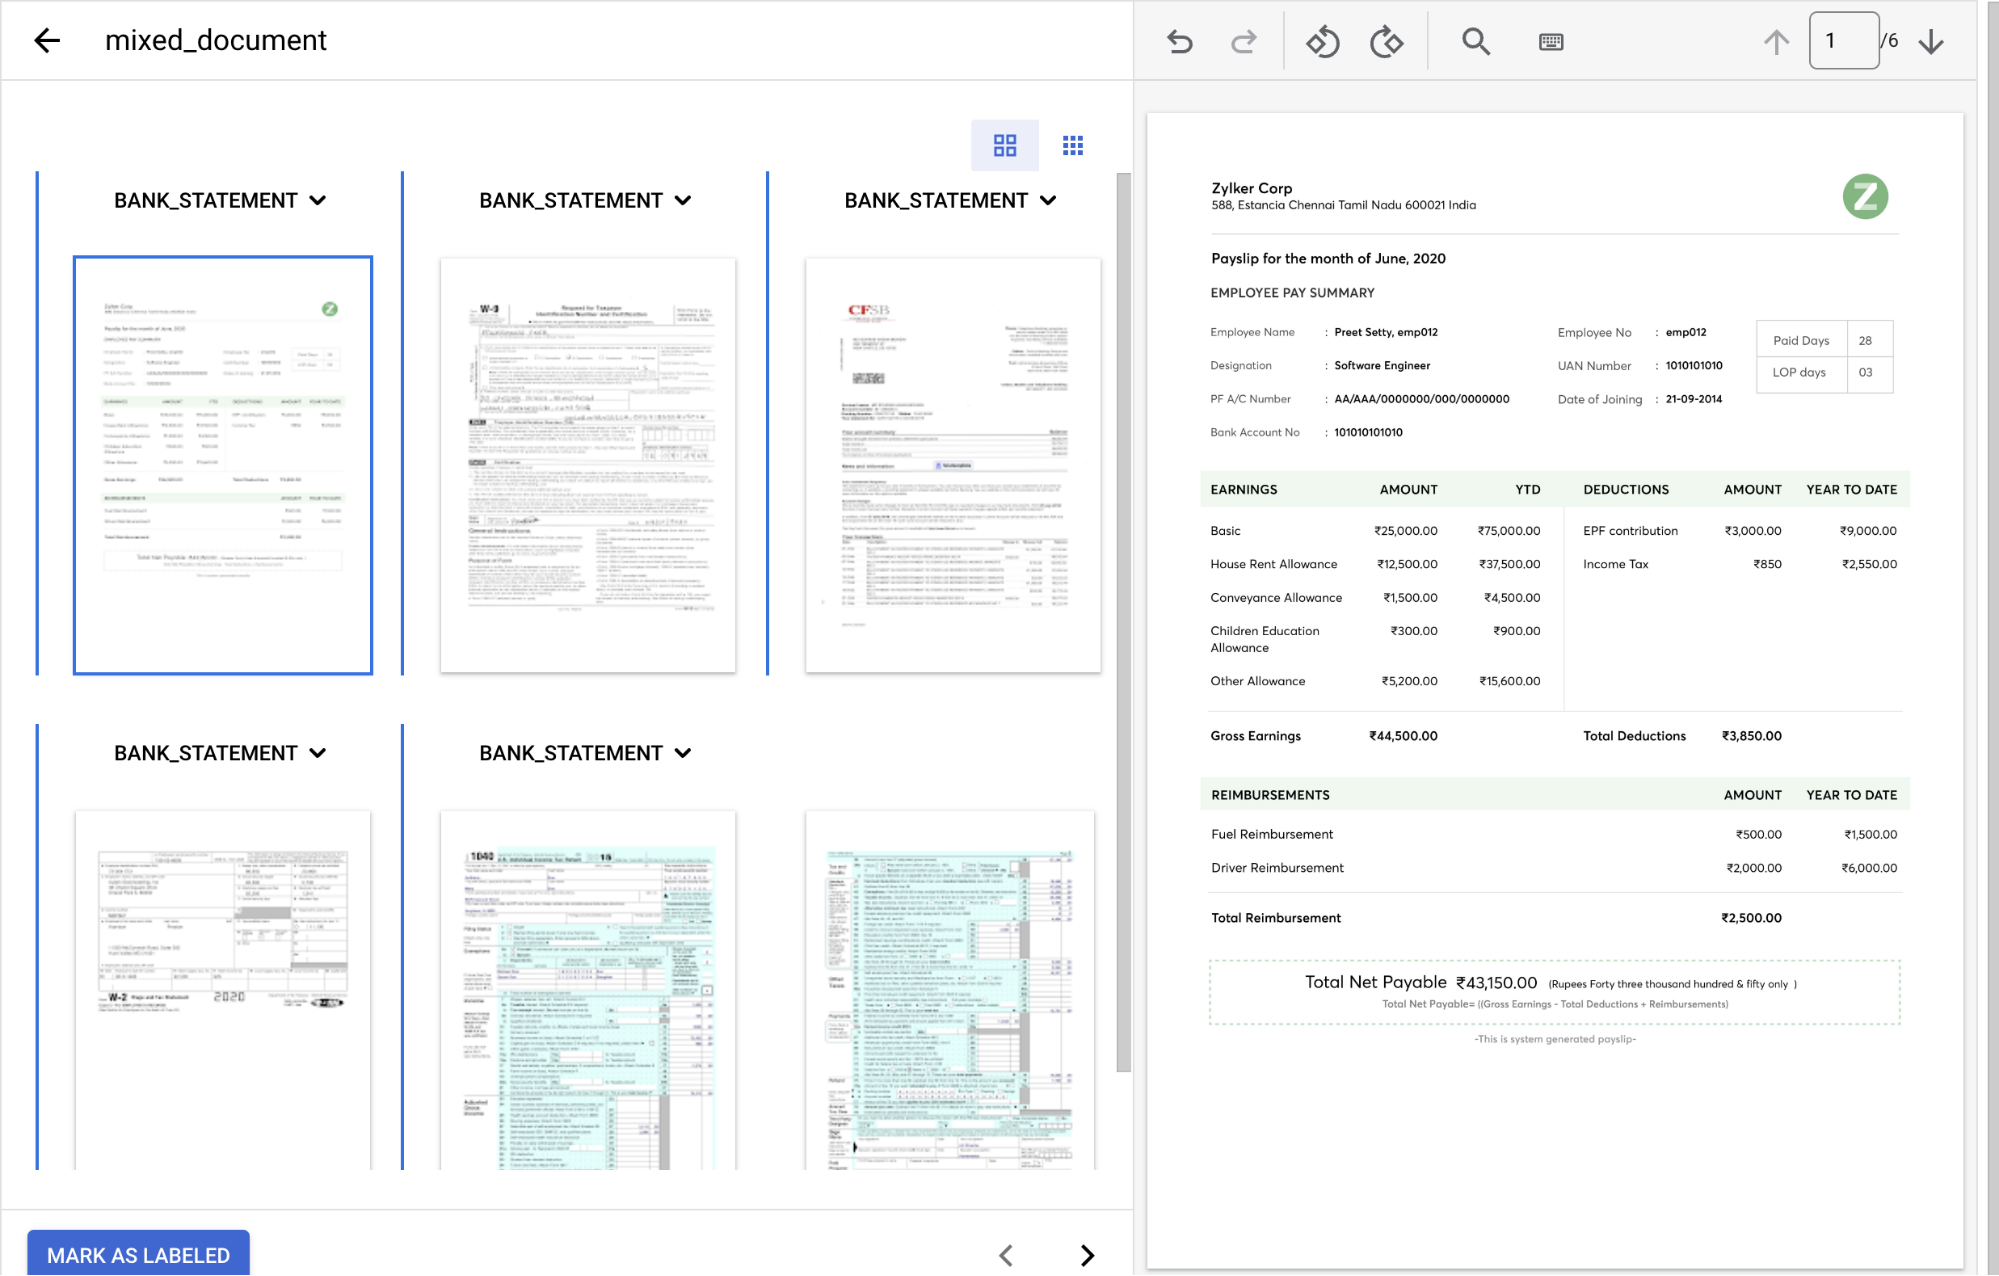
In the
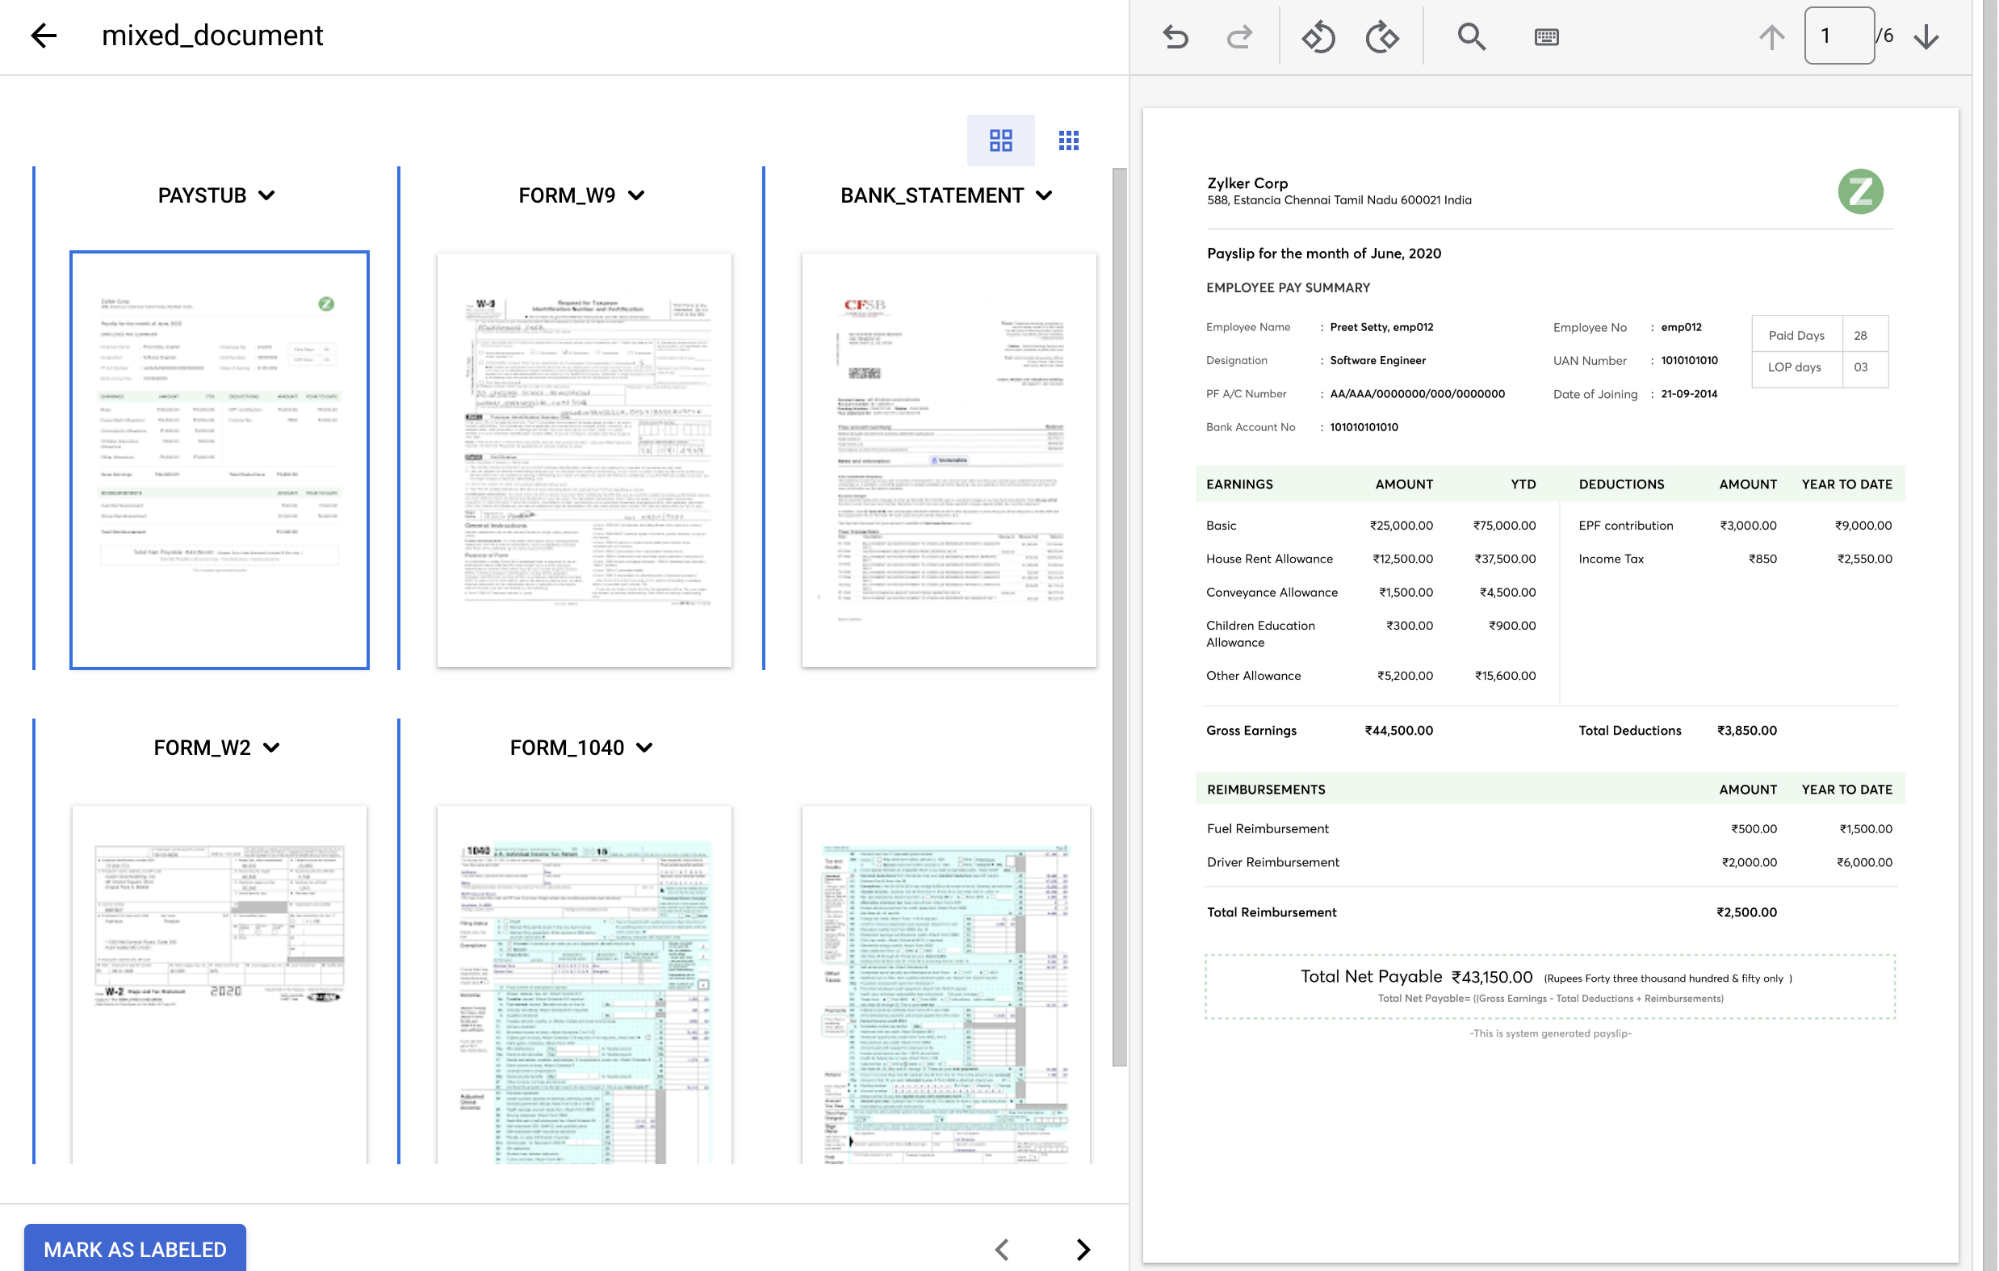
Document type dropdown , select the appropriate label for each page group.Page(s) Document type 1 paystub2 form_w93 bank_statement4 form_w25 & 6 form_1040The labeled document should look like this when complete:
Select
Mark as Labeled when you have finished annotating the document.On the Train tab, the left-hand panel shows that 1 document has been labeled.
Assign annotated document to the training set
Now that you have labeled this example document, you can assign it to the training set.
On the Train tab, select the
Select All checkbox.From the
Assign to Set list, select Training.
In the left-hand panel, you can find that 1 document has been assigned to the training set.
Import data with batch labeling
Next, you import unlabeled PDF files that are sorted into different Cloud Storage folders by their type. Batch labeling helps save time on labeling by assigning a label at import time based on the path.
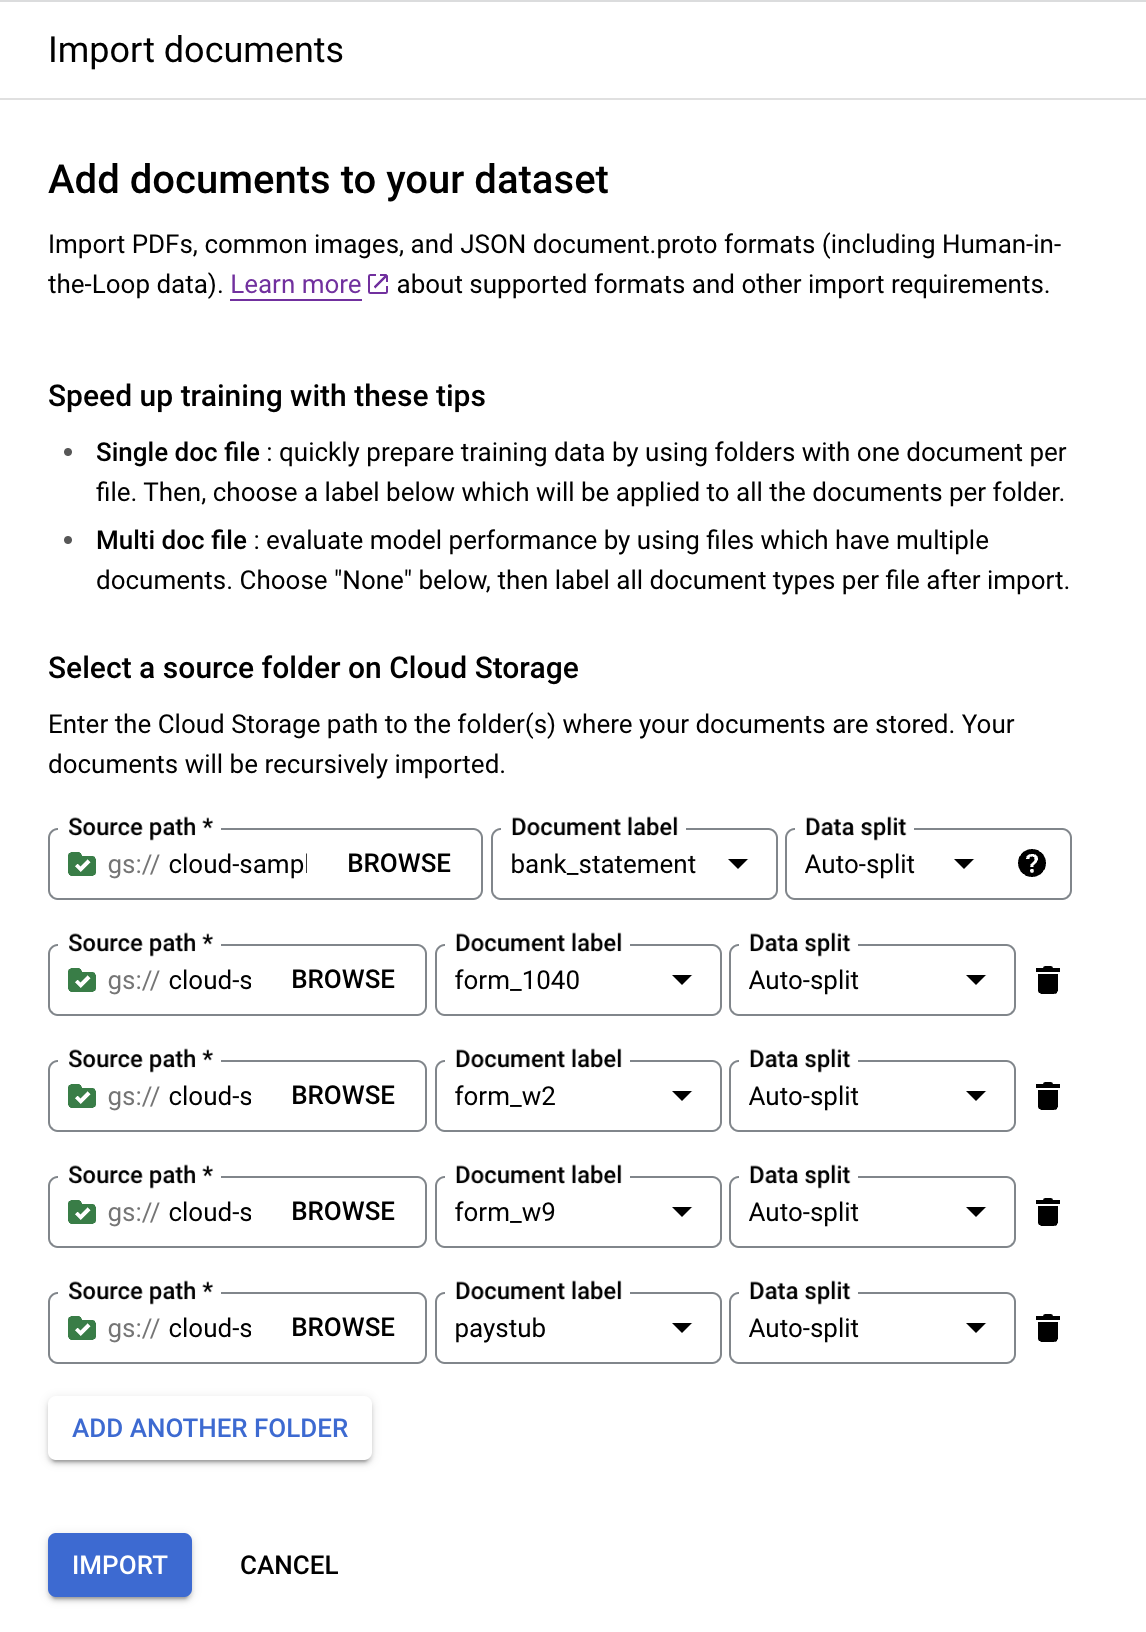
On the Train tab, select
Import documents .Enter the following path in
Source path . This folder contains PDFs of bank statements.cloud-samples-data/documentai/Custom/Lending-Splitter/PDF-CDS-BatchLabel/bank-statementSet the
Document label asbank_statement.Set, in the
Dataset split menu, to Auto-split. This automatically splits the documents to have 80% in the training set and 20% in the test set.Select
Add Another Folder to add more folders.Repeat the previous steps with the following paths and document labels:
Bucket path Document label cloud-samples-data/documentai/Custom/Lending-Splitter/PDF-CDS-BatchLabel/1040form_1040cloud-samples-data/documentai/Custom/Lending-Splitter/PDF-CDS-BatchLabel/w2form_w2cloud-samples-data/documentai/Custom/Lending-Splitter/PDF-CDS-BatchLabel/w9form_w9cloud-samples-data/documentai/Custom/Lending-Splitter/PDF-CDS-BatchLabel/paystubpaystubThe console should look like this when complete:
Select
Import . The import takes several minutes.
When the import is finished, find the documents on the Train tab.
Import prelabeled data
In this guide, you are provided with prelabeled data in the Document format as JSON files.
This is the same format that Document AI outputs when processing a document, labeling with Human-in-the-Loop, or exporting a dataset.
On the Train tab, select
Import documents .Enter the following path in
Source path .cloud-samples-data/documentai/Custom/Lending-Splitter/JSON-LabeledSet the
Document label as None.Set the
Dataset split dropdown to Auto-split.Select
Import .
When the import is finished, find the documents on the Train tab.
Train the processor
Now that you have imported the training and test data, you can train the processor. Because training might take several hours, make sure you have set up the processor with the appropriate data and labels before you begin training.
Select
Train New Version .In the
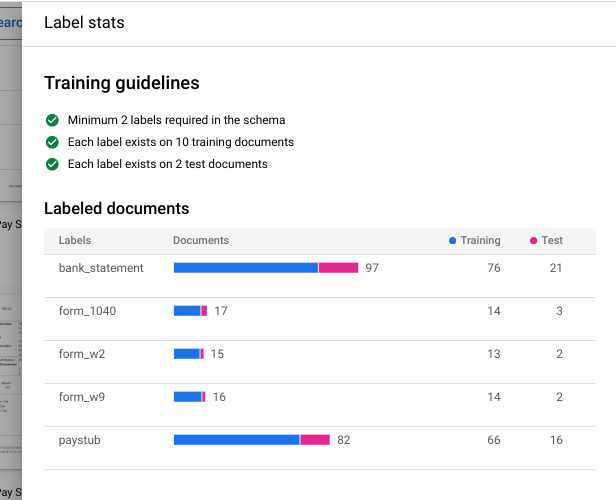
Version name field, enter a name for this processor version, such asmy-cds-version-1.(Optional) Select View Label Stats to find information about the document labels. That can help determine your coverage. Select Close to return to the training setup.
Select
Start training You can check the status on the right-hand panel.
Deploy the processor version
After training is complete, navigate to the
Manage Versions tab. You can view details about the version you just trained.Select the
three vertical dots on the right of the version you want to deploy, and select Deploy version.Select
Deploy from the popup window.Deployment takes a few minutes to complete.
Evaluate and test the processor
After deployment is complete, navigate to the
Evaluate & Test tab.On this page, you can view evaluation metrics including the F1 score, precision and recall for the full document, and individual labels. For more information about evaluation and statistics, refer to Evaluate processor.
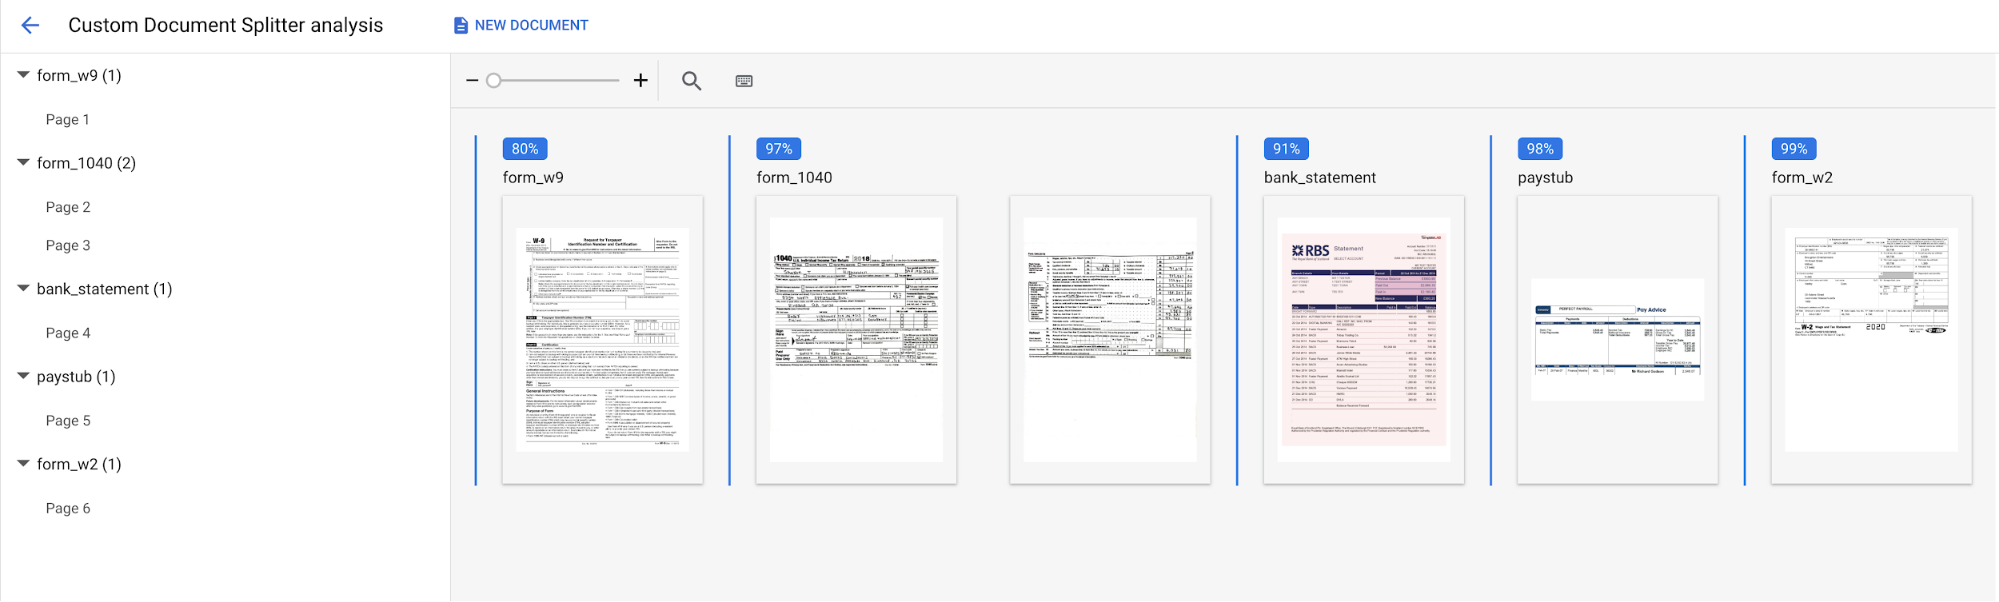
Download a document that has not been involved in previous training or testing so that you can use it to evaluate the processor version. If using your own data, you would use a document set aside for this purpose.
Select
Upload Test Document and select the document you just downloaded.The Custom splitter analysis page opens. The screen output demonstrate how well the document was split and classified.
The console should look like this when complete:
You can also re-run the evaluation against a different test set or processor version.
(Optional) Import data with auto-labeling
After deploying a trained processor version, you can use Auto-labeling to save time on labeling when importing new documents.
On the Train tab, select
Import documents .Enter the following path in
Source path . This folder contains unlabeled PDFs of multiple document types.cloud-samples-data/documentai/Custom/Lending-Splitter/PDF-CDS-AutoLabelSet the
Document label as Auto-label.Set the
Dataset split dropdown to Auto-split.In the Auto-labeling section, set the
Version as the version you previously trained.- For example:
2af620b2fd4d1fcf
- For example:
Select
Import and wait for the documents to import.You cannot use autolabeled documents for training or testing without marking them as labeled. Go to the
Auto-labeled section to view the autolabeled documents.Select the first document to enter the labeling console.
Verify the label to ensure it's correct, and adjust if not.
Select
Mark as Labeled when finished.Repeat the label verification for each autolabeled document.
Return to the Train page and select Train New Version to use the data for training.
Use the processor
You have successfully created and trained a custom splitter processor.
You can manage your custom-trained processor versions just like any other processor version. For more information, refer to Managing processor versions.
Once deployed, you can Send a processing request to your custom processor, and the response can be handled the same as other splitter processors.
Clean up
To avoid incurring charges to your Google Cloud account for the resources used on this page, follow these steps.
To avoid unnecessary Google Cloud charges, use the Google Cloud console to delete your processor and project if you don't need them.
If you created a new project to learn about Document AI and you no longer need the project, delete the project.
If you used an existing Google Cloud project, delete the resources you created to avoid incurring charges to your account:
In the Google Cloud console navigation menu, select Document AI and select My Processors.
Select
More actions in the same row as the processor you want to delete.Select Delete processor, type the processor name, then select Delete again to confirm.