Vor der Bereitstellung Ihrer Anwendung in App Engine haben Sie die Möglichkeit, Ihre App Engine-Standardanwendung lokal auszuführen und eventuelle Fehler zu beheben. In diesem Dokument wird gezeigt, wie Sie die IDE für die lokale Ausführung und die Fehlerbehebung in IntelliJ IDEA konfigurieren.
Hinweise
Ihre Anwendung muss ein App Engine-Standardprojekt sein, das eine
appengine-web.xml-Datei enthält.Führen Sie die Verfahren für das Hinzufügen von Cloud-Clientbibliotheken zu einem Maven-Projekt durch, um lokal auf die Cloud-Clientbibliotheken zuzugreifen.
Anwendung lokal ausführen
Wenn Sie die IntelliJ IDEA Ultimate Edition verwenden, können Sie eine App Engine-Anwendung lokal ausführen. Gehen Sie dazu so vor:
Wählen Sie File > Open (Datei > Öffnen), um das Projekt zu öffnen, das Sie ausführen möchten.
Gehen Sie zum Verzeichnis mit Ihrem Projekt.
Wählen Sie Tools > Cloud Code > App Engine > Auf einem lokalen App Engine Standard-Entwicklungsserver ausführen aus.
Das Erstellen des Projekts dauert einen Moment.
Ausführungskonfiguration bearbeiten
Server konfigurieren
So können Sie die Ausführungskonfiguration für Ihren lokalen Server bearbeiten:
Wählen Sie Run > Edit Configurations aus.
Aktualisieren Sie im Dialogfeld Run/Debug Configurations die Konfigurationseinstellungen je nach Bedarf. Zu den gängigsten Einstellungen gehören:
- Bereitzustellendes Artefakt
- App Engine-Host
- App Engine-Port
Umgebungsvariablen hinzufügen
Fügen Sie Ihrer Konfiguration gegebenenfalls Umgebungsvariablen hinzu.
Wählen Sie den Tab Startup/Connection (Start/Verbindung) aus.
Wählen Sie Run (Ausführen) aus.
Klicken Sie das Kästchen Pass environment variables (Umgebungsvariablen übergeben) an.
Fügen Sie die erforderlichen Variablen hinzu.
Wählen Sie Debug (Fehler beheben) aus.
Klicken Sie das Kästchen Pass environment variables (Umgebungsvariablen übergeben) an.
Fügen Sie die erforderlichen Variablen hinzu.
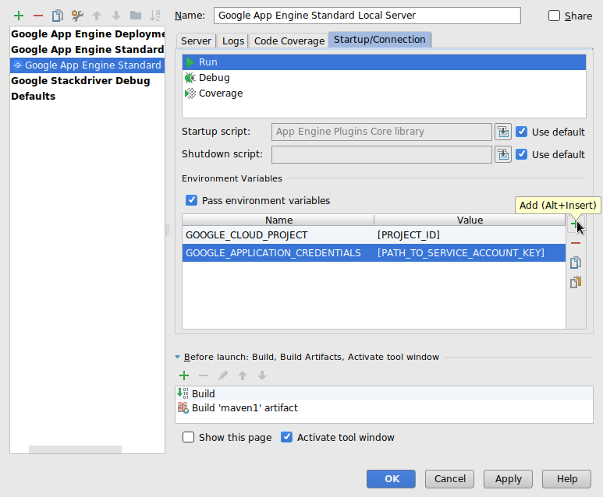
Klicken Sie auf OK, wenn Sie fertig sind.
Server stoppen
Wählen Sie Run > Stop 'Google App Engine Standard Local Server' (Ausführen > "Lokalen Google App Engine-Standardserver" stoppen), um den Entwicklungsanwendungsserver zu stoppen.
Fehler in einer Anwendung beheben
So können Sie mit der zuvor erstellten Ausführungskonfiguration die Anwendung im Fehlerbehebungsmodus ausführen:
Wählen Sie Run > Debug (Ausführen > Fehlerbehebung) aus.
Klicken Sie im Dialogfeld auf Google App Engine Standard Local Server (Lokaler Google App Engine-Standardserver).
Wenn das Projekt erstellt ist, können Sie Haltepunkte zur Fehlerbehebung der Anwendung festlegen.
Fehler in einer Anwendung in der Community Edition lokal beheben
IntelliJ Community Edition bietet keine integrierte Unterstützung für die Ausführung lokaler Java-Servlet-basierter Anwendungen. Für die lokale Fehlerbehebung der Anwendung mit der IntelliJ Community Edition müssen Sie Ihr Projekt für die Verwendung der Plug-ins Maven oder Gradle konfigurieren.
Maven
So konfigurieren Sie Ihr Projekt mit dem Maven-Plug-in
Tragen Sie das App Engine-Plug-in Maven in die Datei
pom.xmlIhres Projekts ein.Konfigurieren Sie die Fehlerbehebung auf einem Entwicklungsserver.
Erstellen Sie für Maven eine Ausführungs-/Fehlerbehebungskonfiguration.
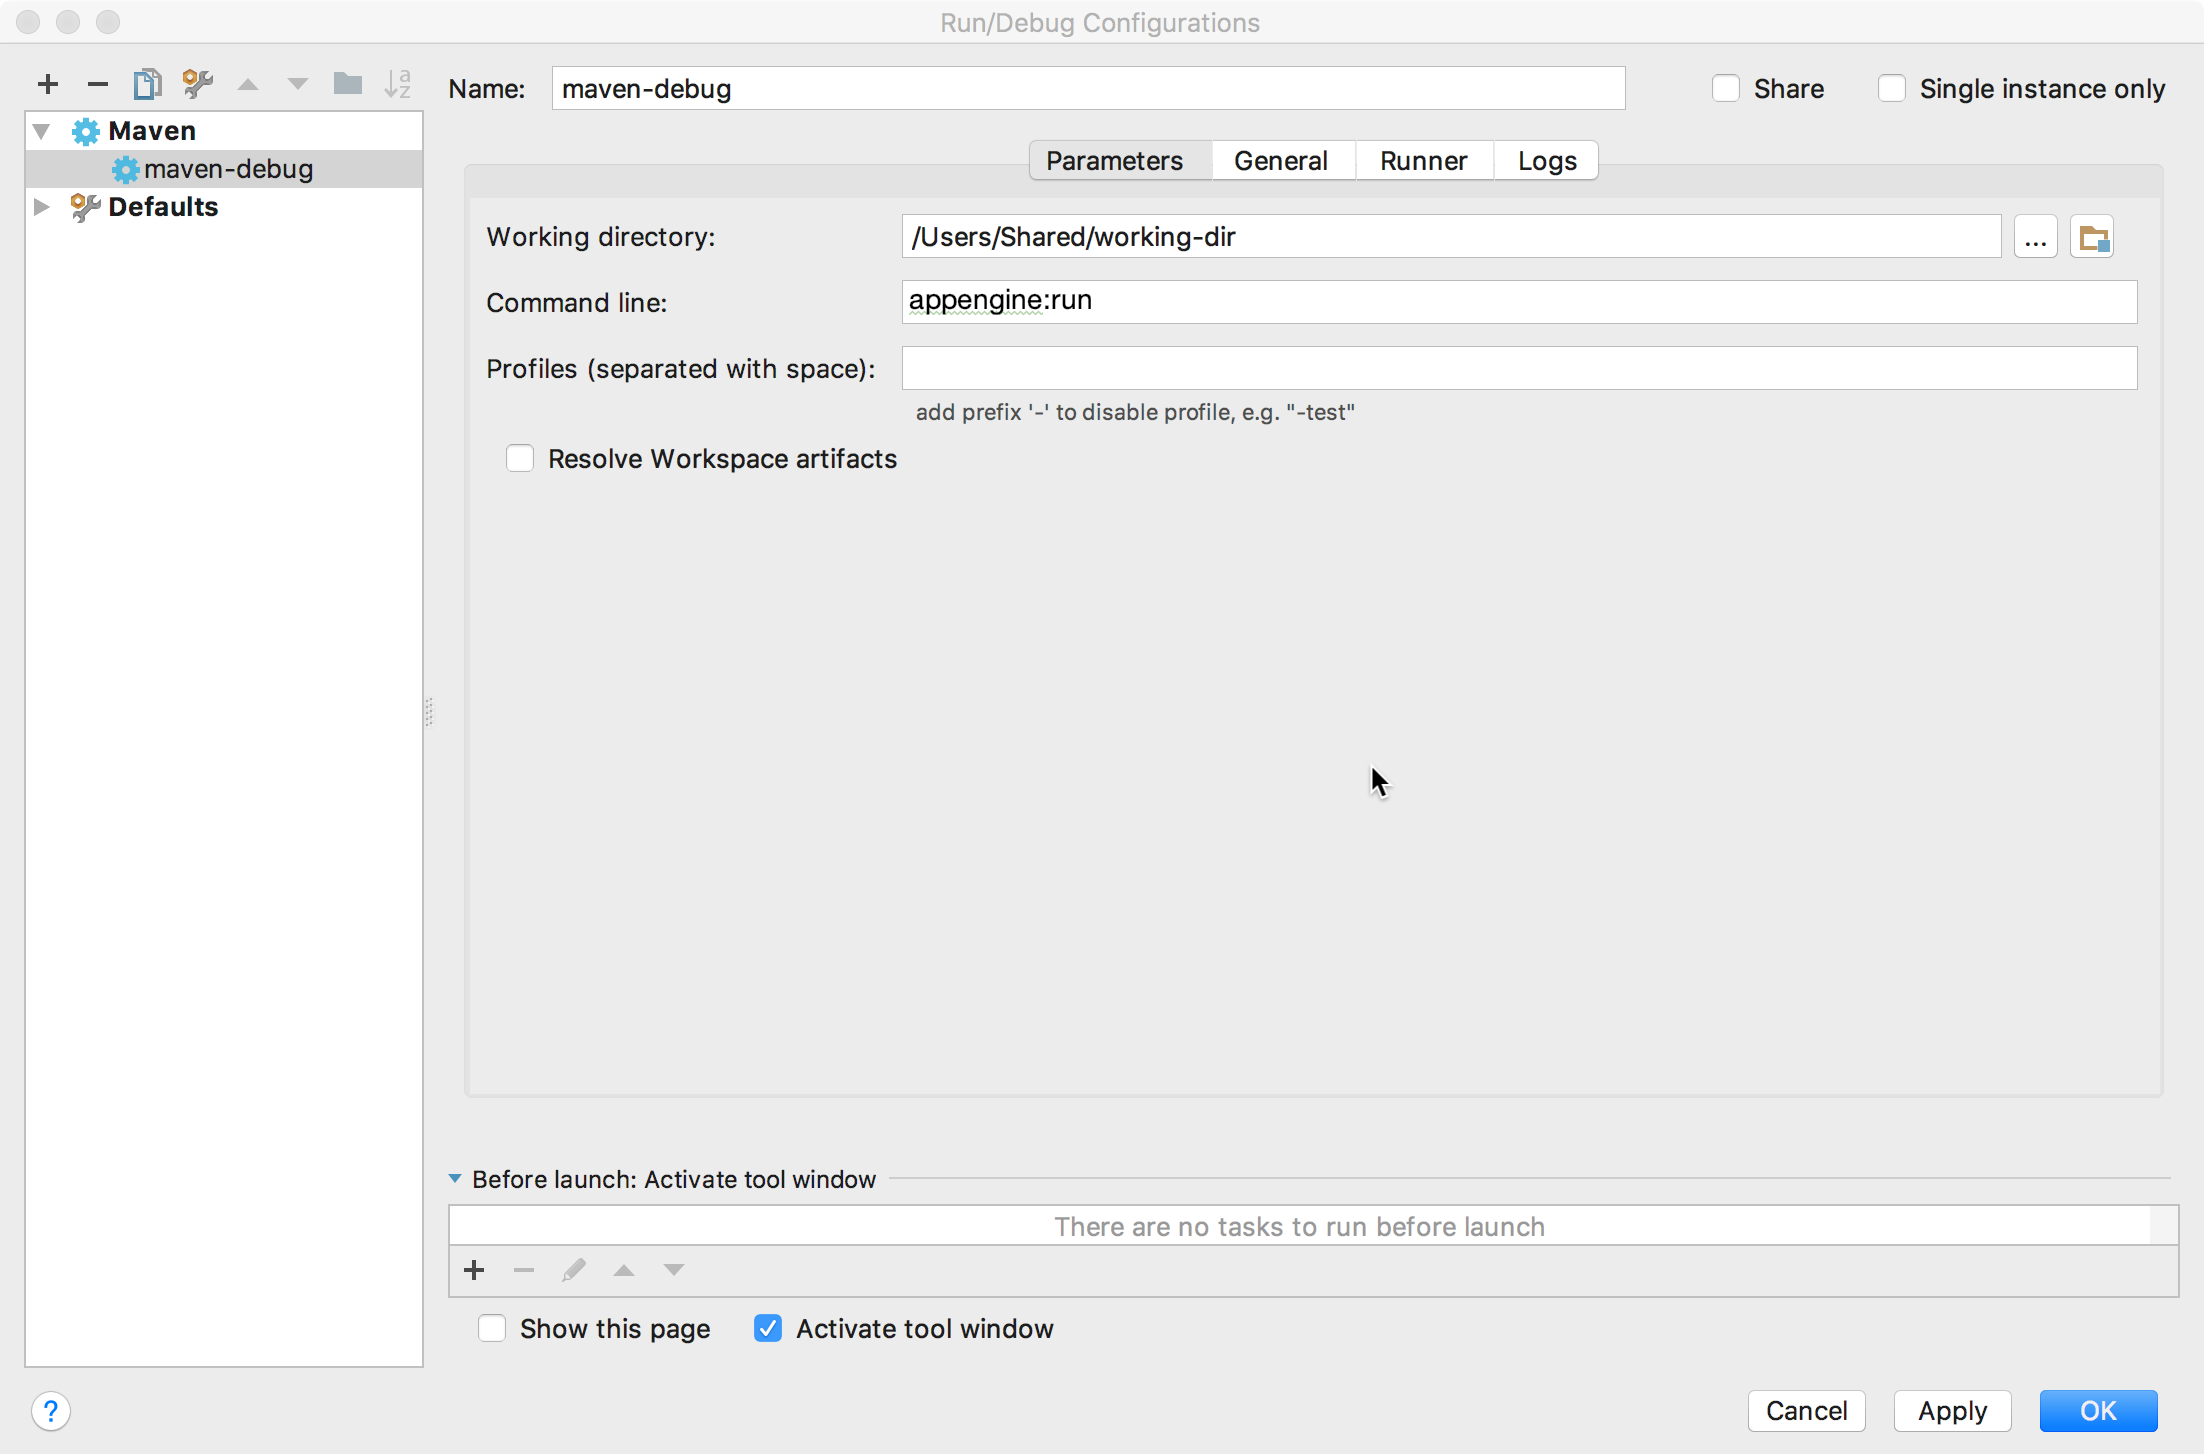
Wählen Sie Run > Edit Configurations aus.
Klicken Sie auf + Neue Konfiguration hinzufügen.
Wählen Sie Maven aus.
Geben Sie im Feld Command line den Wert
appengine:runein.Klicken Sie auf OK.
Erstellen Sie eine Remote-Fehlerbehebungskonfiguration.
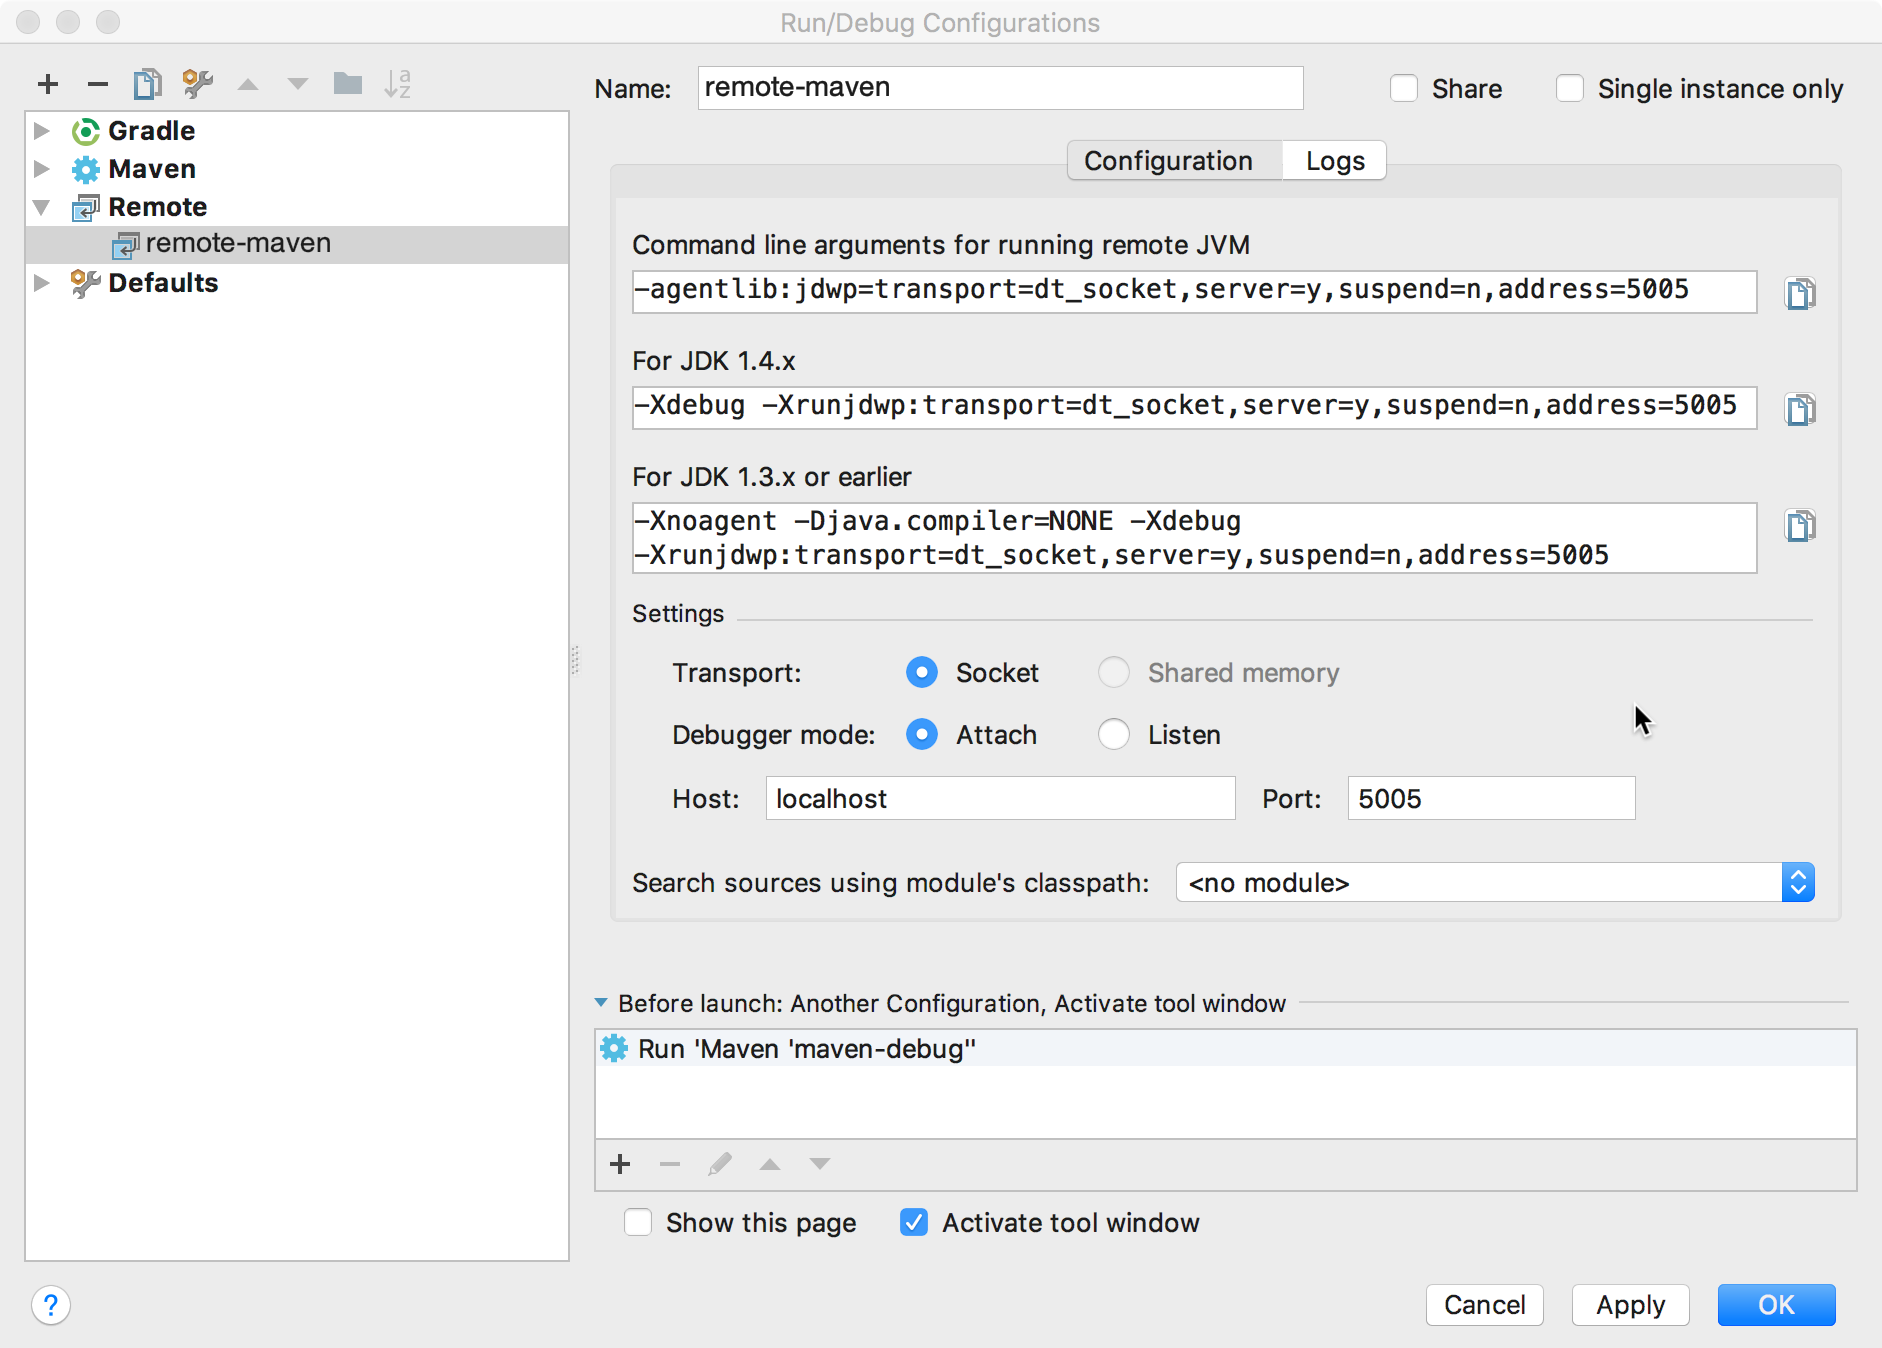
Wählen Sie Run > Edit Configurations aus.
Klicken Sie auf + Neue Konfiguration hinzufügen.
Wählen Sie Remote aus.
Achten Sie darauf, dass die Portnummer mit dem Port übereinstimmt, den Sie in der Maven-Plug-in-Konfiguration Ihrer App Engine konfiguriert haben. Port 5005 ist die Standardeinstellung.
Klicken Sie im Abschnitt Before launch (Vor dem Start) auf das Pluszeichen (+).
Wählen Sie Run Another Configuration (Weitere Konfiguration ausführen) aus.
Wählen Sie die Ausführungskonfiguration für Ihr Maven-Projekt aus.
Klicken Sie auf OK.
So beheben Sie Fehler in Ihrer Anwendung lokal:
Wählen Sie Run > Debug (Ausführen > Fehlerbehebung) aus.
Wählen Sie Ihre Remote-Fehlerbehebungskonfiguration aus.
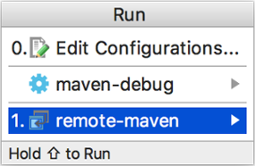
Jetzt können Sie Fehler in Ihrer Anwendung lokal beheben.
Gradle
So konfigurieren Sie Ihr Projekt mit dem Gradle-Plug-in
Konfigurieren Sie die Fehlerbehebung auf einem Entwicklungsserver.
Erstellen Sie eine Ausführungs-/Fehlerbehebungskonfiguration für Gradle.

Wählen Sie Run > Edit Configurations aus.
Klicken Sie auf + Neue Konfiguration hinzufügen.
Wählen Sie Gradle aus.
Wählen Sie im Feld Gradle project das Modul aus, in dem Sie das Plug-in
appengine-gradle-pluginkonfiguriert haben.Geben Sie im Feld Tasks den Wert
appengineRunein.Klicken Sie auf OK.
Erstellen Sie eine Remote-Fehlerbehebungskonfiguration.
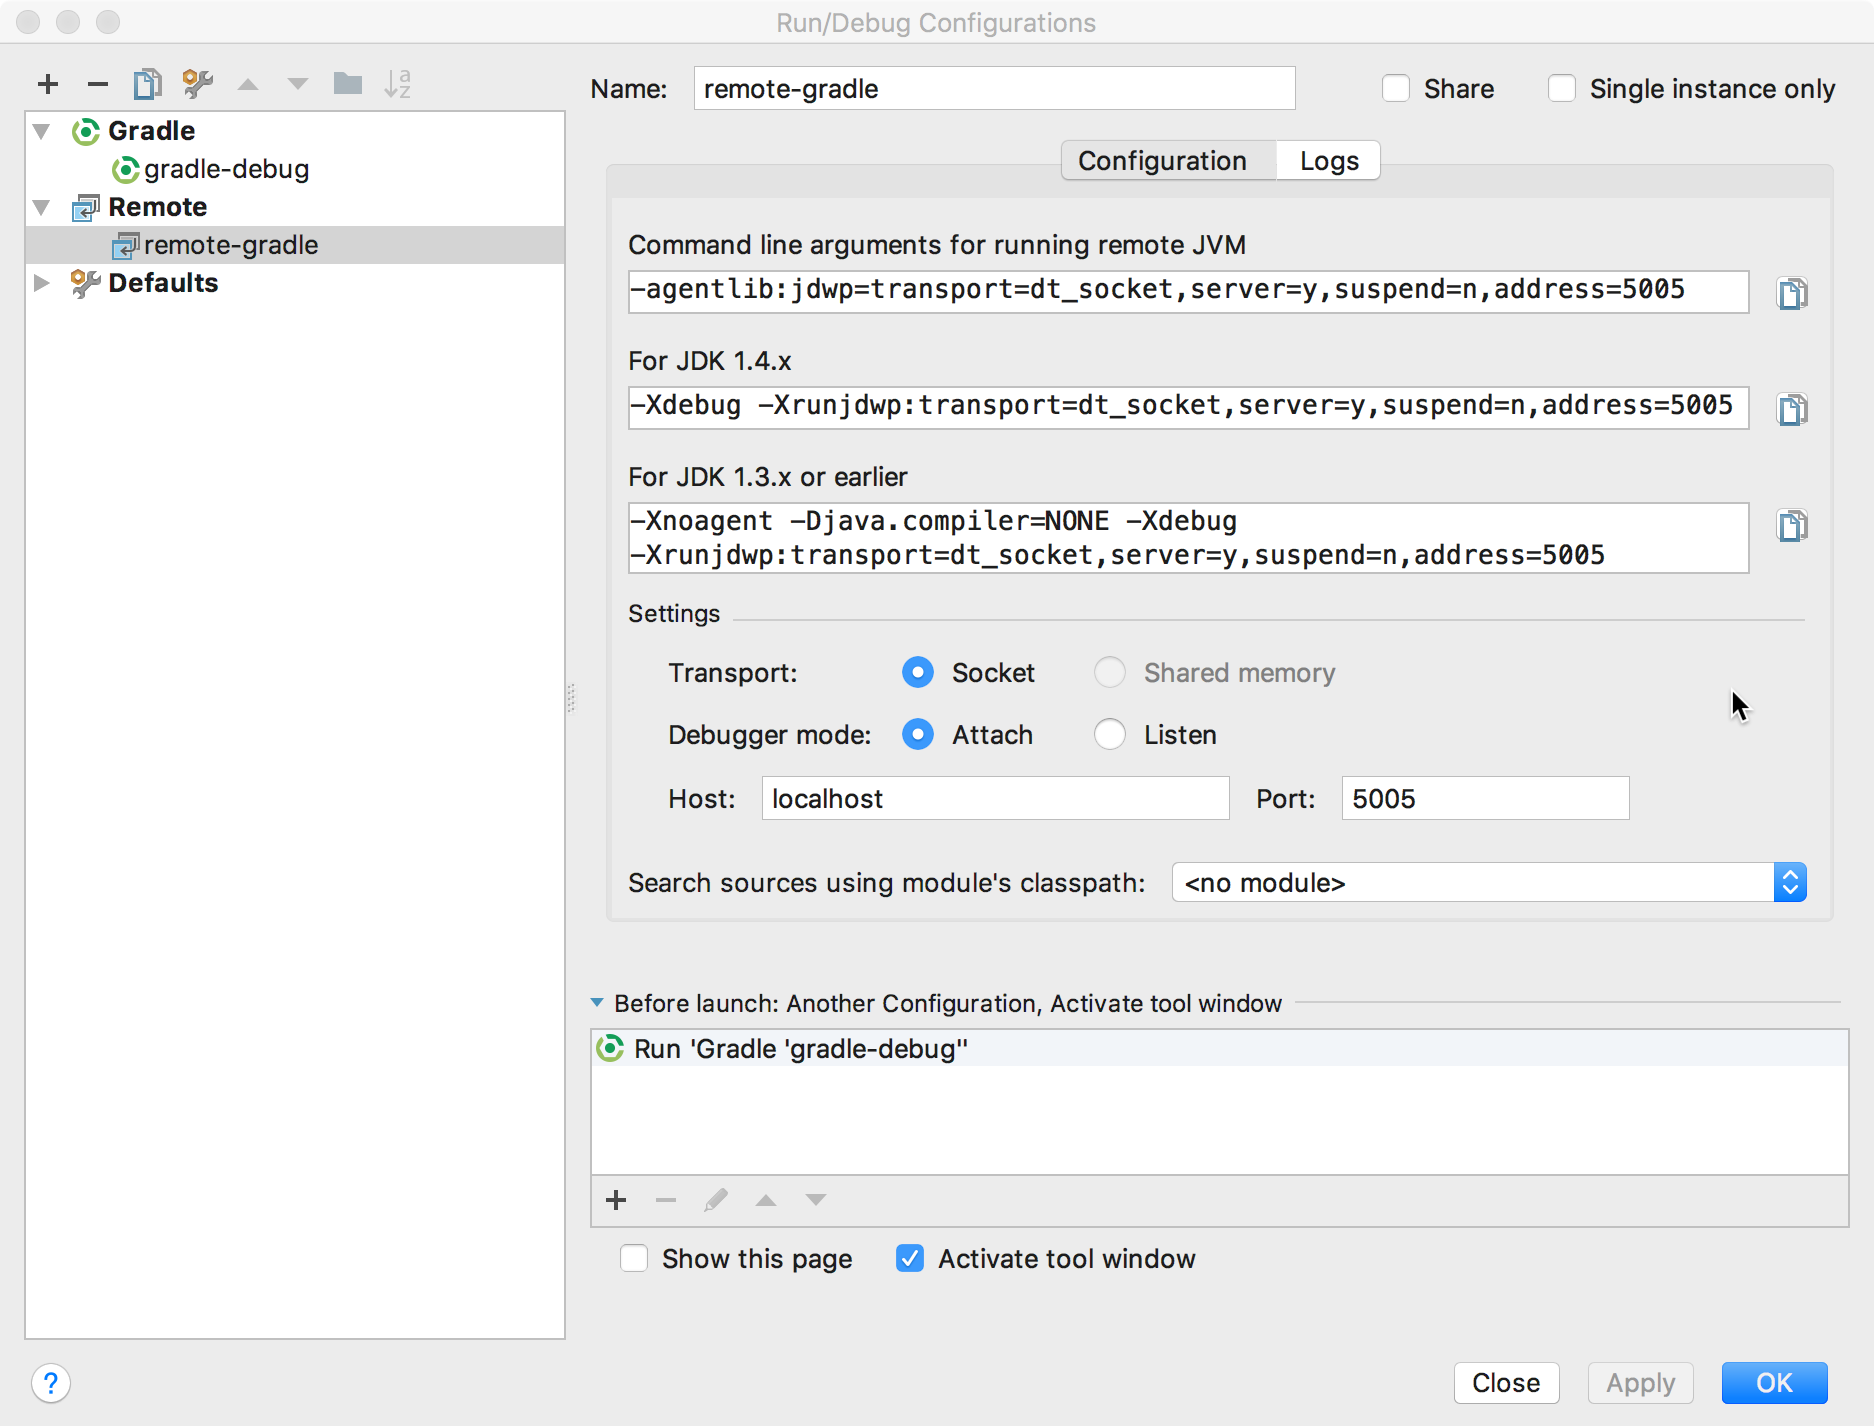
Wählen Sie Run > Edit Configurations aus.
Klicken Sie auf + Neue Konfiguration hinzufügen.
Wählen Sie Remote aus.
Achten Sie darauf, dass die Portnummer mit dem Port übereinstimmt, den Sie in der Gradle-Plug-in-Konfiguration Ihrer App Engine konfiguriert haben. Port 5005 ist die Standardeinstellung.
Klicken Sie im Abschnitt Before launch (Vor dem Start) auf das Pluszeichen (+).
Wählen Sie Run Another Configuration (Weitere Konfiguration ausführen) aus.
Wählen Sie die Ausführungskonfiguration für Ihr Gradle-Projekt aus.
Klicken Sie auf OK.
So beheben Sie Fehler in Ihrer Anwendung lokal:
Wählen Sie Run > Debug (Ausführen > Fehlerbehebung) aus.
Wählen Sie Ihre Remote-Fehlerbehebungskonfiguration aus.
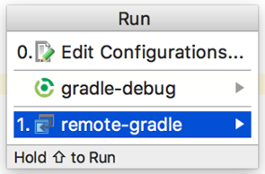
Jetzt können Sie Fehler in Ihrer Anwendung lokal beheben.
Wenn der Link Debugger anhängen im Konsolenlog angezeigt wird, klicken Sie auf den Link.