Consultez les connecteurs compatibles avec Application Integration.
Convertir une chaîne en majuscules
À l'aide de la tâche "Mappage de données", parcourez les éléments d'un tableau de chaînes et appliquez des fonctions de transformation pour convertir chaque valeur de chaîne en majuscules.
Exemple de code
Exemple de flux d'intégration
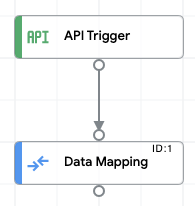
L'image suivante présente un exemple de mise en page de l'éditeur d'intégration pour cet exemple de code d'intégration.
Importer et exécuter l'exemple d'intégration
Pour importer et exécuter l'exemple d'intégration, procédez comme suit :
- Enregistrez l'exemple d'intégration en tant que fichier .json sur votre système.
- Dans la console Google Cloud, accédez à la page Application Integration.
- Cliquez sur Intégrations dans le menu de navigation de gauche pour ouvrir la page Intégrations.
- Sélectionnez une intégration existante ou créez-en une en cliquant sur Créer une intégration.
Si vous créez une intégration :
- Saisissez un nom et une description dans la boîte de dialogue Créer une intégration.
- Sélectionnez une région pour l'intégration.
- Sélectionnez un compte de service pour l'intégration. Vous pouvez modifier ou mettre à jour les informations du compte de service d'une intégration à tout moment depuis le volet Résumé de l'intégration de la barre d'outils d'intégration.
- Cliquez sur Créer.
Cela entraîne son ouverture dans l'éditeur d'intégrations.
- Dans l'éditeur d'intégration, cliquez sur Menu Importer/Télécharger, puis sélectionnez Importer l'intégration.
- Dans la boîte de dialogue de l'explorateur de fichiers, sélectionnez le fichier que vous avez enregistré à l'étape 1, puis cliquez sur Ouvrir.
Une nouvelle version de l'intégration est créée à l'aide du fichier importé.
- Dans l'éditeur d'intégrations, cliquez sur Tester.
- Cliquez sur Tester l'intégration. L'intégration est exécutée et le résultat d'exécution s'affiche dans le volet Tester l'intégration.