Consulta los conectores compatibles con Application Integration.
Cómo convertir una cadena en mayúsculas
Con la tarea de asignación de datos, itera por los elementos de un array de cadenas y aplica funciones de transformación para convertir cada valor de cadena en mayúsculas.
Muestra de código
Flujo de integración de muestra
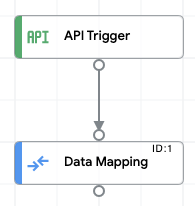
En la siguiente imagen, se muestra un ejemplo de diseño del editor de integración para este muestra de código de integración.
Sube y ejecuta la integración de muestra
Para subir y ejecutar la integración de ejemplo, sigue estos pasos:
- Guarda el ejemplo de integración como un archivo .json en tu sistema.
- En la consola de Google Cloud, ve a la página Application Integration.
- Haz clic en Integraciones en el menú de navegación de la izquierda para abrir la página Integraciones.
- Selecciona una integración existente o crea una nueva haciendo clic en Crear integración.
Si creas una integración nueva, haz lo siguiente:
- Ingresa un nombre y una descripción en el diálogo Crear integración.
- Selecciona una región para la integración.
- Selecciona una cuenta de servicio para la integración. Puedes cambiar o actualizar los detalles de la cuenta de servicio de una integración en cualquier momento desde el panel Resumen de la integración en la barra de herramientas de integración.
- Haz clic en Crear.
Esto abrirá la integración en la página del editor de integración.
- En el diseñador de integración, haz clic en Menú de carga y descarga y, luego, selecciona Subir integración.
- En el cuadro de diálogo del navegador de archivos, selecciona el archivo que guardaste en el paso 1 y haz clic en Abrir.
Se crea una versión nueva de la integración mediante el archivo subido.
- En el editor de integración, haz clic en Probar.
- Haz clic en Probar integración. Esto ejecuta la integración y muestra el resultado de la ejecución en el panel Probar integración.