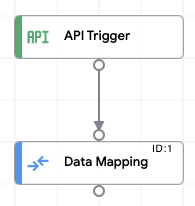
Utilizzando l'attività di mappatura dei dati, risolvi un riferimento JSON in un JSON modello che contiene un riferimento $variable$. Archivia l'output in una nuova variabile JSON.
Fai clic su Integrazioni nel menu di navigazione a sinistra per aprire la pagina Integrazioni.
Seleziona un'integrazione esistente o creane una nuova facendo clic su Crea integrazione.
Se stai creando una nuova integrazione:
Inserisci un nome e una descrizione nella finestra di dialogo Crea integrazione.
Seleziona una regione per l'integrazione.
Seleziona un account di servizio per l'integrazione. Puoi modificare o aggiornare i dettagli dell'account di servizio di un'integrazione in qualsiasi momento dal riquadro Riepilogo integrazione nella barra degli strumenti dell'integrazione.info
Fai clic su Crea.
Si apre l'integrazione nell'editor integrazioni.
Nell'editor dell'integrazione, fai clic su publishMenu Carica/Scarica e poi seleziona Carica integrazione.
Nella finestra di dialogo del browser di file, seleziona il file che hai salvato nel passaggio 1 e poi fai clic su Apri.
Viene creata una nuova versione dell'integrazione utilizzando il file caricato.
Nell'editor dell'integrazione, fai clic su Testa.
Fai clic su Test integration (Prova integrazione). L'integrazione viene eseguita e il risultato dell'esecuzione viene visualizzato nel riquadro Testa integrazione.
[[["Facile da capire","easyToUnderstand","thumb-up"],["Il problema è stato risolto","solvedMyProblem","thumb-up"],["Altra","otherUp","thumb-up"]],[["Difficile da capire","hardToUnderstand","thumb-down"],["Informazioni o codice di esempio errati","incorrectInformationOrSampleCode","thumb-down"],["Mancano le informazioni o gli esempi di cui ho bisogno","missingTheInformationSamplesINeed","thumb-down"],["Problema di traduzione","translationIssue","thumb-down"],["Altra","otherDown","thumb-down"]],["Ultimo aggiornamento 2025-09-03 UTC."],[[["\u003cp\u003eThis content describes how to resolve a JSON reference within a template JSON using the Data Mapping task in Application Integration.\u003c/p\u003e\n"],["\u003cp\u003eThe process involves using a variable reference within the template JSON, identified by a \u003ccode\u003e$\u003c/code\u003e symbol.\u003c/p\u003e\n"],["\u003cp\u003eThe provided code sample demonstrates a configuration for resolving a JSON reference by mapping fields and applying transformation functions such as "RESOLVE_TEMPLATE" and "TO_JSON".\u003c/p\u003e\n"],["\u003cp\u003eThe document outlines the steps to upload and run a sample integration that demonstrates this JSON reference resolution, including how to save it as a .json file, upload to Application Integration, and test.\u003c/p\u003e\n"],["\u003cp\u003eThis configuration also includes input parameters, output parameters, and a sample integration flow.\u003c/p\u003e\n"]]],[],null,["# Resolve a JSON reference\n\nSee the [supported connectors](/integration-connectors/docs/connector-reference-overview) for Application Integration.\n\nResolve a JSON reference\n========================\n\n\nUsing the Data Mapping task, resolve a JSON reference in a template JSON that contains a $\u003cvar translate=\"no\"\u003evariable\u003c/var\u003e$ reference. Store the output in a new JSON variable.\n\nCode sample\n-----------\n\n {\n \"triggerConfigs\": [{\n \"label\": \"API Trigger\",\n \"startTasks\": [{\n \"taskId\": \"1\"\n }],\n \"properties\": {\n \"Trigger name\": \"json_structure_mapping_API_1\"\n },\n \"triggerType\": \"API\",\n \"triggerNumber\": \"1\",\n \"triggerId\": \"api_trigger/json_structure_mapping_API_1\"\n }],\n \"taskConfigs\": [{\n \"task\": \"FieldMappingTask\",\n \"taskId\": \"1\",\n \"parameters\": {\n \"FieldMappingConfigTaskParameterKey\": {\n \"key\": \"FieldMappingConfigTaskParameterKey\",\n \"value\": {\n \"jsonValue\": \"{\\n \\\"@type\\\": \\\"type.googleapis.com/enterprise.crm.eventbus.proto.FieldMappingConfig\\\",\\n \\\"mappedFields\\\": [{\\n \\\"inputField\\\": {\\n \\\"fieldType\\\": \\\"JSON_VALUE\\\",\\n \\\"transformExpression\\\": {\\n \\\"initialValue\\\": {\\n \\\"referenceValue\\\": \\\"$new_structure_json_template$\\\"\\n },\\n \\\"transformationFunctions\\\": [{\\n \\\"functionType\\\": {\\n \\\"stringFunction\\\": {\\n \\\"functionName\\\": \\\"RESOLVE_TEMPLATE\\\"\\n }\\n }\\n }, {\\n \\\"functionType\\\": {\\n \\\"stringFunction\\\": {\\n \\\"functionName\\\": \\\"TO_JSON\\\"\\n }\\n }\\n }]\\n }\\n },\\n \\\"outputField\\\": {\\n \\\"referenceKey\\\": \\\"$output_order_json$\\\",\\n \\\"fieldType\\\": \\\"JSON_VALUE\\\",\\n \\\"cardinality\\\": \\\"OPTIONAL\\\"\\n }\\n }]\\n}\"\n }\n }\n },\n \"taskExecutionStrategy\": \"WHEN_ALL_SUCCEED\",\n \"displayName\": \"Data Mapping\"\n }],\n \"integrationParameters\": [{\n \"key\": \"output_order_json\",\n \"dataType\": \"JSON_VALUE\",\n \"displayName\": \"output_order_json\",\n \"inputOutputType\": \"OUT\"\n }, {\n \"key\": \"new_structure_json_template\",\n \"dataType\": \"STRING_VALUE\",\n \"defaultValue\": {\n \"stringValue\": \"{\\n\\t\\\"order\\\": {\\n\\t\\t\\\"ordDate\\\": \\\"$input_order_json.orderDate$\\\",\\n\\t\\t\\\"orderID\\\": \\\"$input_order_json.orderNum$\\\",\\n\\t\\t\\\"btAddr\\\": {\\n\\t\\t\\t\\\"btAddr\\\": \\\"$input_order_json.billTo.street$ $input_order_json.billTo.city$ $input_order_json.billTo.state$ $input_order_json.billTo.zipCode$\\\",\\n\\t\\t\\t\\\"btCode\\\": \\\"$input_order_json.billTo.billToCode$\\\"\\n\\t\\t},\\n\\\"stAddr\\\": {\\n\\t\\t\\t\\\"stAddress\\\": \\\"$input_order_json.shipTo.street$ $input_order_json.shipTo.city$ $input_order_json.shipTo.state$ $input_order_json.shipTo.zipCode$\\\",\\n\\t\\t\\t\\\"stCode\\\": \\\"$input_order_json.shipTo.shipToCode$\\\"\\n\\t\\t}\\n\\t}\\n}\"\n },\n \"displayName\": \"new_structure_json_template\"\n }, {\n \"key\": \"input_order_json\",\n \"dataType\": \"JSON_VALUE\",\n \"defaultValue\": {\n \"jsonValue\": \"{\\n \\\"orderNum\\\": \\\"123\\\",\\n \\\"orderDate\\\": \\\"29/5/2022\\\",\\n \\\"shipTo\\\": {\\n \\\"shipToCode\\\": \\\"CX3H-XC Sunnyvale, California\\\",\\n \\\"street\\\": \\\"1155 Borregas Ave\\\",\\n \\\"city\\\": \\\"Sunnyvale\\\",\\n \\\"state\\\": \\\"CA\\\",\\n \\\"zipCode\\\": \\\"94089\\\"\\n },\\n \\\"billTo\\\": {\\n \\\"billToCode\\\": \\\"CX3H+XC Sunnyvale, California\\\",\\n \\\"street\\\": \\\"1155 Borregas Ave\\\",\\n \\\"city\\\": \\\"Sunnyvale\\\",\\n \\\"state\\\": \\\"CA\\\",\\n \\\"zipCode\\\": \\\"94089\\\"\\n }\\n}\"\n },\n \"displayName\": \"input_order_json\",\n \"jsonSchema\": \"{\\n \\\"$schema\\\": \\\"http://json-schema.org/draft-04/schema#\\\",\\n \\\"type\\\": \\\"object\\\",\\n \\\"properties\\\": {\\n \\\"billTo\\\": {\\n \\\"type\\\": \\\"object\\\",\\n \\\"properties\\\": {\\n \\\"zipCode\\\": {\\n \\\"type\\\": \\\"string\\\"\\n },\\n \\\"city\\\": {\\n \\\"type\\\": \\\"string\\\"\\n },\\n \\\"street\\\": {\\n \\\"type\\\": \\\"string\\\"\\n },\\n \\\"state\\\": {\\n \\\"type\\\": \\\"string\\\"\\n },\\n \\\"billToCode\\\": {\\n \\\"type\\\": \\\"string\\\"\\n }\\n }\\n },\\n \\\"orderNum\\\": {\\n \\\"type\\\": \\\"string\\\"\\n },\\n \\\"orderDate\\\": {\\n \\\"type\\\": \\\"string\\\"\\n },\\n \\\"shipTo\\\": {\\n \\\"type\\\": \\\"object\\\",\\n \\\"properties\\\": {\\n \\\"zipCode\\\": {\\n \\\"type\\\": \\\"string\\\"\\n },\\n \\\"city\\\": {\\n \\\"type\\\": \\\"string\\\"\\n },\\n \\\"street\\\": {\\n \\\"type\\\": \\\"string\\\"\\n },\\n \\\"shipToCode\\\": {\\n \\\"type\\\": \\\"string\\\"\\n },\\n \\\"state\\\": {\\n \\\"type\\\": \\\"string\\\"\\n }\\n }\\n }\\n }\\n}\"\n }]\n }\n\n### Sample integration flow\n\nThe following image shows a sample layout of the integration editor for this integration code sample.\n\n\nUpload and run the sample integration\n-------------------------------------\n\nTo upload and run the sample integration, do the following steps:\n\n1. Save the [integration sample](#code-sample) as a .json file on your system.\n2. In the Google Cloud console, go to the **Application Integration** page.\n\n [Go to Application Integration](https://console.cloud.google.com/integrations)\n3. Click **Integrations** from the left navigation menu to open the **Integrations** page.\n4. Select an existing integration or create a new integration by clicking **Create integration** .\n\n\n If you are creating a new integration:\n 1. Enter a name and description in the **Create Integration** dialog.\n 2. Select a region for the integration. **Note:** The **Regions** dropdown only lists the regions provisioned in your Google Cloud project. To provision a new region, Click **Enable Region** . See [Enable new region](/application-integration/docs/enable-new-region) for more information.\n 3. Select a service account for the integration. You can change or update the service account details of an integration any time from the info **Integration summary** pane in the integration toolbar. **Note:** The option to select a service account is displayed only if you have enabled integration governance for the selected region.\n 4. Click **Create**.\n\n\n This opens the integration in the *integration editor*.\n5. In the *integration editor* , click publish**Upload/download menu** and then select **Upload integration**.\n6. In the file browser dialog, select the file that you saved in step 1, and then click **Open** .\n\n A new version of the integration is created using the uploaded file.\n7. In the *integration editor* , click **Test**.\n8. Click **Test integration** . This runs the integration and displays the execution result in the **Test Integration** pane."]]