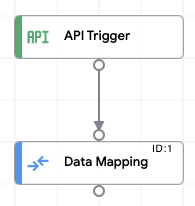
Con la tarea Data Mapping, resuelve una referencia JSON en una plantilla JSON que contiene una referencia $variable$. Almacena el resultado en una nueva variable JSON.
Haz clic en Integraciones en el menú de navegación de la izquierda para abrir la página Integraciones.
Selecciona una integración existente o crea una nueva haciendo clic en Crear integración.
Si creas una integración nueva, haz lo siguiente:
Ingresa un nombre y una descripción en el diálogo Crear integración.
Selecciona una región para la integración.
Selecciona una cuenta de servicio para la integración. Puedes cambiar o actualizar los detalles de la cuenta de servicio de una integración en cualquier momento desde el panel Resumen de la integracióninfo en la barra de herramientas de integración.
Haz clic en Crear.
Esto abrirá la integración en la página del editor de integración.
En el diseñador de integración, haz clic en publishMenú de carga y descarga y, luego, selecciona Subir integración.
En el cuadro de diálogo del navegador de archivos, selecciona el archivo que guardaste en el paso 1 y haz clic en Abrir.
Se crea una versión nueva de la integración mediante el archivo subido.
En el editor de integración, haz clic en Probar.
Haz clic en Probar integración. Esto ejecuta la integración y muestra el resultado de la ejecución en el panel Probar integración.
[[["Fácil de comprender","easyToUnderstand","thumb-up"],["Resolvió mi problema","solvedMyProblem","thumb-up"],["Otro","otherUp","thumb-up"]],[["Difícil de entender","hardToUnderstand","thumb-down"],["Información o código de muestra incorrectos","incorrectInformationOrSampleCode","thumb-down"],["Faltan la información o los ejemplos que necesito","missingTheInformationSamplesINeed","thumb-down"],["Problema de traducción","translationIssue","thumb-down"],["Otro","otherDown","thumb-down"]],["Última actualización: 2025-09-03 (UTC)"],[[["\u003cp\u003eThis content describes how to resolve a JSON reference within a template JSON using the Data Mapping task in Application Integration.\u003c/p\u003e\n"],["\u003cp\u003eThe process involves using a variable reference within the template JSON, identified by a \u003ccode\u003e$\u003c/code\u003e symbol.\u003c/p\u003e\n"],["\u003cp\u003eThe provided code sample demonstrates a configuration for resolving a JSON reference by mapping fields and applying transformation functions such as "RESOLVE_TEMPLATE" and "TO_JSON".\u003c/p\u003e\n"],["\u003cp\u003eThe document outlines the steps to upload and run a sample integration that demonstrates this JSON reference resolution, including how to save it as a .json file, upload to Application Integration, and test.\u003c/p\u003e\n"],["\u003cp\u003eThis configuration also includes input parameters, output parameters, and a sample integration flow.\u003c/p\u003e\n"]]],[],null,["# Resolve a JSON reference\n\nSee the [supported connectors](/integration-connectors/docs/connector-reference-overview) for Application Integration.\n\nResolve a JSON reference\n========================\n\n\nUsing the Data Mapping task, resolve a JSON reference in a template JSON that contains a $\u003cvar translate=\"no\"\u003evariable\u003c/var\u003e$ reference. Store the output in a new JSON variable.\n\nCode sample\n-----------\n\n {\n \"triggerConfigs\": [{\n \"label\": \"API Trigger\",\n \"startTasks\": [{\n \"taskId\": \"1\"\n }],\n \"properties\": {\n \"Trigger name\": \"json_structure_mapping_API_1\"\n },\n \"triggerType\": \"API\",\n \"triggerNumber\": \"1\",\n \"triggerId\": \"api_trigger/json_structure_mapping_API_1\"\n }],\n \"taskConfigs\": [{\n \"task\": \"FieldMappingTask\",\n \"taskId\": \"1\",\n \"parameters\": {\n \"FieldMappingConfigTaskParameterKey\": {\n \"key\": \"FieldMappingConfigTaskParameterKey\",\n \"value\": {\n \"jsonValue\": \"{\\n \\\"@type\\\": \\\"type.googleapis.com/enterprise.crm.eventbus.proto.FieldMappingConfig\\\",\\n \\\"mappedFields\\\": [{\\n \\\"inputField\\\": {\\n \\\"fieldType\\\": \\\"JSON_VALUE\\\",\\n \\\"transformExpression\\\": {\\n \\\"initialValue\\\": {\\n \\\"referenceValue\\\": \\\"$new_structure_json_template$\\\"\\n },\\n \\\"transformationFunctions\\\": [{\\n \\\"functionType\\\": {\\n \\\"stringFunction\\\": {\\n \\\"functionName\\\": \\\"RESOLVE_TEMPLATE\\\"\\n }\\n }\\n }, {\\n \\\"functionType\\\": {\\n \\\"stringFunction\\\": {\\n \\\"functionName\\\": \\\"TO_JSON\\\"\\n }\\n }\\n }]\\n }\\n },\\n \\\"outputField\\\": {\\n \\\"referenceKey\\\": \\\"$output_order_json$\\\",\\n \\\"fieldType\\\": \\\"JSON_VALUE\\\",\\n \\\"cardinality\\\": \\\"OPTIONAL\\\"\\n }\\n }]\\n}\"\n }\n }\n },\n \"taskExecutionStrategy\": \"WHEN_ALL_SUCCEED\",\n \"displayName\": \"Data Mapping\"\n }],\n \"integrationParameters\": [{\n \"key\": \"output_order_json\",\n \"dataType\": \"JSON_VALUE\",\n \"displayName\": \"output_order_json\",\n \"inputOutputType\": \"OUT\"\n }, {\n \"key\": \"new_structure_json_template\",\n \"dataType\": \"STRING_VALUE\",\n \"defaultValue\": {\n \"stringValue\": \"{\\n\\t\\\"order\\\": {\\n\\t\\t\\\"ordDate\\\": \\\"$input_order_json.orderDate$\\\",\\n\\t\\t\\\"orderID\\\": \\\"$input_order_json.orderNum$\\\",\\n\\t\\t\\\"btAddr\\\": {\\n\\t\\t\\t\\\"btAddr\\\": \\\"$input_order_json.billTo.street$ $input_order_json.billTo.city$ $input_order_json.billTo.state$ $input_order_json.billTo.zipCode$\\\",\\n\\t\\t\\t\\\"btCode\\\": \\\"$input_order_json.billTo.billToCode$\\\"\\n\\t\\t},\\n\\\"stAddr\\\": {\\n\\t\\t\\t\\\"stAddress\\\": \\\"$input_order_json.shipTo.street$ $input_order_json.shipTo.city$ $input_order_json.shipTo.state$ $input_order_json.shipTo.zipCode$\\\",\\n\\t\\t\\t\\\"stCode\\\": \\\"$input_order_json.shipTo.shipToCode$\\\"\\n\\t\\t}\\n\\t}\\n}\"\n },\n \"displayName\": \"new_structure_json_template\"\n }, {\n \"key\": \"input_order_json\",\n \"dataType\": \"JSON_VALUE\",\n \"defaultValue\": {\n \"jsonValue\": \"{\\n \\\"orderNum\\\": \\\"123\\\",\\n \\\"orderDate\\\": \\\"29/5/2022\\\",\\n \\\"shipTo\\\": {\\n \\\"shipToCode\\\": \\\"CX3H-XC Sunnyvale, California\\\",\\n \\\"street\\\": \\\"1155 Borregas Ave\\\",\\n \\\"city\\\": \\\"Sunnyvale\\\",\\n \\\"state\\\": \\\"CA\\\",\\n \\\"zipCode\\\": \\\"94089\\\"\\n },\\n \\\"billTo\\\": {\\n \\\"billToCode\\\": \\\"CX3H+XC Sunnyvale, California\\\",\\n \\\"street\\\": \\\"1155 Borregas Ave\\\",\\n \\\"city\\\": \\\"Sunnyvale\\\",\\n \\\"state\\\": \\\"CA\\\",\\n \\\"zipCode\\\": \\\"94089\\\"\\n }\\n}\"\n },\n \"displayName\": \"input_order_json\",\n \"jsonSchema\": \"{\\n \\\"$schema\\\": \\\"http://json-schema.org/draft-04/schema#\\\",\\n \\\"type\\\": \\\"object\\\",\\n \\\"properties\\\": {\\n \\\"billTo\\\": {\\n \\\"type\\\": \\\"object\\\",\\n \\\"properties\\\": {\\n \\\"zipCode\\\": {\\n \\\"type\\\": \\\"string\\\"\\n },\\n \\\"city\\\": {\\n \\\"type\\\": \\\"string\\\"\\n },\\n \\\"street\\\": {\\n \\\"type\\\": \\\"string\\\"\\n },\\n \\\"state\\\": {\\n \\\"type\\\": \\\"string\\\"\\n },\\n \\\"billToCode\\\": {\\n \\\"type\\\": \\\"string\\\"\\n }\\n }\\n },\\n \\\"orderNum\\\": {\\n \\\"type\\\": \\\"string\\\"\\n },\\n \\\"orderDate\\\": {\\n \\\"type\\\": \\\"string\\\"\\n },\\n \\\"shipTo\\\": {\\n \\\"type\\\": \\\"object\\\",\\n \\\"properties\\\": {\\n \\\"zipCode\\\": {\\n \\\"type\\\": \\\"string\\\"\\n },\\n \\\"city\\\": {\\n \\\"type\\\": \\\"string\\\"\\n },\\n \\\"street\\\": {\\n \\\"type\\\": \\\"string\\\"\\n },\\n \\\"shipToCode\\\": {\\n \\\"type\\\": \\\"string\\\"\\n },\\n \\\"state\\\": {\\n \\\"type\\\": \\\"string\\\"\\n }\\n }\\n }\\n }\\n}\"\n }]\n }\n\n### Sample integration flow\n\nThe following image shows a sample layout of the integration editor for this integration code sample.\n\n\nUpload and run the sample integration\n-------------------------------------\n\nTo upload and run the sample integration, do the following steps:\n\n1. Save the [integration sample](#code-sample) as a .json file on your system.\n2. In the Google Cloud console, go to the **Application Integration** page.\n\n [Go to Application Integration](https://console.cloud.google.com/integrations)\n3. Click **Integrations** from the left navigation menu to open the **Integrations** page.\n4. Select an existing integration or create a new integration by clicking **Create integration** .\n\n\n If you are creating a new integration:\n 1. Enter a name and description in the **Create Integration** dialog.\n 2. Select a region for the integration. **Note:** The **Regions** dropdown only lists the regions provisioned in your Google Cloud project. To provision a new region, Click **Enable Region** . See [Enable new region](/application-integration/docs/enable-new-region) for more information.\n 3. Select a service account for the integration. You can change or update the service account details of an integration any time from the info **Integration summary** pane in the integration toolbar. **Note:** The option to select a service account is displayed only if you have enabled integration governance for the selected region.\n 4. Click **Create**.\n\n\n This opens the integration in the *integration editor*.\n5. In the *integration editor* , click publish**Upload/download menu** and then select **Upload integration**.\n6. In the file browser dialog, select the file that you saved in step 1, and then click **Open** .\n\n A new version of the integration is created using the uploaded file.\n7. In the *integration editor* , click **Test**.\n8. Click **Test integration** . This runs the integration and displays the execution result in the **Test Integration** pane."]]