Introduction
Migrate to Virtual Machines lets you migrate your EC2 instances from your AWS account to Google Compute Engine instances.
Prerequisites
- Review Migrating VMs with Migrate to Virtual Machines: Getting started documentation. This document provides insight into the overall structure of Migrate to Virtual Machines, including important terms, concepts, and reference information that help you migrate your workload efficiently and effectively.
- Enable the VM Migration API on your host project using https://console.cloud.google.com/apis/library/vmmigration.googleapis.com.
- Review the operating systems that support migrating VMs from AWS as a source to Google Cloud.
Migrate your workload from an AWS source
Before initiating your migration with AWS as a source, set up your AWS environment by completing the following tasks:
- Create an AWS IAM policy.
- Create an IAM user to be accessed by the Migrate to Virtual Machines service.
- Optional: Tag EC2 instances intended for migration.
- Create a source using Google Cloud.
Create an AWS IAM policy
Before creating an IAM user, create a policy that describes the permissions for your intended workload. To create a policy, see the AWS IAM documentation for Creating IAM policies.
Use the provided JSON template to provide migration permissions for your policy:
{
    "Version": "2012-10-17",
    "Statement": [
        {
            "Effect": "Allow",
            "Action": [
                "ec2:DescribeInstances",
                "ec2:DescribeVolumes",
                "ec2:DescribeInstanceTypes",
                "ec2:DescribeSnapshots",
                "ec2:CreateTags",
                "ec2:CreateSnapshots",
                "ec2:StopInstances"
            ],
            "Resource": "*"
        },
        {
            "Effect": "Allow",
            "Action": [
                "ebs:ListSnapshotBlocks",
                "ebs:ListChangedBlocks",
                "ebs:GetSnapshotBlock",
                "ec2:DeleteSnapshot",
                "ec2:DeleteTags"
            ],
            "Resource": "*",
            "Condition": {
                "StringEquals": {
                    "aws:ResourceTag/m2vm-resource": "snapshot"
                }
            }
        }
    ]
}
If your EC2 instances use encrypted volumes with non-AWS managed keys, you must add the following statement to the preceding policy to grant the created user permission to access the encryption key.
{
    "Effect": "Allow",
    "Action": [
        "kms:Decrypt",
        "kms:DescribeKey"
    ],
    "Resource": "<<KMS key ARN>>"
}
For more information about the permissions breakdown for the JSON template fields, see permissions breakdown.
Create an IAM user
To migrate your AWS workload, create an IAM user for use by Migrate to Virtual Machines. The IAM user enables Migrate to Virtual Machines to interact with your account using the AWS public API.
To configure IAM user permissions to use AWS as source for your migration, create an API user in the AWS IAM.
During user creation, make sure you do the following:
- Create a user with Programmatic access.
- Attach the IAM policy you created in the previous section to your new user.
- Store the Access key ID and Secret access key generated during this step. You need them when creating your source using Migrate to Virtual Machines.
Optional: Tag the EC2 instances that you want to migrate
Recommended: Tag the instances that you want to migrate. The tags
wantToMigrate and true provided in the image are examples.
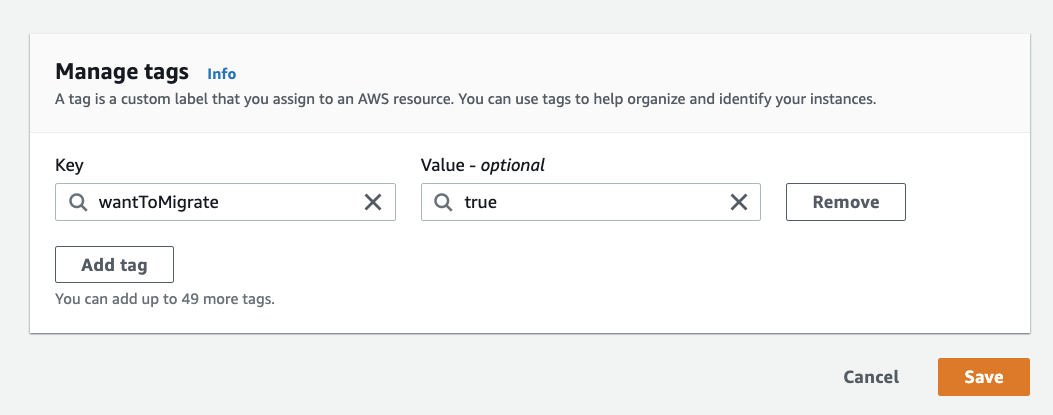
For more information about tagging EC2 instances, see the AWS IAM documentation.
Create an AWS source
After you have created an IAM user and have added that user to your new IAM policy for Migrate to Virtual Machines, you must create an AWS source before you can begin your migration process.
To create an AWS source:
- In the Google Cloud console, go to the Migrate to Virtual Machines page.
- Select the SOURCES tab.
- Open the ADD SOURCE drop-down and select +Add AWS Source.
Enter your source details on the Create AWS source panel.
The following table describes the parameters for AWS source details.
Detail Description Name (mandatory) A string that identifies the source. The string must conform to Compute Engine naming conventions. You cannot update this field after creating your source. GCP region (mandatory) The region in Google Cloud that you want to migrate your instances to. You cannot update this field after creating your source.
For more information, see locations documentation.AWS region (mandatory) The region in AWS (e.g. eu-west-1) from which you want to migrate EC2 instances. The inventory displayed in the Migrate to Virtual Machines console only includes EC2 instances from this AWS region. You cannot update this field after creating your source.
Note: We recommend that you copy the region from your AWS console and paste it into the source detail field to avoid typos. A typo results in the source failing to become active and is indicated in the console. If this happens, you must create a new source.Access Key ID (mandatory) Part of the IAM user credentials. Secret access key (mandatory) Part of the IAM user credentials. Customer managed encryption key The key you want to use to protect your data in Google Cloud. By default, Google Cloud automatically encrypts data when it is at rest using encryption keys managed by Google. If you have specific compliance or regulatory requirements related to the keys that protect your data, you can use customer-managed encryption keys (CMEK) to encrypt and decrypt your data at rest. These encryption keys are created, managed, and owned by you.
Note: The encryption key that you set will be used for all the resources created under this source.Optional: Filter inventory by security groups Filter visible EC2 instances in the Migrate to Virtual Machines inventory.
You can specify several group names, in which case Migrate to Virtual Machines displays instances that belong to any of those security groups.Optional: Filter inventory by VM tags (recommended) Specify the tags that you want to filter your inventory by. This is highly recommended as specifying tags lets you mark a subset of your EC2 instances that are intended for migration.
If you specify several VM tags, Migrate to Virtual Machines only displays instances that have all of these tags.Optional: User tags for migration resource Migrate to Virtual Machines creates snapshots of your EC2 volumes to migrate them to Google Cloud.
If you would like to have a custom tag associated with these resources, specify them here. This can help you identify all resources created by Migrate to Virtual Machines in your AWS environment. Snapshots already have tags as detailed in Snapshots.Press the CREATE button. A notice detailing your new source appears.
Wait (up to 15 minutes but usually less) until the Source status is indicated as Active.
Check your inventory to verify that there are instances that correspond to the tags (and/or security groups) that you specified when you created your source.
As part of source creation, your project is automatically added as a target project.
Cloud sources limitations
You can host a maximum of 15 cloud sources (AWS sources, Azure sources, or both the sources combined) on a host project at a time. For example, you can host 10 AWS sources and 5 Azure sources on a host project at a time. Conversely, you can host 7 AWS sources and 8 Azure sources on a host project at a time. If you want to add a new cloud source to a project that already hosts 15 cloud sources, you must delete an existing source, and then add the new source. You can also try using a different project to host the new cloud source if you don't want to delete any existing sources.
Next steps: Start your migration
After you've created an AWS source, you are ready to start your migration. The rest of the process for migrating your workload from an AWS source matches the process for other sources for Migrate to Virtual Machines.
For details on how to start your migration process, see Migrating individual VM.
Differences from using Azure as a source
The usage is almost identical to the usage of Azure as a source.