This tutorial shows how to set up the F5 BIG-IP when you integrate with Google Distributed Cloud using the manual load-balancing mode on Google Distributed Cloud.
The F5 BIG-IP platform provides various services to help you enhance the security, availability, and performance of your apps. These services include, L7 load balancing, network firewalling, web application firewalling (WAF), DNS services, and more. For Google Distributed Cloud, BIG-IP provides external access and L3/4 load-balancing services.
Additional configuration
After the Setup utility completes, you need to Create an administrative partition for each user cluster you intend to expose and access.
Initially, you define a partition for the first user cluster. Don't use cluster partitions for anything else. Each of the clusters must have a partition that is for the sole use of that cluster.
Configuring the BIG-IP for Google Distributed Cloud external endpoints
If you didn't disable bundled ingress, you must configure the BIG-IP with the virtual servers (VIPs), corresponding to the following Google Distributed Cloud endpoints:
User partition
- VIP for user cluster ingress controller (port exposed:
443) - VIP for user cluster ingress controller (port exposed:
80)
- VIP for user cluster ingress controller (port exposed:
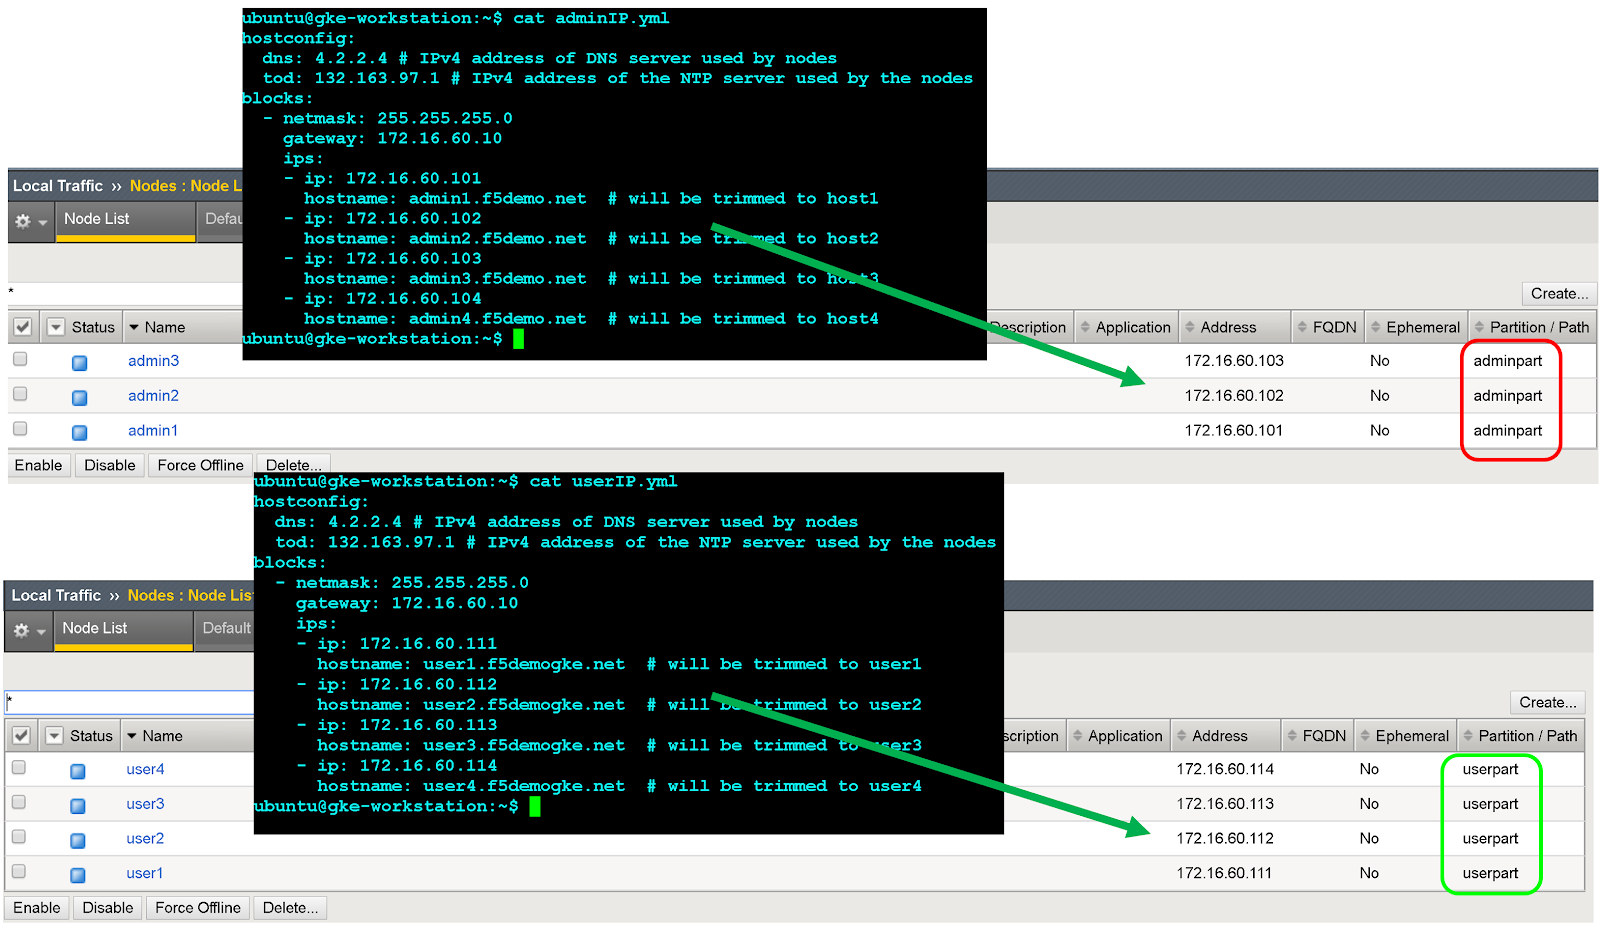
Create node object
The cluster node external IP addresses are in turn used to configure node objects on the BIG-IP system. You will create a node object for each Google Distributed Cloud cluster node. The nodes are added to backend pools that are then associated with virtual servers.
- To sign in to the BIG-IP management console, go to the IP address. The address is provided during the installation.
- Click the User partition that you previously created.
- Go to Local Traffic > Nodes > Node List.
- Click Create.
Enter a name and IP address for each cluster host and click Finished.
Create backend pools
You create a backend pool for each node Port.
- In the BIG-IP management console, click User partition for the user partition that you previously created.
- Go to Local Traffic > Pools > Pool List.
- Click Create.
- In the Configuration drop-down list, click Advanced.
- In the Name field, enter
Istio-80-pool. - To verify the pool member accessibility, under Health Monitor, click tcp. Optional: Because this is a manual configuration, you can also take advantage of more advanced monitors as appropriate for your deployment.
For Action on Service Down, click Reject.
For this tutorial, in the Load Balancing Method drop-down list, click Round Robin.
In the New Members section, click Node List and then select the previously created node.
In the Service Port field, enter the appropriate
nodePortfrom the configuration file orspec.ports[?].nodePortin the runtime istio ingress Kubernetes Service (name:istio-ingress, namespace:gke-system).Click Add.
Repeat steps 8-9 and add each cluster node instance.
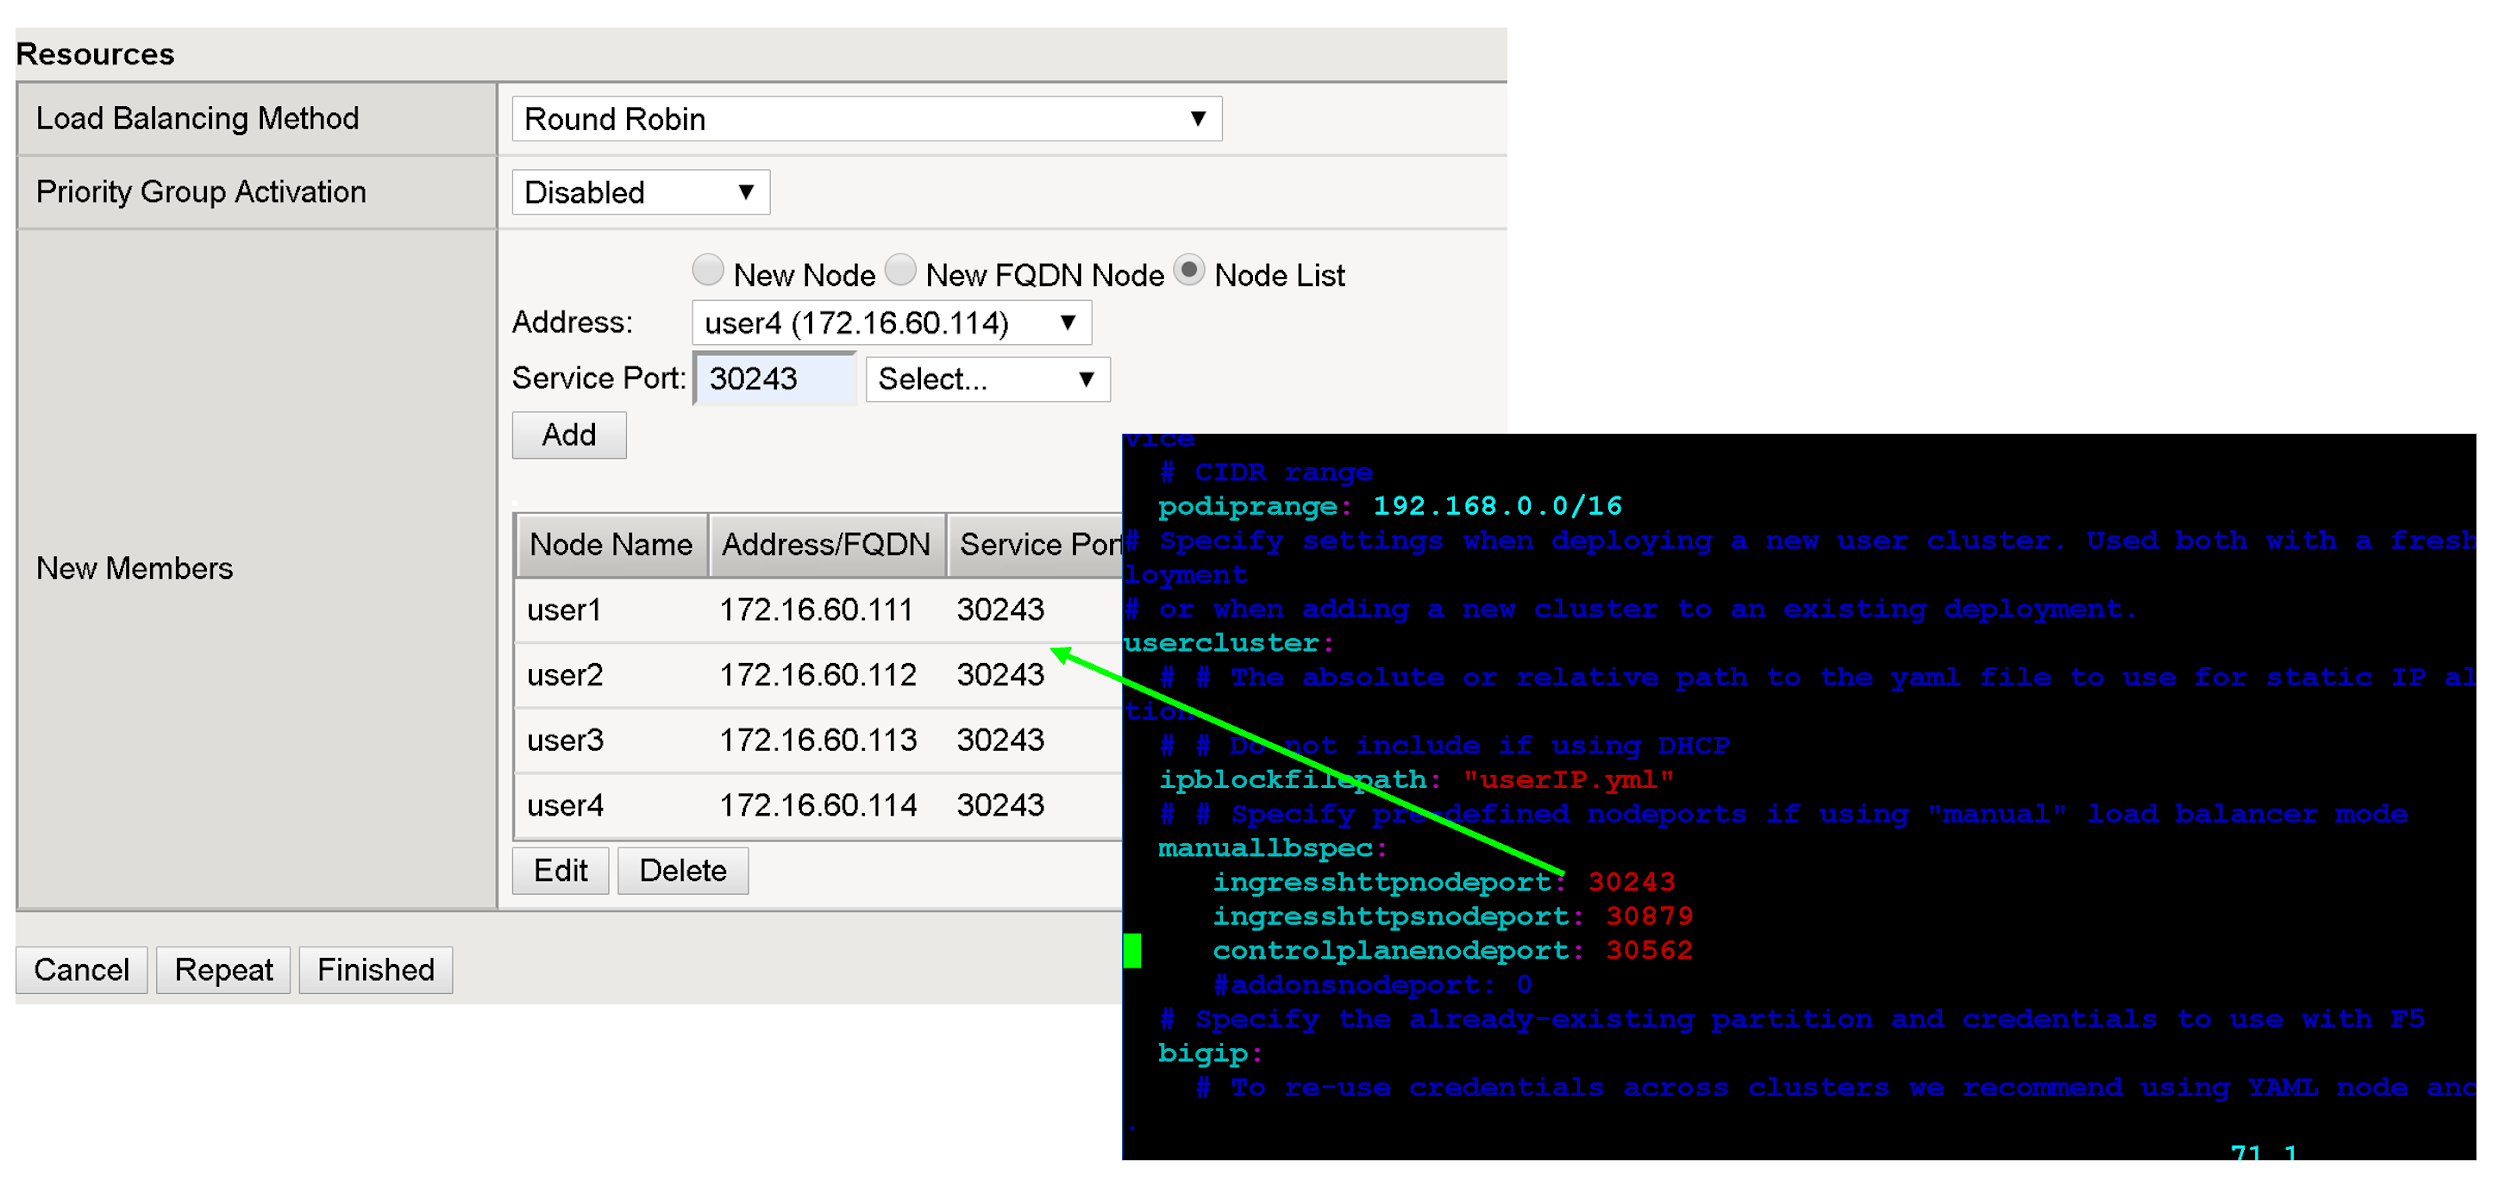
Click Finished.
Repeat all of these steps in this section for the remaining user cluster nodePorts.
Create virtual servers
You create a total of two virtual servers on the BIG-IP for the first user cluster. The virtual servers correspond to the "VIP + port" combinations.
- In the BIG-IP management console, click the User partition that you previously created.
- Go to Local Traffic > Virtual Servers > Virtual Server List.
- Click Create.
- In the Name field, enter
istio-ingress-80. In the Destination Address/Mask field, enter the IP address for the VIP. For this tutorial, use the HTTP ingress VIP in the
configuration fileorspec.loadBalancerIPin the runtime istio ingress Kubernetes Service (name:istio-ingress, namespace:gke-system).In the Service Port field, enter the appropriate listener port for the VIP. For this tutorial, use port
80orspec.ports[?].portin the runtime istio ingress Kubernetes Service (name:istio-ingress, namespace:gke-system).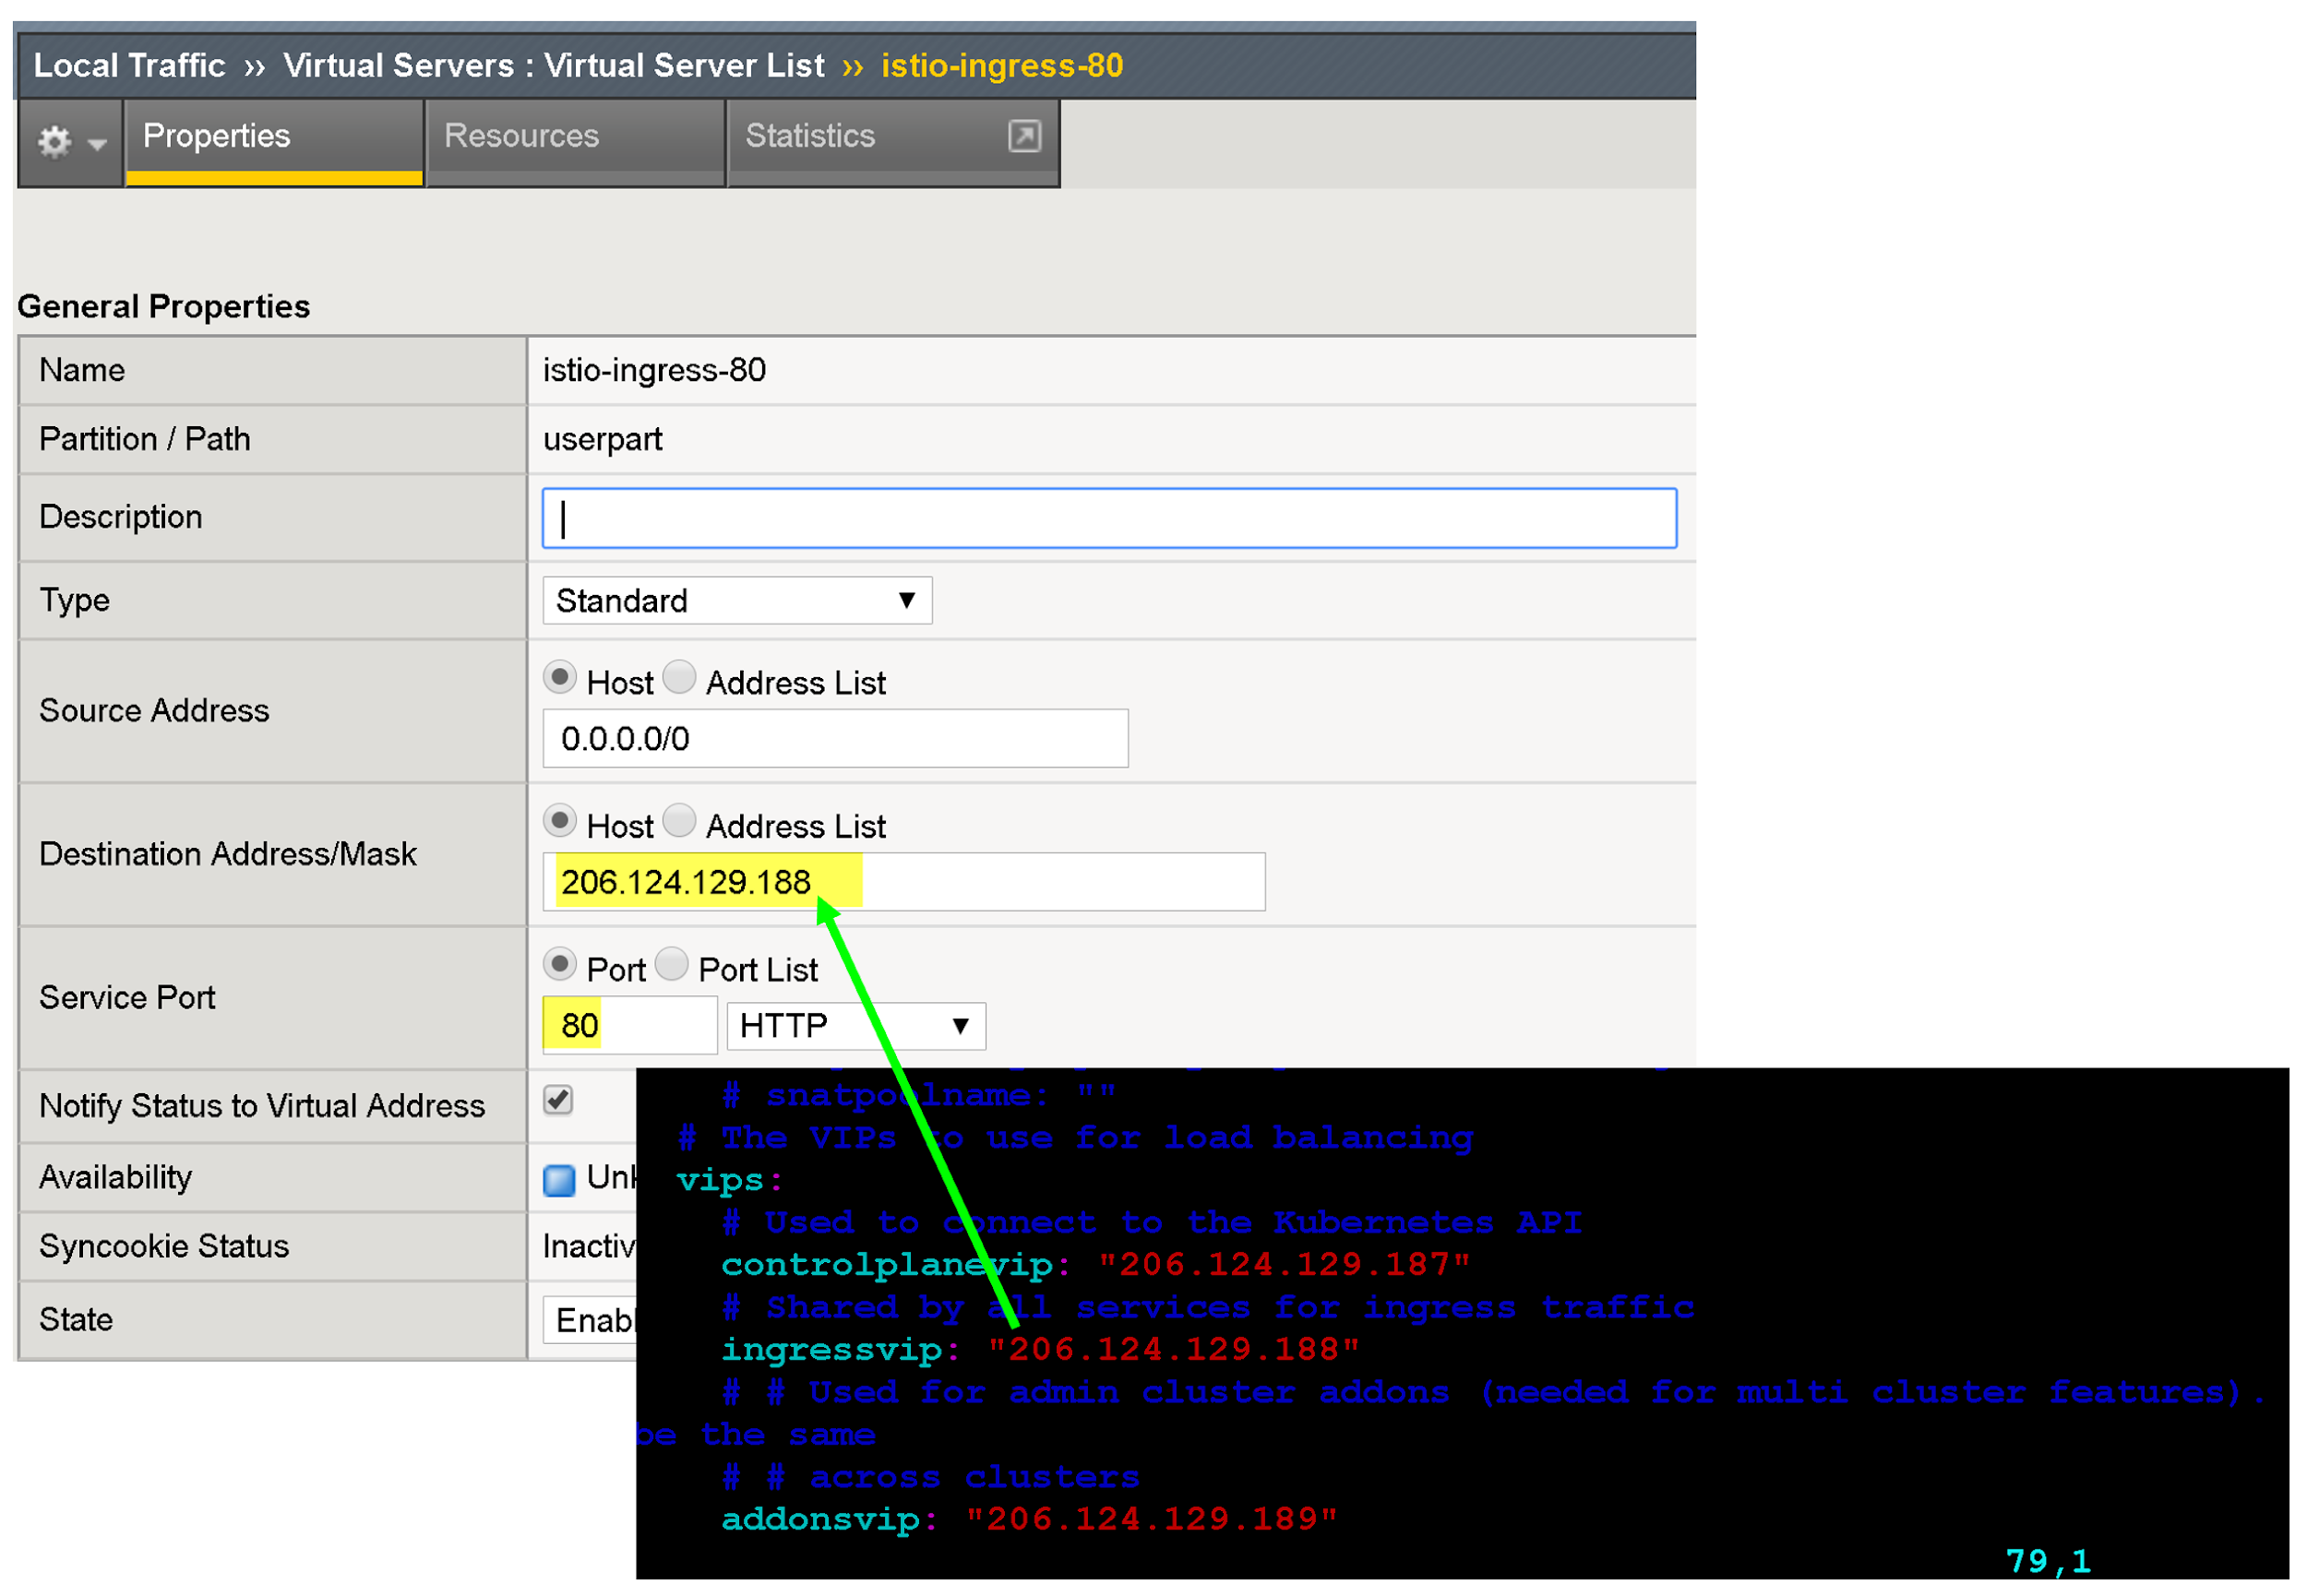
There are several configuration options for enhancing your app's endpoint, such as associating protocol-specific profiles, certificate profiles, and WAF policies.
For Source Address Translation click Auto Map.
For Default Pool select the appropriate pool that you previously created.
Click Finished.
Create and download an archive of the current configuration.
What's next
To further enhance the security and performance of the external-facing VIPs, consider the following:
Learn more about F5 BIG-IP Application Services.
Learn more about BIG-IP configurations and capabilities: