使用 Workflows 建立文件處理管道
如果您使用 Document AI 建構工作流程,其中包含處理文件的多個步驟,建議您使用無伺服器自動化調度管理功能來管理工作流程。
Workflows 會按照您定義的順序,將一系列工作串連在一起。這項產品不需管理基礎架構,並能視需求順暢調度資源,甚至將資源縮減至零。採用「以量計價,即付即用」的定價模式,因此您只需要為執行時間付費。
Workflows 提供內建的 Document AI API 連接器。除了使用設定檔定義步驟之外,連接器不需要額外程式碼。連接器會處理要求的格式化作業,隱藏 API 的詳細資料。此外,連接器也提供了驗證、處理重試和長時間執行的作業的內建行為。
詳情請參閱「瞭解連接器」一文。
本指南使用應付憑據剖析器處理器,透過批次處理的方式處理一組應付憑據範例
如要直接在 Google Cloud 控制台按照逐步指南操作,請按一下「Guide me」(逐步引導):
事前準備
- Sign in to your Google Cloud account. If you're new to Google Cloud, create an account to evaluate how our products perform in real-world scenarios. New customers also get $300 in free credits to run, test, and deploy workloads.
-
In the Google Cloud console, on the project selector page, select or create a Google Cloud project.
Roles required to select or create a project
- Select a project: Selecting a project doesn't require a specific IAM role—you can select any project that you've been granted a role on.
-
Create a project: To create a project, you need the Project Creator
(
roles/resourcemanager.projectCreator), which contains theresourcemanager.projects.createpermission. Learn how to grant roles.
-
Verify that billing is enabled for your Google Cloud project.
-
Enable the Document AI, Cloud Storage, Workflows APIs.
Roles required to enable APIs
To enable APIs, you need the Service Usage Admin IAM role (
roles/serviceusage.serviceUsageAdmin), which contains theserviceusage.services.enablepermission. Learn how to grant roles. -
In the Google Cloud console, on the project selector page, select or create a Google Cloud project.
Roles required to select or create a project
- Select a project: Selecting a project doesn't require a specific IAM role—you can select any project that you've been granted a role on.
-
Create a project: To create a project, you need the Project Creator
(
roles/resourcemanager.projectCreator), which contains theresourcemanager.projects.createpermission. Learn how to grant roles.
-
Verify that billing is enabled for your Google Cloud project.
-
Enable the Document AI, Cloud Storage, Workflows APIs.
Roles required to enable APIs
To enable APIs, you need the Service Usage Admin IAM role (
roles/serviceusage.serviceUsageAdmin), which contains theserviceusage.services.enablepermission. Learn how to grant roles. 按一下 Google Cloud 控制台導覽選單中的「Document AI」,然後選取「Processor Gallery」(處理器庫)。
在「Processor Gallery」(處理器庫) 中
搜尋 「Invoice Parser」(應付憑據剖析器),然後選取「Create」(建立)。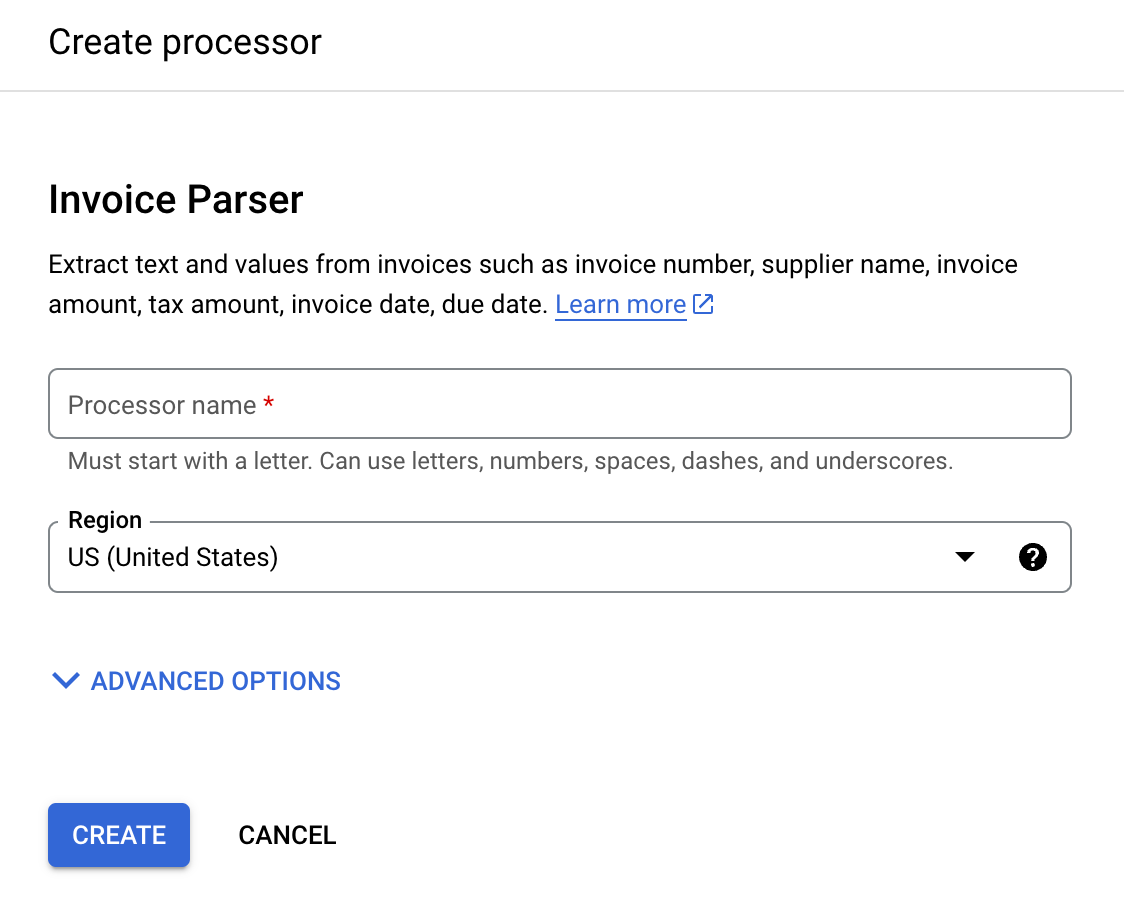
輸入處理器名稱,例如
workflows-invoice-processor。選取區域 (Document AI API 中的
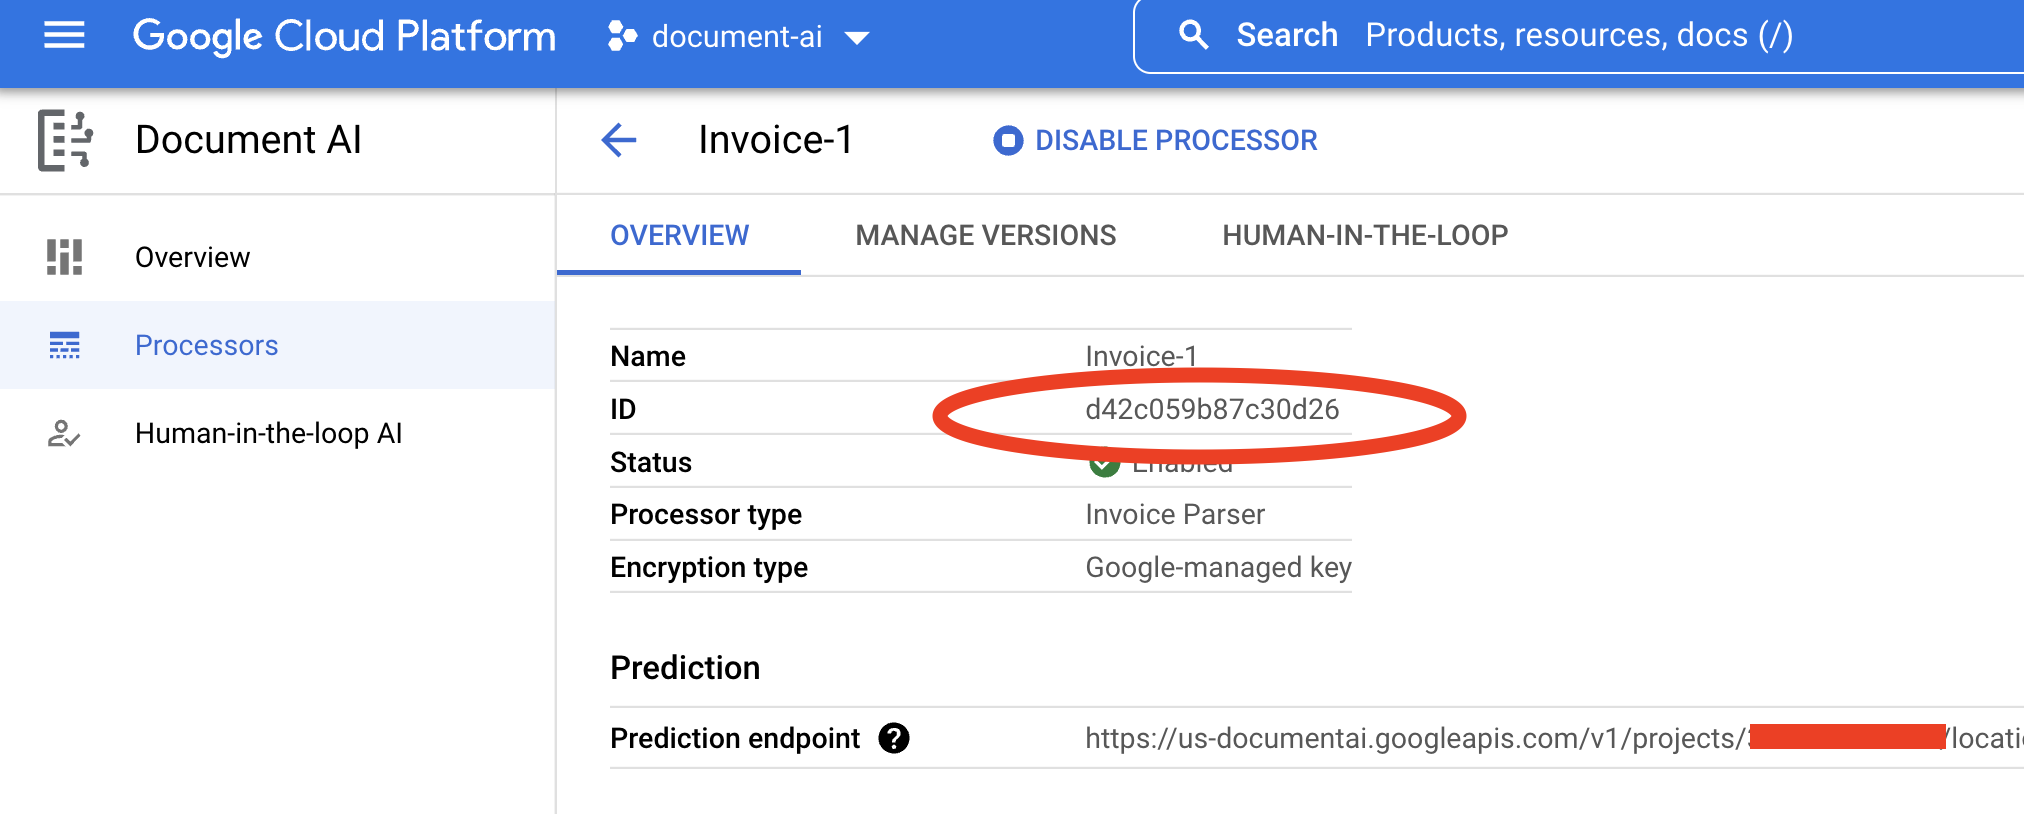
location),以託管處理器。點選「Create」(建立)。系統會隨即顯示「Processor Details」(處理器詳細資料) 分頁。
複製您的處理器 ID。您稍後必須在程式碼中使用此 ID。
按照 Cloud Storage 說明文件中的「建立 bucket」指南建立 bucket,或使用既有 bucket。
在 bucket 中建立資料夾 (例如
docai-workflows-output)。在 Google Cloud 控制台中開啟「Workflows dashboard」(Workflows 資訊主頁)。
按一下
「Create」(建立) 來建立第一個工作流程。系統隨即會顯示「Create Workflow」(建立工作流程) 頁面。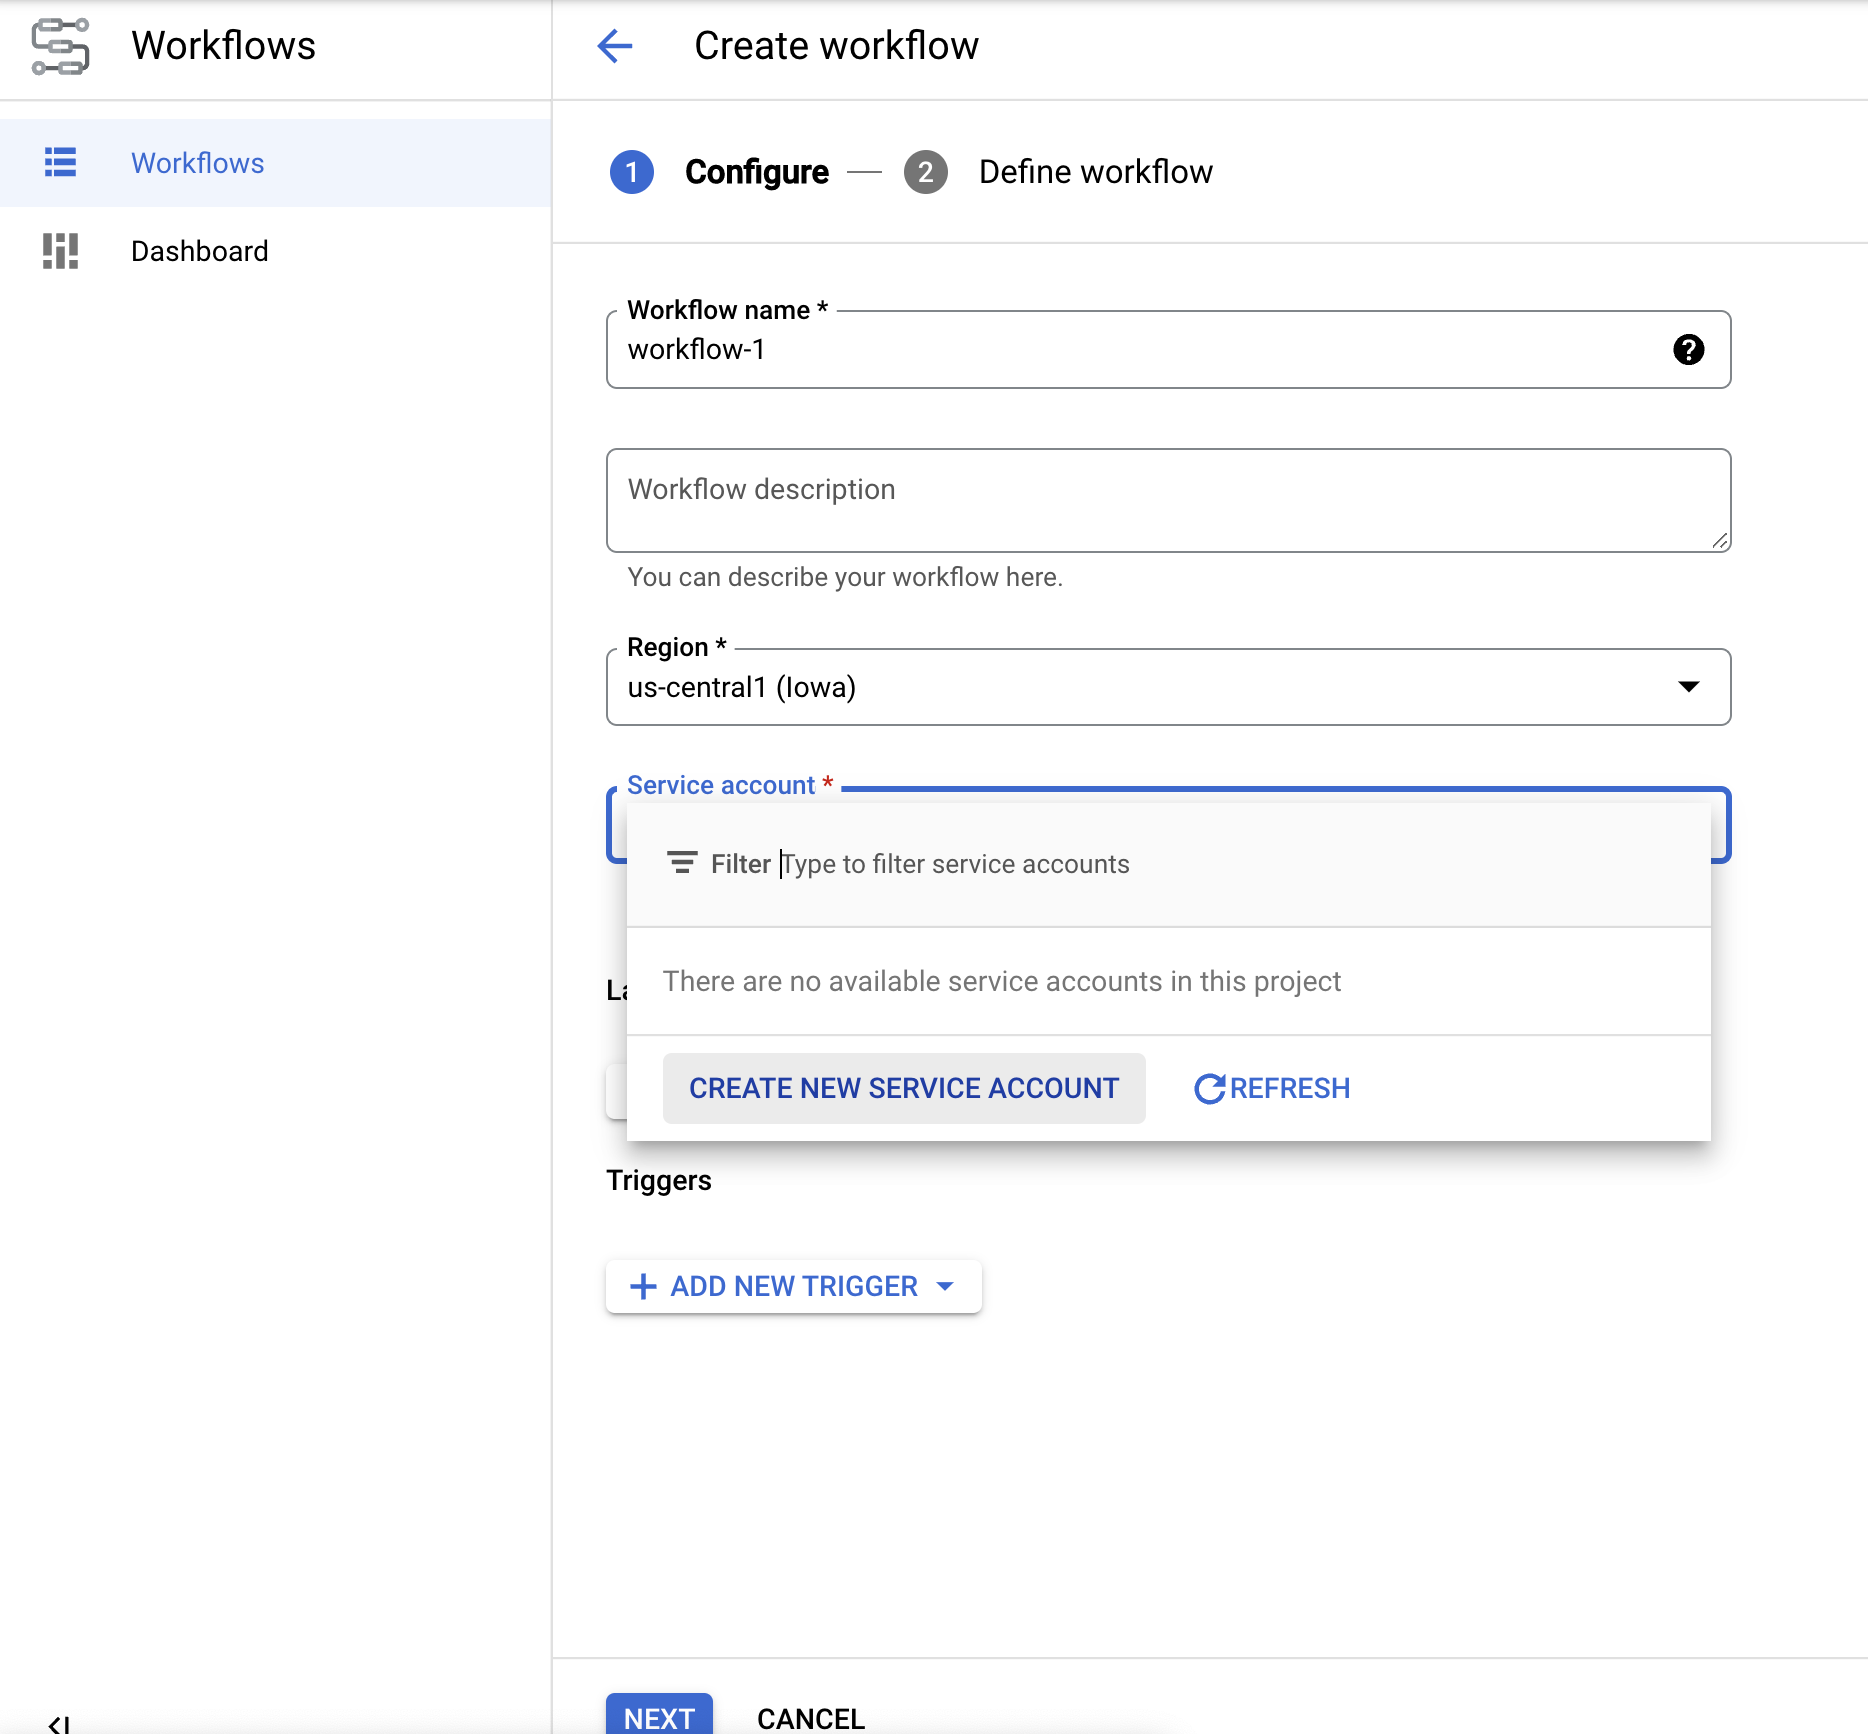
將工作流程重新命名為 docai-workflows-quickstart。新增說明,然後選取您用於這項專案的服務帳戶 (如有)。
- 如果您沒有服務帳戶,請選取「Create New Service Account」(建立新的服務帳戶)。
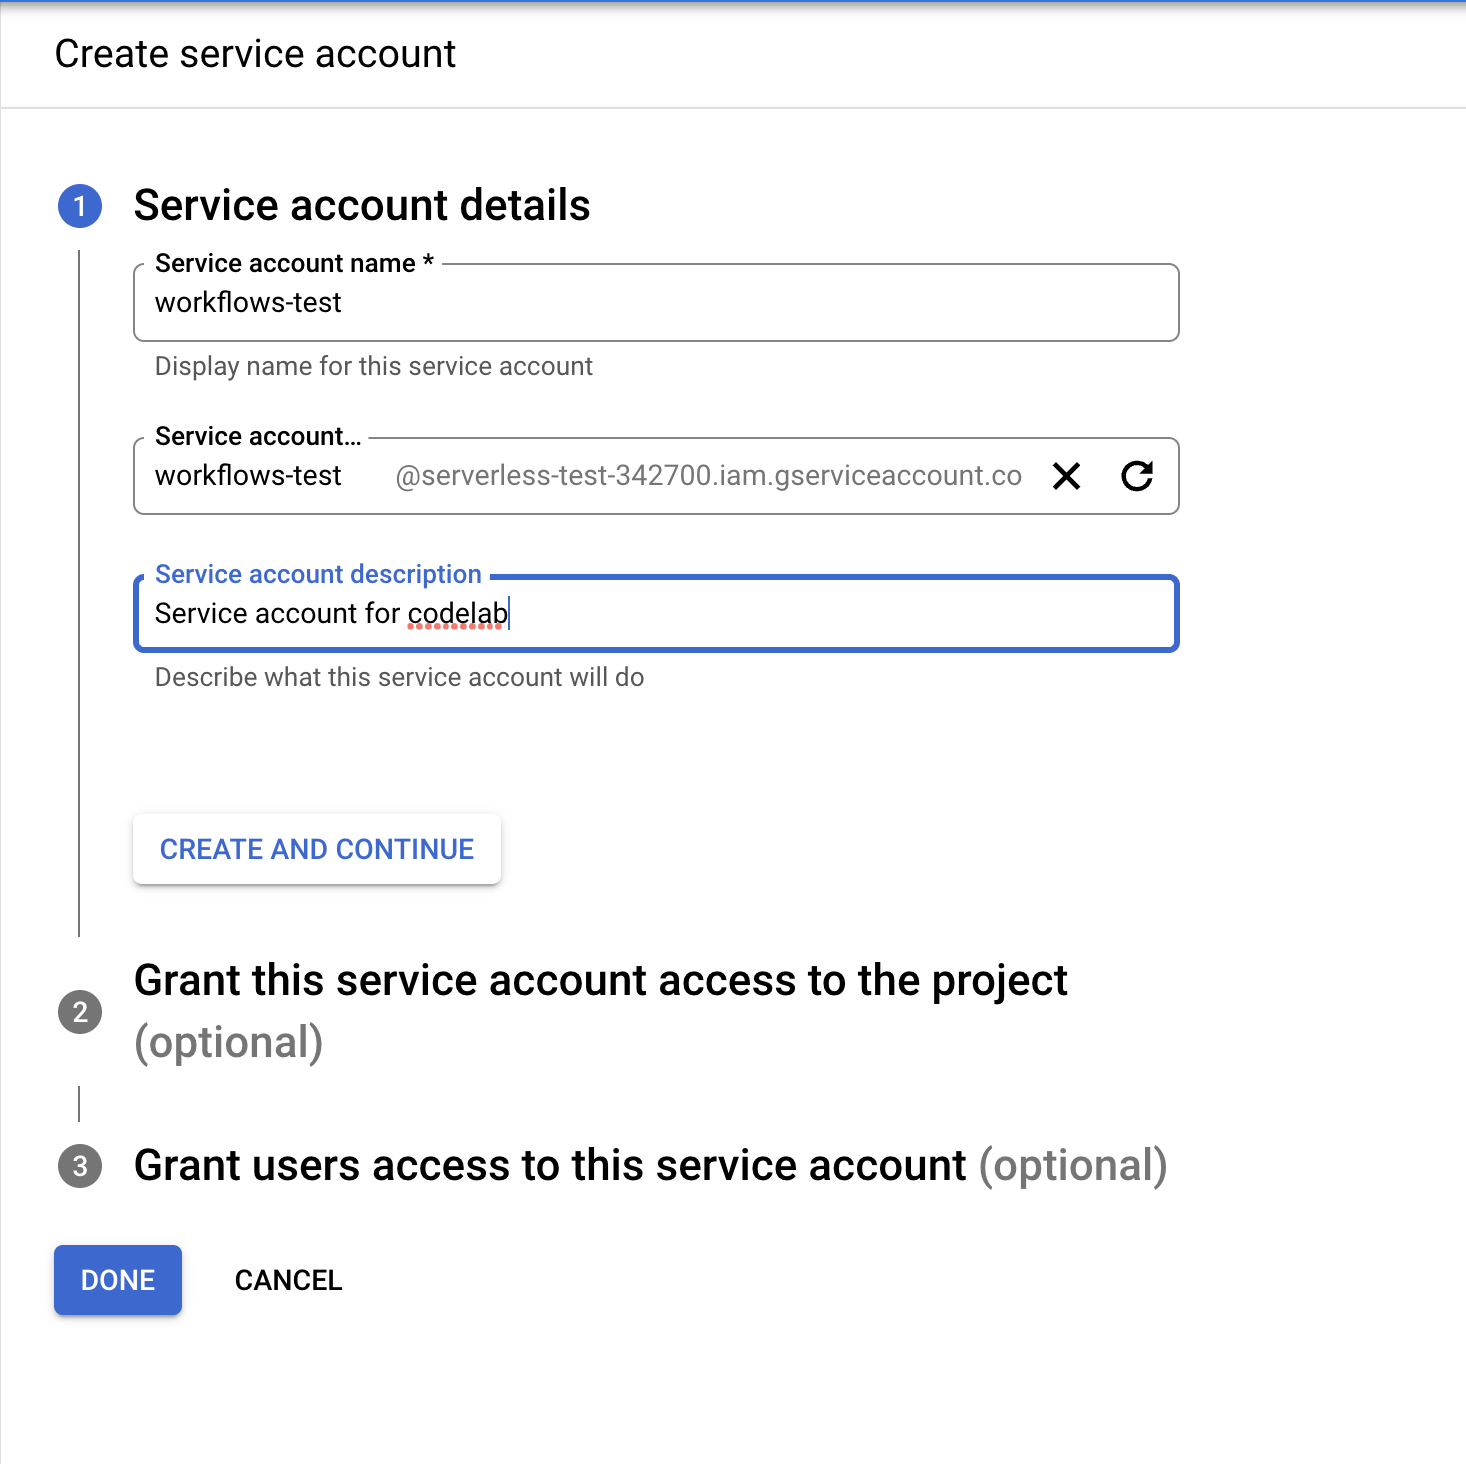
- 為服務帳戶命名,然後選取「Create and Continue」(建立並繼續)。
- 為服務帳戶指派下列角色:
Document AI API UserWorkflows InvokerLogs WriterService Usage Consumer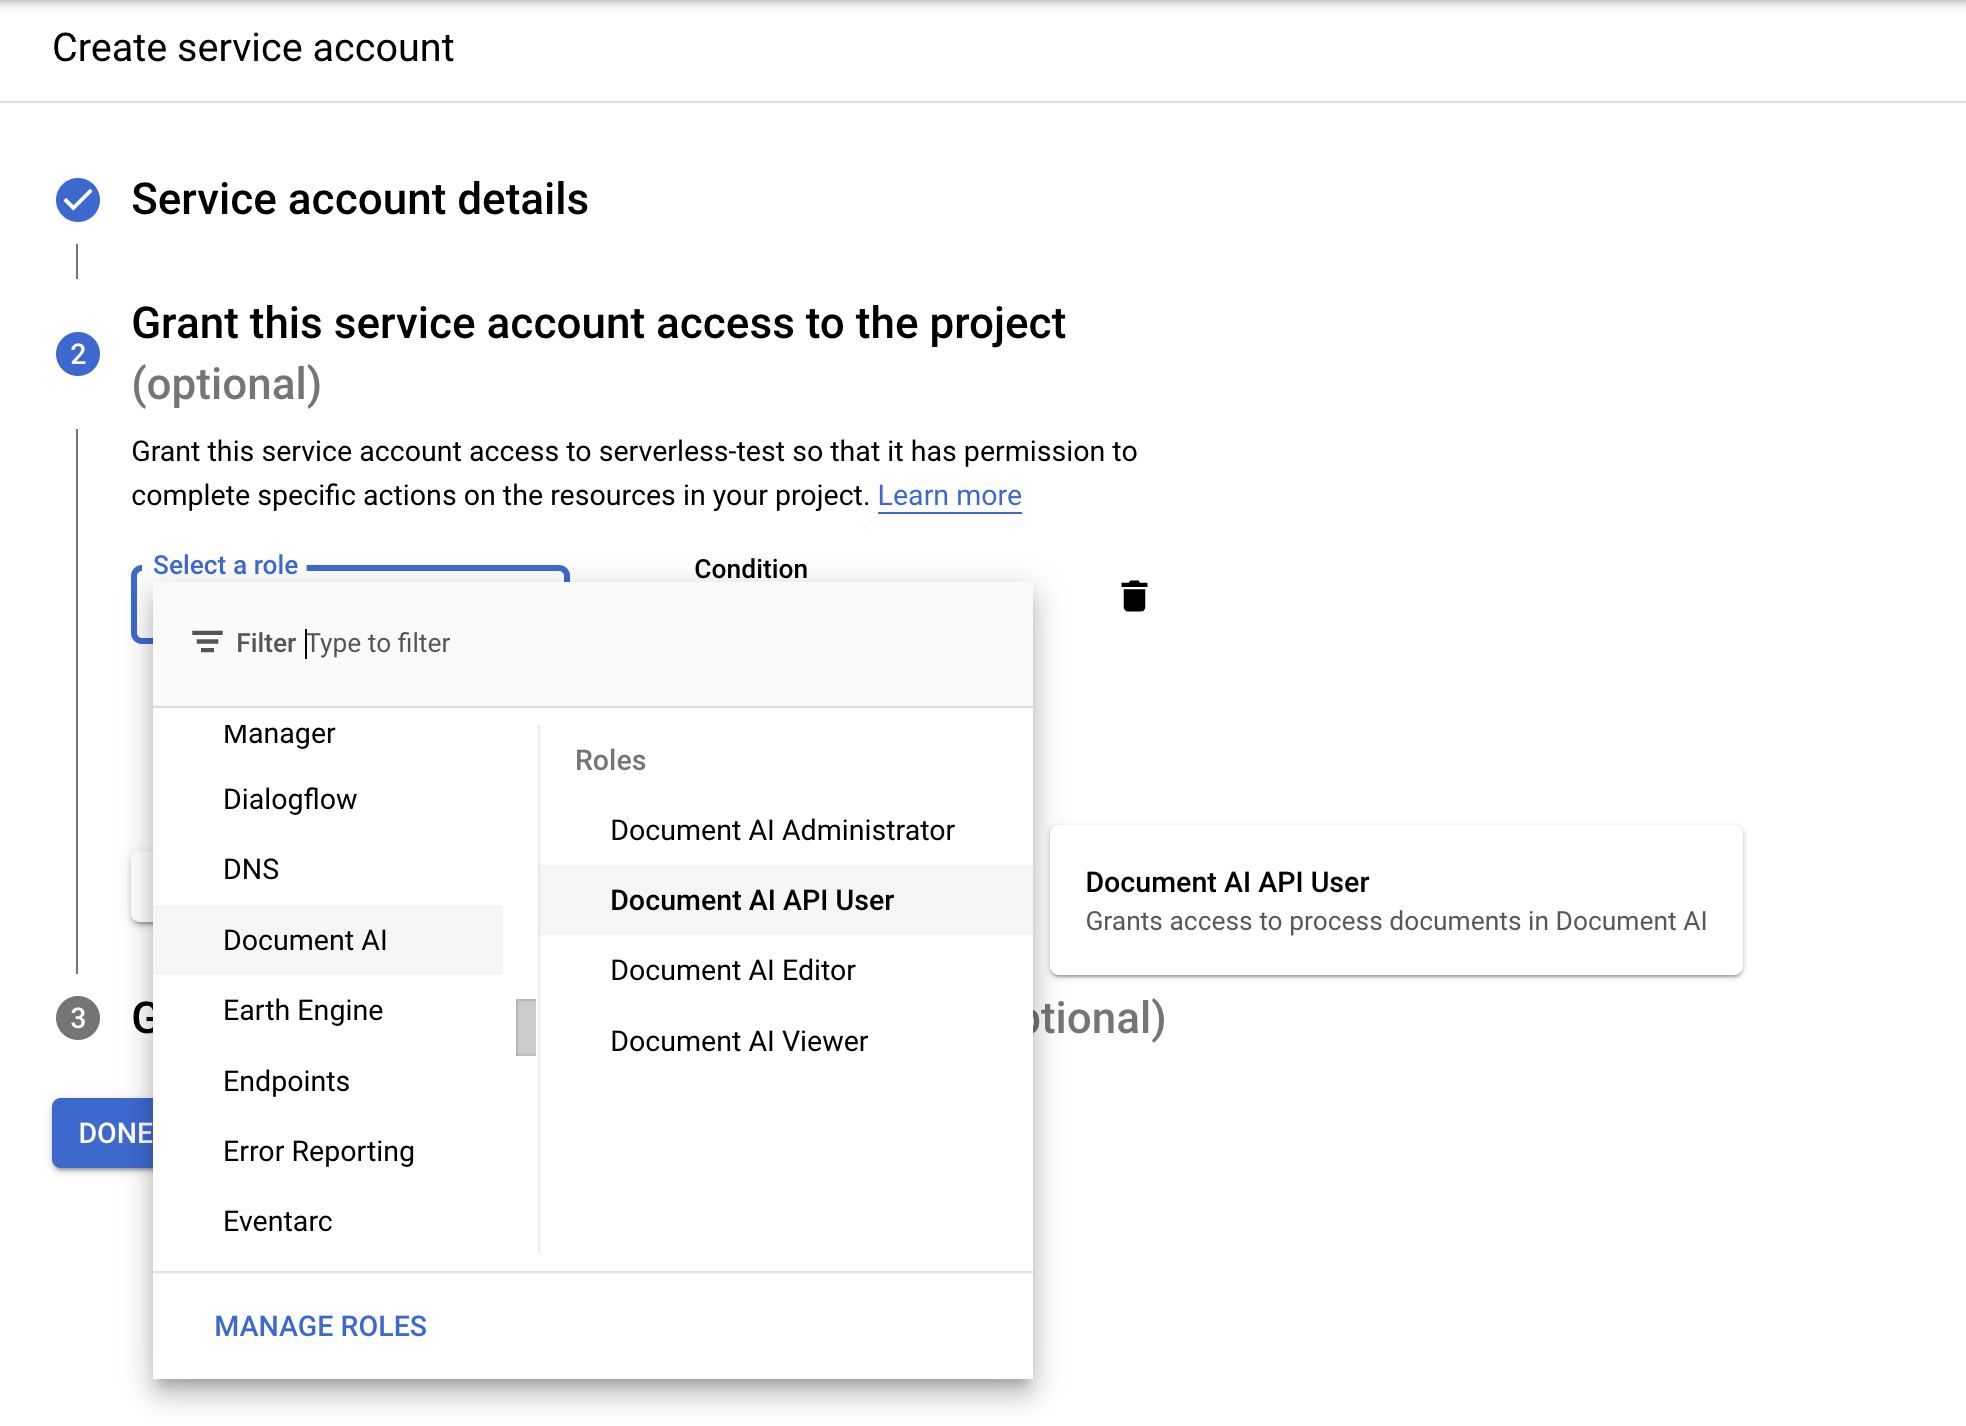
- 為服務帳戶命名,然後選取「Create and Continue」(建立並繼續)。
- 如果您沒有服務帳戶,請選取「Create New Service Account」(建立新的服務帳戶)。
在「Create Workflow」(建立工作流程) 頁面中,點按
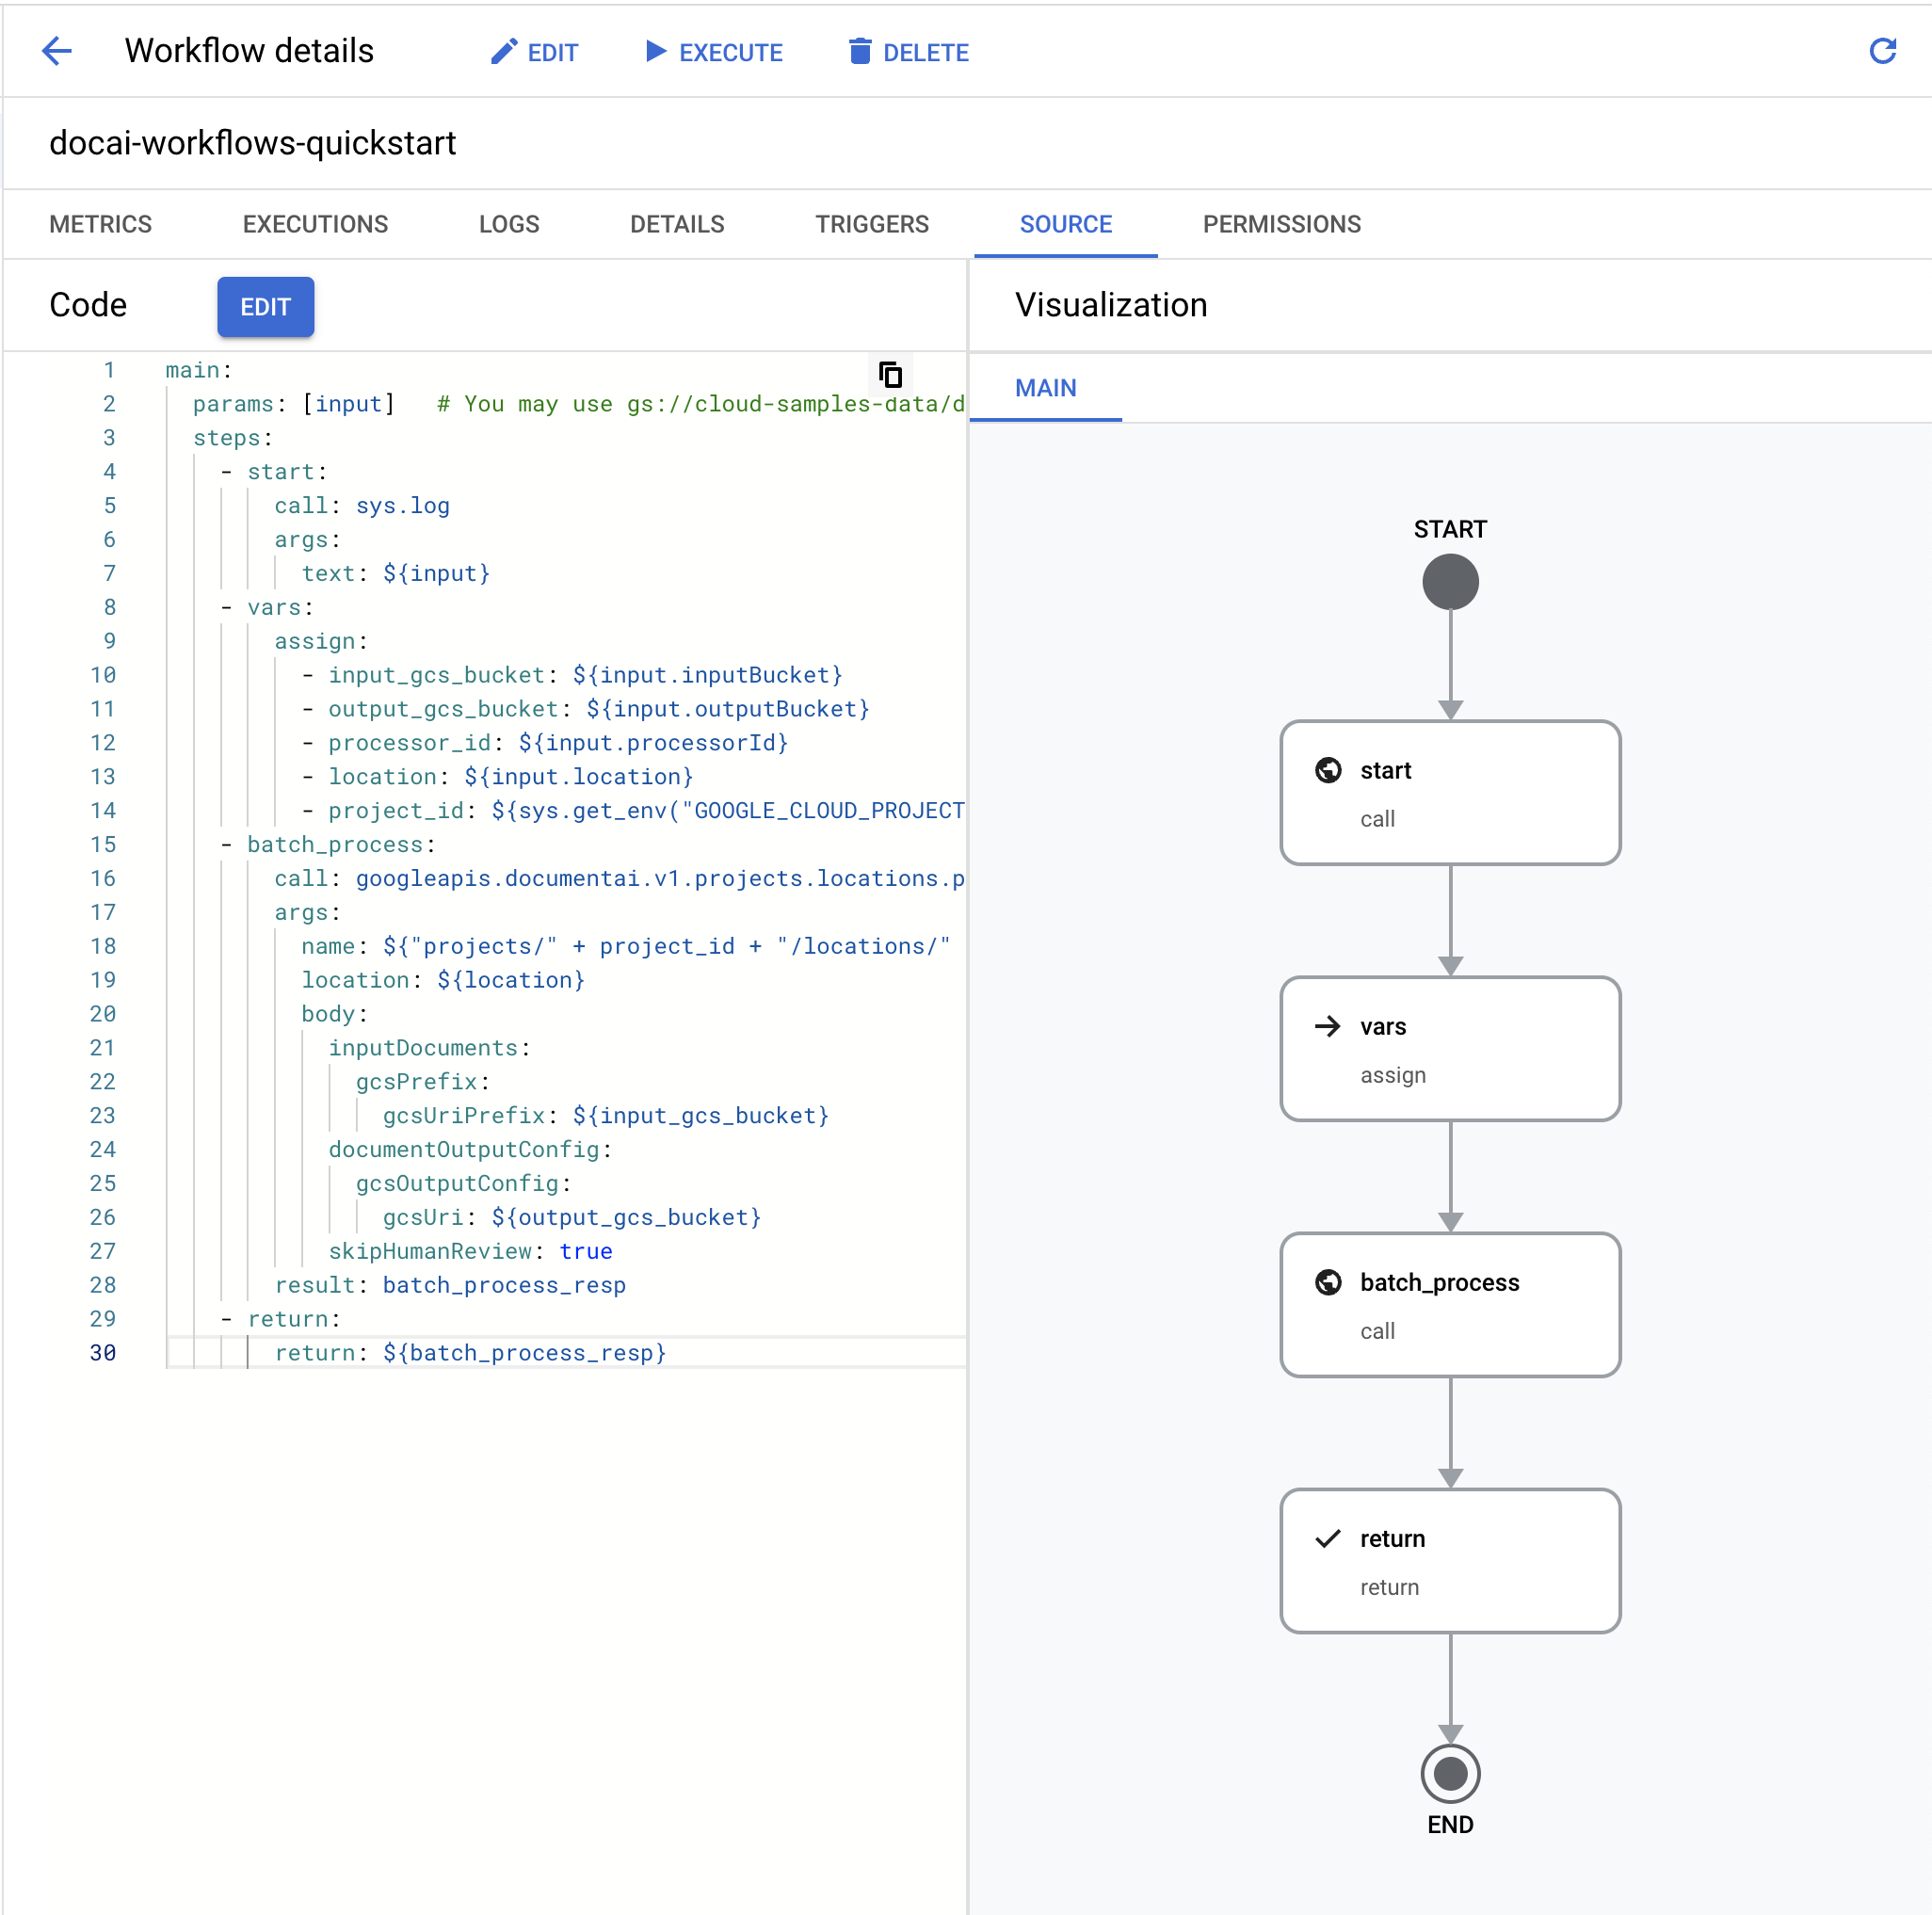
「Next」(下一步) 。在
「Workflows Editor」(工作流程編輯器) 中,清除預設 YAML,然後貼上以下程式碼:main: params: [input] steps: - start: call: sys.log args: text: ${input} - vars: assign: - input_gcs_bucket: ${input.inputBucket} - output_gcs_bucket: ${input.outputBucket} - processor_id: ${input.processorId} - location: ${input.location} - project_id: ${sys.get_env("GOOGLE_CLOUD_PROJECT_ID")} - batch_process: call: googleapis.documentai.v1.projects.locations.processors.batchProcess args: name: ${"projects/" + project_id + "/locations/" + location + "/processors/" + processor_id} location: ${location} body: inputDocuments: gcsPrefix: gcsUriPrefix: ${input_gcs_bucket} documentOutputConfig: gcsOutputConfig: gcsUri: ${output_gcs_bucket} skipHumanReview: true result: batch_process_resp - return: return: ${batch_process_resp}- 選取
「Deploy」(部署) 。 按一下頁面頂端的
「Execute」(執行) ,前往「Execute workflow」(執行工作流程) 頁面。這個頁面可讓您在控制台中測試工作流程。替換下列輸入內容 JSON 中的預留位置變數:
- OUTPUT_BUCKET_PATH:先前建立的輸出內容 bucket 和資料夾完整路徑。
- PROCESSOR_ID:先前建立的處理器 ID。
- LOCATION:先前建立的處理器區域。
{
  "inputBucket": "gs://cloud-samples-data/documentai/workflows",
  "outputBucket": "OUTPUT_BUCKET_PATH",
  "processorId": "PROCESSOR_ID",
  "location": "LOCATION"
}
複製 JSON 並貼到
輸入文字方塊 。按一下工作流程底部的
「Execute」(執行) 來測試輸入內容,並等候整個程序完成。工作流程完成後,輸出內容 JSON 應如下所示。
{
  "done": true,
  "metadata": {
    "@type": "type.googleapis.com/google.cloud.documentai.v1.BatchProcessMetadata",
    "createTime": "2023-02-24T18:31:18.521764Z",
    "individualProcessStatuses": [
      {
        "humanReviewStatus": {
          "state": "SKIPPED"
        },
        "inputGcsSource": "gs://cloud-samples-data/documentai/workflows/baking_technologies_invoice.pdf",
        "outputGcsDestination": "OUTPUT_BUCKET_PATH/11119195367705871803/0",
        "status": {}
      },
      {
        "humanReviewStatus": {
          "state": "SKIPPED"
        },
        "inputGcsSource": "gs://cloud-samples-data/documentai/workflows/generic_invoice.pdf",
        "outputGcsDestination": "OUTPUT_BUCKET_PATH/11119195367705871803/1",
        "status": {}
      },
      {
        "humanReviewStatus": {
          "state": "SKIPPED"
        },
        "inputGcsSource": "gs://cloud-samples-data/documentai/workflows/google_invoice.pdf",
        "outputGcsDestination": "OUTPUT_BUCKET_PATH/11119195367705871803/2",
        "status": {}
      }
    ],
    "state": "SUCCEEDED",
    "updateTime": "2023-02-24T18:31:52.543163Z"
  },
  "name": "projects/PROJECT_ID/locations/LOCATION/operations/11119195367705871803",
  "response": {
    "@type": "type.googleapis.com/google.cloud.documentai.v1.BatchProcessResponse"
  }
}
開啟輸出儲存空間 bucket,所有處理的應付憑據輸出內容都會存放在根據作業 ID 命名的資料夾中。

這個資料夾中會包含子資料夾,而每個從包含
DocumentJSON 檔案的輸入批次處理中完成的文件都會有一個子資料夾。您可以檢查每個 JSON 檔案,或撰寫程式碼,根據用途使用相關欄位。詳情請參閱處理回應指南。
您現在可以連結工作流程中的其他步驟,進一步處理輸出內容,例如將擷取的實體插入資料庫以進行分析。
如要進一步瞭解如何觸發工作流程,請參閱 Workflows 說明文件。
- 進一步瞭解工作流程
- 進一步瞭解 Document AI Workflows Connector
- 查看目前可用的處理器清單和說明。
- 瞭解如何處理處理回應。
建立應付憑據剖析器
使用 Google Cloud 控制台建立新的應付憑據剖析器。詳情請參閱「建立及管理處理器」頁面。
在 Cloud Storage 中設定輸出值區
使用批次 (非同步) 處理功能時,必須將輸入和輸出檔案儲存在 Cloud Storage 中。下列值區包含範例檔案,可做為本指南的輸入內容:
gs://cloud-samples-data/documentai/workflows
設定 bucket,將輸出檔案儲存在專案中。
建立工作流程
定義工作流程
測試工作流程
現在,工作流程已部署完成,您應該會位於「Workflow details」(工作流程詳細資料) 頁面。
清除所用資源
如要避免系統向您的 Google Cloud 帳戶收取本頁所用資源的費用,請按照下列步驟操作。
請透過Google Cloud console 刪除不需要的處理器、bucket、工作流程和專案,以免產生不必要的 Google Cloud 費用。