Organiza tus páginas con colecciones
Guarda y categoriza el contenido según tus preferencias.
Crea un experimento
En esta página, se muestra cómo interactuar con Vertex AI Experiments a través del panel lateral en Colab Enterprise.
Para acceder a los Google Cloud servicios y las APIs ejecutando código en tu notebook de Colab Enterprise, puedes usar las credenciales asociadas a tu Cuenta de Google. Para obtener más información, consulta Cómo acceder a los servicios y las APIs. Google Cloud
El panel lateral es una forma adicional de interactuar con Vertex AI Experiments sin salir de la interfaz de Colab Enterprise.
El panel lateral aparece a la derecha de un notebook abierto.
Antes de comenzar
Sign in to your Google Cloud account. If you're new to
Google Cloud,
create an account to evaluate how our products perform in
real-world scenarios. New customers also get $300 in free credits to
run, test, and deploy workloads.
In the Google Cloud console, on the project selector page,
select or create a Google Cloud project.
Para obtener los permisos que necesitas para usar el panel lateral en un notebook de Colab Enterprise, pídele a tu administrador que te otorgue los siguientes roles de IAM en el proyecto:
Vertex AI Experiments te ayuda a hacer un seguimiento de diferentes arquitecturas de modelos, hiperparámetros y entornos de entrenamiento, y te permite analizarlos, lo que te permite hacer un seguimiento de los pasos, las entradas y las salidas de una ejecución de experimento.
Para obtener más información, consulta Introducción a Vertex AI Experiments.
Cómo crear y ver un experimento
Puedes crear y ver los resultados de un experimento con el panel lateral de Colab Enterprise.
En la Google Cloud consola, ve a la página Mis notebooks de Colab Enterprise.
En el menú Región, selecciona la región que contiene el notebook.
Haz clic en el notebook que quieras abrir. Si aún no creaste un notebook, crea uno.
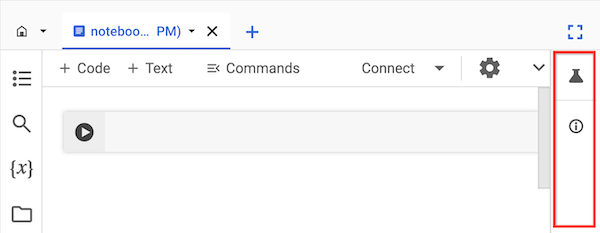
A la derecha del notebook, en el panel lateral, haz clic en el botón Experimentos.
El panel lateral expande la pestaña Experimentos.
Haz clic en el botón Insertar código de muestra.
Colab Enterprise agrega celdas de código a tu notebook para interactuar con un experimento.
En tu notebook, busca la celda de código que almacena los valores de los parámetros.
Usarás estos parámetros para interactuar con Vertex AI Experiments.
Actualiza los valores de los siguientes parámetros:
PROJECT_ID: ID del proyecto en el que se encuentra tu notebook.
REGION: Es la región en la que se encuentra tu notebook.
BUCKET_URI: Es un URI de bucket de Cloud Storage, con el formato gs://BUCKET_NAME.
Puede ser un bucket existente o puedes crearlo cuando
ejecutes el código. Este bucket debe estar en el mismo proyecto y región
que tu notebook de Colab Enterprise.
EXPERIMENT_NAME: El nombre de tu experimento.
Si tu experimento no existe, Vertex AI Experiments
crea uno.
Si necesitas crear tu bucket de Cloud Storage, busca y quita el comentario de la siguiente línea de código:
Ejecuta las celdas de código que el panel lateral agregó a tu notebook.
Después de que se ejecute la última celda de código, haz clic en el botón Ver experimento que aparece.
En el panel lateral, haz clic en la pestaña Ejecuciones o Detalles para ver información sobre tu experimento.
Para obtener más información, consulta Crea y administra ejecuciones de experimentos.
[[["Fácil de comprender","easyToUnderstand","thumb-up"],["Resolvió mi problema","solvedMyProblem","thumb-up"],["Otro","otherUp","thumb-up"]],[["Difícil de entender","hardToUnderstand","thumb-down"],["Información o código de muestra incorrectos","incorrectInformationOrSampleCode","thumb-down"],["Faltan la información o los ejemplos que necesito","missingTheInformationSamplesINeed","thumb-down"],["Problema de traducción","translationIssue","thumb-down"],["Otro","otherDown","thumb-down"]],["Última actualización: 2025-09-04 (UTC)"],[[["\u003cp\u003eThe Colab Enterprise side panel provides a way to interact with Vertex AI Experiments directly within the notebook interface.\u003c/p\u003e\n"],["\u003cp\u003eTo use the side panel, users must have the Colab Enterprise User and Vertex AI User IAM roles assigned to their project.\u003c/p\u003e\n"],["\u003cp\u003eVertex AI Experiments allows users to track and analyze various aspects of model development, such as architectures, hyperparameters, and training environments.\u003c/p\u003e\n"],["\u003cp\u003eCreating an experiment involves navigating to the Colab Enterprise My notebooks page, opening a notebook, and using the Experiments tab in the side panel to insert sample code.\u003c/p\u003e\n"],["\u003cp\u003eAfter running the code cells, users can view detailed information about their experiment runs within the side panel's Runs and Details tabs.\u003c/p\u003e\n"]]],[],null,["# Create an experiment\n====================\n\nThis page shows you how to interact with Vertex AI Experiments\nby using the side panel in Colab Enterprise.\n\nTo access Google Cloud services and APIs by running code in\nyour Colab Enterprise notebook, you can use the\ncredentials associated with your Google Account. To learn more, see\n[Access Google Cloud services and APIs](/colab/docs/run-code-adc).\n\nThe side panel is an additional way to interact with\nVertex AI Experiments without leaving the Colab Enterprise\ninterface.\n\nThe side panel appears to the right of an open notebook.\n\nBefore you begin\n----------------\n\n- Sign in to your Google Cloud account. If you're new to Google Cloud, [create an account](https://console.cloud.google.com/freetrial) to evaluate how our products perform in real-world scenarios. New customers also get $300 in free credits to run, test, and deploy workloads.\n- In the Google Cloud console, on the project selector page,\n select or create a Google Cloud project.\n\n | **Note**: If you don't plan to keep the resources that you create in this procedure, create a project instead of selecting an existing project. After you finish these steps, you can delete the project, removing all resources associated with the project.\n\n [Go to project selector](https://console.cloud.google.com/projectselector2/home/dashboard)\n-\n [Verify that billing is enabled for your Google Cloud project](/billing/docs/how-to/verify-billing-enabled#confirm_billing_is_enabled_on_a_project).\n\n-\n\n\n Enable the Vertex AI, Dataform, and Compute Engine APIs.\n\n\n [Enable the APIs](https://console.cloud.google.com/flows/enableapi?apiid=aiplatform.googleapis.com, dataform.googleapis.com, compute.googleapis.com&redirect=https://console.cloud.google.com)\n\n- In the Google Cloud console, on the project selector page,\n select or create a Google Cloud project.\n\n | **Note**: If you don't plan to keep the resources that you create in this procedure, create a project instead of selecting an existing project. After you finish these steps, you can delete the project, removing all resources associated with the project.\n\n [Go to project selector](https://console.cloud.google.com/projectselector2/home/dashboard)\n-\n [Verify that billing is enabled for your Google Cloud project](/billing/docs/how-to/verify-billing-enabled#confirm_billing_is_enabled_on_a_project).\n\n-\n\n\n Enable the Vertex AI, Dataform, and Compute Engine APIs.\n\n\n [Enable the APIs](https://console.cloud.google.com/flows/enableapi?apiid=aiplatform.googleapis.com, dataform.googleapis.com, compute.googleapis.com&redirect=https://console.cloud.google.com)\n\n### Required roles\n\n\nTo get the permissions that\nyou need to use the side panel in a Colab Enterprise notebook,\n\nask your administrator to grant you the\nfollowing IAM roles on the project:\n\n- [Colab Enterprise User](/iam/docs/roles-permissions/aiplatform#aiplatform.colabEnterpriseUser) (`roles/aiplatform.colabEnterpriseUser`)\n- [Vertex AI User](/iam/docs/roles-permissions/aiplatform#aiplatform.user) (`roles/aiplatform.user`)\n\n\nFor more information about granting roles, see [Manage access to projects, folders, and organizations](/iam/docs/granting-changing-revoking-access).\n\n\nYou might also be able to get\nthe required permissions through [custom\nroles](/iam/docs/creating-custom-roles) or other [predefined\nroles](/iam/docs/roles-overview#predefined).\n| One or more of the required roles includes the `dataform.repositories.list` permission. Users who are granted the `dataform.repositories.list` permission or the [Code Creator\n| (`roles/dataform.codeCreator`)](/iam/docs/understanding-roles#dataform.codeCreator) role in a project can list the names of code assets in that project by using the Dataform API or the Dataform command-line interface (CLI). Non-administrators using BigQuery Studio can only see code assets that they created or that were shared with them.\n\nVertex AI Experiments\n---------------------\n\nVertex AI Experiments helps you track and analyze different\nmodel architectures, hyperparameters, and training environments by\nletting you track the steps, inputs, and outputs of an experiment run.\nTo learn more, see [Introduction to\nVertex AI Experiments](/vertex-ai/docs/experiments/intro-vertex-ai-experiments).\n\nCreate and view an experiment\n-----------------------------\n\nYou can create and view the results of an experiment by using the\nside panel in Colab Enterprise.\n\n1. In the Google Cloud console, go to\n the Colab Enterprise **My notebooks** page.\n\n [Go to My notebooks](https://console.cloud.google.com/vertex-ai/colab/notebooks)\n2. In the **Region** menu, select the region that contains your notebook.\n\n3. Click the notebook that you want to open. If you haven't created a notebook yet,\n [create a notebook](/colab/docs/create-console-quickstart#create).\n\n4.\n To the right of your notebook, in the side panel, click the\n **Experiments** button.\n\n The side panel expands the **Experiments** tab.\n5. Click the **Insert sample code** button.\n\n\n Colab Enterprise adds code cells to your notebook for\n interacting with an experiment.\n6.\n In your notebook, find the code cell that stores parameter values.\n You'll use these parameters to interact with\n Vertex AI Experiments.\n\n7.\n Update the values for the following parameters:\n\n - \u003cvar translate=\"no\"\u003ePROJECT_ID\u003c/var\u003e: The ID of the project that your notebook is in.\n - \u003cvar translate=\"no\"\u003eREGION\u003c/var\u003e: The region that your notebook is in.\n - \u003cvar translate=\"no\"\u003eBUCKET_URI\u003c/var\u003e: A Cloud Storage bucket URI, in the format `gs://`\u003cvar translate=\"no\"\u003eBUCKET_NAME\u003c/var\u003e. This can be an existing bucket, or you can create it when you run the code. This bucket must be in the same project and region as your Colab Enterprise notebook.\n - \u003cvar translate=\"no\"\u003eEXPERIMENT_NAME\u003c/var\u003e: The name of your experiment. If your experiment doesn't exist, Vertex AI Experiments creates one.\n8.\n If you need to create your Cloud Storage bucket, find and\n uncomment the following line of code:\n\n ```\n # ! gcloud storage buckets create {BUCKET_URI} --location={REGION} --project={PROJECT_ID}\n ```\n9. Run the code cells that the side panel added to your notebook.\n\n10.\n After the last code cell runs, click the\n **View\n experiment** button that appears.\n\n11.\n In the side panel, click the **Runs** tab or\n **Details** tab to see information about your experiment.\n To learn more, see\n [Create and\n manage experiment runs](/vertex-ai/docs/experiments/create-manage-exp-run).\n\n | The side panel shows information about your experiment runs. You can create, manage, and delete runs by using [Vertex AI Experiments\n | in the Google Cloud console](https://console.cloud.google.com/vertex-ai/experiments) or through the Vertex AI API.\n\nWhat's next\n-----------\n\n- Learn more about\n [Vertex AI Experiments](/vertex-ai/docs/experiments/intro-vertex-ai-experiments).\n\n- To find a notebook that can help you get your project started quickly,\n see the [notebook gallery](https://console.cloud.google.com/vertex-ai/colab/notebook-gallery)."]]