This page shows you how to manage multiple Cloud Functions configurations in a single workspace and a multi-folder workspace, and how to rearrange your Cloud Run functions Explorer with Cloud Code.
Before you begin
This guide requires a workspace already setup (a launch.json file with at
least one configuration listed). To get started with a sample, see the
Create and deploy a function
quickstart.
Manage multiple configurations in a single workspace
To add a new Cloud Function configuration to your launch.json file, follow
these steps:
Click Cloud Code and then expand the Cloud Functions Explorer.
In the Cloud Run functions Explorer, hold your pointer over WORKSPACE and click Add new cloud function configuration.
Follow the prompts and perform the following actions:
- Enter a function name
- Select a Cloud Run functions environment
- Enter an entry point (the name of the method to call for this function)
- Enter the test input
Alternatively, you can manually enter these values into your
launch.jsonfile:{ "configurations": [ { "name": "Deploy Cloud Function", "type": "cloudcode.cloudfunctions", "request": "launch", "functionName": "hello-world-get", "gen": "GEN_2", "entryPoint": "helloGet" } ] }Your Cloud Run functions workspace corresponds to the first configuration listed in your
launch.jsonfile. The workspace name reflects thefunctionNameof the first configuration listed in yourlaunch.jsonfile:{ "configurations": [ { "name": "Deploy Cloud Function", "type": "cloudcode.cloudfunctions", "request": "launch", "functionName": "hello-world-pub-sub", "gen": "GEN_2", "entryPoint": "helloPubSub" }, { "name": "Deploy Cloud Function", "type": "cloudcode.cloudfunctions", "request": "launch", "functionName": "hello-world-get", "gen": "GEN_2", "entryPoint": "helloGet" } ] }(Optional) To deploy another configuration from your
launch.jsonfile, move the configuration you want to deploy to the top of thelaunch.jsonfile and click refresh Refresh Cloud Functions Explorer.
Manage a multi-folder workspace
Cloud Code supports having multiple folders in a
Cloud Run functions workspace if each function contains its own
launch.json file.
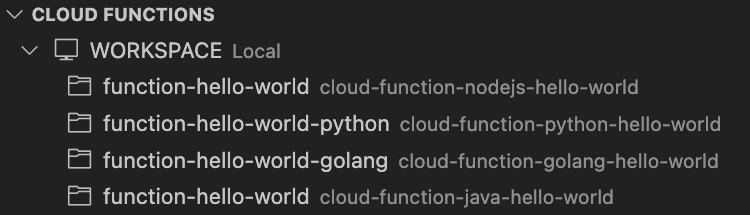
Each Cloud Run functions workspace folder that appears is named after the
first configuration's functionName in its corresponding launch.json file.
To arrange a multi-folder workspace for your project, see VS Code's Multi-root Workspaces.
Rearrange Cloud Run functions Explorer into your IDE's file Explorer
You can rearrange your Cloud Run functions Explorer into VS Code's file Explorer by performing the following:
Drag your Cloud Run functions Explorer into VS Code's file Explorer:
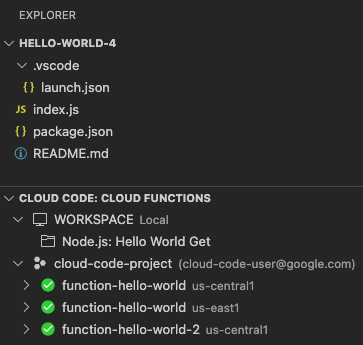
This arrangement displays your Cloud Run functions Explorer under the file Explorer so that you can view your deployed functions and Cloud Run functions workspace(s) in the same pane as your project files.
(Optional) To undo this arrangement, right-click the Cloud Code: Cloud Functions Explorer's heading and select Reset location. This moves the Cloud Run functions Explorer back to the Cloud Code tab.