Puedes acceder a los productos y servicios de Google Cloud desde tu código con las APIs de Cloud. Estas API de Cloud exponen una interfaz JSON REST simple que puedes llamar a través de bibliotecas cliente.
En este documento, se describe cómo explorar las API disponibles, habilitar las API de Cloud y agregar bibliotecas cliente de Cloud a tu proyecto, y configurar la autenticación según tus necesidades de desarrollo.
Explora las API de Cloud
Para explorar todas las API de Google Cloud disponibles en tu IDE, sigue estos pasos:
- Selecciona Tools (Herramientas) > Cloud Code (Cloud Code) > Add Cloud Libraries and Manage Cloud APIs (Agregar bibliotecas de Cloud y administrar las API de Cloud).
- Expande el árbol del Explorador de API de Google Cloud para ver todas las API disponibles. El explorador agrupa las API de Cloud por categoría. También puedes buscar una API específica con la barra de búsqueda de las API de Búsqueda.
- Haz clic en una API a fin de ver más detalles, como su estado, instrucciones de instalación específicas del lenguaje para sus bibliotecas cliente correspondientes y documentación relevante.

Habilita las API de Cloud
Para habilitar rápidamente las API de Cloud para un proyecto con los detalles de la API, sigue estos pasos:
- En la vista de detalles de la API de Cloud, elige un proyecto de Google Cloud para el que deseas habilitar la API de Cloud.
- Haz clic en el botón Habilitar API.
Una vez que se haya habilitado la API, verás un mensaje que confirma este cambio.
Agrega las bibliotecas cliente de Cloud
Sigue estos pasos para agregar bibliotecas a tu proyecto en IntelliJ:
Para proyectos de Java Maven
- Selecciona Herramientas > Cloud Code > Cloud APIs.
- Selecciona el tipo de biblioteca que prefieras de la biblioteca cliente de Google Cloud (opción recomendada) o la biblioteca de Java Spring Google Cloud.
- En el menú desplegable Module (Módulo), selecciona el módulo al que deseas agregar la biblioteca.
- Haz clic en Add Maven Dependency (Agregar dependencia de Maven) a fin de agregar la BOM y la biblioteca cliente a tu proyecto.
En el cuadro de diálogo Manage Google Cloud APIs (Administrar las API de Google Cloud) se muestran las bibliotecas compatibles.

Para todos los demás proyectos
- Selecciona Tools (Herramientas) > Cloud Code (Cloud Code) > Add Cloud Libraries and Manage Cloud APIs (Agregar bibliotecas de Cloud y administrar las API de Cloud).
- Instala la API mediante las instrucciones de instalación disponibles en la página de detalles de la API de tu lenguaje preferido.
En el cuadro de diálogo Add Google Cloud Libraries (Agregar bibliotecas de Google Cloud), se muestran las bibliotecas compatibles.
Configura la autenticación
Después de habilitar las API necesarias y agregar las bibliotecas cliente necesarias, debes configurar tu aplicación para que se autentique de forma correcta. La configuración depende del tipo de desarrollo y de la plataforma en la que se ejecute.
Una vez que completes los pasos de autenticación relevantes, tu aplicación puede autenticarse y estará lista para implementarse.
Desarrollo local
minikube
- Ejecuta
gcloud auth application-default loginpara asegurarte de tener las credenciales predeterminadas de la aplicación (ADC). Esto permite que Minikube encuentre las ADC con las que te autenticarás.
minikube
- Ejecuta
gcloud auth application-default loginpara asegurarte de tener las credenciales predeterminadas de la aplicación (ADC). Esto permite que Minikube encuentre las ADC con las que te autenticarás. - Inicia Minikube con
minikube start --addons gcp-auth. Esto activa tus ADC en los Pods. Si deseas obtener una guía detallada de autenticación de Minikube para Google Cloud, consulta los documentos de gcp-auth de Minikube.
Clúster de Kubernetes local
- Ejecuta
gcloud auth application-default loginpara asegurarte de tener las credenciales predeterminadas de la aplicación (ADC). - Activa tu directorio
gcloudlocal en tus pods de Kubernetes mediante la edición de los manifiestos de implementación para que las bibliotecas cliente de Google Cloud puedan encontrar tus credenciales. Ejemplo de configuración de Pod de Kubernetes:apiVersion: v1 kind: Pod metadata: name: my-app labels: name: my-app spec: containers: - name: my-app image: gcr.io/google-containers/busybox ports: - containerPort: 8080 volumeMounts: - mountPath: /root/.config/gcloud name: gcloud-volume volumes: - name: gcloud-volume hostPath: path: /path/to/home/.config/gcloud
Cloud Run
- Ejecuta
gcloud auth application-default loginpara asegurarte de tener las credenciales predeterminadas de la aplicación (ADC). Esto también permite que el entorno simulado local de Cloud Run encuentre las ADC con las que puedas autenticarte.
Desarrollo remoto
Google Kubernetes Engine
- Configura el clúster y la aplicación de GKE con Workload Identity para autenticar los servicios de Google Cloud en GKE. Esto asocia tu cuenta de servicio de Kubernetes con tu cuenta de servicio de Google.
- Si el servicio de Google Cloud al que intentas acceder requiere roles adicionales, otórgales la cuenta de servicio de Google que usas para desarrollar tu app.
Para obtener una lista de los tipos de roles de IAM y los roles predefinidos que puedes otorgar a las identidades, consulta la guía sobre los roles. Si deseas conocer los pasos para otorgar los roles, consulta Otorga, cambia y revoca el acceso a los recursos. - Configura tu implementación de Kubernetes para que haga referencia a la cuenta de servicio de Kubernetes mediante la configuración del campo
.spec.serviceAccountNameen tu archivo YAML de implementación de Kubernetes.
Si trabajas en una app creada a partir de una plantilla de Cloud Code, este archivo se encuentra en la carpeta kubernetes-manifests.
Cloud Run
- Para crear una cuenta de servicio única nueva para implementar tu aplicación de Cloud Run, en la página Cuentas de servicio, selecciona el proyecto en el que se almacena tu secreto.
- Haga clic en Crear cuenta de servicio.
- En el cuadro de diálogo Crear cuenta de servicio, ingresa un nombre descriptivo para la cuenta de servicio.
- Cambia el ID de cuenta de servicio por un valor único y reconocible y, luego, haz clic en Crear.
- Si el servicio de Google Cloud al que intentas acceder requiere roles adicionales, otórgales, haz clic en Continuar y, luego, en Listo.
- Para agregar tu cuenta de servicio a la configuración de implementación,
navega a la configuración de ejecución de Cloud Run: Deploy,
expande la sección Advanced revision settings y, luego,
especifica tu cuenta de servicio en el campo Service Account.

Cloud Run
- Configura el clúster y la aplicación de GKE con Workload Identity para autenticar los servicios de Google Cloud en GKE. Esto asocia tu cuenta de servicio de Kubernetes con tu cuenta de servicio de Google.
- Si el servicio de Google Cloud al que intentas acceder requiere funciones adicionales, otórgales la cuenta de servicio de Google que usas con el fin de desarrollar tu app.
La guía para comprender las funciones describe los tipos de funciones y enumera las funciones predefinidas disponibles que puedes otorgar a las identidades. - Para agregar tu cuenta de servicio de Kubernetes a tu configuración de implementación,
navega a la configuración de ejecución de Cloud Run: Deploy,
expande la sección Advanced revision settings y, luego,
especifica tu cuenta de servicio de Kubernetes en el campo Service
Account.

Desarrollo remoto con Secret Manager habilitado
Si desarrollas de manera remota, con una cuenta de servicio para realizar la autenticación, y tu aplicación usa secretos, debes completar algunos pasos más a fin de asignar a tu cuenta de servicio de Google la función requerida para acceder a un secreto de Secret Manager específico:
Abre el panel Secret Manager y selecciona el secreto al que deseas acceder en el código.
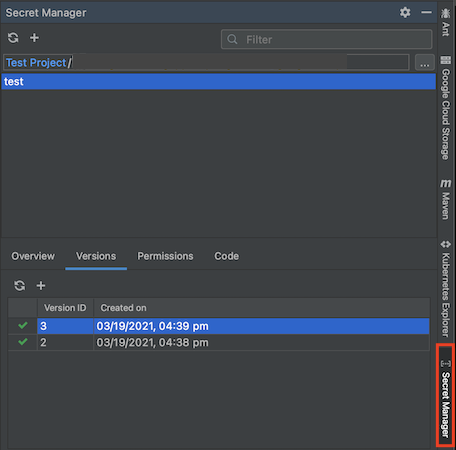
Cambia a la pestaña Permisos y, luego, configura los permisos de tu secreto haciendo clic en editar Editar permiso. Se abrirá la página de configuración de Secret Manager para el secreto en tu navegador web.

En la consola de Google Cloud , haz clic en Mostrar panel de información y, luego, en Agregar principal.
Asigna a tu cuenta de servicio la función de descriptor de acceso a secretos de Secret Manager.
Tu cuenta de servicio tiene permiso para acceder a este secreto.