Review and approve access requests using a custom signing key
This document shows how to set up Access Approval using the Google Cloud console and a custom signing key to receive email notifications of access requests on a project.
Access Approval ensures that a cryptographically-signed approval is present for Google personnel to access your content stored on Google Cloud.
Access Approval lets you bring your own cryptographic key to sign the access request. You can create a key using Cloud Key Management Service or bring an externally-managed key using Cloud External Key Manager.
Before you begin
- Enable Access Transparency for your organization. For more information, see Enabling Access Transparency.
- Ensure that you have the
Access Approval Config Editor
(
roles/accessapproval.configEditor) IAM role.
Enroll in Access Approval
To enroll in Access Approval, do the following:
In the Google Cloud console, select the project for which you want to enable Access Approval.
Go to the Access Approval page.
To enroll in Access Approval, click Enroll.
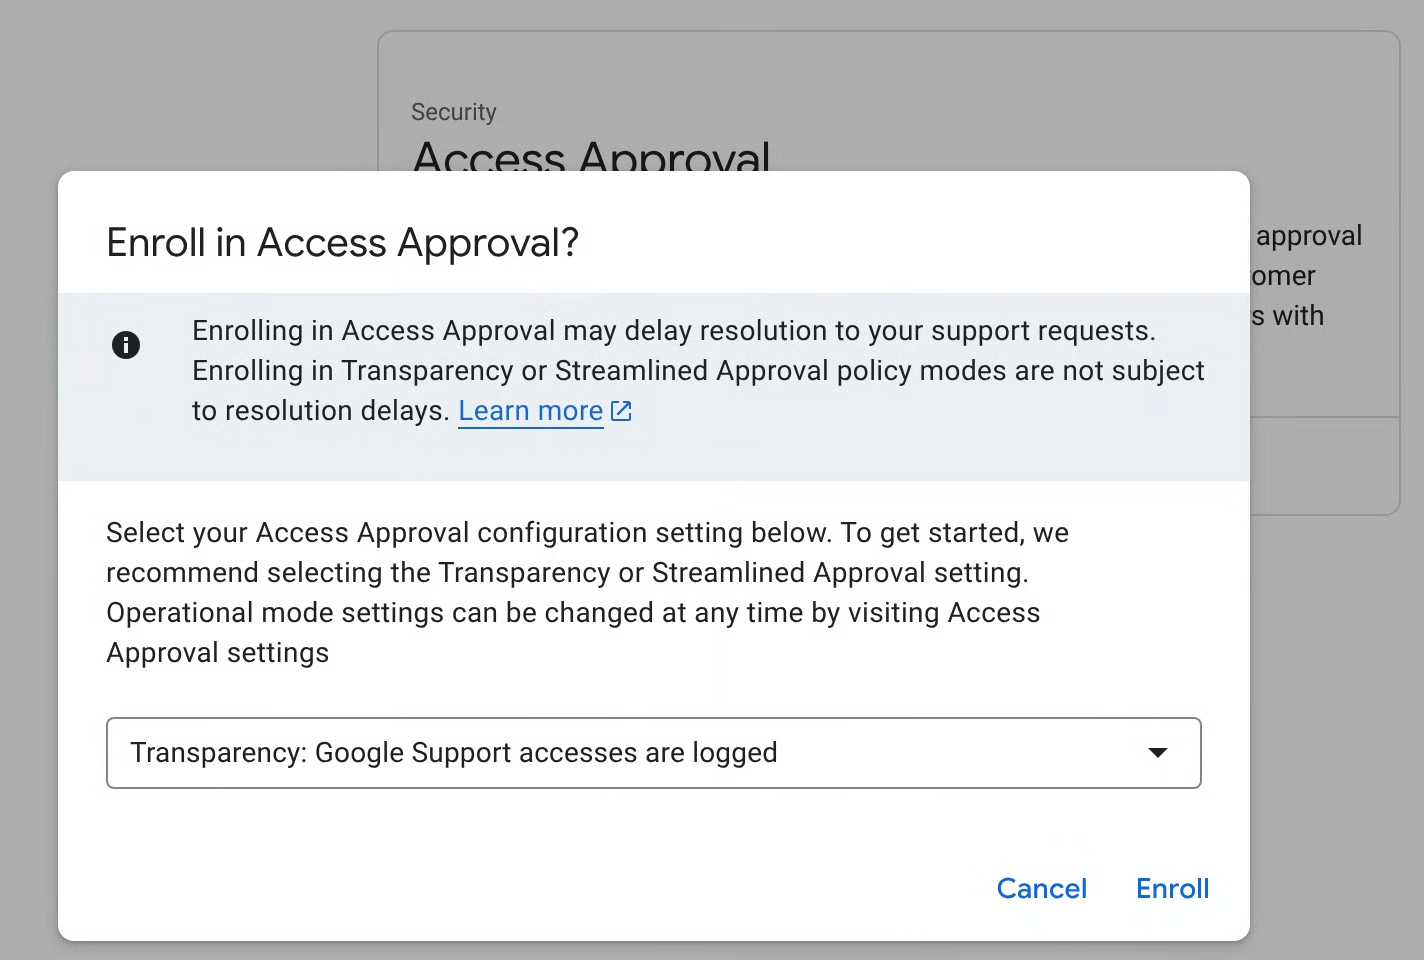
In the dialog, select the enrollment mode for your policy and click Enroll.
Access Approval primary enrollment mode
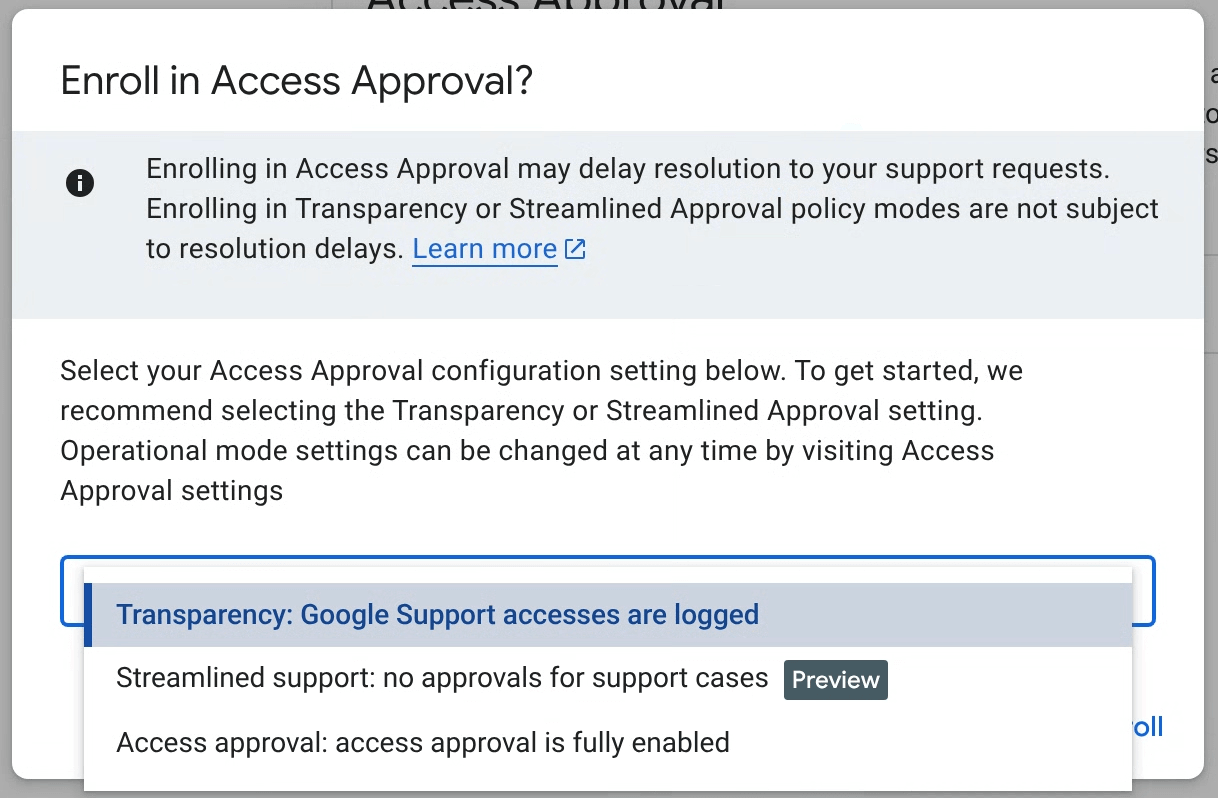
You can configure Access Approval in one of three modes, and can change the mode at any time in the Access Approval settings. The following modes can be selected:
- Transparency (Recommended): Use this mode to only log Google administrative access into your workloads without interrupting Google's support for your support cases or proactive maintenance on your workloads. See the Access Transparency docs for more information.
- Streamlined support (Preview): Use this mode to automatically approve Customer Care access to work on your support cases. Proactive maintenance and repair access will be requested for approval with Access Approval. This feature is in the Preview launch stage.
- Access Approval: Use this mode to enable full Access Approval functionality for all accesses.
Access Transparency logs are generated automatically for all Access Approval policies.
Configure settings
On the Access Approval page in the Google Cloud console, click Manage settings.

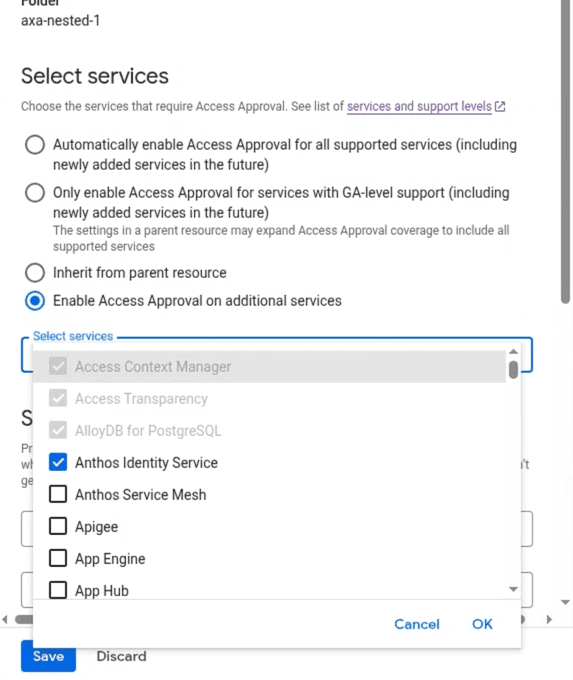
Select services
Access Approval settings, including the list of enabled products, are inherited from the parent resource. You can expand the scope of enrollment by enabling Access Approval for all or selected additional services supported services.
Set up email notifications
This section explains how you can receive access request notifications for this project.
Grant the required IAM role
To view and approve access requests, you must have the Access Approval Approver
(roles/accessapproval.approver) IAM role.
To grant this IAM role to yourself, do the following:
- Go to the IAM page in the Google Cloud console.
- In the View by principals tab, click Grant access.
- In the New principals field in the right pane, enter your email address.
- Click the Select a role field, and select the Access Approval Approver role from the menu.
- Click Save.
Add yourself as an approver for Access Approval requests
To add yourself as an approver so you can review and approve access requests, do the following:
Go to the Access Approval page in the Google Cloud console.
Click Manage settings.
Under Set up approval notifications, add your email address in the User or group email field.
To save the notification settings, click Save.
Use a custom signing key
Access Approval uses a signing key to verify the integrity of the Access Approval request.
If you have Cloud EKM enabled, you can choose an externally-managed signing key. For information about using external keys, see Cloud EKM overview.
You can also choose to create a Cloud KMS signing key with an algorithm of your choice. For more information, see Creating asymmetric keys.
To use a custom signing key, follow the instructions in this section.
Get the email address of the service account
The email address for the service account is of the following form:
service-pPROJECT_NUMBER@gcp-sa-accessapproval.iam.gserviceaccount.com
Replace PROJECT_NUMBER with the project number.
For example, the email address is service-p123456789@gcp-sa-accessapproval.iam.gserviceaccount.com
for a service account in a project whose project number is 123456789.
To use your signing key, do the following:
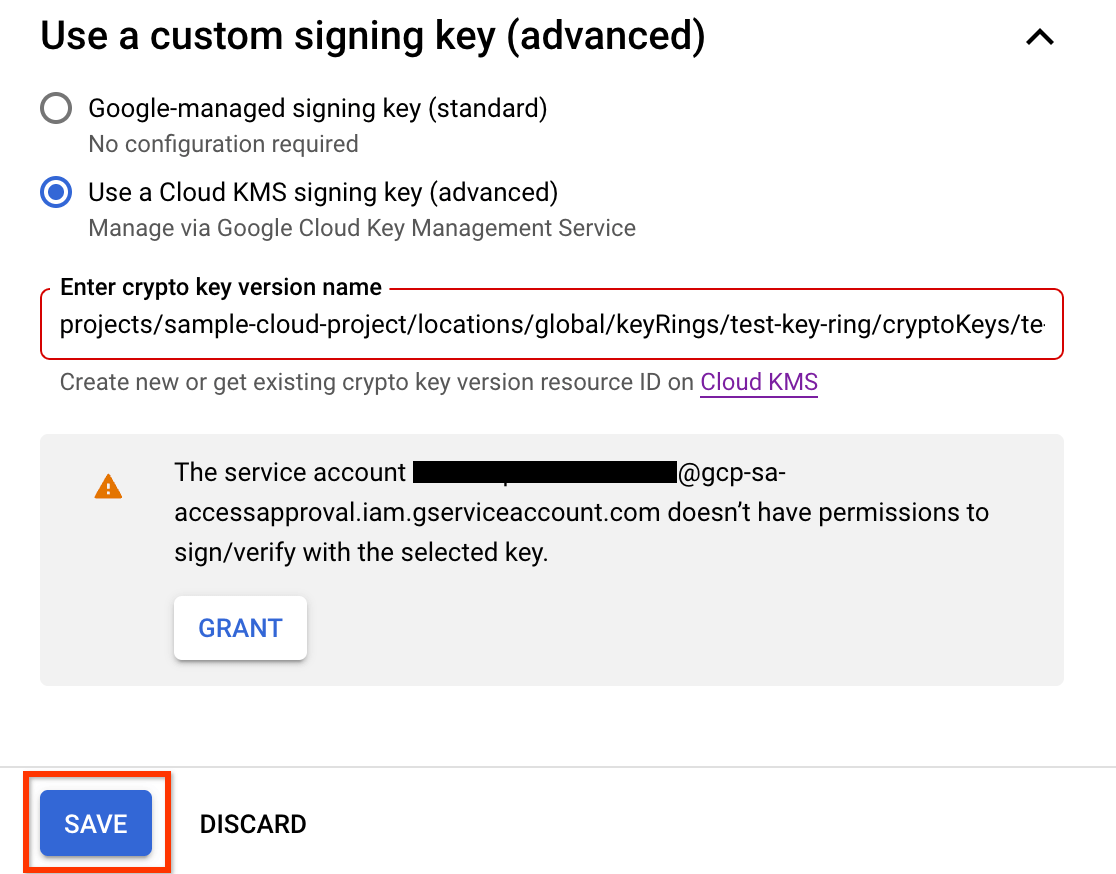
On the Access Approval page in the Google Cloud console, select Use a Cloud KMS signing key (advanced).
Add the crypto key version resource ID.
The crypto key version resource ID must have the following form:
projects/PROJECT_ID/locations/LOCATION/keyRings/KEYRING_ID/cryptoKeys/CRYPTOKEY_ID/cryptoKeyVersions/KEY_ID
For more information, see Getting a Cloud KMS resource ID.
To save your settings, click Save.
To use a custom signing key, you must provide the Cloud KMS CryptoKey Signer/Verifier (
roles/cloudkms.signerVerifier) IAM role to the Access Approval service account for your project.If the Access Approval service account doesn't have the permissions to sign with the key you provided, you can grant the required permissions by clicking Grant. After granting the permissions, click Save.
Review Access Approval requests
Now that you have enrolled in Access Approval and added yourself as an approver for access requests, you can expect to receive email notifications for access requests.
The following image shows a sample email notification that Access Approval sends when Google personnel request access to Customer Data.

To review and approve an incoming access request, do the following:
Go to the Access Approval page in the Google Cloud console.
To be taken to this page, you can also click the link in the email sent to you with the approval request.
Click Approve.
After you approve the request, Google personnel with characteristics matching the approval, such as, same justification, location, or desk location can access the specified resource and its child resources within the approved timeframe.
Clean up
-
To unenroll from Access Approval, do the following:
- On the Access Approval page in the Google Cloud console, click Manage settings.
- Click Unenroll.
- In the dialog that opens, click Unenroll.
- To disable Access Transparency for your organization, contact Cloud Customer Care.
No additional steps are required to avoid incurring charges to your account.
What's next
- Learn about the anatomy of an access request.
- Learn how to approve Access Approval requests.
- Learn how to view historical Access Approval requests.